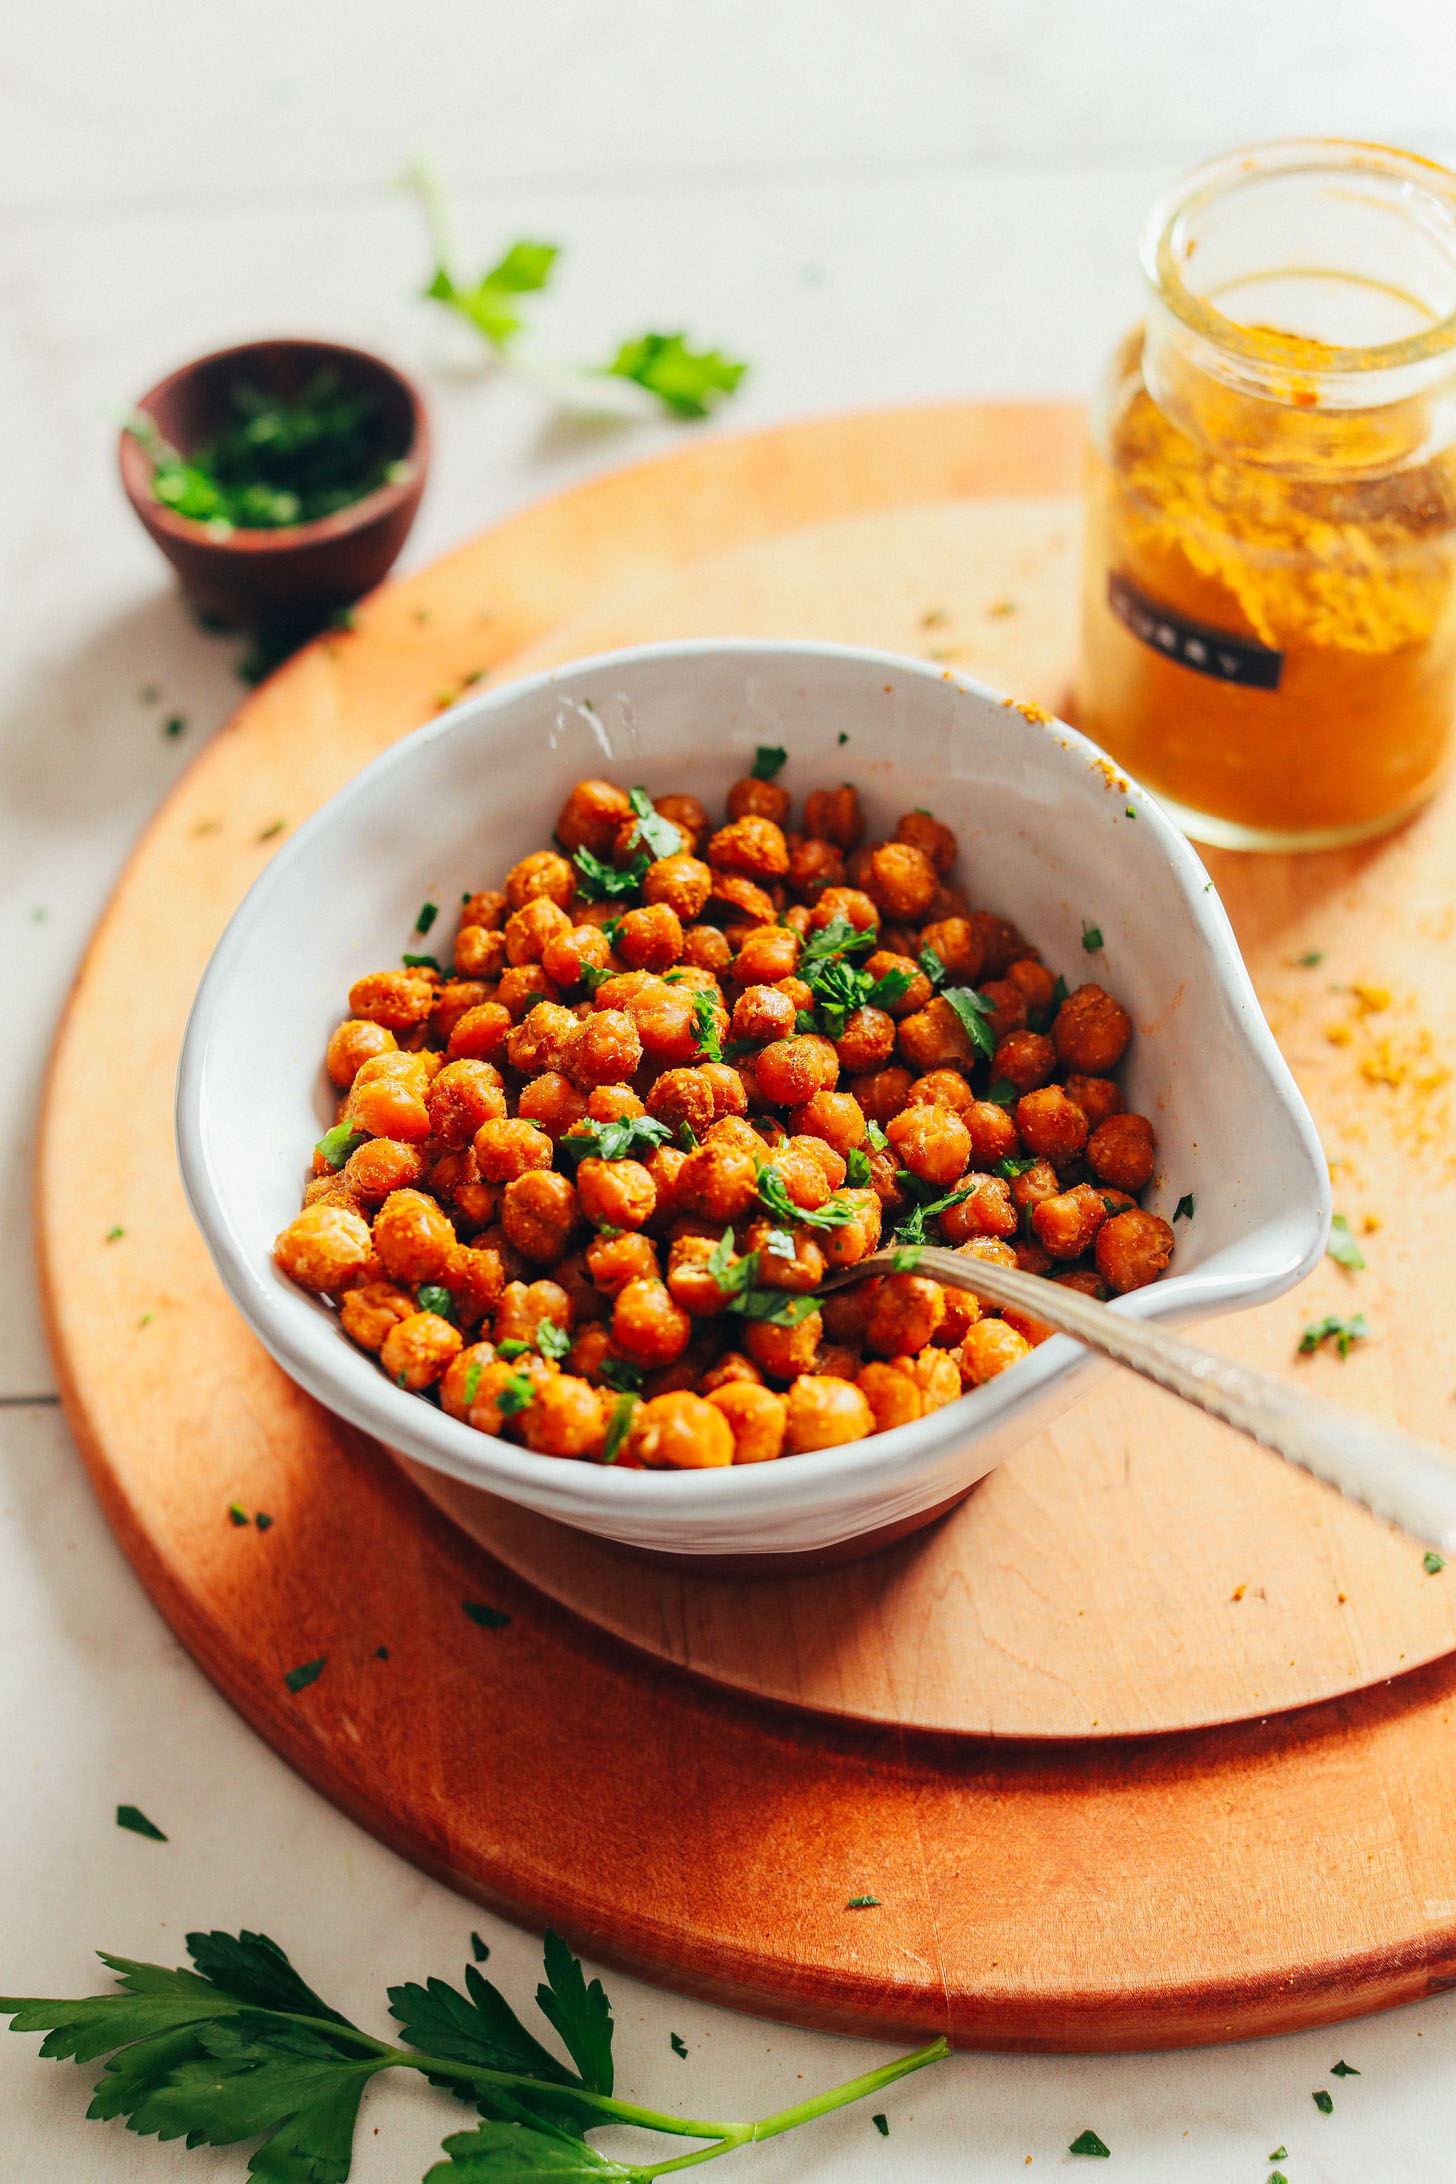
Friends, the day has arrived! The day that actually crispy roasted chickpeas (not fried) can happen in your kitchen! Like, it’s a real thing!
Let’s do this!
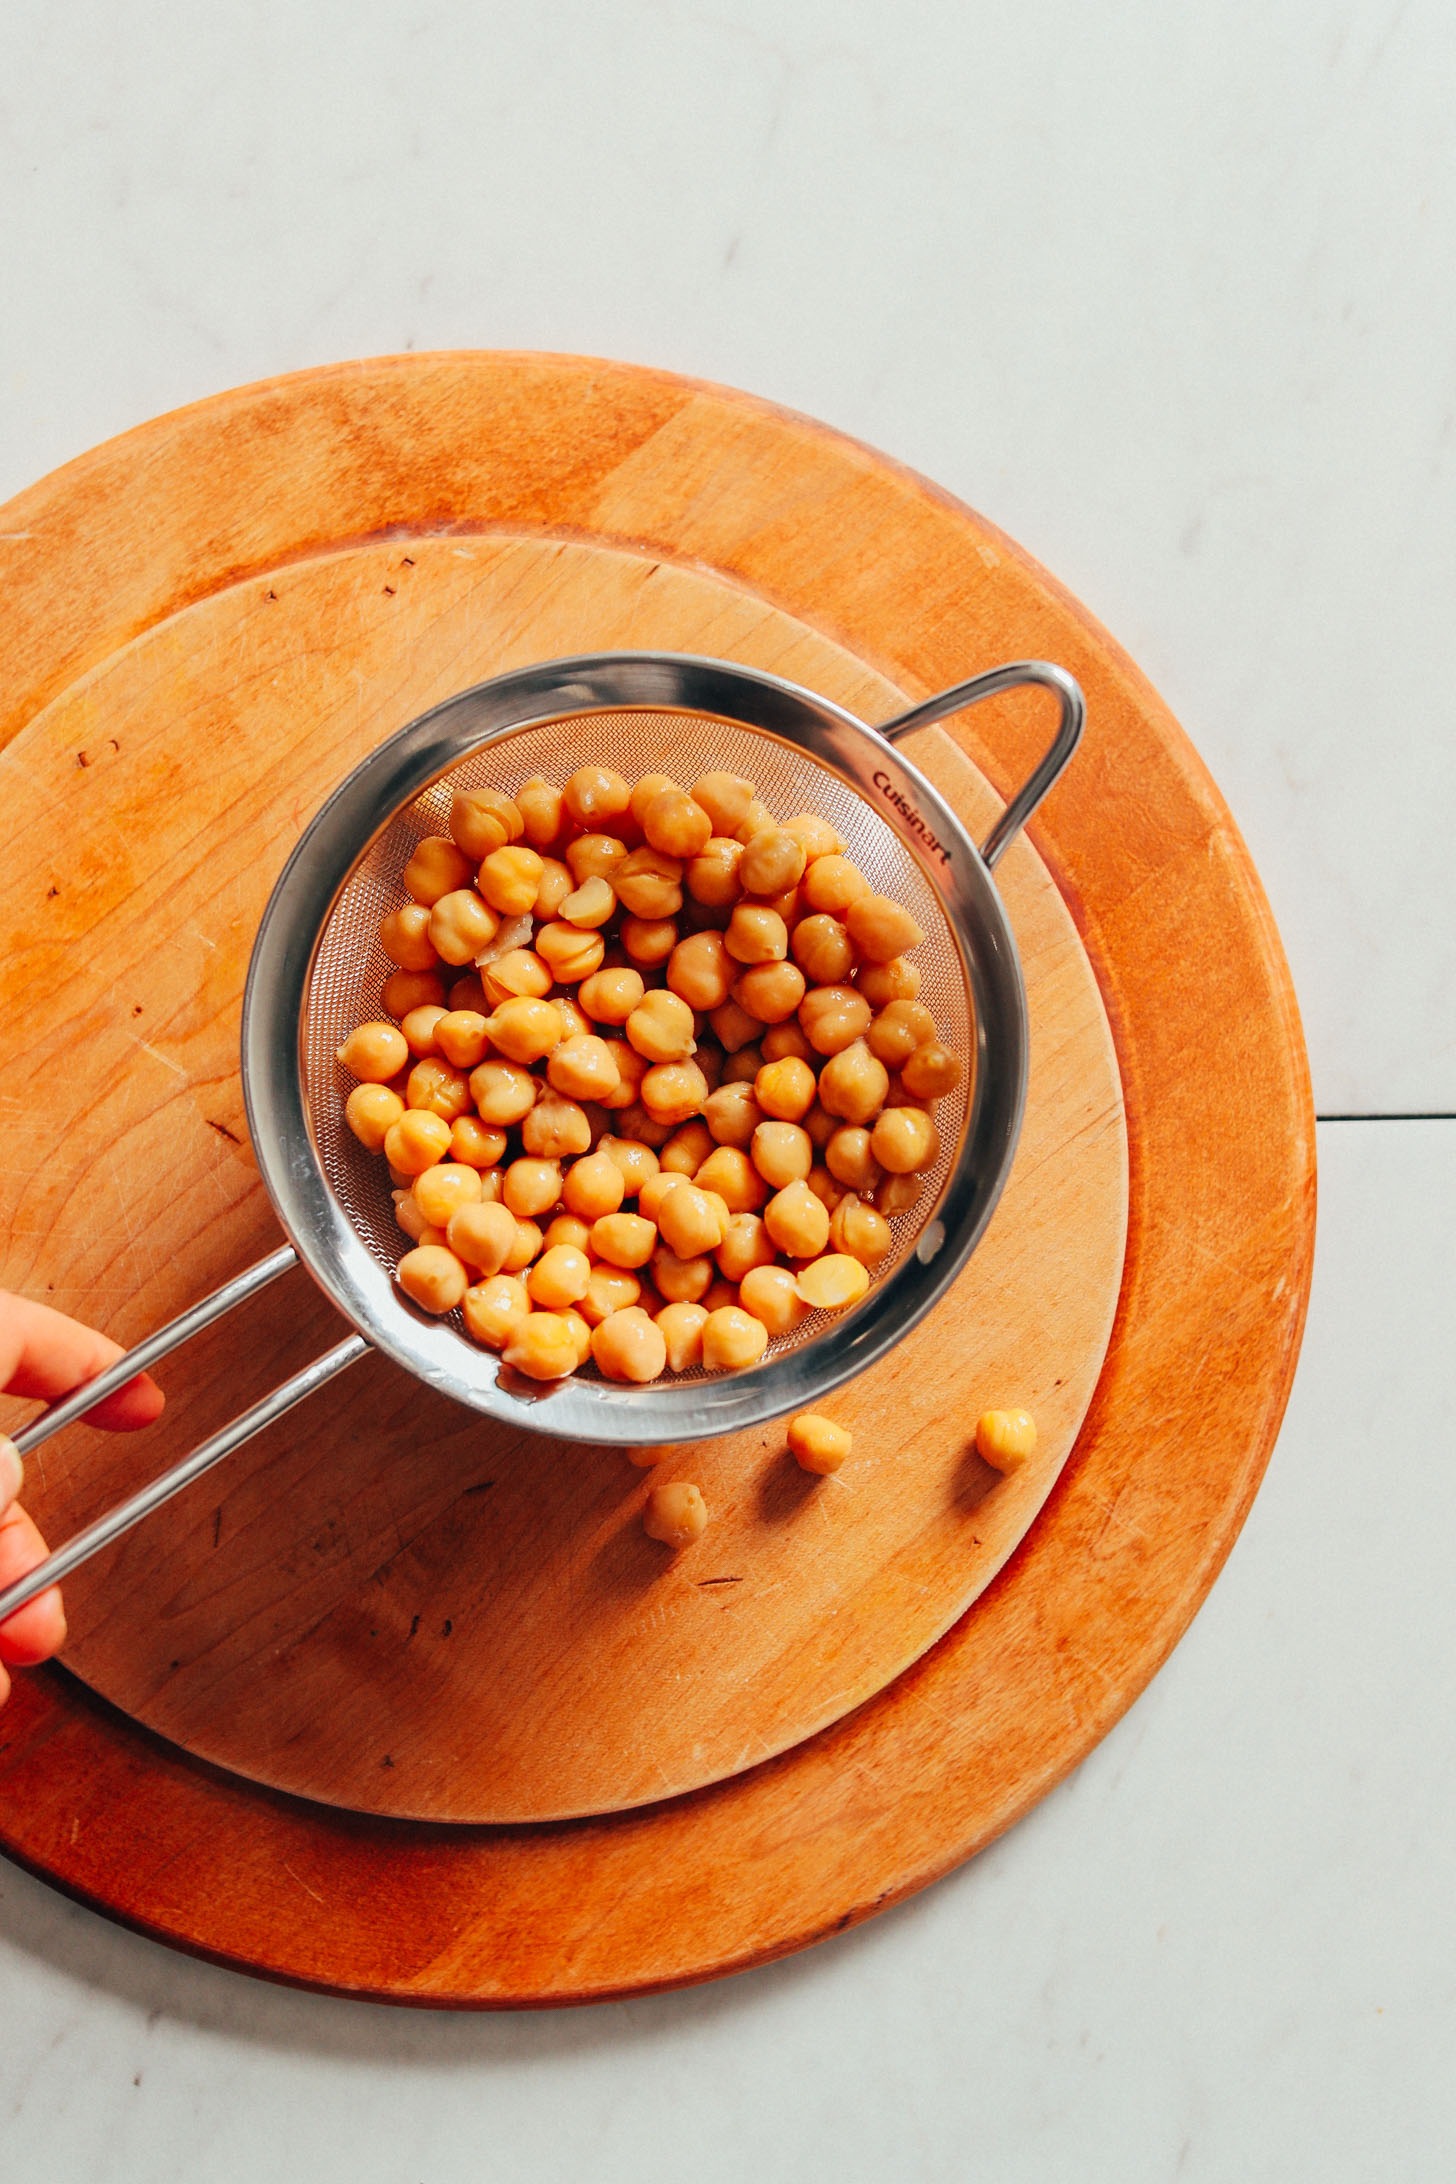
The magic of this 4-ingredient, easy recipe starts with cooked chickpeas. I went for canned because: easy. But I also suspect you could use home-cooked if that’s your thing.
The #1 crispy tip is to rinse, drain really well, then dry really well. Like, really, really well. The less moist (ew, sorry) the chickpeas are, the crispier they will become!
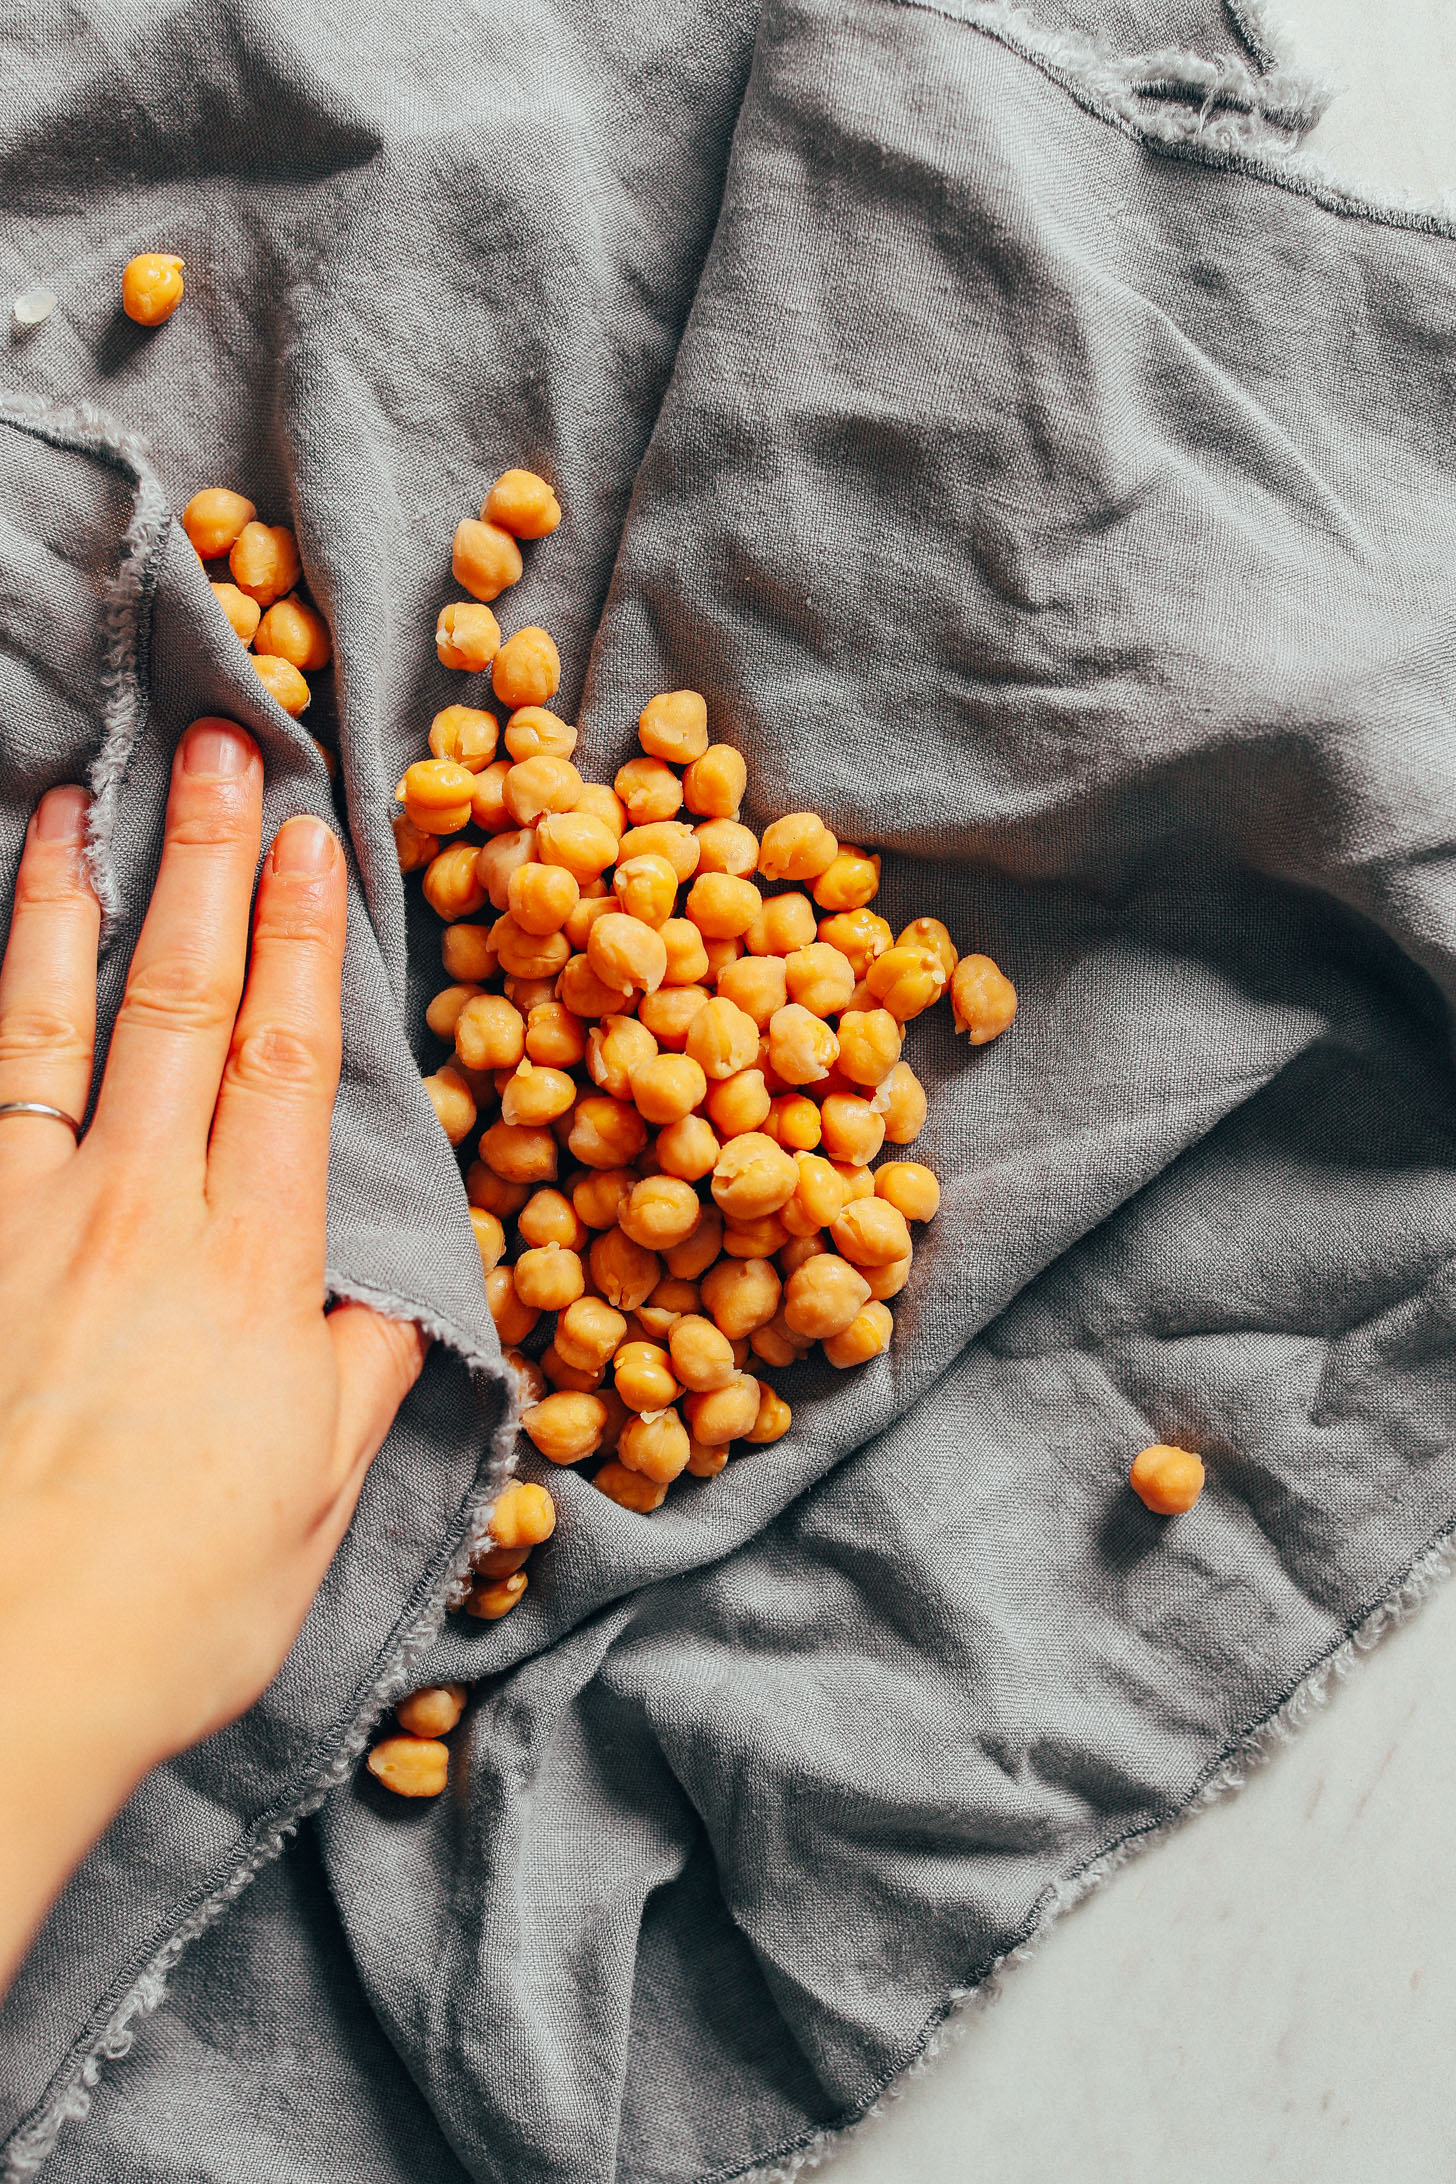
Once your chickpeas are dry, this brings me to tip #2: Peel the skins!
Peeling the skins is onerous and annoying. Yes, I know. But in my experience, it does help them crisp up a bit more in the oven. And when it comes to crisping chickpeas, every little bit helps!
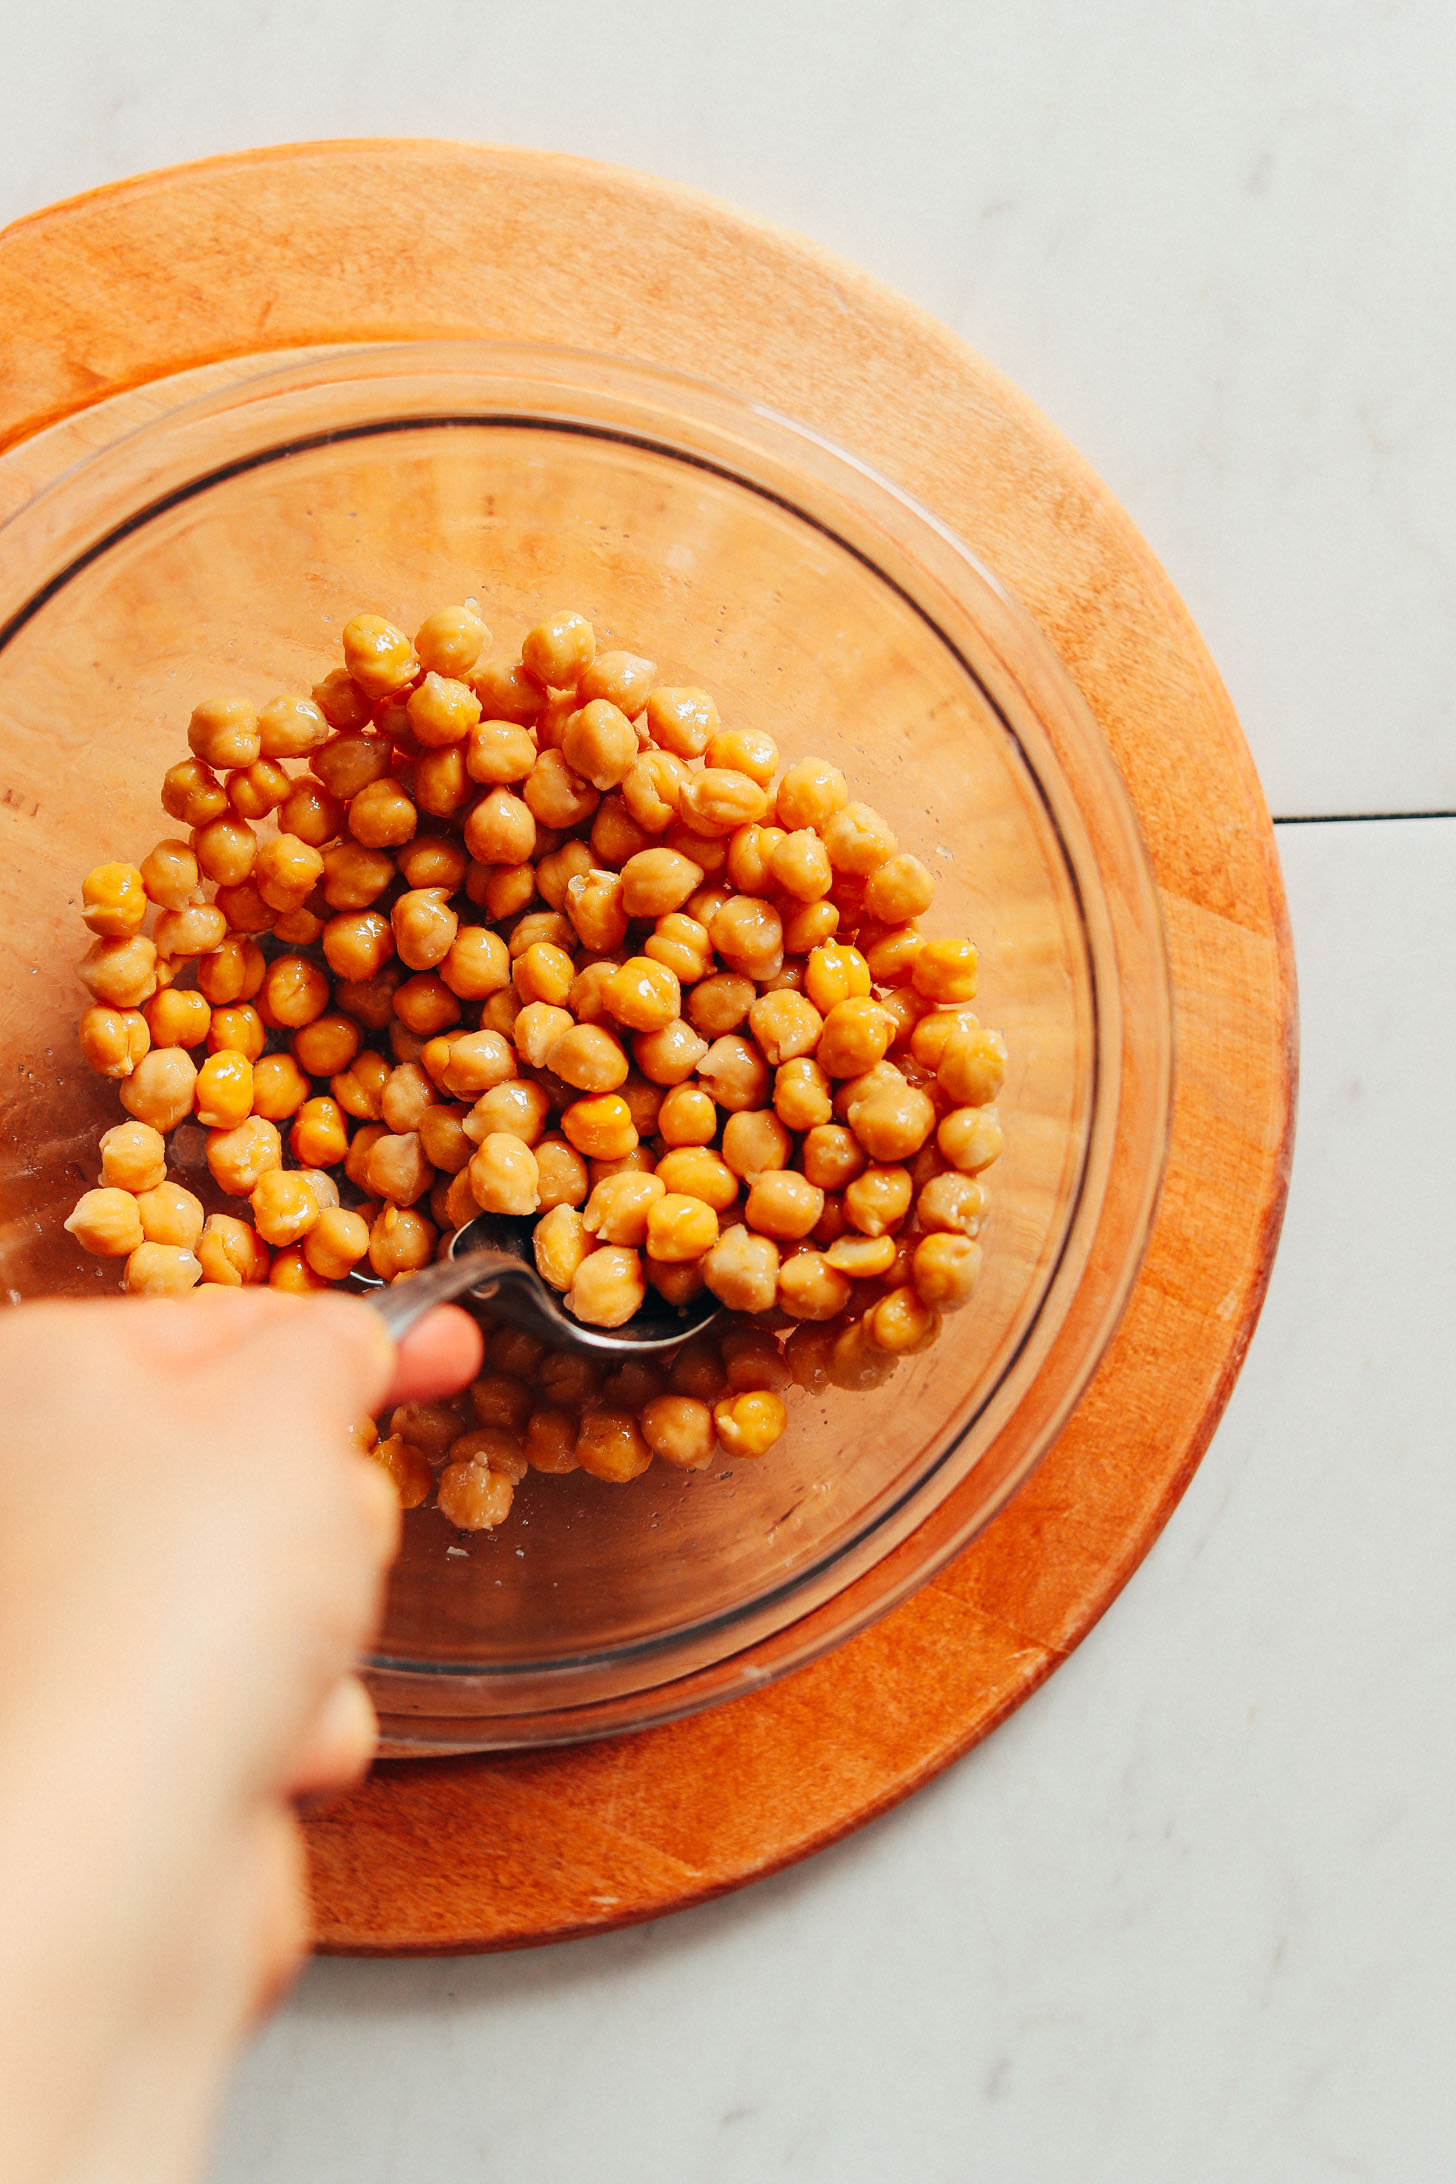
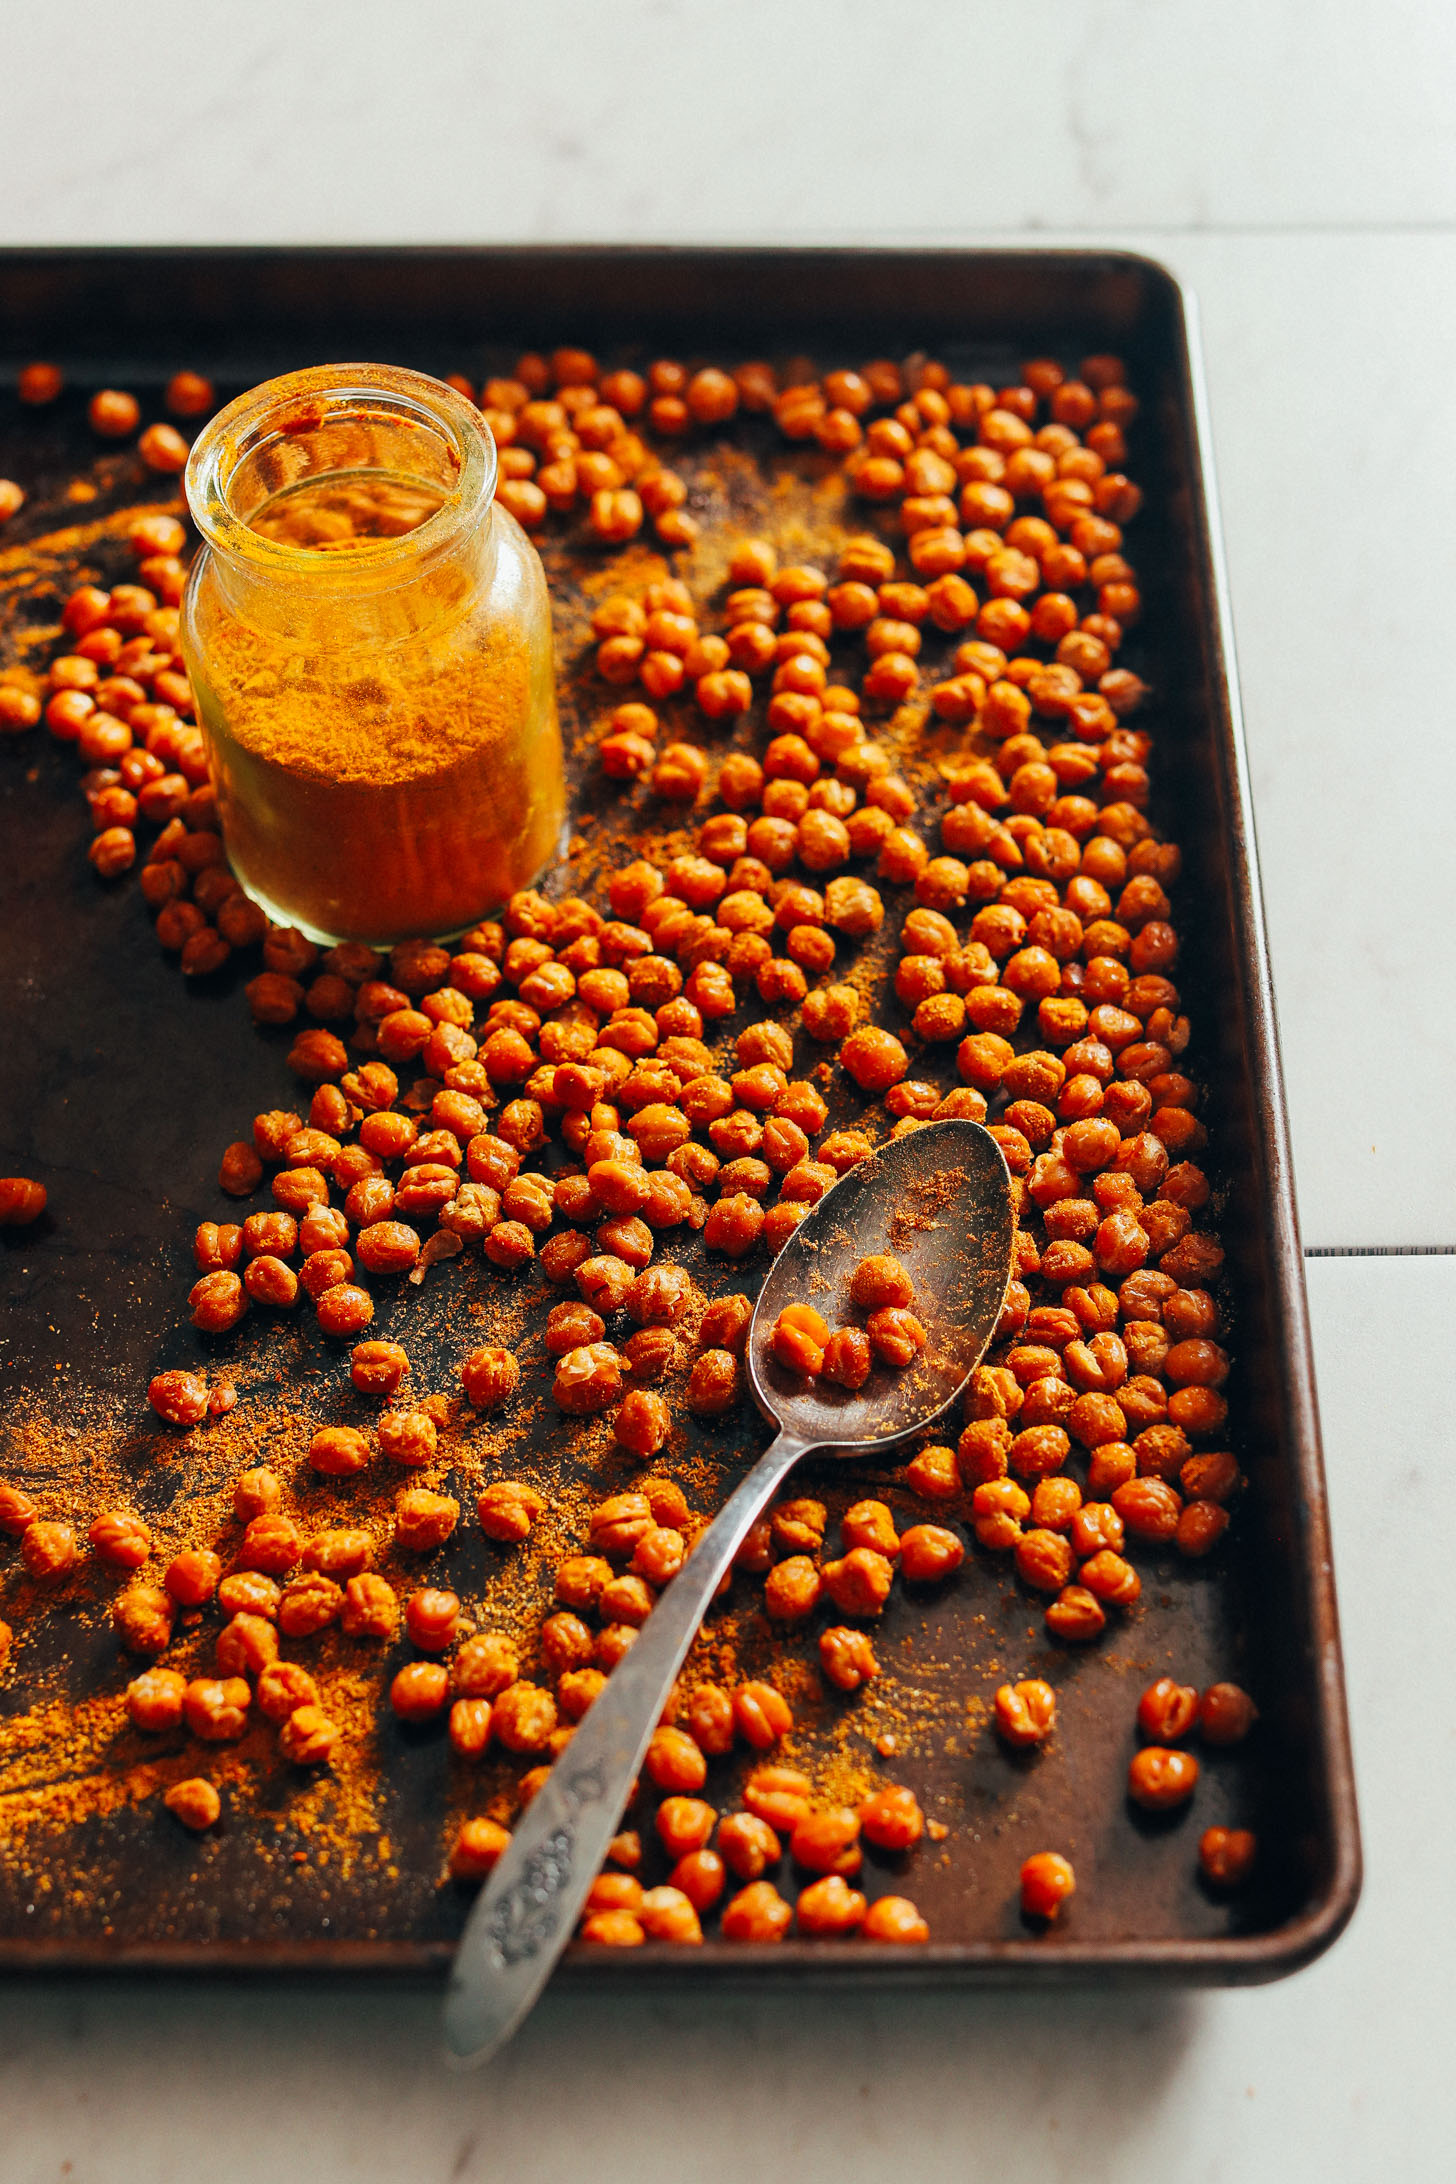
Now, it’s time for oil (if oil-free, you’ll omit this step) and salt. This brings me to tip #3: You’ll want to wait to add any other seasonings until after they’re done baking. I’ve found that too much seasoning can interrupt the crisping process, almost by trapping in the moisture and not letting the chickpeas “breathe.”
Next step is tip #4: Bake at 350 F (176 C) for 40-50 minutes. In experimenting, I found that, at too high a temperature, the chickpeas burn quickly while being tender in the center. And if too low, no crisping seems to happen for a very long time. So 350 degrees is the sweet spot.
Tip #5 is to let the chickpeas cool once out of the oven, and tip #6 is to store without a sealed lid. Doing so lets the chickpeas breathe and stay crispy longer than just 1 day.
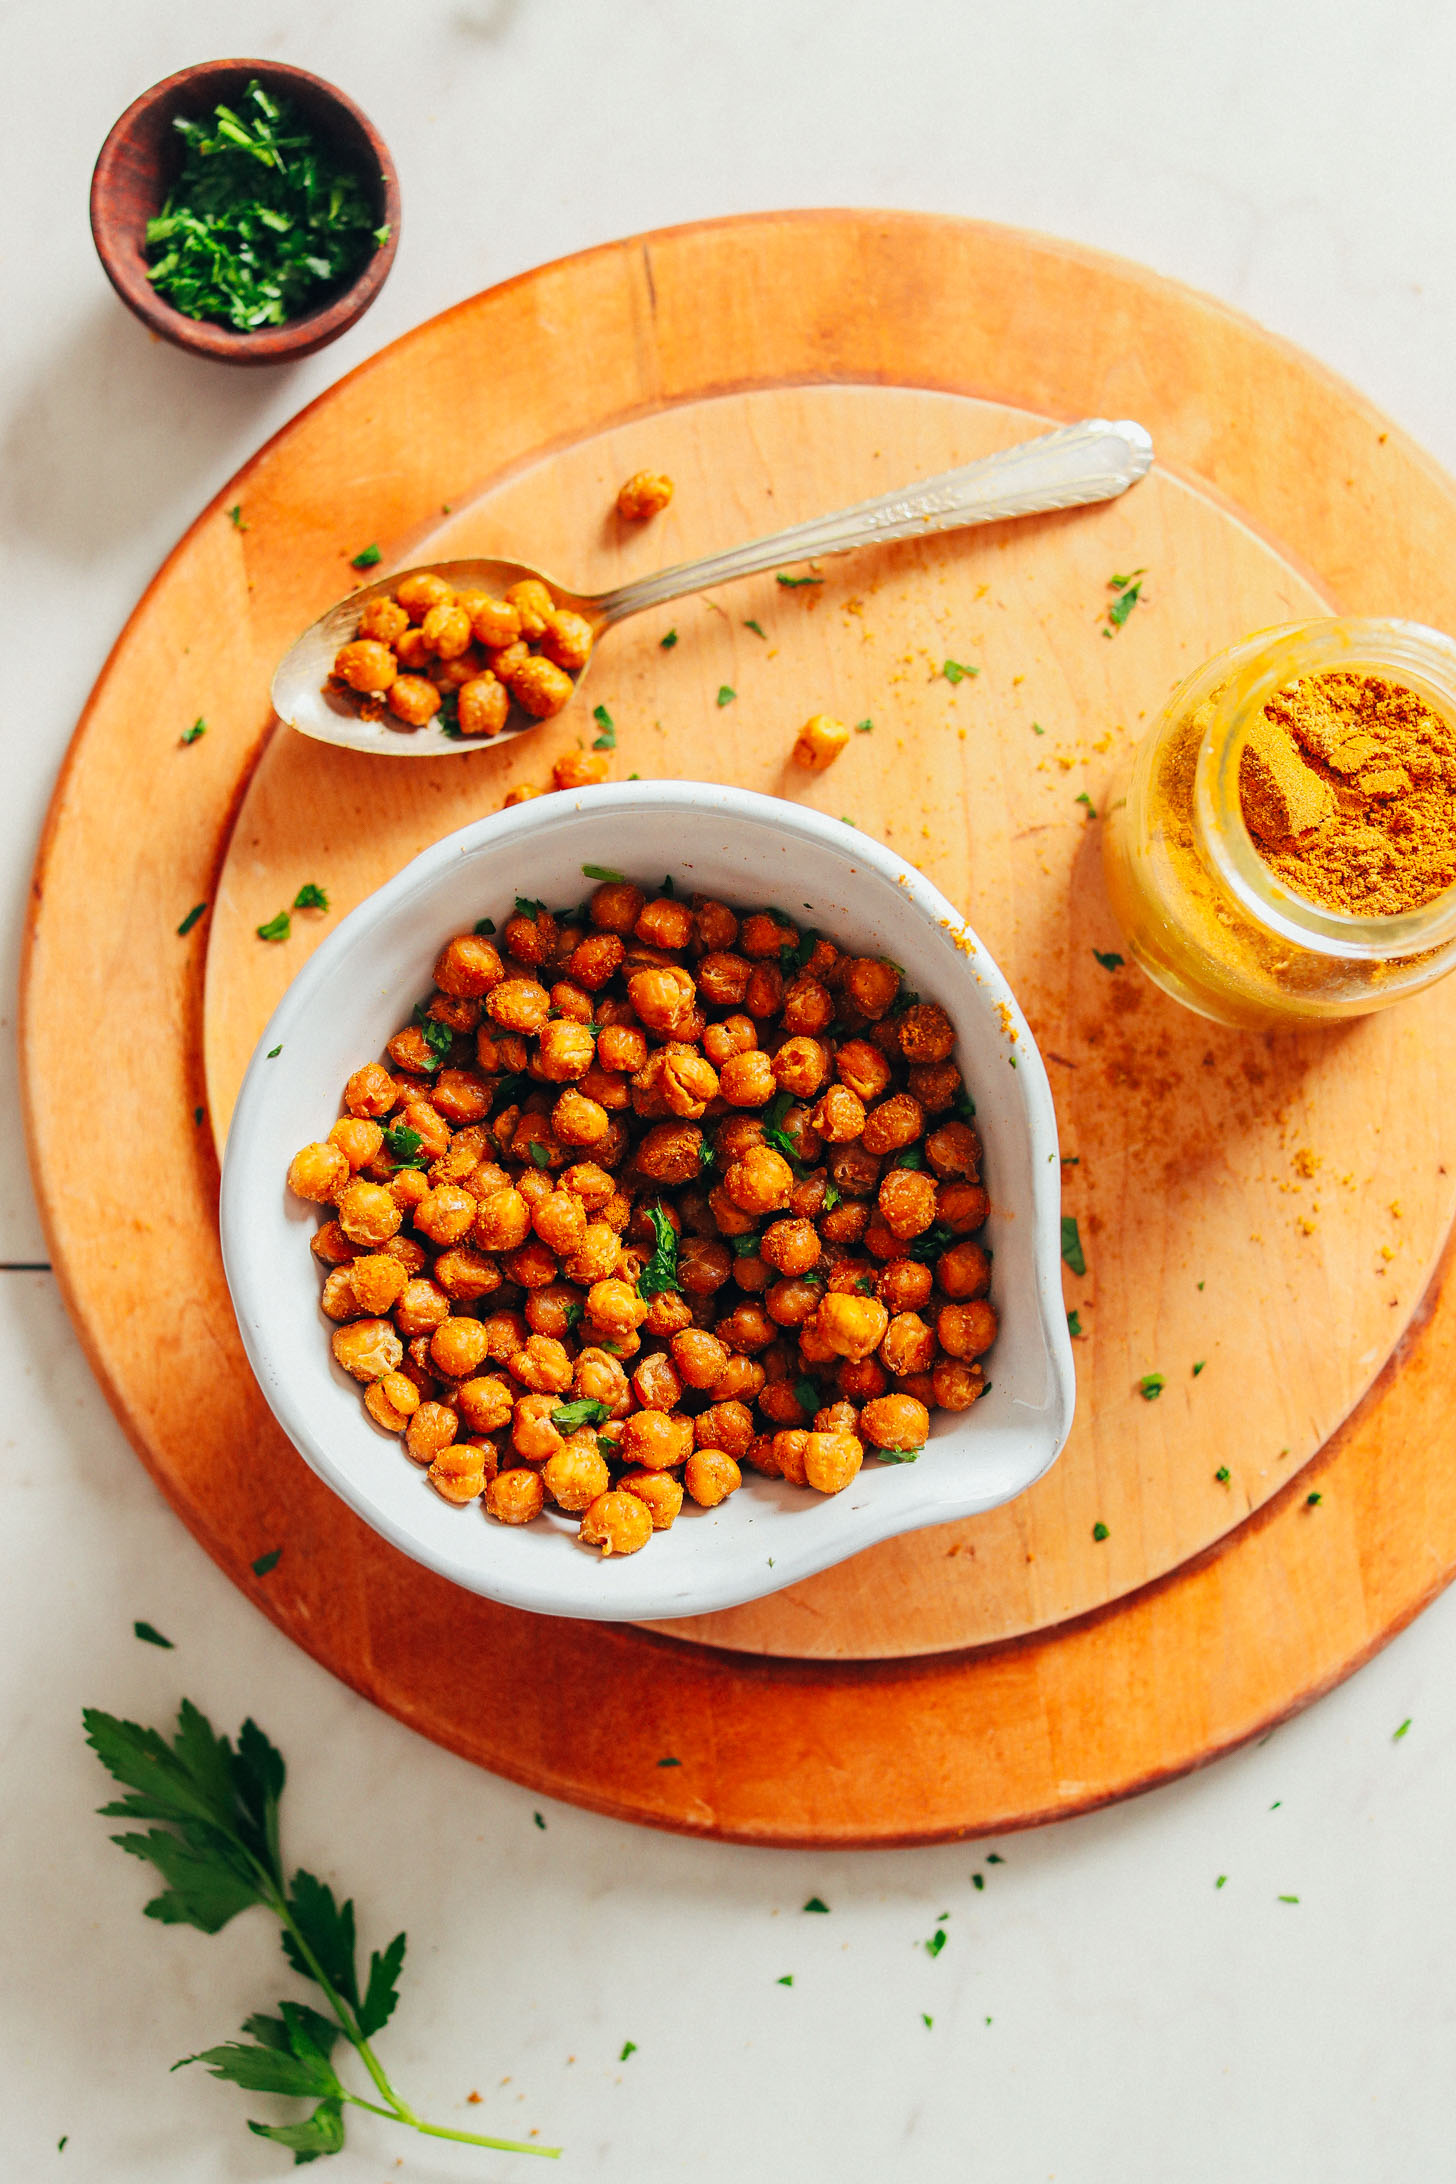
That’s it, friends! You now have crispy roasted chickpeas. They’re:
Crispy
Flavorful
Simple to make
Versatile
Healthy
Snacky
& SUPER delicious
What goes with roasted chickpeas?
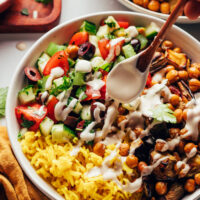
I love these chickpeas as a straight-up snack at home or on the go. They’re also great atop things like salads, soups, and Buddha bowls!
Try these chickpeas with my Curry Roasted Fennel Salad, Garlicky Kale Salad, Sweet Potato Noodle Pasta, Curried Butternut Squash Soup, Butternut Squash Pizza, Greek Goddess Bowl, or Sweet Potato Chickpea Buddha Bowl! They’d also be equally tasty on my Mediterranean Baked Sweet Potatoes. What I’m saying is: They’re delicious on pretty much everything!
If you try this recipe, let us know! Leave a comment, rate it, and don’t forget to tag a photo #minimalistbaker on Instagram. We’d LOVE to see what you come up with. Cheers, friends!
Actually Crispy Baked Chickpeas
Ingredients
- 1 15-ounce can chickpeas (drained and very well drained + thoroughly dried)
- 1 Tbsp avocado or other neutral oil (if avoiding oil, omit and don’t rinse chickpeas out of the can – just drain)
- 1/2 tsp sea salt
- 1 tsp seasonings of choice (such as DIY Curry Powder, Shawarma Spice Blend, or chili powder)
Instructions
- Preheat oven to 350 degrees F (176 C) and set out a bare baking sheet (or more, as needed).
- Drain chickpeas well. If using oil, rinse well with water and thoroughly drain. If omitting oil, simply drain well and skip rinsing with water.
- Once drained well, spread the chickpeas out on a clean, absorbent towel and use your hands to gently roll and dry the chickpeas. Some of the skins should start coming off. You can opt to peel all of the chickpeas – which can help for extra crispiness! – or simply remove the skins that come off. Either way, the chickpeas will crisp up. I just found that peeling them does yield slightly crispier chickpeas.
- Transfer the chickpeas to a mixing bowl and top with oil (or omit) and salt. Mix well to combine. DO NOT add the other seasoning at this point – it can interrupt the crisping process, so wait to add until after baking.
- Bake for a total of 40-50 minutes or until golden brown and dry/crispy to the touch. I like turning my pan around and shaking the chickpeas around at the halfway point for even cooking. Note: peeled chickpeas cook faster than unpeeled. If omitting oil, they will also cook faster.
- Remove from oven and toss with seasonings (if desired) while still warm. Then let cool 5-10 minutes – they will continue crisping as they cool.
- Serve as is or atop bowls or salads! To store, place in a storage container or jar and DO NOT tightly cover. Instead, crack lid so they can “breathe” a bit. I found that this helped them stay crispy longer. These are best in the first day, but they will last for 4-5 days at room temperature. Alternatively, seal well and freeze up to 1 month.


Jen says
I’ve recently been wanting to try some of the many scrumptious looking recipes using halloumi cheese, with various other assorted ingredients, and crispy chickpeas are one of them. I will be using your recipe later today, given the great testimonials by your reviewers.
Also want to comment on your excellent professional videos. I love recipe videos just a little bit too much.
Thank you for your kind words, Jen! We’re excited for you to try these chickpeas! xo
Allyson says
Seriously, I’ve tried them all. This is the only recipe that gets the chickpeas as crispy as a tortilla chip AND the seasoning sticks to them. Only problem is now I can’t stop eating them. I don’t usually comment but you deserve it for sharing this. They are that good!
Aw, thanks so much for taking the time to leave a review, Allyson! We’re so glad you enjoy the chickpeas prepared this way! xo
Jessica Sheer says
What towel is pictured when you’re drying the garbanzo beans?
Hi Jessica, we can’t remember the brand of that one, sorry!
Thekli says
These were actually crispy! Amazing!
Yay! We’re so glad you had success with this recipe, Thekli. Thank you for sharing your experience! xo
Dave says
9-year home chef using your site and cookbook SOO often!
I appreciate your use of the word actually in this recipe name. That’s just what we all want :)
For tip #4, you did not mention convection oven (or air fryer). I trust these do not improve the crisp to cooked ratio?
Hi Dave, we’re so glad you’re enjoying our recipes! This is an older recipe before air fryers were popular :) An air fryer or convection oven would likely get them even crispier! If going that route, we’d suggest reducing the temperature by 25 degrees Fahrenheit and cooking for less time.
MommaT says
These are addictive! Great for those of us trying to stay away from chips, but crave something crunchy and salty! I used Virgin Olive Oil, which is milder in flavor than the EVOO, cooked for longer, (probably closer to an hour so as not to burn them while I was busy with other recipes), kept testing them until they got the required crunch, and sprinkled with a chili lime seasoning, cumin and a little extra salt upon removal. They are fabulous! Topped the massaged kale salad with them and took it over the top! Thanks for the yummy-ness! ;-)
Yum, those seasonings sound amazing! Thank you for sharing! xo
lee-ann smith says
It’s a waste of time peeling them. I followed your recipe but just pat dry with paper towel and they turned out delish!
A says
Totally agree. Peeling chickpeas isnanlesson in how to be anal.
Jennifer Hollowell says
I tried several different recipes before I settled on this one. I’m trying to eat healthier and this fits the bill for snacks (I’ve given up potato chips, alas!)
I top the cooked peas with garam masala, curry, a touch of garlic powder and a bit of seasoning salt. I absolutely love it. Found a 4 lb bag of dried garbanzo beans in an Indian grocery store and am working my way through the bag.
(Will make Spanish Garbanzo Bean soup soon, though)
That sounds delicious! Thank you for sharing, Jennifer! xo
Julie says
I hardly leave comments on recipes I find online, but yall – this is the real deal! I’ve tried so many other times to get crispy chickpeas and failed. Step by step using this recipe and it turned out to be perfect. SO delicious!!!! Thank you!!!
Whoop! Thanks so much for taking the time to leave a review, Julie! xo
Stephanie B says
Absolutely, peeling them makes a major difference! Well worth the extra effort.
Woohoo! So glad you enjoyed this recipe, Stephanie. Thanks for the great review!
Sarah says
Made these today for a salad going. Turned out awesome! Definitely recommend peeling the chick peas. They turned out much better than the few I missed with skins.
Amazing! Thank you for sharing, Sarah! xo
Christa says
Unfortunately, this recipe didn’t work for me. While the chickpeas crisped up fairly well, the spices didn’t stick to them at all and I didn’t enjoy the taste of the plain chickpea.
Hi Christa, sorry to hear you didn’t enjoy this recipe. Did you happen to make any modifications? We’re wondering why the spices didn’t stick!
Missy says
GREAT!!!!!!! They actually are much more crispy than any other recipe I have tried. Thank you!!!!
Whoop! We’re so glad to hear it, Missy. Thank you for the lovely review! xo
Billie Durbin says
Is there a recipe for vegan feta?
Thanks
I love your recipes 🥰😍♥️♥️♥️
Aw, thank you! Not yet, but it’s on our ideas list!
Heather p says
The best way ever is with tahini instead of oil….. and if you want low fat.. oil free hummus! Ahhhmazing and easy to coat.
Thanks for sharing, Heather!
April says
Wonderful recipe!
So many of my friends struggle to get crispy chickpeas in the oven that they resort to pan frying them. I listened to a podcast while peeling the skins off and then let them sit on a dish towel for 6+ hours to dry before putting them in the oven. They were crispy after only 25 minutes!
I am so happy to have found another cheap homemade snack food!
Yay! We’re so glad you enjoyed the recipe, April! Thank you for sharing! xo
Karla says
I made these today, following the oil-free directions, and my spices would not stick. Any suggestions? TIA
Hi Karla, We’d suggest trying a little maple syrup to help them stick. Hope that helps!
Kim says
These were yum! I seasoned half with the DIY shawarma spice and the other half with sea salt. Tasty!
I’ll do a few cans at once next time because these went fast. Lovely addition to tonight’s quinoa with collard greens. I’ll be making these chickpeas again soon, thx!
Yay! We’re so glad you enjoyed them, Kim! Thanks for the lovely review =)
Jenny S. says
SO GOOD! Your tips on drying the chickpeas made all the difference in the world. These tasty little bites satisfied my crunchy snack craving! For the first batch I did 1/2 teaspoon curry powder and 1/2 chili powder. Looking forward to the next batch when I can experiment with other spice combos!
Yay! Thanks so much for sharing, Jenny! xo
Bita H says
Followed the recipe as described – they turned out perfect. Such a great thing to snack on and so much more affordable than store-bought chickpea snacks! Thank you! Love your site!
Yay! We’re so glad you enjoyed them, Bita. Thanks so much for the lovely review!
Juliya says
I love it. This is really looking tasty and crispy chickpeas baked. I’m thankful to you to share this amazing chickpeas recipe.
Sarah says
So good!! This recipe makes legitimately crispy chickpeas. I used home-cooked instead of canned and it worked really well. I recommend smoked paprika and cumin as a seasoning (an idea I found on the Yay! For Food blog)
Thanks, Sarah!!
Mink says
Hey! I’ll be making this tomorrow. Just wondering how the texture will go with freezing. Thank you for your reply! :)
They may lose some crispiness, but should work okay!
Kelly says
So good and easy! Made these for my son during his nap as part of a nutritious snack plate since he hasn’t been eating well at meal times. I probably gobbled 1/3 before he woke up, and he quickly dug into the rest. Left them plain this time, but they are so delightfully crunchy I will have to make more soon!
Yay! Thanks for sharing, Kelly! xo
Steven says
This recipe worked perfectly! The chickpeas were nice and crisp. I used peanut oil which imparted a nice taste. I also used garam masala to season. Planning on using the chickpeas in a salad for lunch tomorrow!
Yay! Thanks for sharing, Steven!
LisM says
I used to remove the visible skins when I dried the chickpeas and always thought that I was removing them all and the others didn’t have any… After reading your directions to remove the skins I actually bothered to feel the other chickpeas (that I assumed were skinless). Well… I was so wrong! Every single one had a skin to remove. And yes, it made a difference and they were so crispy!
We’re so glad it worked well! Thanks so much for sharing!
Jeannette says
Wow – these are so tasty and sooo crispy! Followed the recipe exactly and they turned out perfectly. Thank you for another great recipe!!
Yay! Thanks so much for sharing, Jeannette!
Stan Stalnaker says
Pretty much followed directions but did lightly season with ground sea salt and black pepper, garlic powder and fresh garlic slivers. I saved the skins, tossed with olive oil and added them to the roasting pan for the last 10 minutes. Awesome!!!
Clever! Thanks for sharing, Stan!
Justin says
I also did the skins, but in a separate tray at the bottom of the oven for about 15-20 mins: nice
Faith V. says
I’ve actually gotten back into making crispy chickpeas after a long absence, due to only having dried chickpeas and no Instant Pot. Well, I have an Instant Pot now, and I decided to try this again, so here’s my way of making crispy chickpeas from dry chickpeas.
I soak them for a day, then I cook the chickpeas for an hour in the IP, then put them to dry on a clean dish towel. After they’re completely dry, I follow the recipe as written here, though I do NOT peel them, though I used to when I first started making them.
After they’re done cooking, I actually like to leave them in the oven for about 5 minutes as the oven is cooling down. Then I take them out, season them, and enjoy. They normally don’t last past the 2nd day here, and even with the extra steps of having to soak and cook the chickpeas, I genuinely enjoy making this healthy and delicious snack!
Thanks for sharing, Faith!
Shelli Bond says
I want to make these and keep on hand during a road trip for a healthy, easy snack. How long are they good for, and what is my best bet for storing properly??
Hi Shelli, To store, place in a storage container or jar and DO NOT tightly cover. Instead, crack lid so they can “breathe” a bit. These are best in the first day, but they will last for 4-5 days at room temperature.
Lauren says
Is it okay to not refrigerate them them… I have been eating them for the past few days- I put them in a weck jar on the counter.. now I just looked it up and it says dont leave for more than 4 hours!!? Could this make you sick??
Hi Lauren, we’ve never had a problem with leaving them out. But if your room is really hot, they could spoil faster. Baking them dries them out which helps them last longer.
brushjl says
delicious, and healthy too? wow. I used everything bagel topping. I also soaked and boiled my own garbanzos, ways better, in my opinion.
Nina says
I have made these about once a week for two months. My little girl is vegetarian and allergic to most nuts and doesn’t like beans. But she will eat the entire batch of these in one sitting. Thank you so so much for this recipe!
Aw, we’re so glad she enjoys them! Thanks so much for the lovely review, Nina. Next time, would you mind leaving a rating with your review? It’s super helpful for us and other readers. Thanks so much! Xo
Polly Richards says
Made these tonight along with Baked Kale Chips. Doubled recipe, baked first, then tossed with random seasoning blend – Great tip! Put kale chips in same oven temp … they worked out fantastically too :) we are happy here.
Miranda says
This worked perfectly! My oven is finicky so I needed an extra 5 mins. Removing the skins helped a lot. I split the batch and tried a 2 different seasonings after roasting. My favorite is just plain curry powder. I will absolutely make these again!
Charisse says
Great snack! Chickpea skins came off pretty easy. Recipe worked perfectly. I used 1 can of chickpeas, the brine to make your Fudgy Vegan Brownie Cookies and then the chickpeas to make this snack. Really loving your recipes- thanks for sharing!
We’re so glad you’re enjoying our recipes, Charisse! Thanks for sharing!
Pat says
LOVE!
Alex says
These were a great snack and just what I was looking for. THANKS! However I’m glad I checked at 40 minutes because they were almost too crunchy to eat by that point. Next time I’ll check at 30 minutes.
Brian says
Hello, I followed the recipe as best I could but still not crunchy. Maybe I didn’t peel the skins enough or dried enough (although I thought pretty dry). Anyhow, at this point, is it too late and need to start over or can I do anything to make more crispy? Was just thinking more oven time bust wasn’t sure. Let me know when you can.
Hi Brian, try baking a little longer to see if that helps!
Sheila M says
I had dried chickpeas and used a tbsp of baking soda during the softening process which eased the skins right off! Also during the softening process, I used vegetable broth. Followed your recipe exactly while mixing a little garlic and sea salt. Delicious. Will use again!
Great tip & we’re so glad you enjoyed them! Thanks so much for sharing, Sheila!
Leah says
My roommate has been telling me about these for months and I finally got around to making them. Cooked for about 50 mins in a 350 degree oven and they’re beautifully crispy! I used Trader Joes chili lime seasoning and curry powder and I think they’re great.
Wonderful! Thanks for sharing, Leah! Love that seasoning tip.
Leslie N. says
I followed the directions exactly and it turned out perfectly! Delicious <3
Carol Mavity says
Really great snack, so crispy. Relatively easy to prepare except for peeling the skin (but worth the effort). Served at a dinner with salad and received raves-no one believed it was just “chickpeas”.
Thanks.
Used garlic and onion powder, cumin, paprika and cayenne.
Marni Neuburger says
Best recipe for a simple, nutritious snack or as an add in for so many other dishes!
Thanks!
Kristen B says
These are great! Perfect way to use all those extra chickpeas after opening the can for aquafaba.
Nicolene says
Made this today, and yes, a definite 5*! I used chilli infused olive oil and seasoned the chickpeas with Steers seasoning salt and just a little garlic salt. Trying really hard to leave 1 or 2 chickpeas for my husband who will be home soon…
Sarah Bridger says
Delicious and so moreish! I used the aquafaba to make mayonnaise had all the chickpeas leftover, this was the perfect way to use them and cut down my crisp intake!
Thanks so much for the lovely review, Sarah. We are so glad you enjoyed them! Next time, would you mind leaving a rating with your review? It’s super helpful for us and other readers. Thanks so much! Xo
Sarah Bridger says
Done!
xo!
Spudlover says
How do you make mayo with Aquafaba?
Find our recipe here!
Joana Bornia says
If I am not using can garbanzo beans, but natural ones, do I cook first? I have soaked them in water overnight.
Thank you!!!
You still need to cook them until tender before using them in this recipe.
Kim Coleman says
What is the best way to cook dry chickpeas to get to a can consistency? I have tried them in my pressure cooker and on top of the stove. I just can’t get the consistency right, they are either too firm or over cooked!
Follow this recipe for best results in our experience.
Olivia says
I had success with version 4 from this recipe. https://www.pressurecookrecipes.com/instant-pot-chickpeas/
It uses an electric pressure cooker, but perhaps there is a way to convert it?
catherine bailey says
Been meaning to try these for ages, and so glad I eventually did! I drained the chickpeas in a sieve for the evening (without rinsing as I wasn’t using oil), then put them on a tray in the airing cupboard overnight, which made them very dry, and most of them had lost their skins, just left the others on. Baked them today for around 30 mins and they came out perfectly! Just tossed them in a little more salt. Thanks for the recipe – it works!
Thanks for sharing, Catherine!
Zubeida says
I’m a bit of a picky eater and I made these. They were delicious. I’m crossing fingers that my fussy toddlers will enjoy it too. I baked it for 35 minutes in 160 deg celcius because I know my oven, it was perfect
Jenna says
I peeled the chickpeas, which i do for hummus as well. Came out amazing! Still crunchy the next day! Used them on top of the kale salad with tahini lemon dressing. ?
We’re so glad you enjoyed them! Thanks for sharing, Jenna!