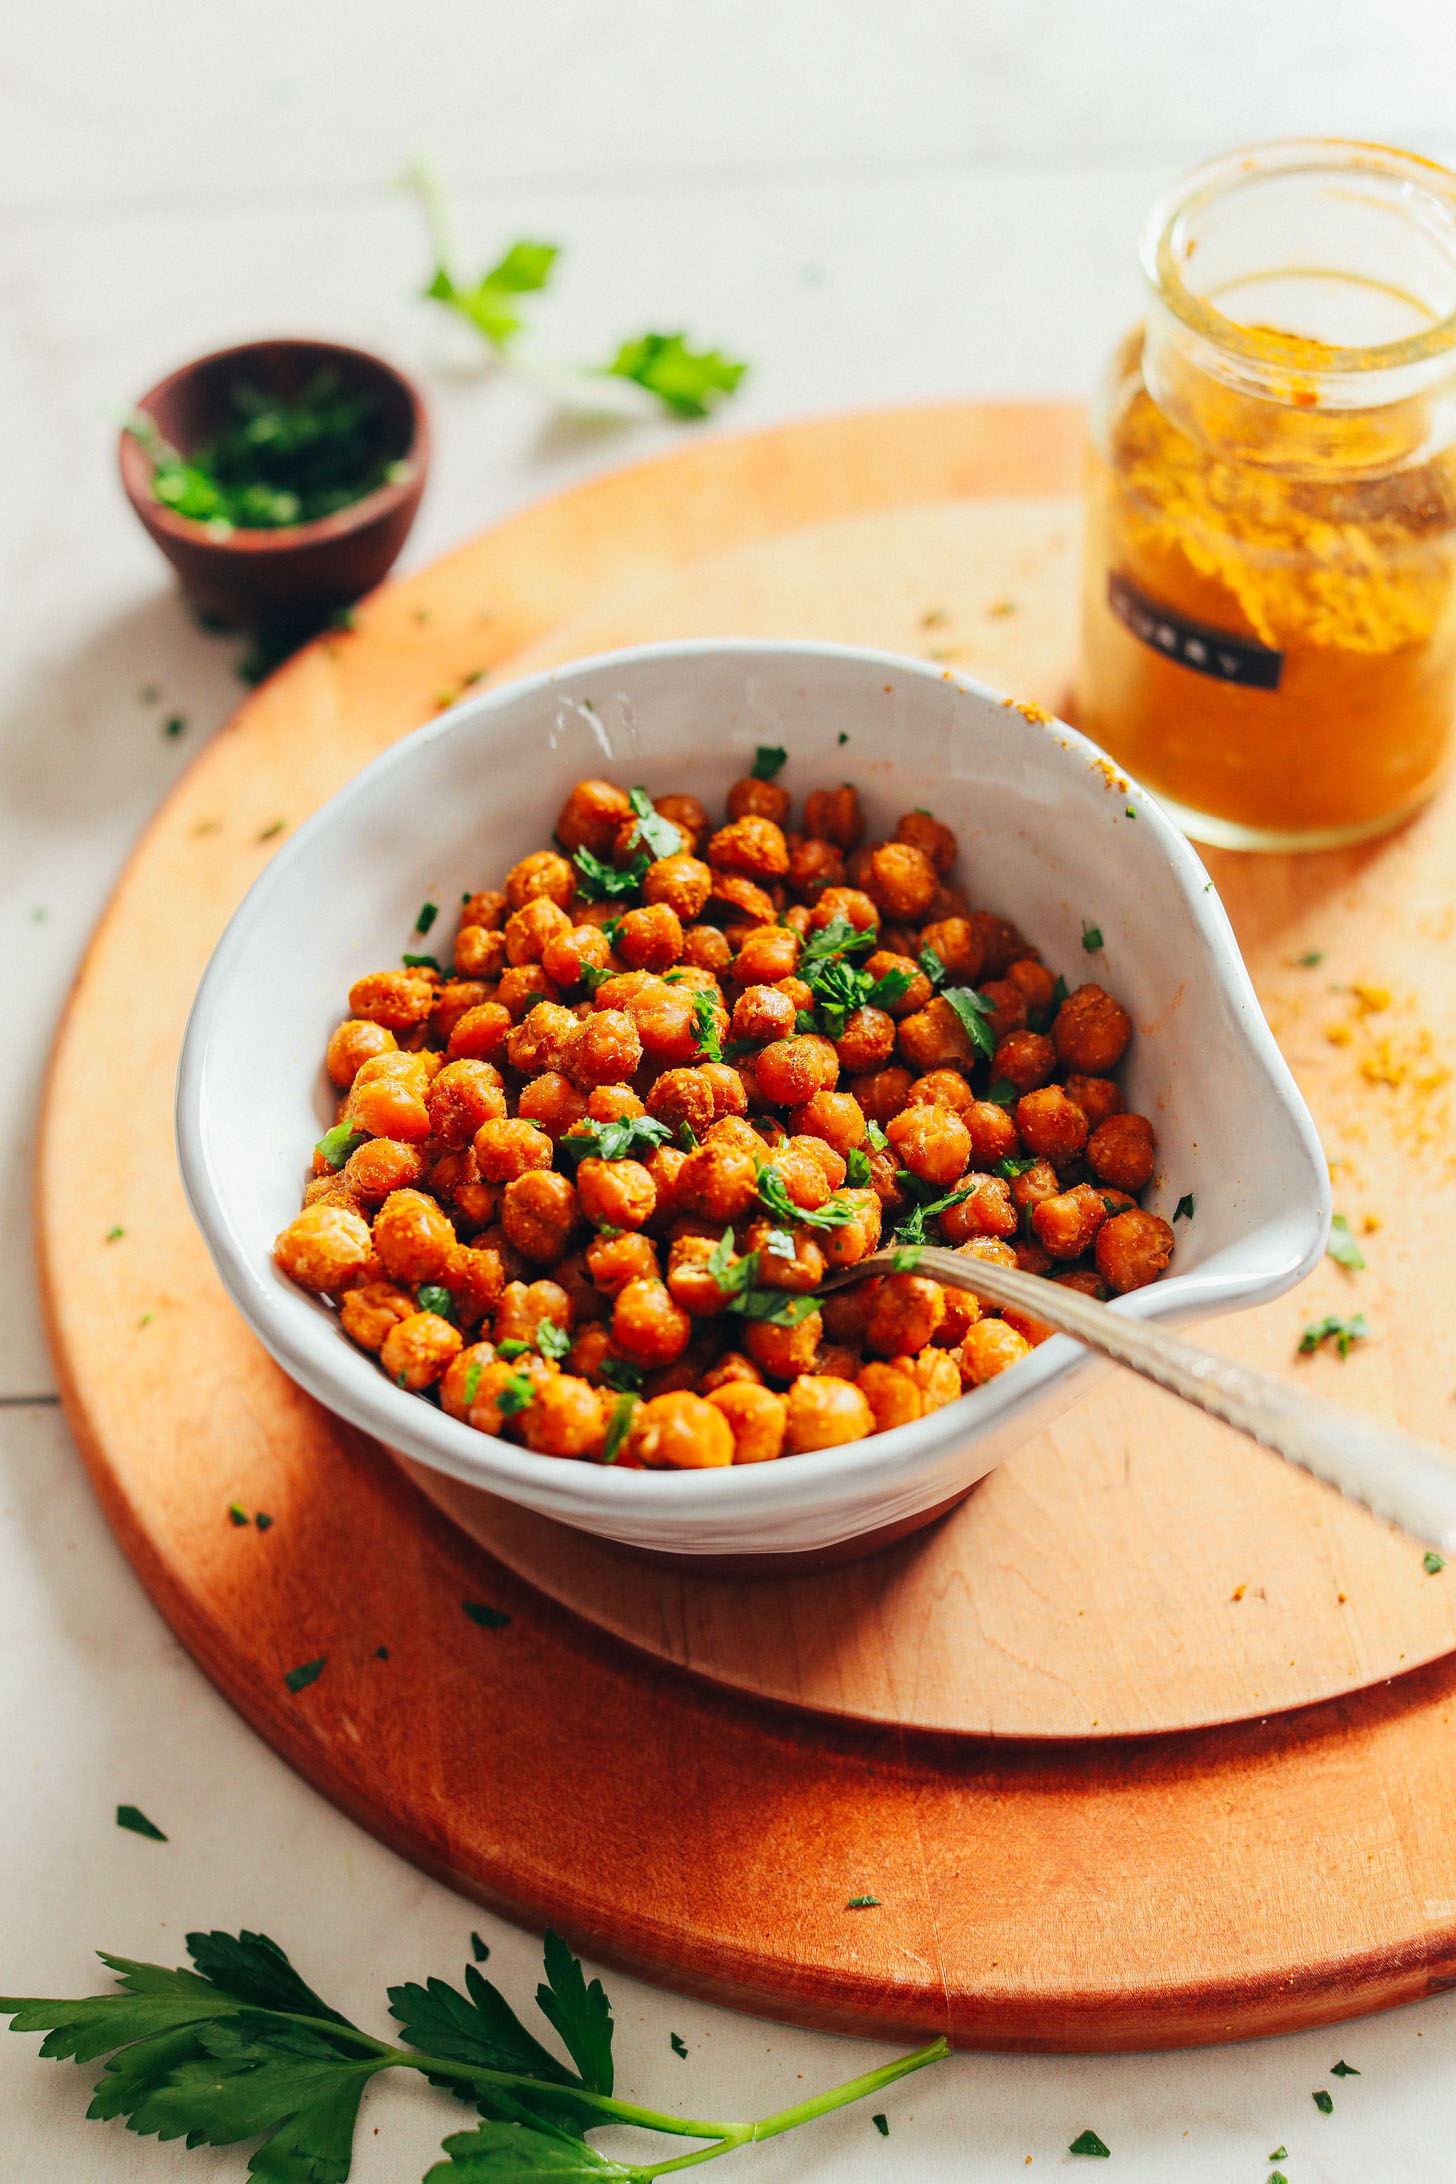
Friends, the day has arrived! The day that actually crispy roasted chickpeas (not fried) can happen in your kitchen! Like, it’s a real thing!
Let’s do this!
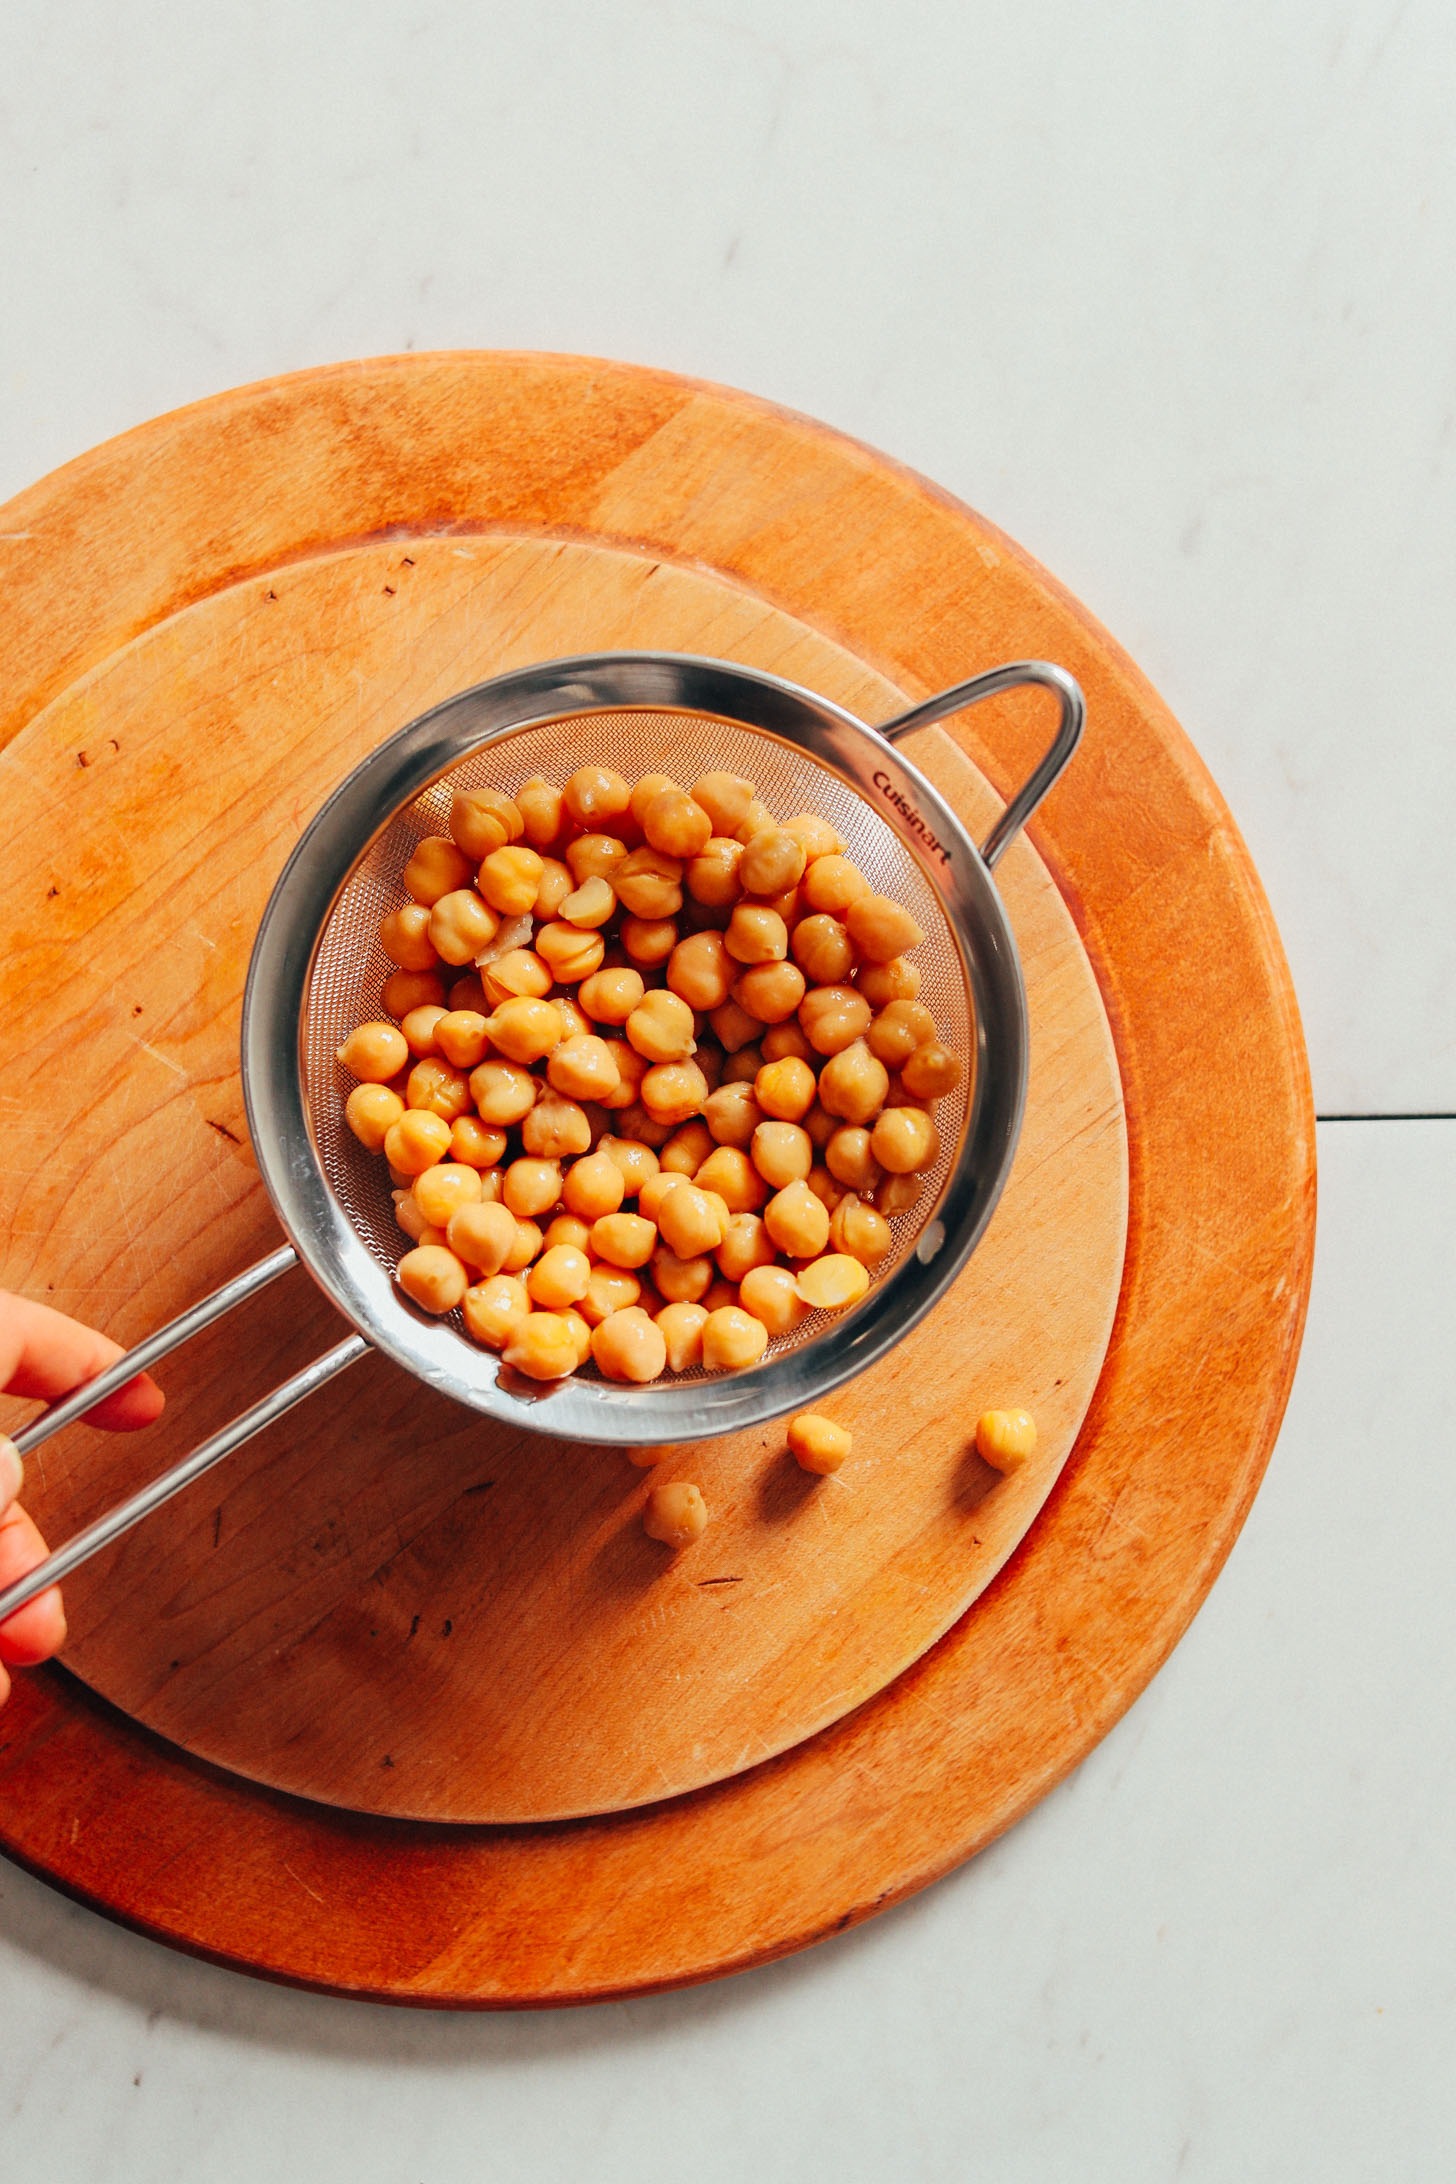
The magic of this 4-ingredient, easy recipe starts with cooked chickpeas. I went for canned because: easy. But I also suspect you could use home-cooked if that’s your thing.
The #1 crispy tip is to rinse, drain really well, then dry really well. Like, really, really well. The less moist (ew, sorry) the chickpeas are, the crispier they will become!
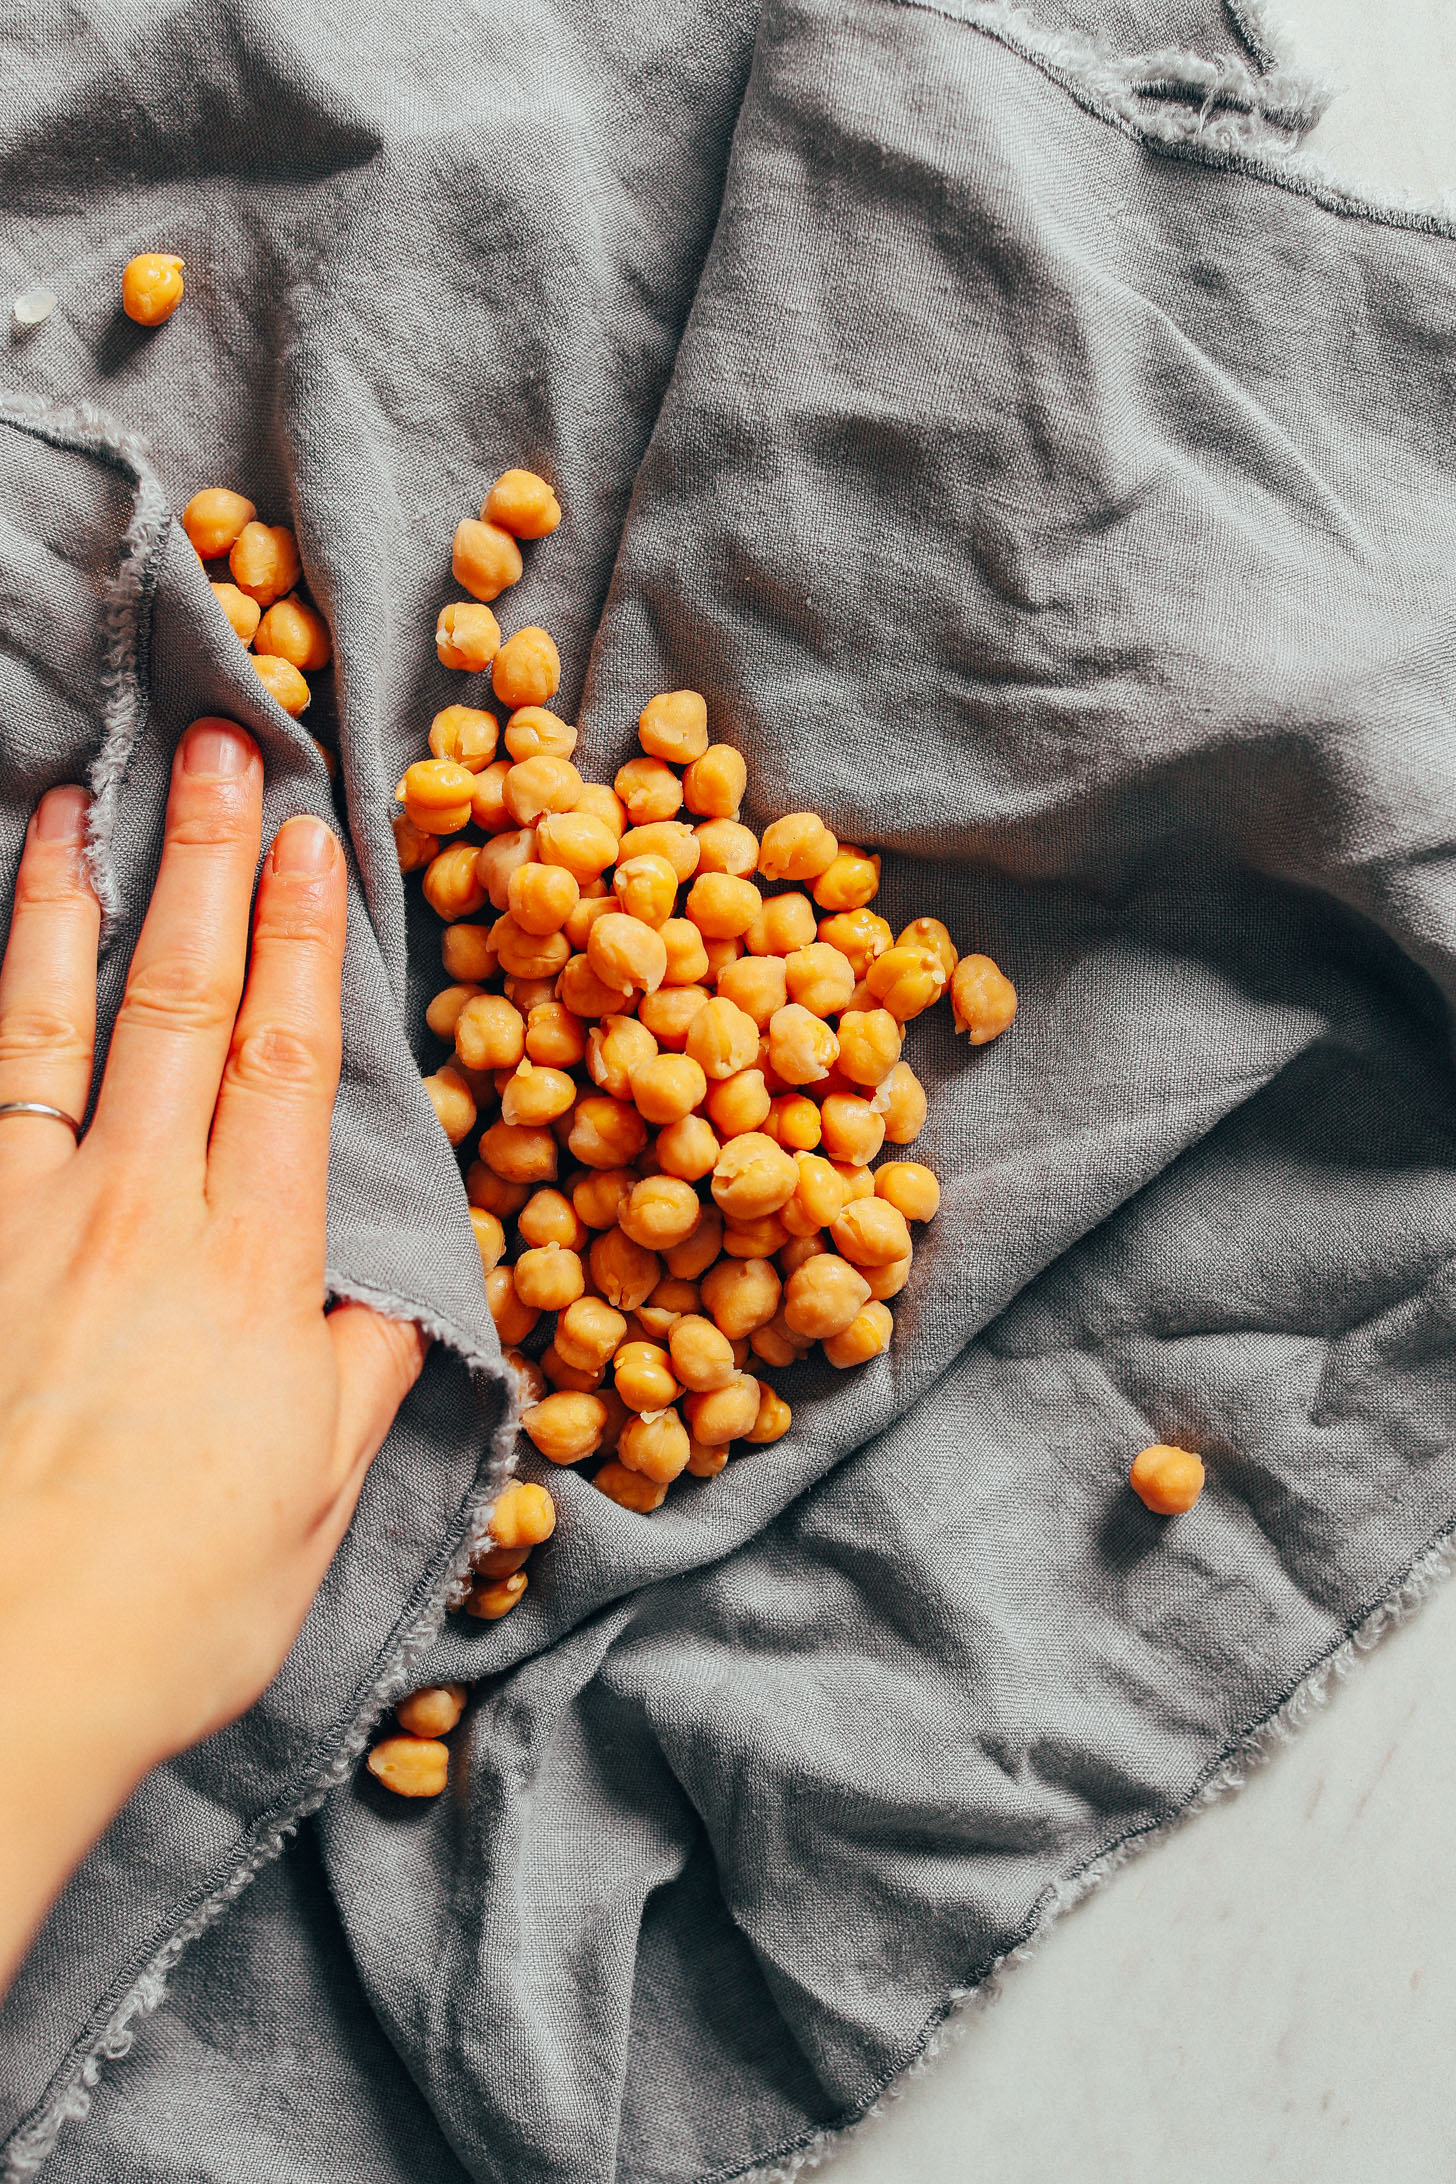
Once your chickpeas are dry, this brings me to tip #2: Peel the skins!
Peeling the skins is onerous and annoying. Yes, I know. But in my experience, it does help them crisp up a bit more in the oven. And when it comes to crisping chickpeas, every little bit helps!
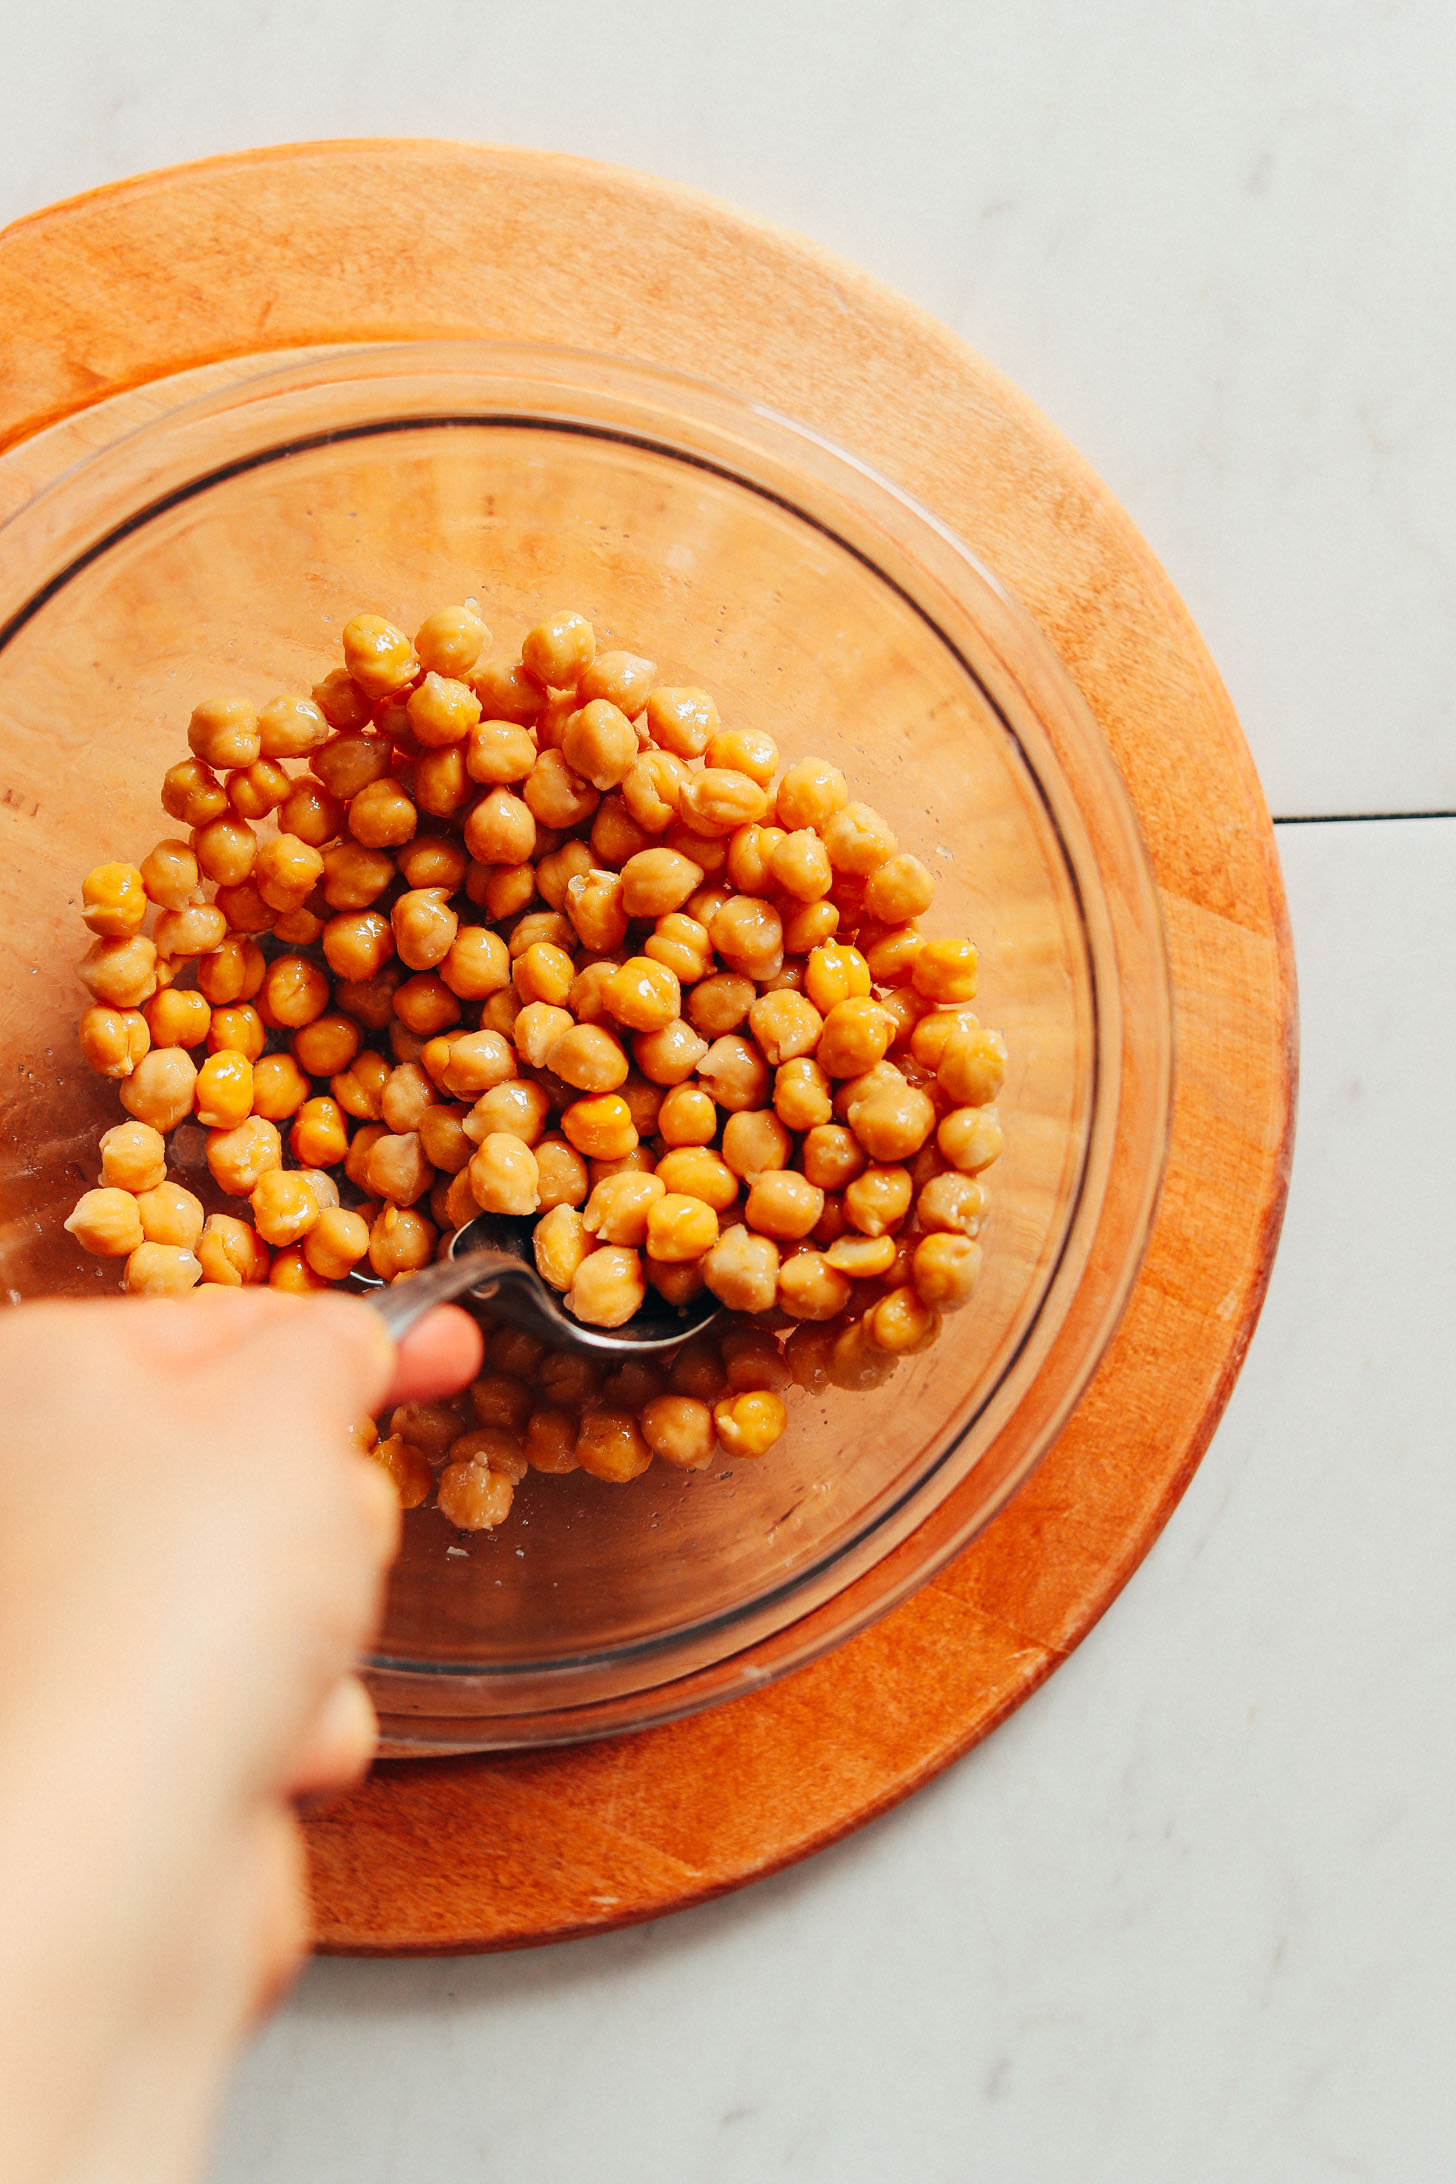
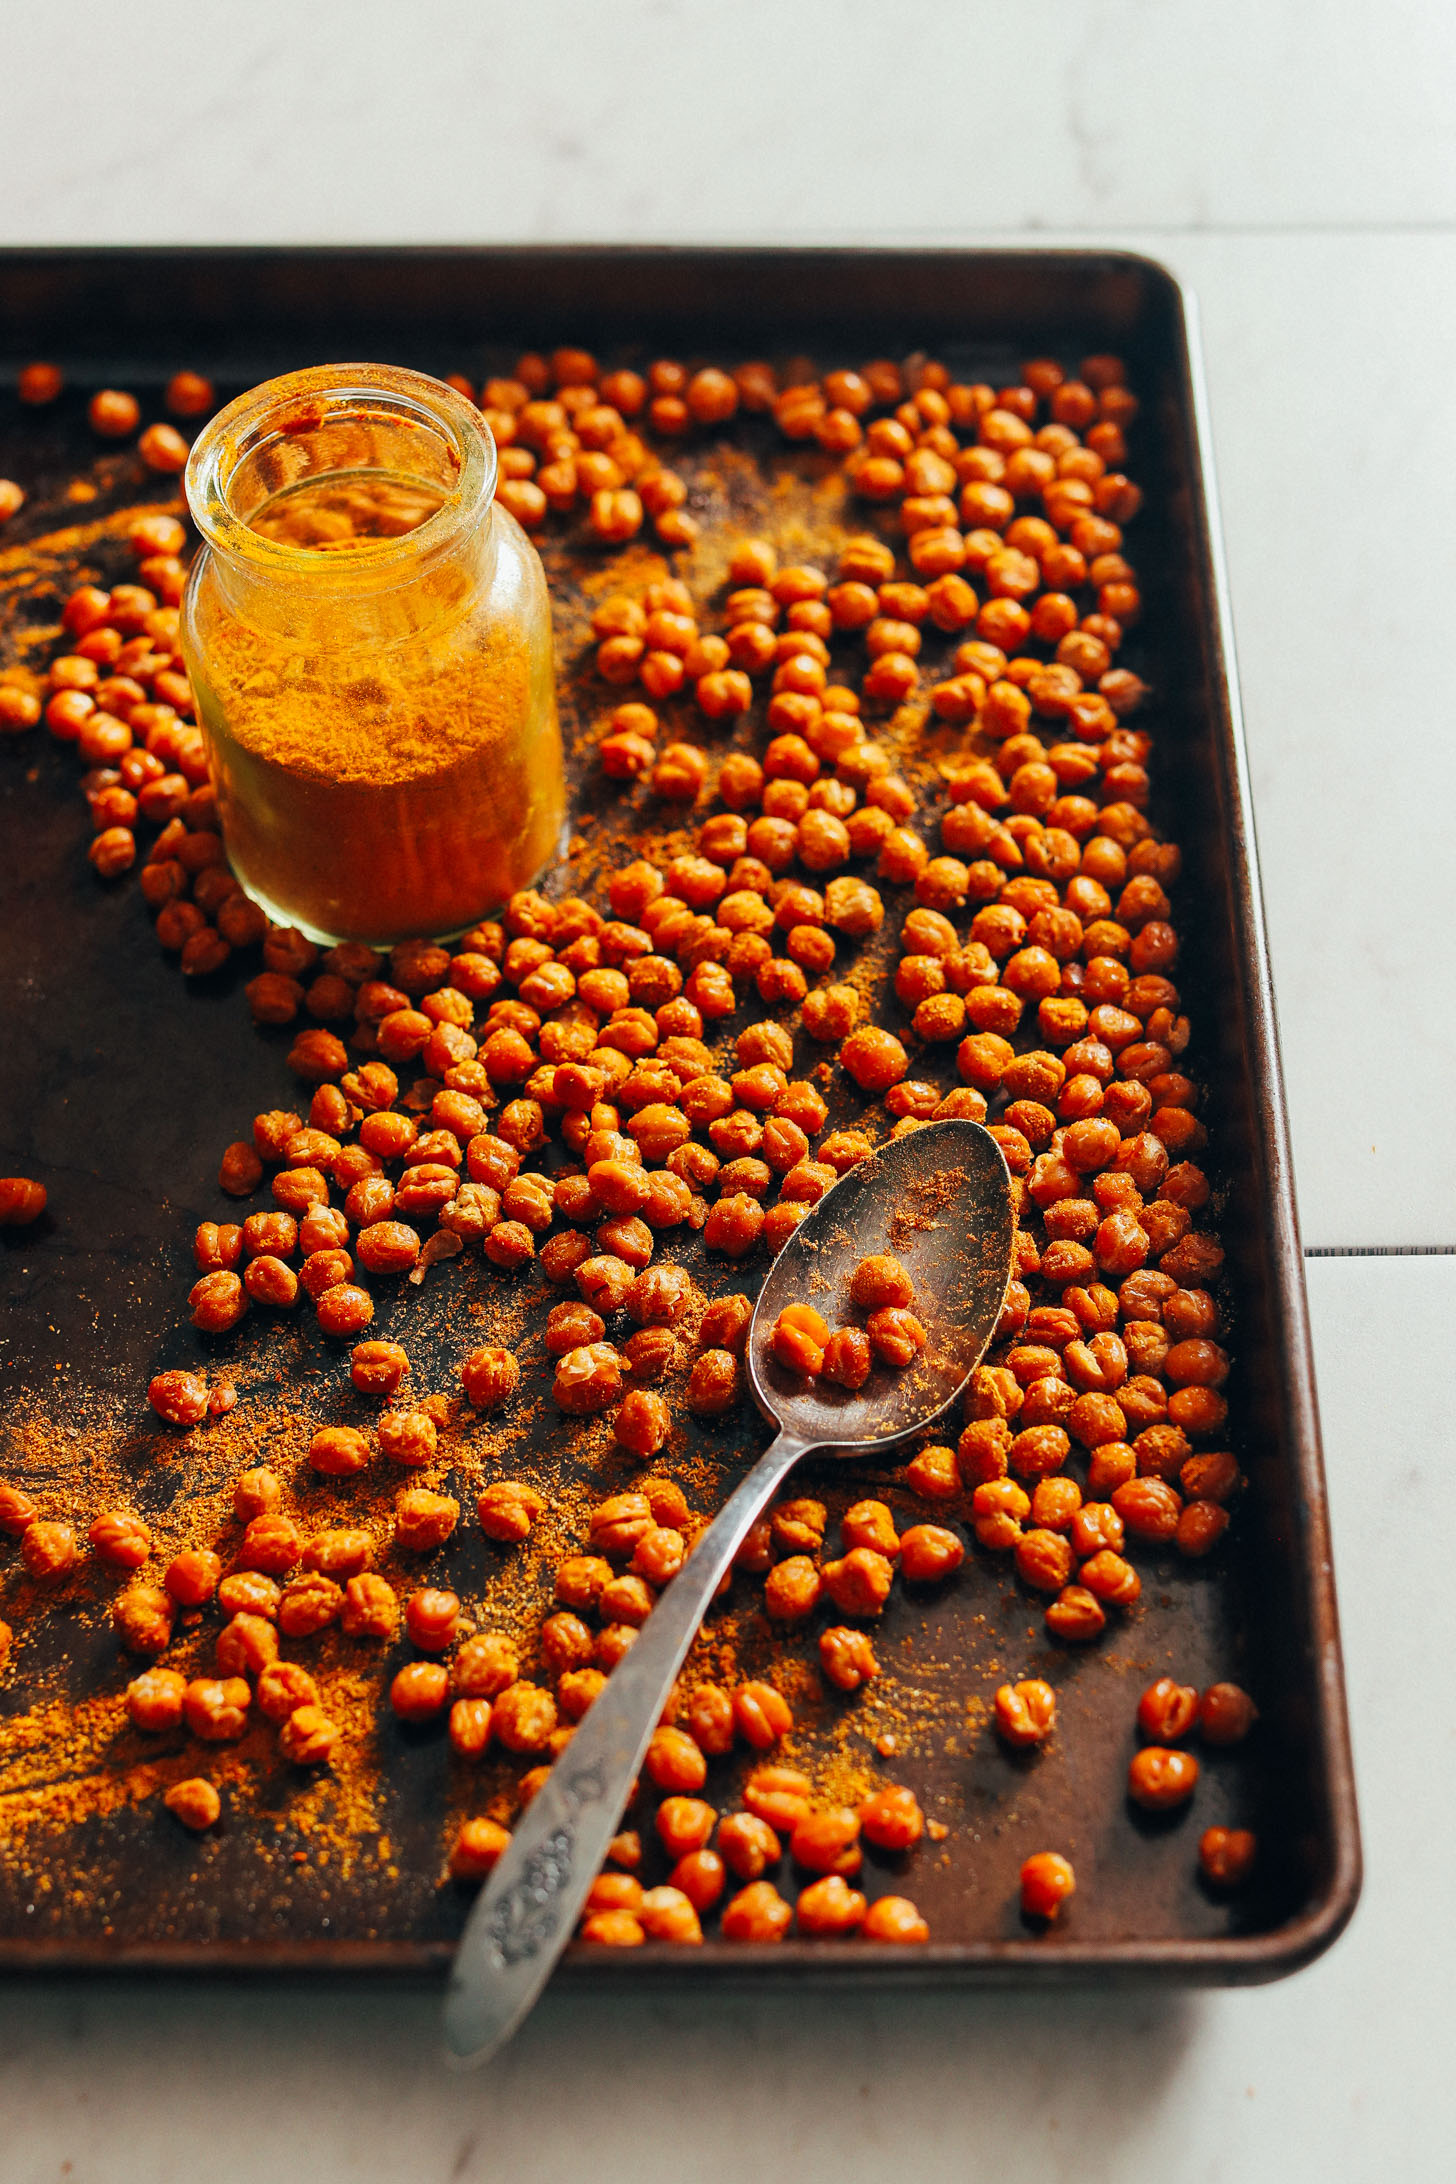
Now, it’s time for oil (if oil-free, you’ll omit this step) and salt. This brings me to tip #3: You’ll want to wait to add any other seasonings until after they’re done baking. I’ve found that too much seasoning can interrupt the crisping process, almost by trapping in the moisture and not letting the chickpeas “breathe.”
Next step is tip #4: Bake at 350 F (176 C) for 40-50 minutes. In experimenting, I found that, at too high a temperature, the chickpeas burn quickly while being tender in the center. And if too low, no crisping seems to happen for a very long time. So 350 degrees is the sweet spot.
Tip #5 is to let the chickpeas cool once out of the oven, and tip #6 is to store without a sealed lid. Doing so lets the chickpeas breathe and stay crispy longer than just 1 day.
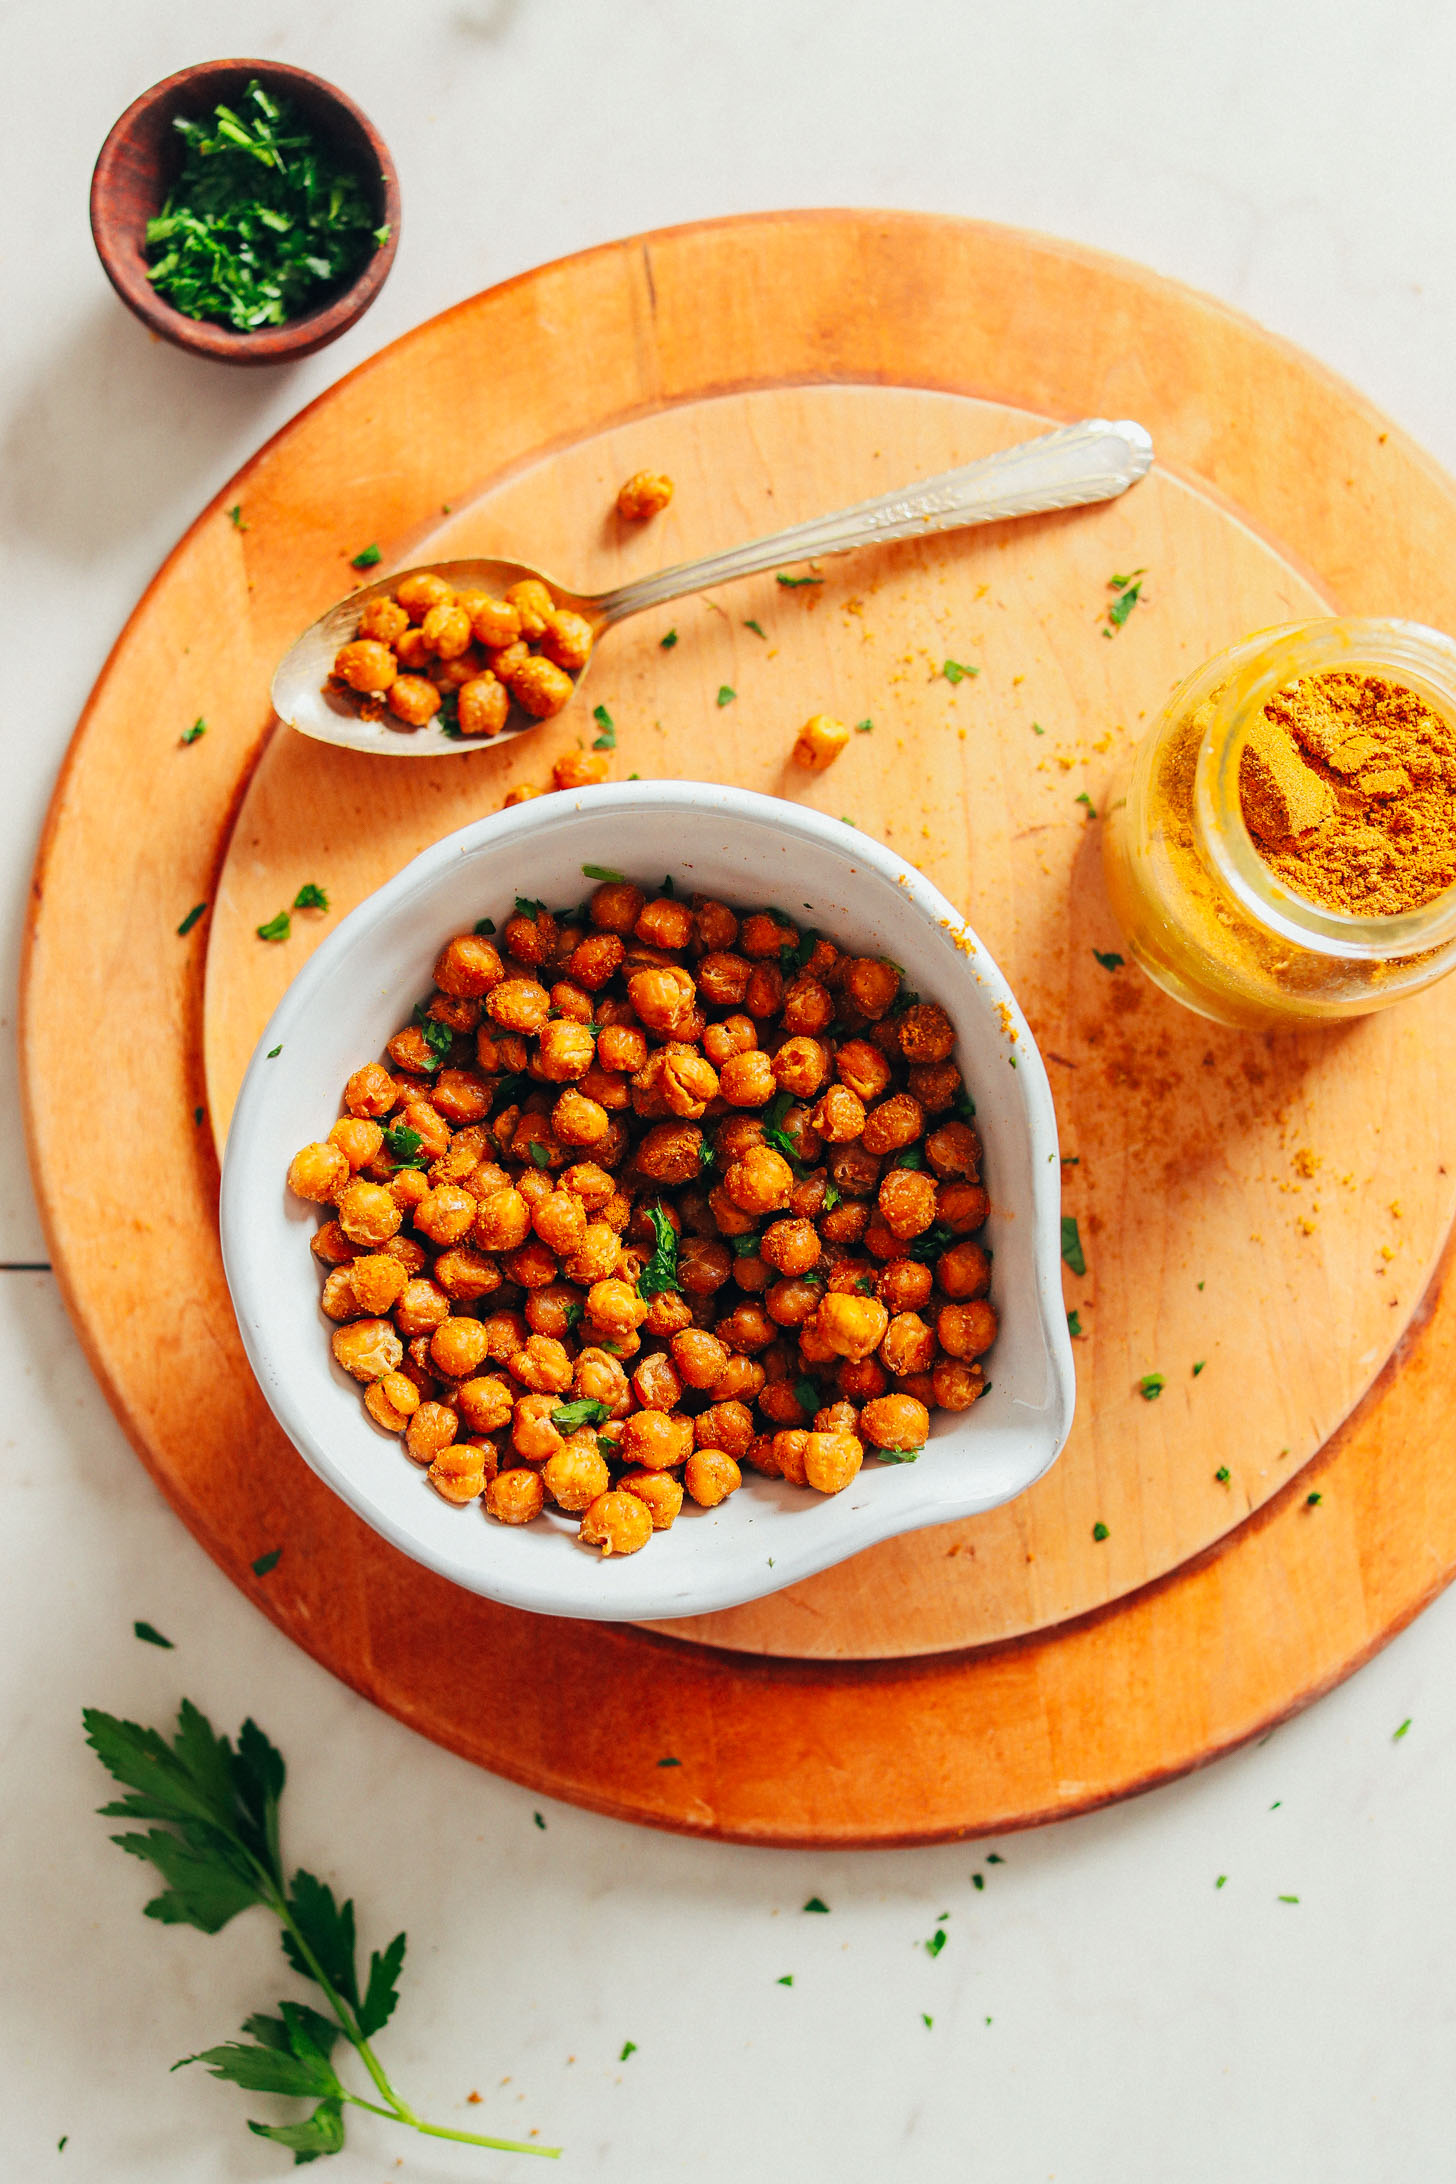
That’s it, friends! You now have crispy roasted chickpeas. They’re:
Crispy
Flavorful
Simple to make
Versatile
Healthy
Snacky
& SUPER delicious
What goes with roasted chickpeas?
I love these chickpeas as a straight-up snack at home or on the go. They’re also great atop things like salads, soups, and Buddha bowls!
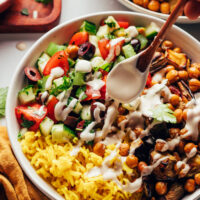
Try these chickpeas with my Curry Roasted Fennel Salad, Garlicky Kale Salad, Sweet Potato Noodle Pasta, Curried Butternut Squash Soup, Butternut Squash Pizza, Greek Goddess Bowl, or Sweet Potato Chickpea Buddha Bowl! They’d also be equally tasty on my Mediterranean Baked Sweet Potatoes. What I’m saying is: They’re delicious on pretty much everything!
If you try this recipe, let us know! Leave a comment, rate it, and don’t forget to tag a photo #minimalistbaker on Instagram. We’d LOVE to see what you come up with. Cheers, friends!
Actually Crispy Baked Chickpeas
Ingredients
- 1 15-ounce can chickpeas (drained and very well drained + thoroughly dried)
- 1 Tbsp avocado or other neutral oil (if avoiding oil, omit and don’t rinse chickpeas out of the can – just drain)
- 1/2 tsp sea salt
- 1 tsp seasonings of choice (such as DIY Curry Powder, Shawarma Spice Blend, or chili powder)
Instructions
- Preheat oven to 350 degrees F (176 C) and set out a bare baking sheet (or more, as needed).
- Drain chickpeas well. If using oil, rinse well with water and thoroughly drain. If omitting oil, simply drain well and skip rinsing with water.
- Once drained well, spread the chickpeas out on a clean, absorbent towel and use your hands to gently roll and dry the chickpeas. Some of the skins should start coming off. You can opt to peel all of the chickpeas – which can help for extra crispiness! – or simply remove the skins that come off. Either way, the chickpeas will crisp up. I just found that peeling them does yield slightly crispier chickpeas.
- Transfer the chickpeas to a mixing bowl and top with oil (or omit) and salt. Mix well to combine. DO NOT add the other seasoning at this point – it can interrupt the crisping process, so wait to add until after baking.
- Bake for a total of 40-50 minutes or until golden brown and dry/crispy to the touch. I like turning my pan around and shaking the chickpeas around at the halfway point for even cooking. Note: peeled chickpeas cook faster than unpeeled. If omitting oil, they will also cook faster.
- Remove from oven and toss with seasonings (if desired) while still warm. Then let cool 5-10 minutes – they will continue crisping as they cool.
- Serve as is or atop bowls or salads! To store, place in a storage container or jar and DO NOT tightly cover. Instead, crack lid so they can “breathe” a bit. I found that this helped them stay crispy longer. These are best in the first day, but they will last for 4-5 days at room temperature. Alternatively, seal well and freeze up to 1 month.


Alyssa says
Hi!
This sounds great! Quick question, once baked, do they not need to be refrigerated? I can see eating off these for a few days but they are okay to stay on the counter and not refrigerated?
Thank you so much for all this delicious guidance… I love your recipes!
Hi Alyssa, we find they keep well at room temp for a few days.
Diana says
I have tried roasting garbanzo beans several times with less than stellar results — slightly chewy, and worse. This technique is perfect!! I cooked dried and soaked garbanzo beans in my Instant Pot, then air dried on a bed of paper towels. It’s the air drying that made the difference as I didn’t have the patience to peel every one, though lots fell off in the cooking. I love crispy, so yay!! I did use the no- oil method, and the seasoning didn’t stick well. Not sure if using a little oil might fix that. Thank you so much for posting and with such exact detail.
Whoop! We’re so glad you found this recipe helpful, Diana! Thanks for sharing!
Michelle Jones says
Loved this snack! I ended up baking for roughly 30 minutes (tossing the chickpeas after 20min) in my non-convection oven at 350F as I found they were getting to be pretty crunchy (I took all the skins off). Topped the final product with some black truffle salt and WOW. Will definitely be making these again.
Thanks so much for the lovely review, Michelle. We are so glad you enjoyed these! Next time, would you mind leaving a rating with your review? It’s super helpful for us and other readers. Thanks so much! Xo
Brenda Christmas says
Tasted fine. Followed instructions for no oil version including peeling the garbonzos. Turned out too crunchy….broke a tooth. I used a little garlic salt and some chili powder. 350 degrees for 45 minutes.
Vee says
This did not work out for me. I tried making a couple of times and they ended up like rocks. Both times I dried and skinned the chickpeas (which I cooked myself in a pressure cooker). I checked them in the oven a few times to make sure they weren’t cooking too quickly, but still rocks after I took them out of the oven:(
Strange! I’ve never used home cooked chickpeas, only canned. So perhaps that was the issue. It actually sounds like yours may have been overbaked?
Grace says
I just made these hoping to have them with a Moroccan lamb dish but they came out pretty bad. They were definitely crispy.. So crispy that they were hard and difficult to chew. It was almost like eating rocks.
My oven does not have increments of 5 so I had to cook them at 180°C, and I cooked them for about 25 minutes because they were starting to get pretty brown.
I took the skins off and dried them really well.
I’m not really sure what I did wrong apart from the heat being very slightly (4°C) higher than the recipe.
Also my oven is a convection oven so maybe I should’ve lowered the temperature? I’m not sure
Hi Grace, sorry to hear that happened! It sounds like the fact that it was a convection oven might have been the issue. For convection ovens, try reducing to 160 Celcius. Better luck next time!
Grace says
Thank you, I will try it again and hopefully it comes out better next time. All the positive reviews here can’t be wrong so I’m guessing it’s my oven
Helen says
I just made this. Awesome!!! I took the time to peel each bean. And I used 2 cups boiled garbanzo beans. I used my air fryer at 350F, it only took 15 minutes of baking to have an awesome, healthy snacks..
Thank you for your recipes.
Brittany says
You mention that they can be frozen (I am making a big batch). How can you defrost and use them after freezing?
It’s honestly not ideal as they are best fresh. But I’d say just try leaving them at room temperature and/or reheating in the oven to dry them out (freezing adds moisture).
Mark FRENCH says
I made exactly as suggested but the crispness level was 6/10. I suspected my oven was to blame, or at least how I used it. With the extra step of peeling, the recipe seemed like a lot of effort for little return and remained unused for a while.
Today, however, I took delivery of an air fryer (not a fancy, branded one, you understand) and followed the recipe again and… well, the thing is going to pay for itself in chickpeas alone – I did not even bother peeling the skin.
Thank you.
Alessia says
Hey there, can I ask you at witch temperature & how long in the air fryer?
Jessica says
I love roasted chickpeas and this is by far the best recipe I’ve tried! I followed the recipe exactly as shown – making sure the chickpeas were super dry before baking, and peeling the skins – and they turned out perfect. I’ll definitely be making these again. Thanks, Dana!
So glad you enjoyed them, Jessica! Thanks so much for the lovely review! xo
Jennifer says
True to the reviews and the title – these are ACTUALLY crispy chickpeas!! So delicious and peeling the ‘peas really does make a difference. I accidentally rinsed the canned chickpeas before, but it didn’t seem to make a difference as they still turned out golden, crispy, and tasty. I didn’t use oil and I didn’t mind that the chickpeas were plain (post bake seasoning definitely didn’t stick), because i put them in a wrap with kale & quinoa tossed in your 5 minute caesar dressing and it was 10/10.
Robin says
Nice crispy chickpeas. Used a 1 tsp of the shawarma spice blend and it was just right. I got most of the skins off but will try to speed up the process next time by not being so diligent. Can see me making this on a regular basis. Thanks!
Christy Roppel says
Hi!
If after baking the peas, does the seasoning stay on without adding oil?
Thanks!
Christy
It kind of does, but the oil helps!
Caryn says
I have made these with both canned and home boiled beans, and want to give a shout out to home boiled. They start firmer and drier than canned, so they get crisper. And peeling does help. Thanks for a great recipe!
Barbara Dixon says
Caryn,
Will you share how you cooked the home boiled chickpeas?
Jul says
If I make it with oven with fan, do I need to change temperature or duration? Thanks a lot
Hi Jul, we haven’t tried it, but typically lowering the temperature by about 25 degrees Fahrenheit with a convection/fan oven is best. Hope that helps!
Audra says
First method I’ve tried that has made them actually crispy! Trying not to eat the whole bunch in one sitting. Thank you.
Rosemary Scott says
Can i make this with dried chickpeas
Hi Rosemary, we haven’t tried that, but another reader mentioned it worked for them. Hope that helps!
Jody says
.MMM. What a great snack
BananaBirkLarsen says
I made this because I batch cooked more chickpeas than I could fit in my freezer containers and I didn’t know what to do with the extras. But now I’m considering pulling some back out of the freezer to make more because this is a really good, tasty, crunchy, healthy, inexpensive snack. I used black chickpeas and didn’t peel very many of them because they have a thicker, tougher skin, but they came out super crispy anyway. I used grapeseed oil for roasting and tossed with some ras el hanout while hot. I’ve eaten a good portion of them just off the pan. I suspect that homecooked dried chickpeas probably crisp faster because they don’t have as much moisture to start with (and the black chickpeas maybe faster than the regular?) because I only had mine in the oven for about half an hour. Great recipe — thanks!
Thanks for sharing!
Kristin says
Ok so last night I painstakingly peeled all my fresh cooked chickpeas while watching Ghost Adventures and then made these, thinking they would go on some sweet potatoes I’d already baked with tahini and kale (a favorite meal). Instead, we immediately ate them all, covered in nooch and garlic powder. We’re really trying to avoid the calorie black hole that is chips, and this was such a fantastic and healthy substitute! A bit of effort but very worth it.
Angela W. says
Hello! I love this recipe. My friend and I do a food demonstration in a weekly class to people who have never thought about how food choices affect their health. We think this would be a great recipe to share with the group. Would you allow me to share this with them as long as I give you full credit?
Hi Angela, please refer here for info on this topic.
Angela says
OK Thanks! Good to know. We won’t share your recipe.
sofia says
How long will they last after cooking?
Hi Sofia, to store, place in a Tupperware container or jar and DO NOT tightly cover. Instead, crack lid so they can “breathe” a bit. I found that this helped them stay crispy longer. These are best in the first day, but they will last for 4-5 days at room temperature.
dandyglam says
I’ve roasted chick peas before using your advice in the past…but it has been awhile. This time around I started w/ 2 kg of beans (I batch cook) and I’m 1/2 way thru’ roasting the entire lot. So far the 1st batch is super crispy. I just kept them in the longer cooking (around 1.5 hrs) as I had a lot of beans in both (double) ovens and multiple racks. I plan to add spices to them tomorrow then freeze 3/4 of them. Thank you for these instructions!!
Janet Evpraxia Wehlitz says
I just made these today from canned chickpeas. Thank you for the recipe and the tips!
I used 1/4 tsp of chili powder, I’m not a spicy food gal, but they were Very Good!
Jade says
I made these yesterday, and they did not turn out at all. I’m not sure what I did wrong, but I spent the time to peel all of those chickpeas, and by the time I put them in the oven (about 8 hours later) after drying them with a clean towel, and letting them sit open in the fridge with paper towel, they would not dry!
They were visibly wet when I put them in the oven, but no matter what I tried I could not get them dry. Now they are just kind of pasty mush in a bean. I’ll try again, but likely I’ll just buy them pre-made…
Hmm, sorry to hear this didn’t work out for you! If you give it another try, perhaps consider using a different brand of chickpeas.
Jade Heyden says
Update: They actually turned out! I ended up leaving them out on the baking tray overnight, and transferring them into an open container for another day or so. After a couple of days they were perfectly crispy and enjoyable! They just needed a bit of extra time to dry. I think next time I will leave them spread on the tray out to air-dry overnight before baking, and see if that makes the difference. Perhaps it’s too humid here!
Thanks for reporting back! Glad to hear they worked out!
Carol says
Not sure if it is permitted to mention brand names, but Kuner’s canned chickpeas are almost all skin-free. Amazing compared to some other brands.
Sue says
Found this recipe earlier this week and tried it today!! Took some time getting the skins out but absolutely tasty!! Thank you so much :)
Johanna says
Just made this and they are lovely and crunchy. I added oil and salt before baking, baked until crunchy then tossed them in 2 TBS maple syrup with 1 tsp vanilla extract and baked again for about 15 mins. Took them out then they hardened up as they cooled off. Can’t stop eating them!
Yay! Thanks for sharing!
Vicky says
They pop!!! Are they supposed to? My oven is covered in chick pea pieces ?
Hi Vicky, sorry to hear that! We have never had that happen! Did you make any modifications?
Michele Pondexter says
I tried this recipe today and I Love em’. Too bad I only had 1 can of garbanzos…I would have made more.
They were literally inhaled by my household. So, garbanzo beans are on my grocery list because I think I’ll be making these a few times a week.
Mary says
Made theses last night. They turned out great!!! I don’t think they’re going to be around long enough to worry about storing them. Thanks for your recipe and great tips.
So good right!? We’re glad you’re a fan :D
Briana says
Hey,
I’m about to crisp up some chickpeas and the chickpeas I have are a large bag of dry beans. I clicked over and read your quick soak method. After I cook for a minute and leave covered for an hour am I then ready to rinse and bake?? Do i have to cook before I crisp?
**I have actually already made this recipe (and love it!!!!!)but usually make it from canned chickpeas.
romy says
You have to cook
Aleksandra Trajkovska says
Hi! I have a bag as well can you let me know how to follow the recipe with the dried chickpeas
Hi Aleksandra, we haven’t tried it, but another reader mentioned the following: “I cooked my own chickpeas from dry, drained and layed out on a parchment lined cookie sheet. Place the tray in oven as it preheats to slowly dry them further. When very dry, toss in canola or neutral oil. I sprinnkled with no salt organic seasoning from Costco and fine sea salt. Then I oven roasted for 25 more minutes. No peeling and yum! folowing your storage recommendations. Thanks!”
Thomas says
I sort of made this recipe. I washed, removed skins dried chick peas with towel then put in oven on pizza mesh rack to dry further, about 4 min as oven preheated. Oiled and Cooked for 43 min . on the mesh rack in convection oven. I thought I was being clever…… I got very dry and very crunchy chickpeas. Not an ounce of moisture… I have had these once before out at dinner and loved them. They were creamy inside and crisp outside. When I saw your recipe I was excited. Guess I got carried away. I thought the pizza mesh rack was a good idea….. maybe next time. I think it has possibilities.
Faith says
I made these just now and they’re delicious! I had dried chickpeas, so I first cooked the dried chickpeas, rinsed them, took off the skins, dried them, then followed the instructions for this recipe. Afterwards, I added Trader Joe’s Chile Lime Seasoning and am eating them now! This was the very first roasted chickpea recipe I’ve tried, and I think it will be the last one! They turned out perfectly!
Christina says
Omg! I am pretty much vegan and I’m always felt bad because I didn’t really like garbanzo beans. This recipe has changed my whole outlook! Love it :-)! I used whatever seasonings I wanted, which always includes turmeric for the anti-inflammatory agent. They are so delicious and I will be making them all winter long for a snack on the go. Thank you. Love your site :-)
Lily D says
I recently discovered roasted chickpeas, and am addicted! I have not tried your method of adding the seasonings after roasting, so will do that next time. I don’t remove the skins, but by accident I discovered a fantastic way to get really crispy chickpeas is to turn off the oven after the baking time ends, and just leave them in for another 30 minutes or until the oven cools.
Sierra says
These are so yummy! Worth it to remove as much skins as you can because criiiispy!! Roll them around rubbing with a clean dish towel ;)
I make these in the evening for next days lunch all the time. It’s a challenge to not eat them all right when they come out of the oven… but gotta save them for my lunch salad ?
Heather says
These turned out perfectly! Using them as a salad topping (if I can keep myself from eating them all first)
Maggie says
These are so good! If you have the time I highly recommend soaking dry chickpeas overnight, draining well, and then seasoning and roasting them. Cast iron skillet helps make an extra crunchy chickpea. I usually soak a whole bag then use half for this and half for falafel. Soaking raw chickpeas is the way to go!
Fifi says
I found a shortcut. After letting them cool after baking. I added my seasonings and baked them a second time. They came out of the oven crispy and delicious.
Smart! Thanks for sharing, Fifi!
Gail says
To remove the skins easily, roll the chickpeas around in the kitchen towel during the drying stage, most skins will pop straight off
Great tip!
Ches says
I don’t cook a lot, so this is about the third recipe I’ve followed ever, and thank you so much for the tips and clear instructions. With this recipe I made perfect crispy chickpeas, with chilli powder, and have subsequently stocked up on more tins, and new spicy mixes, so I can keep making them! (I find shelling them quite fun : )
And now I finally have a homemade food I can bring to things :)
Alex says
Hi, did you have more ingredients to this recipe before or am I going crazy? I remembered a recipe by you with something like a curried paste, lemon etc… it was amazing! Let me know :)
Hi Alex! I didn’t change this recipe!
hayden says
This is so so good, I personally don’t enjoy any type of potatoes but leaving them out worked out just fine super good dressing (:
Thanks for sharing, Hayden!
Meghan E Zoll says
These were so delicious! First time I’ve skinned chickpeas and it was totally worth the effort.
Sheetal says
Can we boil chickpeas in a pressure cooker instead of using canned chick peas?
We haven’t tried but if you do, report back!
Susan says
I just did. After speed-soaking (bring to a boil, let sit 1 hour), I pressure cooked for 9 minutes. Use natural pressure release. They come out great. Will be trying the recipe today!
Carol says
I cooked my own chickpeas from dry, drained and layed out on a parchment lined cookie sheet. Place the tray in oven as it preheats to slowly dry them further. When very dry, toss in canola or neutral oil. I sprinnkled with no salt organic seasoning from Costco and fine sea salt. Then I oven roasted for 25 more minutes. No peeling and yum! folowing your storage recommendations. Thanks!
Yay! Glad to hear it, Carol!
Kate says
I have made this twice already, once with cajun seasoning (yum!) and once with a spicy/sweet bbq blend and an extra pinch of chipotle for my husband who requested heat in the second batch. I was amazed at how good these were after having lackluster results from baked chick pea recipes in the past. The peeling isn’t difficult; just tacks on a few minutes to the prep time. I got it done before my oven was done preheating. And the cajun spiced ones are toddler approved, which was an awesome surprise!
Judy says
Worked perfectly! Followed the recipe exactly…super thanks Dana!
Made it for a dinner party to use as croutons on a salad, but everyone ate them as a snack instead!
Thanks, Judy!
Noelle says
I made these before I read your recipe with skinned chickpeas that were not canned but from my freezer. (I am a batch cooker) I thawed them out overnight and did not dry them first. I set my oven at 400 and baked them for approx. 35 minutes turning them twice. What I ended up with was an overly crispy hard chickpea that was chalky and powdery in the middle and I needed to drink water just to get them down. In the future would you lower the temp to 350 and make sure they were dry first? What is the interior texture we are looking to achieve?
Hmm, definitely crispy throughout is what you’re going for. Perhaps lowering the oven temp would help. Sounds like you set it 50 degrees higher than recommended. Try that next time!
Barbara says
I tried making crispy baked chickpeas once with another recipe and they didn’t turn out crispy at all. These are great — I think peeling is key. I’ve been cooking my chickpeas from scratch in an Instant Pot and using them for this recipe, they come out great, and some of the skins are already kind of peeling off when they come out of the pot. I also have a convection oven and I use the convection setting, I think it helps dry the chick peas out a bit more. I’ve stored mine in a sealed ziploc bag after cooling and they stayed crispy for weeks!
Laura says
I did peel the chickpeas and they turned out perfectly crispy! Thanks for the recipe. :)
Yay! glad to hear it, Laura!
Annie Peterson says
I made the no-oil version last night and they were super yummy! I put some on our (2) salads and then by the time the evening was over, I had eaten all the rest. Thank you for the recipe!
Lynn Lewis says
I really don’t like chickpeas, but eat them because they are full of protein. I made beans “from scratch” for the first time yesterday. WOW, what a difference, I even found them tasty just plain (usually I struggle eating them plain). After making your recipe, I barely have any left! I used garlic powder and a tiny bit of jalapeno powder. I just had a handful for breakfast (still crispy 2nd day)! Mine came out like crunchy peanuts!! Absolutely delicious – thank you so much for the recipe.
Yay! We’re so glad you enjoyed them, Lynn!
Carol Watts says
Sounds good. I saw a tip on how to remove skins easily. Put the peas in a bowl of water, agitate with wire whisk and they float off, so I am told !
Marilyn says
Fantastic and so easy. Super crispy and delicious. I used canola oil, sea salt and chili powder for this first batch. I’m looking forward to playing around with other flavours….maybe cinnamon.
Let us know how it goes, Marilyn! Cinnamon would be really interesting!
Megan says
I have attempted crispy chickpeas several times and they have never been crispy. This recipe worked! Thanks Dana!!
Yay!
Tracey says
Rinsed peeled and put a little seasoning salt on ( no oil) and baked for 40 minutes. I sprayed them with a little pam cooking spray and sprinkled on some Montreal Chicken seasoning.
Crispy and delicious and crunchy!
Awesome when I am craving my favorite potatoes chips, but with way less calories and fat! Thank you so much for this recipe!!
Marina says
Made these today and came out super crispy! It took a while to peel the skins, but totally worth it! I used them as a snack and to top a yummy vegan salad. Thank you for sharing!
Thanks so much for the lovely review, Marina. We are so glad you enjoyed them! Next time, would you mind leaving a rating with your review? It’s super helpful for us and other readers. Thanks so much! Xo
Linda Dowling says
Made these and they turned out better than my past attempts. After skinning I let them air dry for awhile. Made sure they were very dry before placing in the oven. Thanks for figuring this out. Really enjoy roasted chickpeas.
Thanks so much for the lovely review, Linda. We are so glad you enjoyed these! Next time, would you mind leaving a rating with your review? It’s super helpful for us and other readers. Thanks so much! Xo
Tony says
Hi…love this recipe and have made it many times. Thought I’d add my way of getting rid of the chick pea skins….
I drain and rinse then dump them in a large than average holed colander. I run water over the peas whilst gently rubbing small handfuls together. The skins come off easily , a lot stick to your hands. The water flow and larger holed colander flush the skins away.
I have also used a “panning for gold” method. I dump the peas in a deep bowl. Fill it with water and rub the peas together to sluff off the skins. Chick peas are heavier than the skins so…once I’ve got a cloud of skins floating in the water, I carefully pour the excess water out of the bowl (put a catcher in your sink drain just incase a few peas try to escape ) and the skins wash away. I repeat this process about 4 to 5 times and have found I get 80 to 90% of the skins off.
Hope this helps you chick pea lovers out there…munch on !! ;) Tony.
Thanks for sharing this, Tony!
Allegra says
Loved!!!!!!!!!!! So easy & versatile.
I added the Trader Joes *Everything But The Bagel Sesame Seasoning Blend*, and I’ve never felt so fulfilled. Physically, spiritually, emotionally. It’s like the best popcorn that ever was. Excuse me, off to make more! Thanks for the recipe!
Sandra Tondreau says
I go the no oil route–so drain only and no rinsing. How about the “drying”step–disregard? Put them in the oven directly from draining?
Hi Sandra, we would still say dry them with the towel for best results!
Ada Honeck says
Excellent! Mine turned out super crispy and I can’t stop munching! I did peal them. Once I figured pealing out, it wasn’t too bad. I will experiment with flavors next time.
e says
Perfection! Thanks.
Connie says
These were perfect and they stayed crisp! Thanks for the great recipe and all the tips.
Abigail says
Since discovering this cooking variation for chickpeas, roasted has been my favorite way to eat them that doesn’t involve a food processor. I like to use a combination of cumin, cayenne pepper, cinnamon, and granulated garlic, plus paprika for color. They work well in so many different dishes – salads, grain bowls, soups – to make for delicious and easy lunches.
Janet R says
I followed your instructions exactly and, yes, they are the crispiest! It took some patience to remove the skins but worth it. 24 hours later and they are still just as crunchy. Thank you for figuring this out and sharing!
Melissa says
Just made these chickpeas about 15 min ago and I’ve eaten them all already …
Krissy says
These were amazing! So crispy! Want to Just make them for snacks!
Kristen says
These are so good! Your tips worked perfectly! Thanks for all of efforts on this one! These are a great salty snack alternative to nuts.
Snflgus says
Thank you! I discovered that if (1.) I GENTLY rub a handful of chickpeas together, the friction will cause many of the skins to come off on their own; (2.) If I add a bit of salt to them, the grit causes e en more friction and chickpea molting. ?
Question: would the same process (skinning, etc) be recommended for other beans? I’d like to try black beans, cannelini and fava.
Again, thanks!
Janet Butters says
Hi just wondering if these could be made minus chickpeas? These look great but I can’t get on board with LEGUMES. Thanks love your stuff.
Food Gola says
I’m so excited to try this because i like crispy food……
kary says
What is a “neutral oil”? I was going to use coconut or olive oil for this recipe….
Hi Kary! A neutral oil is when you don’t want your oil to add its own flavor to your dish. You can use olive oil if you don’t mind the taste!
Kathy C says
Enjoyed this easy snack. Thank you
Lobna says
Hi .. so the chickpeans that are canned are already cooked??
Maria says
Yes, they are cooked.
Hi Lobna! Yes they are, now all you need to do is roast them!
Martine says
Thank you for the recipe, they are perfectly crisp…
I had to put them in for 10 minutes to get them very dry and after I followed the recipe and up voila!!!
Love always ?
Windwardsunny says
Made these crispy chickpeas today! So crunchy! Salt and garlic masala spices added. Will add them to a salad or just snack on them. Thanks for the recipe
Doug Taylor says
Hi Dana,
Thank you for all the work you put into your posts. I love your recipes, just wanted to make this one easier, so this is my version…
I simply DRY ROAST my garbanzos. Drain two cans and pour them from the cans onto a cookie sheet. Keep them in one layer and put into a 375 pre heated oven for 45 minutes.
No oil, no salt. Just dry roast the beans.
Check every fifteen minutes with a spatula to turn and move things around.
After forty-five minutes, turn off oven, leaving beans in for another half hour.
When they’re done, pour them into a bowl, add olive oil and stir. Then add salt, pepper, cumin, cayenne, chili powder, and turmeric. I keep them stored in a Tupperware container at room temp. Don’t cover until completely cool. They will stay crunchy for more than two weeks, but I eat them all before then anyway.
Amanda says
Love this! I have also done a similar thing with brown or green lentils — you can make them savory or dust some cinnamon and sugar (or apple pie spice, even!) on them for a crunchy sweet and ADDICTING snack — I bet that would be great for these chick peas also!! Thank you for this, Dana!
Shelley Phillips says
Could you give more details on how you do this? Would love to try it.
What a great idea! Thanks for sharing!
Arla says
NEED to make this ASAP! Would olive oil work too?
I’d assume so!
Amy says
Just made them and they are super crispy! Great Recipe as always :) Thank you.
Thanks, Amy! xo
Pinky says
This is a great tip to season after they have baked for a more crispy result but I found the spices a little raw even though I added while the chickpeas were still warm. Next time I will probably gently toast my spices before I add them. I absolutely love this snack and topper, thank you.
Yeah! That would probably enhance the flavor for sure!
Mary says
Thank you for giving an option for oil free! I’m really trying to omit added oils from my diet and I love that you gave an alternative. Love your recipes!
jody says
Dang…..just made your awesome beet soup with the added step of topping it with baked chickpeas. Unfortunately, in that recipe, it only mentioned putting them in for 25 min….seemed too short as they weren’t very crisp, and I was also instructed to add the spices while they cooked. Will look forward to using this updated approach; no spices until after, and longer cooking times. Fingers crossed!
Yeah! That method works for baked seasoned chickpeas, but this newer version definitely crisps up more!
CJ says
Want to try your method out… I bake for 30 min without oil then toss in oil which makes them super crispy! So yummy!
Thanks for the tip!
Chris says
What seasoning did you use? Thanks!
Hi Chris! We recommend either our DIY Curry Powder, Shawarma Spice Blend, or chili powder.
Nancy says
How long will these stay? And how do you store? I’ve made them and stored in a jar and 2 days later they smelled a little funky.
Joanna Weir says
See point number 7 in thr printer friendly version :-)
Some Guy says
I save silica gel packs that come with many non-food purchases. I put them in the sealed tupperware with my chickpeas and they keep them crispy and fresh longer than they last in our house. Additionally, I did a lot of experimenting and will share that I found the convection setting at 400 degrees to to be the ideal temp to produce consistently crispy (not crunchy) roasted chickpeas.
Hi Nancy! These are best in the first day, but they will last for 4-5 days at room temperature. Alternatively, seal well and freeze up to 1 month.
Caroline says
does the freezing and thawing
make them too moist again or if thawed on a paper towel, does that keep them crispy?
It might help, but they won’t be as crispy as fresh!
Luci says
I made fresh chickpeas yesterday as I was planning to make some oven baked today. Your post timing was convenient. I tried your version and yes, they are much crispier than using a higher temp. I did not use oil. I do not know if they will keep better uncovered as I ate them all on top of my sweet potato ( another one of your recipes). Thanks!
Barb says
Dana,
Many times I want to print out your recipes, but when I hit print I just get a blank page. Is there something else I need to do before I can print them?
Barb
Phill Adams says
I cut and paste the details I want (including a few piccies), into Microsoft Word and save as a PDF. I then have a catalogued stack of recipes in my own format that I can view anytime on a PDF viewer or print easily. A small amount of work but worth it for the flexibility! You could use any word processing app, even notepad if u wished.
Hi Barb! Do you happen to be printing from an iPad? We have noticed a small bug with ipads and we’ve been waiting on an update from apple. That said, that’s been a couple months and they haven’t rolled out that fix yet. We’re working on an alternative option, but it’s likely a few weeks out as well. All that to say something should be fixed in the near future! The print function should work on a computer if you have access to that.
Frankie says
I have an iPad and I copy and paste onto a Pages document, then keep in a file until I want it, then print that out if you want.
Evelyn J. says
This recipe came at such a convenient time–I’m 14 weeks pregnant and have been craving these and I’d rather make them myself than buy them. Can’t wait to get to it!
Brenda says
Quick question on chickpeas… I have tried baking them before and it is hard to get them crispy so I really appreciate your tips and recipe! As I was reading through the recipe I wondered what would happen if we threw the chickpeas in a dehydrator? Do they crisp up or do they become like pellets? Just curious if it’s been tried.
Kelly says
I have used the dehydrator a lot for chick peas. Since I am a low fat eater this allows me to get some salty crunch, ease of prep and long life of the snack. Travel very well too.
Rochelle says
Like pellets. I’ve tried also without oil I find they also get hard instead of crisp. Although I’ve never cooked them at 350 so I’m going to try. We’ve always done them at 385. For about 35 mins depending on the brand of chickpeas
Vanessa Shay says
Any thoughts on trying this in an Air Fryer? I just got one and am looking for more recipes!
Liz says
Yes! Just tried these in my air fryer today. I did one can in the fryer at 360 for 15 minutes. And another in the oven following the directions above. Air fryer for the win! They were perfectly crisp and my teenager ate every last one in a single sitting without adding anything extra. What!?!
Lisa says
Yes! I love them in the air Fryer! If I don’t let the chickpeas dry out enough first, it takes about 30-40 minutes to crisp up.
Andy R. says
I use just a teaspoon of oil and a 425 temp for 30 minutes in the past. I’ll try your method. Also, drying the chickpeas in the fridge for a few hours or overnight helps.
Pinky says
That’s the best tip, letting them dry unwrapped on the baking tray in the fridge overnight to get them super dry. I also do that with my steaks for a couple of days to get the best crust (sorry vegans)
John says
Any tips on storing them so that they stay crispy?
Pinky says
Dana suggests leaving them in a container without the lid at room temp for up to 4-5 days.
Lou says
Hey Dana,
Great post and recipe. I also recently tried fava beans like this. Amazing!!!
SMART!
Yesim Ilkin says
Do you take off fava bean skins too?
Mansee says
Ahhh I’ve been waiting for this post! So excited to try. Thanks for all your work testing these out :)
Jen says
Do you think it would help to add the salt prior to the oil, and letting that draw some more moisture out (similar to how you would do with zucchini or eggplant)?
Hmm, it’s worth a shot! let me know if you try that!
AJ says
I have been waiting for this since the time I saw you Insta story ;) Cant wait to try it
Jessie says
Great tips! Mine never really turn out right, so I’m excited to try these!