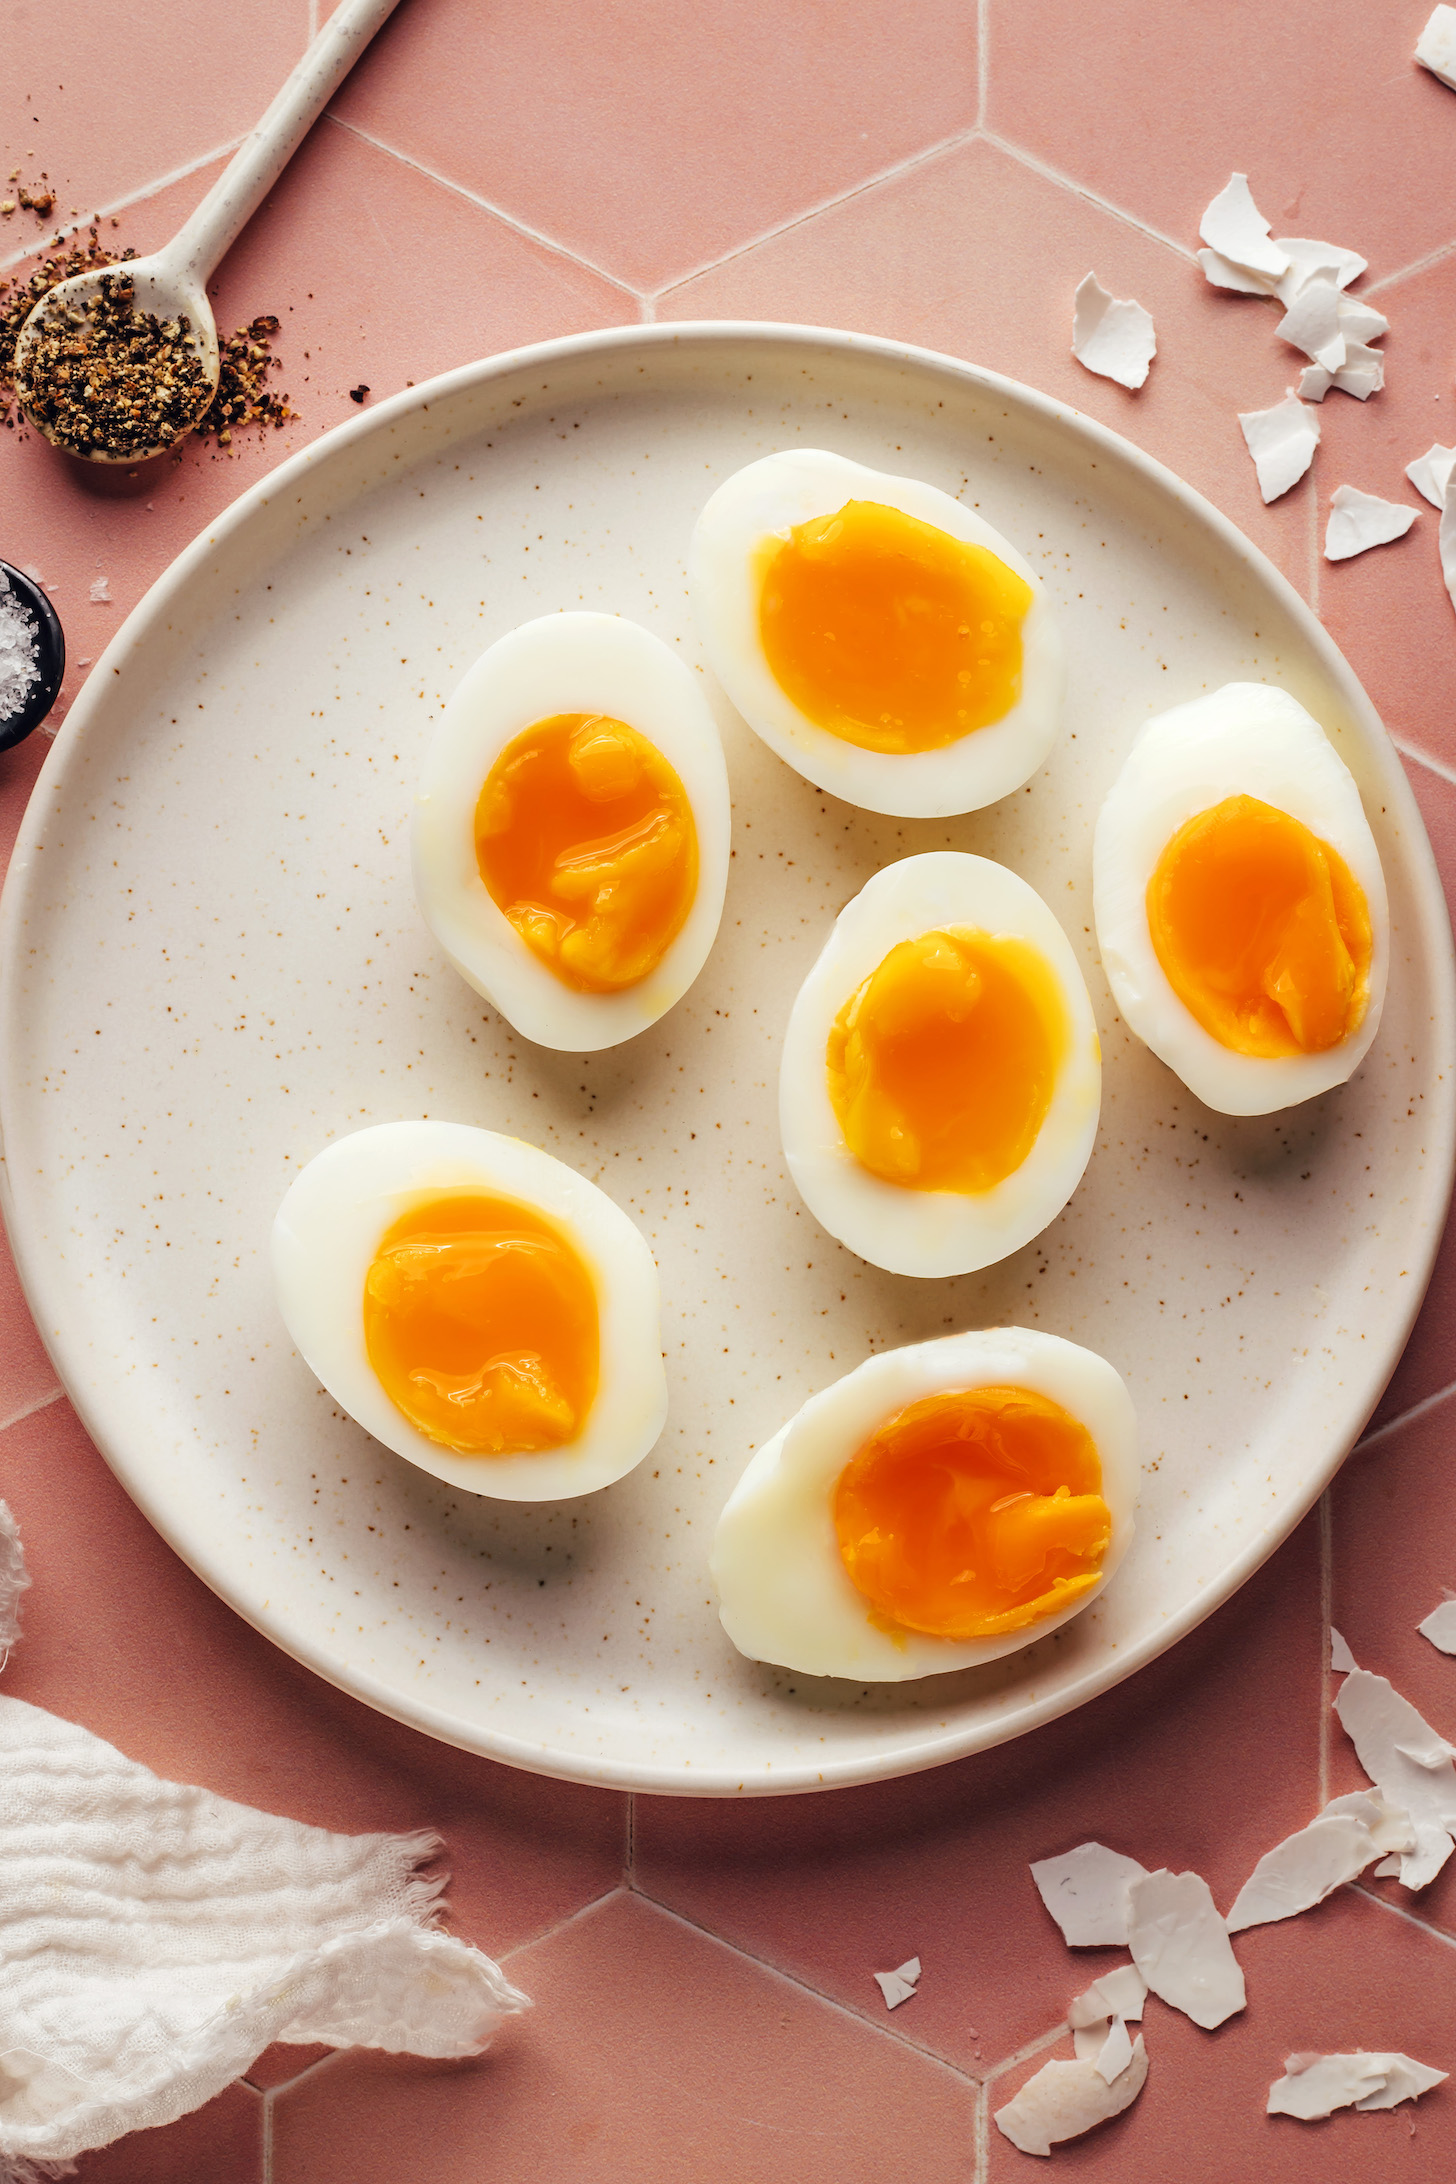
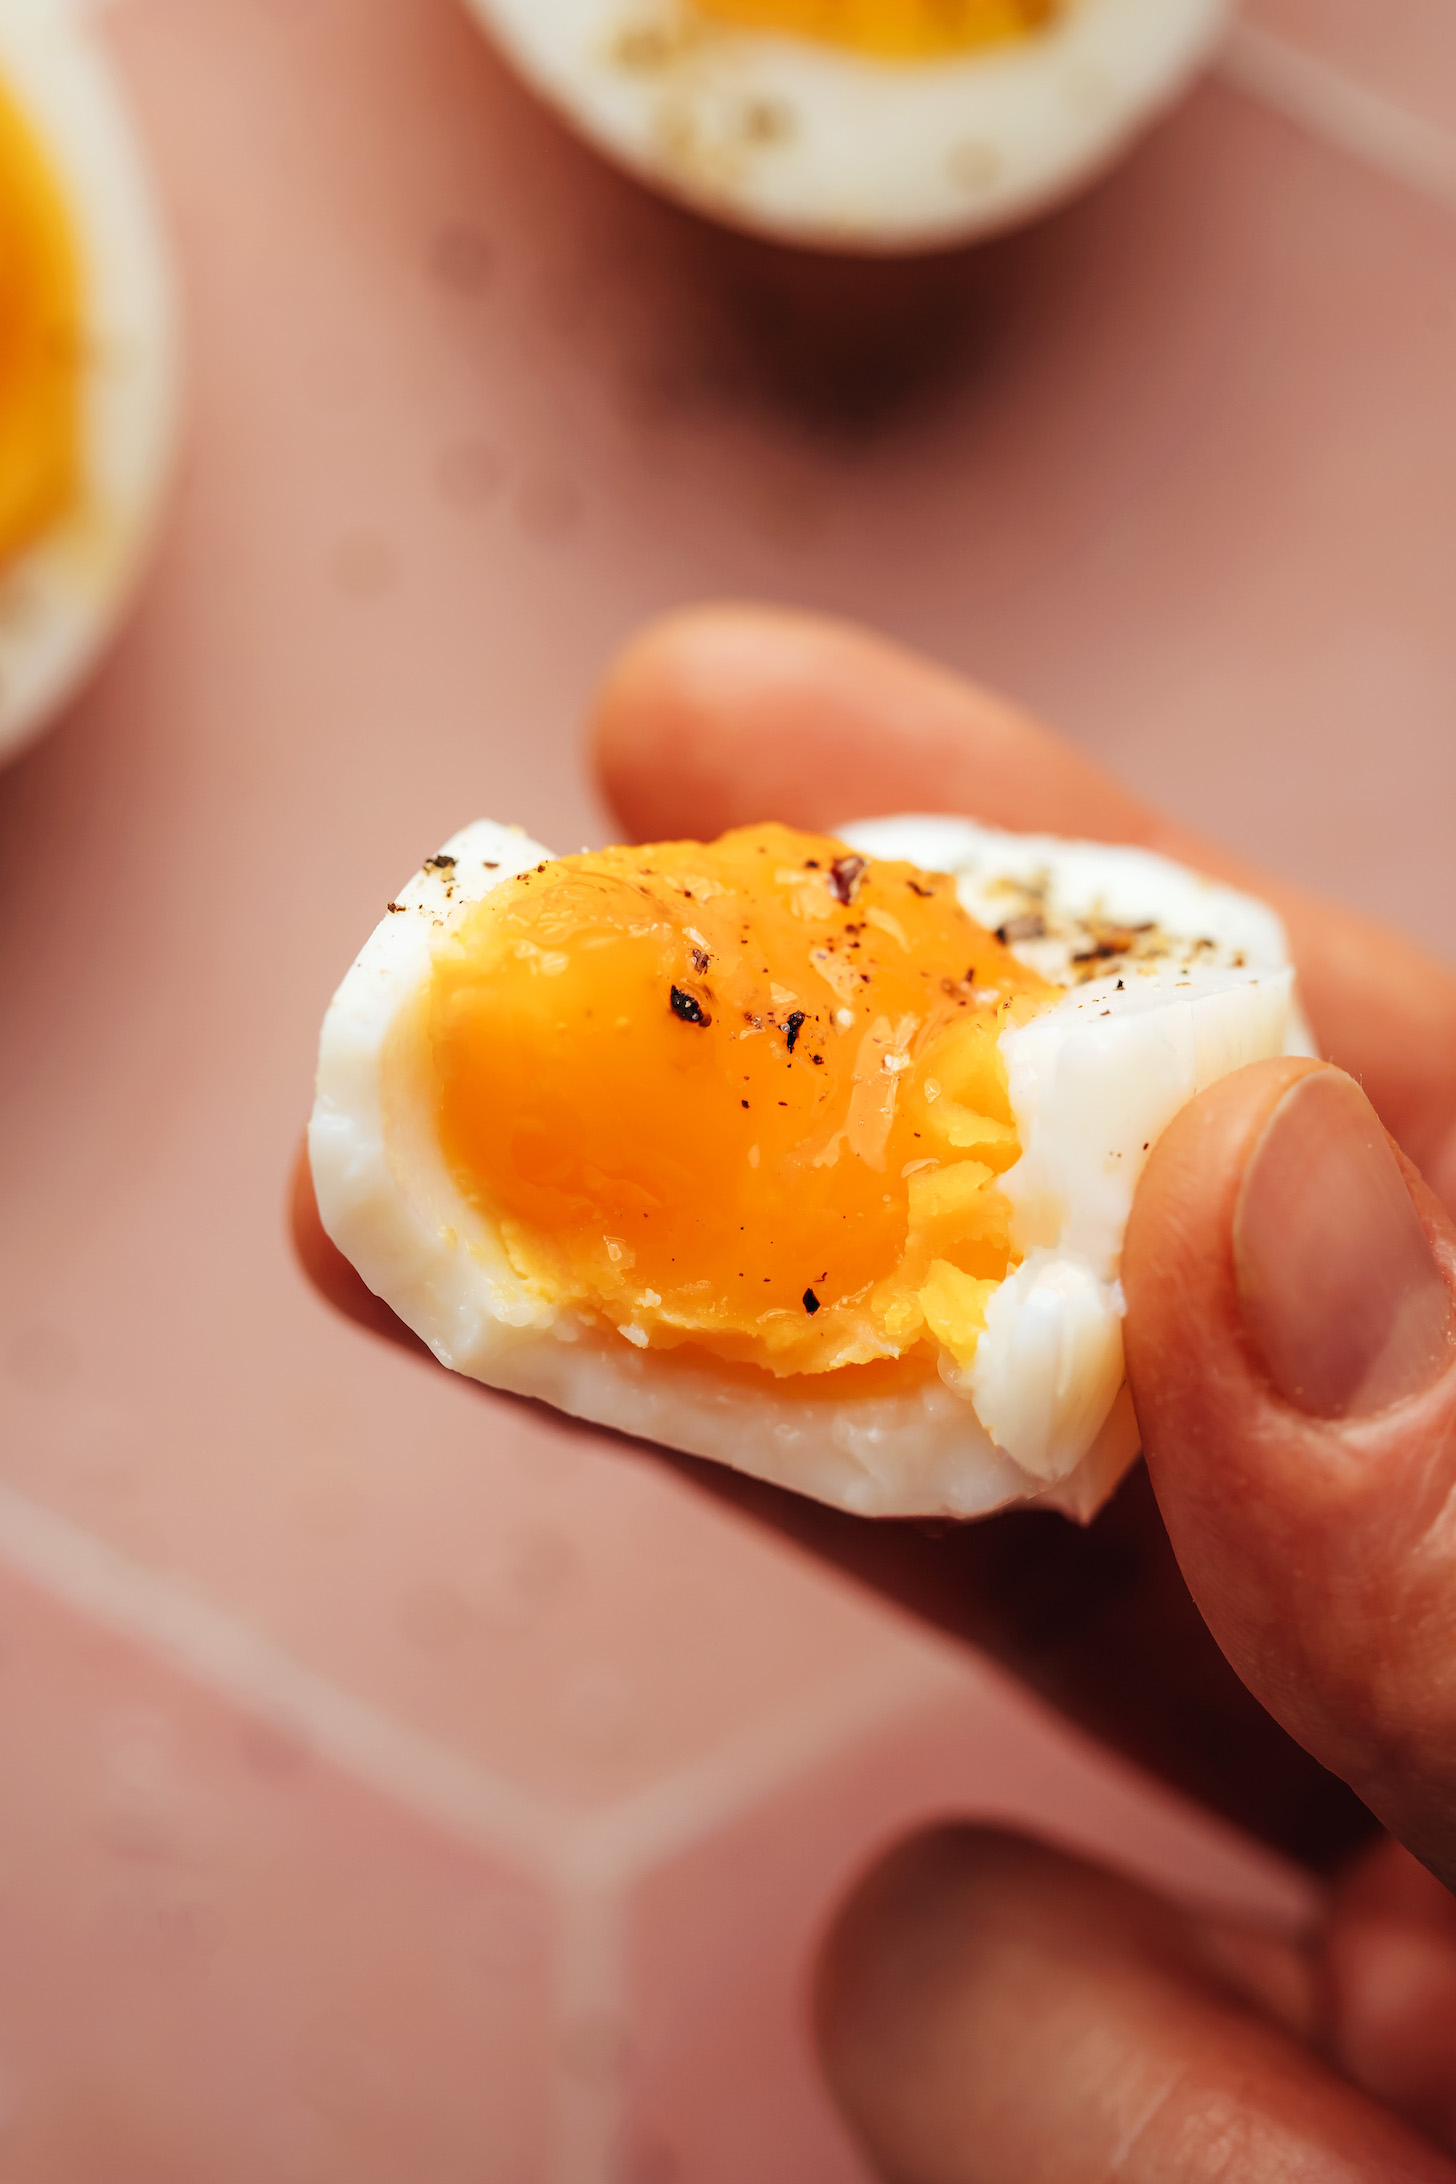
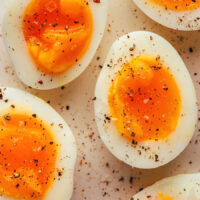
Not to start an argument, but jammy eggs are the BEST way to eat an egg! We’re talking perfectly set whites with a slightly set yolk that still has a soft, “jammy” texture! If you haven’t tried them yet, consider this your invitation!
After scouring the internet and dozens of tests, we’ve nailed down the method and timing (to the second!) for PERFECT jammy eggs EVERY TIME! Put ‘em on toast, in salads and bowls, or have them on their own as a protein-packed snack. Let’s get jammin’.
What is a Jammy Egg?
You might be wondering, “What even is a jammy egg?” Good question, friends!
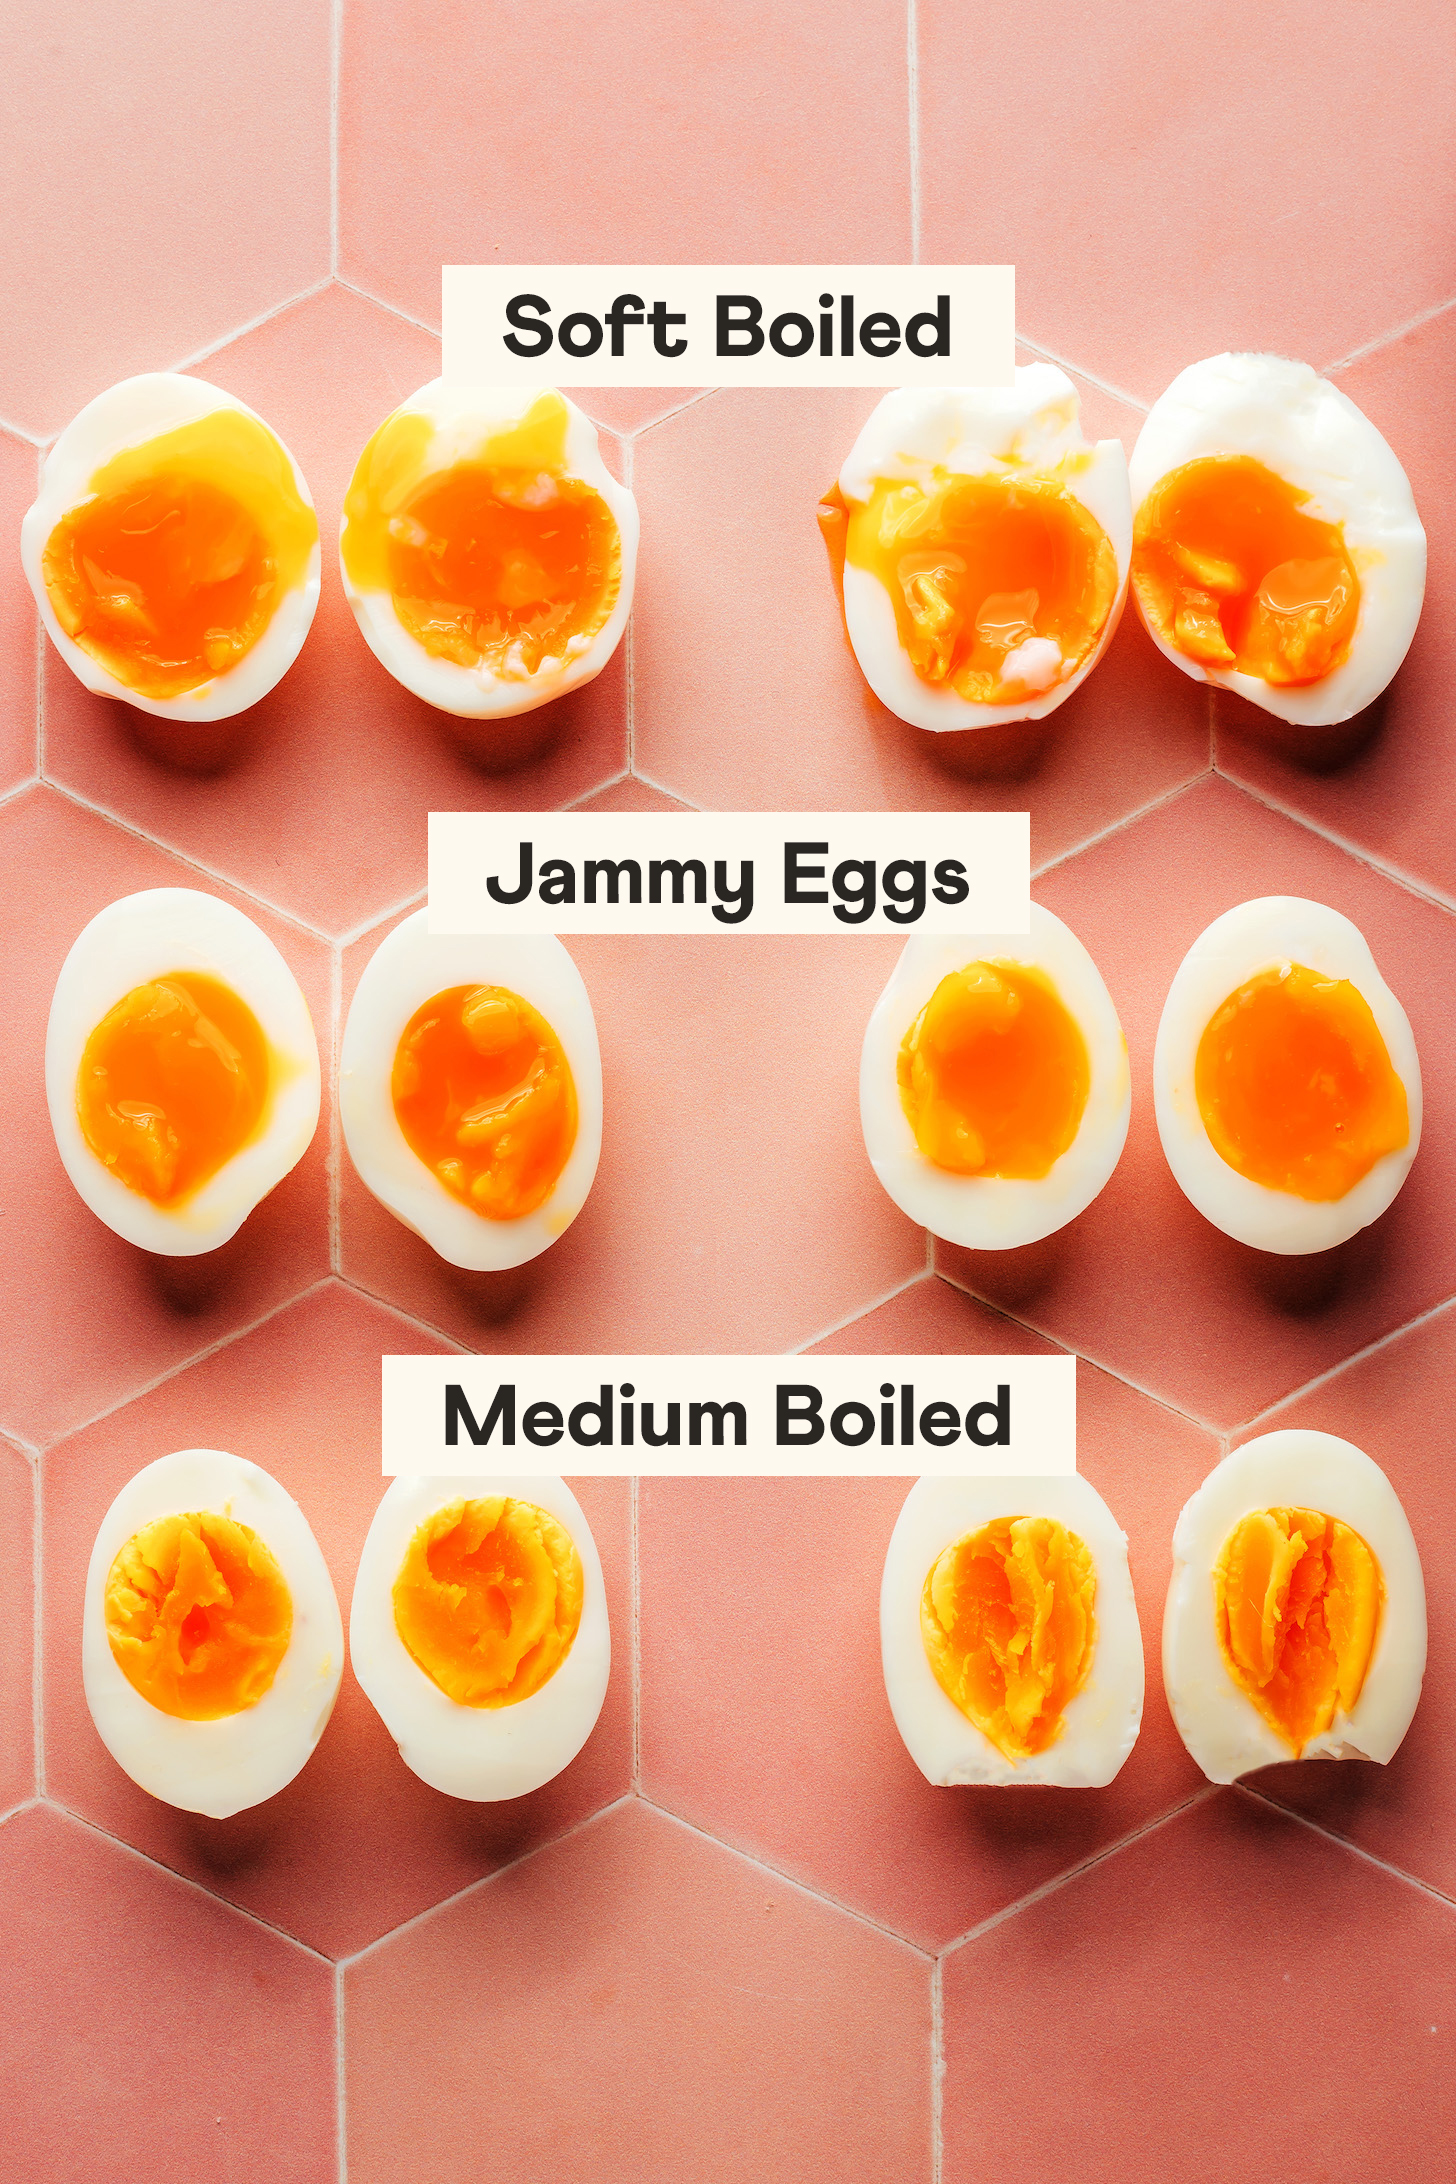
You can think of a jammy egg as somewhere between a hard boiled egg and a soft boiled egg. The white is fully set like a boiled egg, but the difference is in the yolk. It’s slightly set where it touches the egg white (like a hard boiled egg) but soft and “jammy” in the center (like a soft boiled egg)!
How to Make Jammy Eggs
Now that you know what jammy eggs are, shall we learn how to make them?
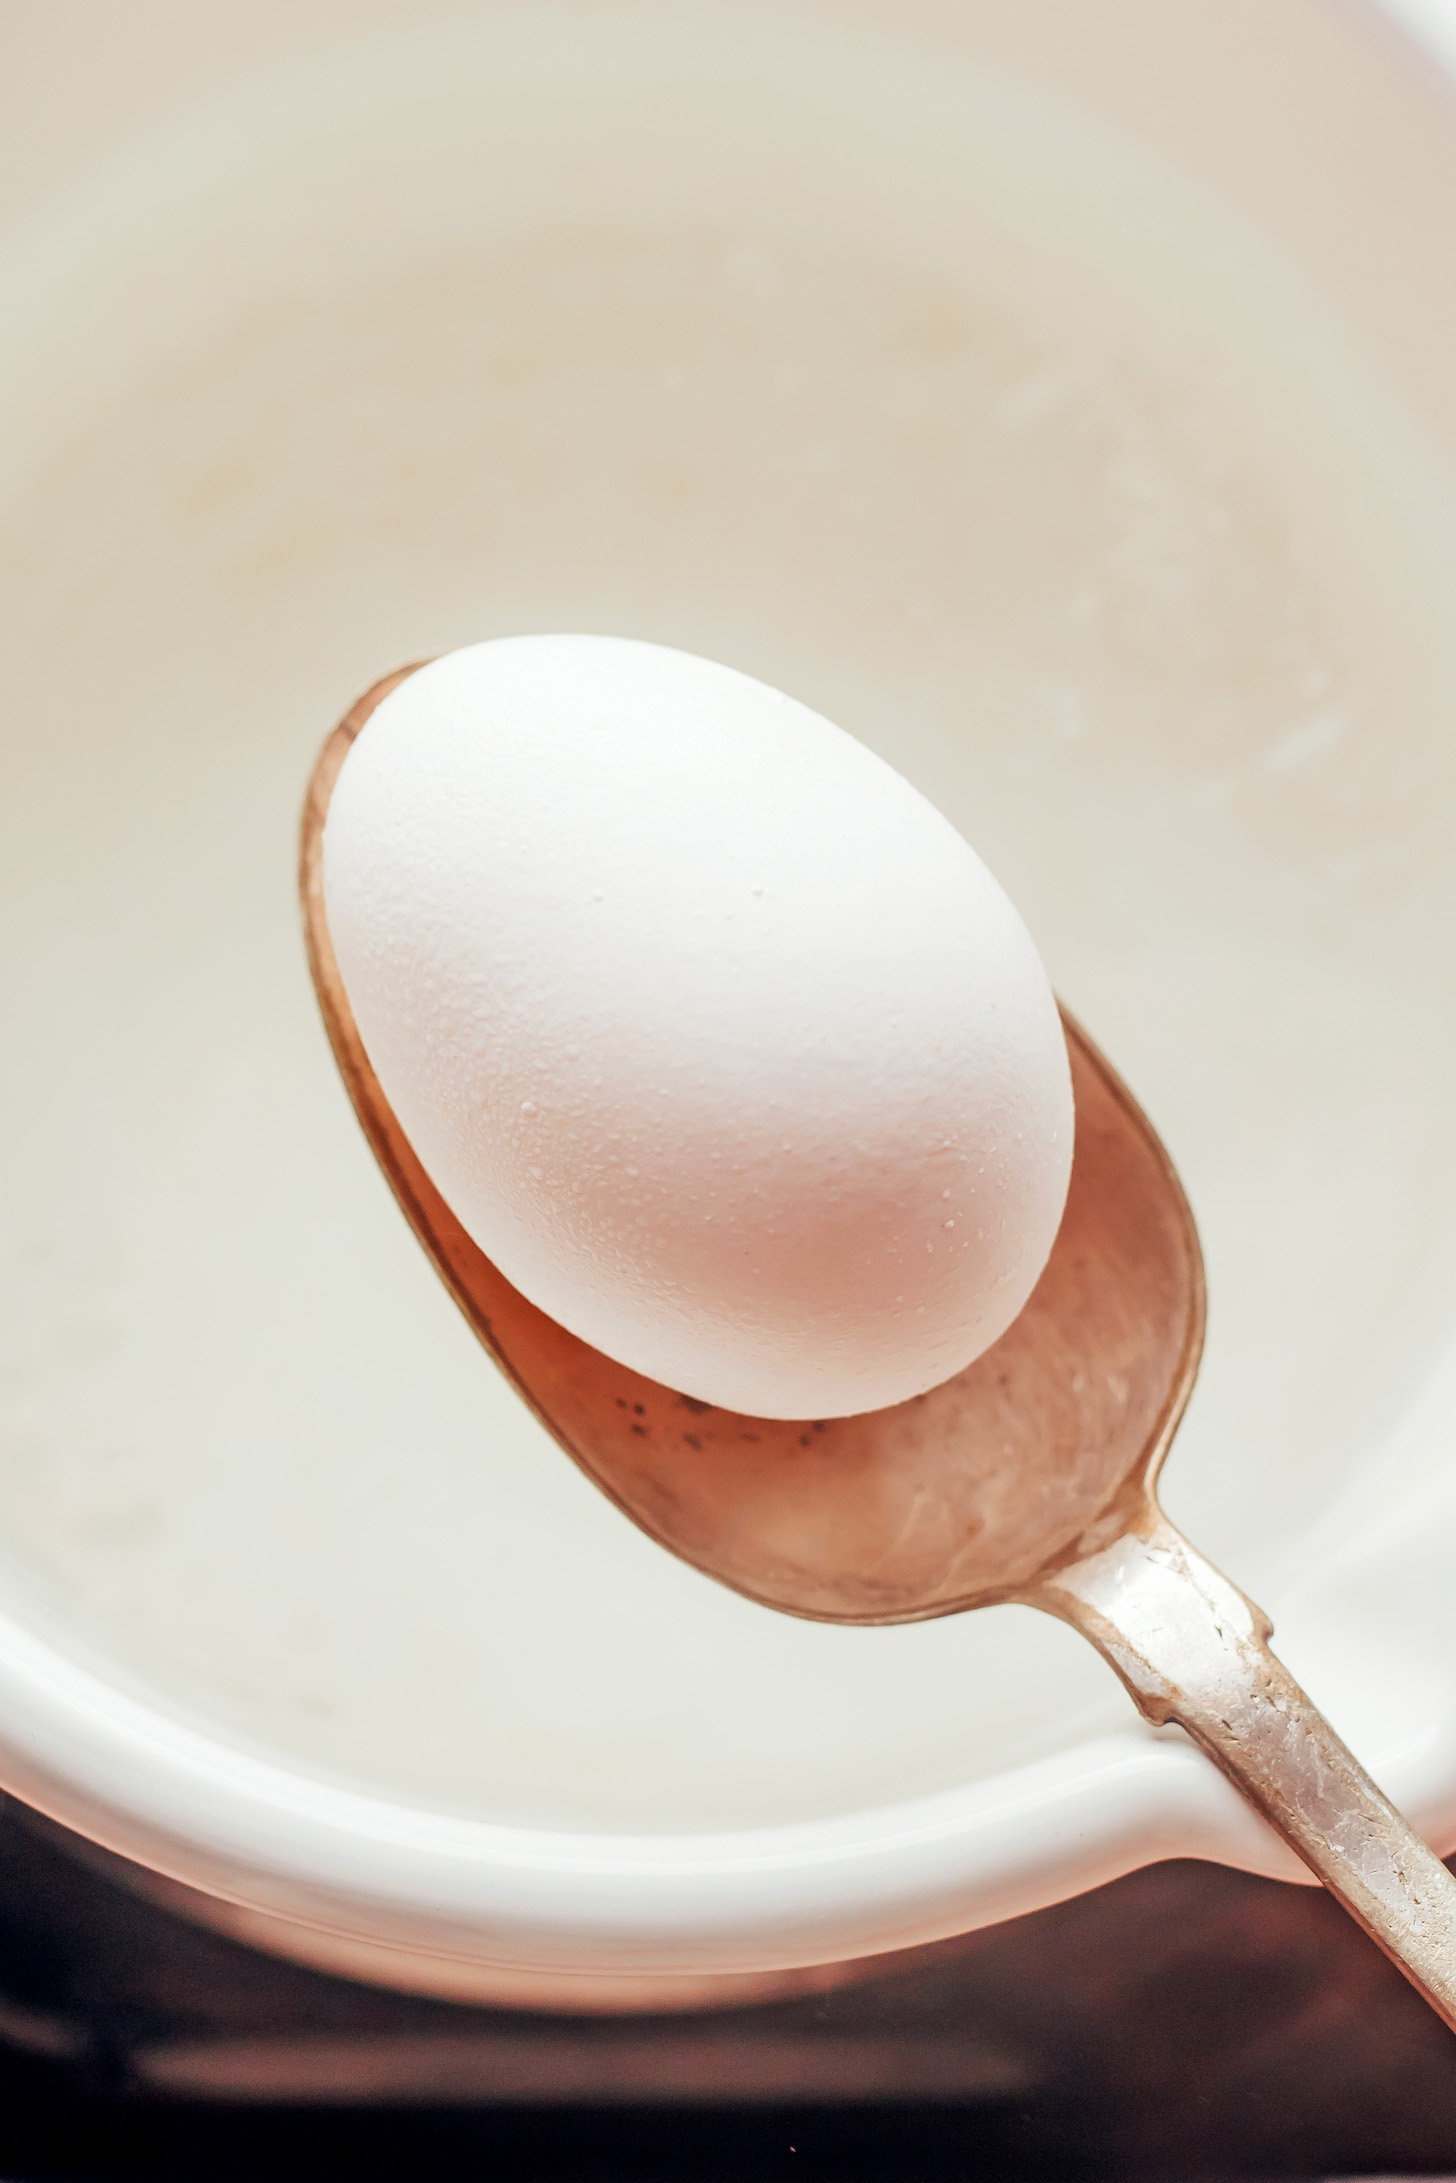
First, we bring a large pot of water to a full, rolling boil! Once boiling, we’ll gently lower an egg (or a few!) into the water using a spoon to help prevent cracking.
You want the water to stay at a full boil the whole time and your eggs to be fully submerged in the water. After 7 minutes and 30 seconds in the bubble bath, you’ll transfer them to an ice bath.
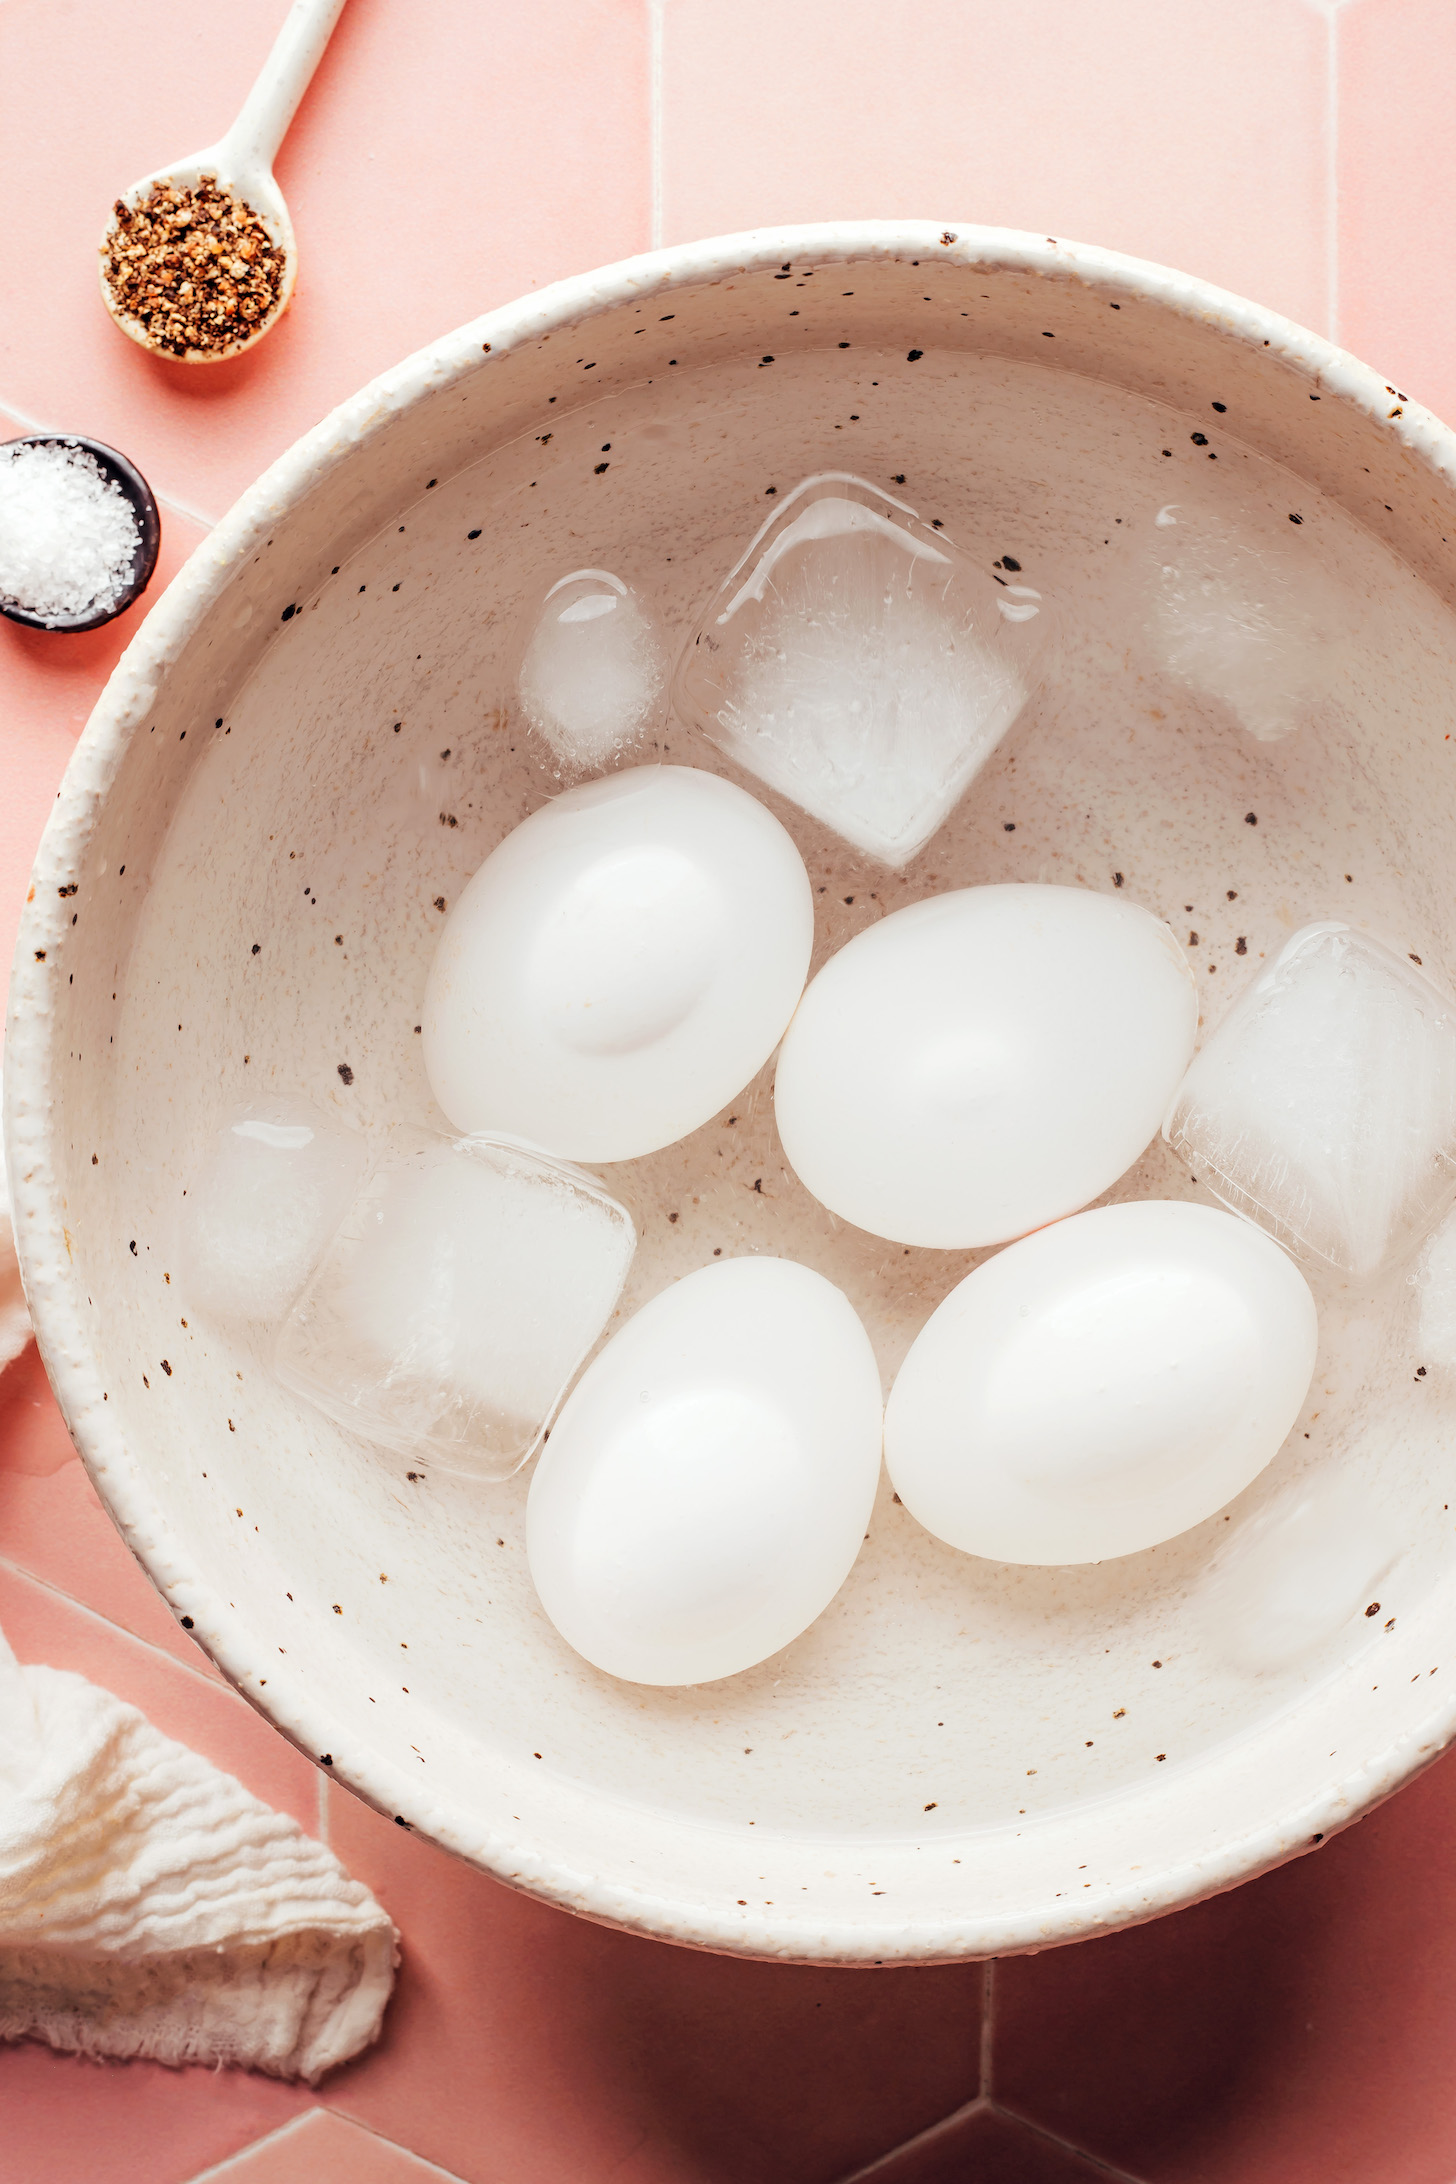
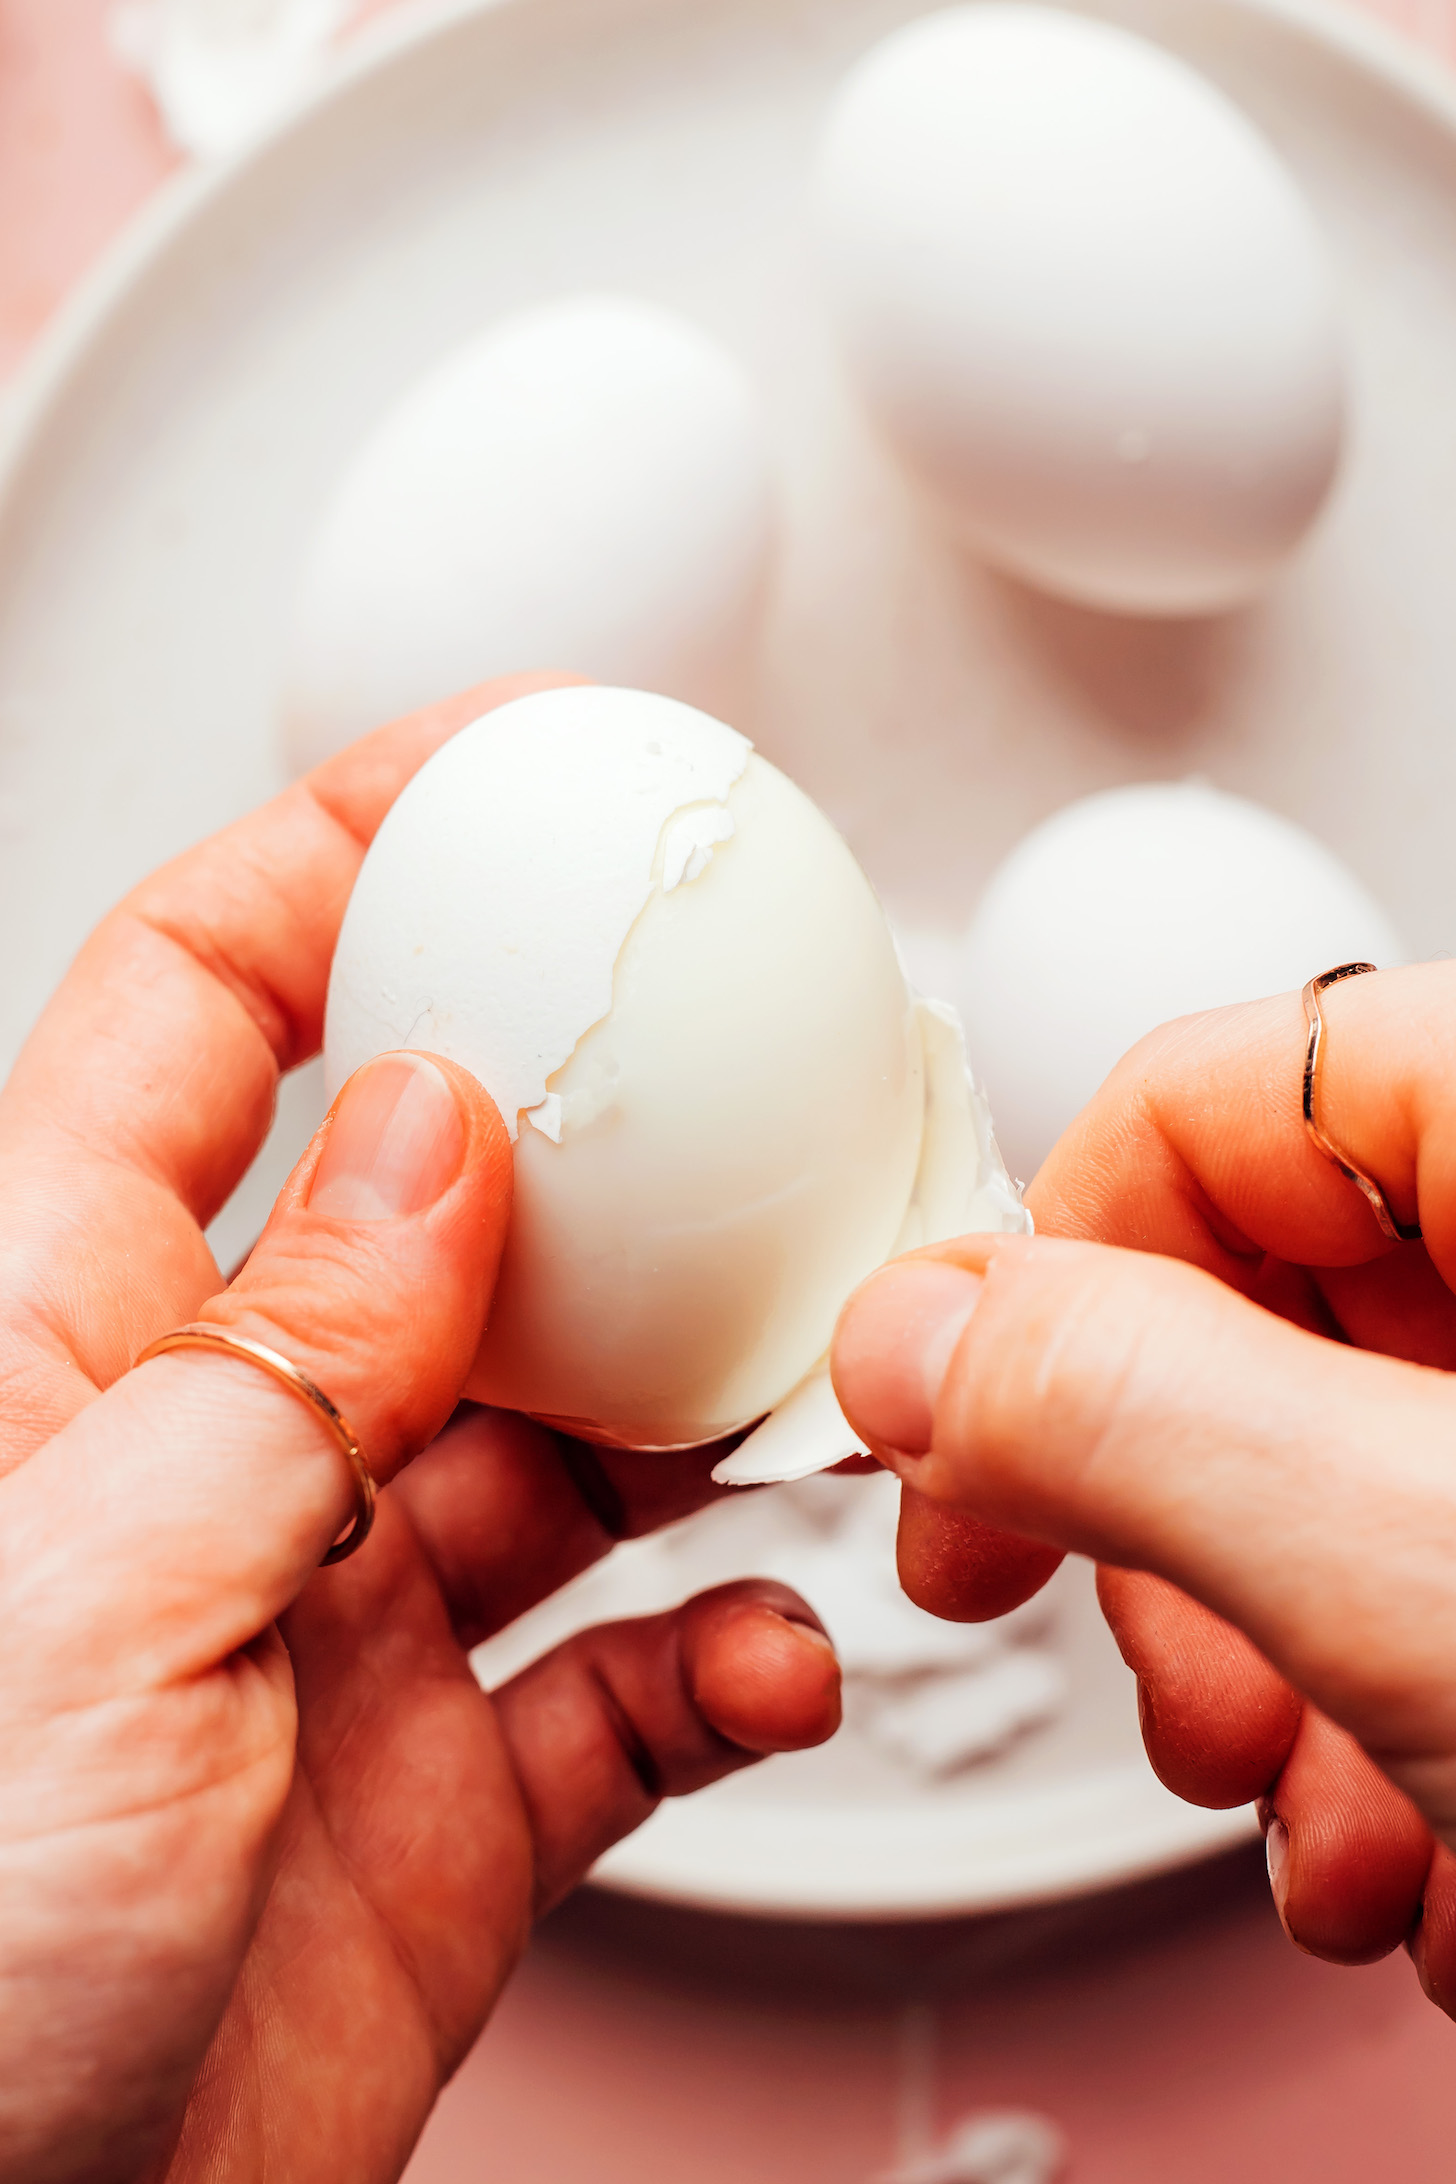
They’ll be cold plunging for 3 minutes (just like the cool kids are doing these days), which makes them easy to peel. Crack ’em open and jammy eggs are yours!
We hope this guide to making jammy eggs is helpful! They’re great on avocado toast, in salads or bowls, or on their own with salt and pepper. They would also be perfect for our Simple But Good Breakfast Bowl or with our Easiest Whole Grain Seeded Bread, BEST Gluten-Free Bread (No Knead!), or Gluten-Free English Muffins.
More Egg Basics
If you try this recipe, let us know! Leave a comment, rate it, and don’t forget to tag a photo @minimalistbaker on Instagram. Cheers, friends!
How to Make Jammy Eggs (Perfect Every Time!)
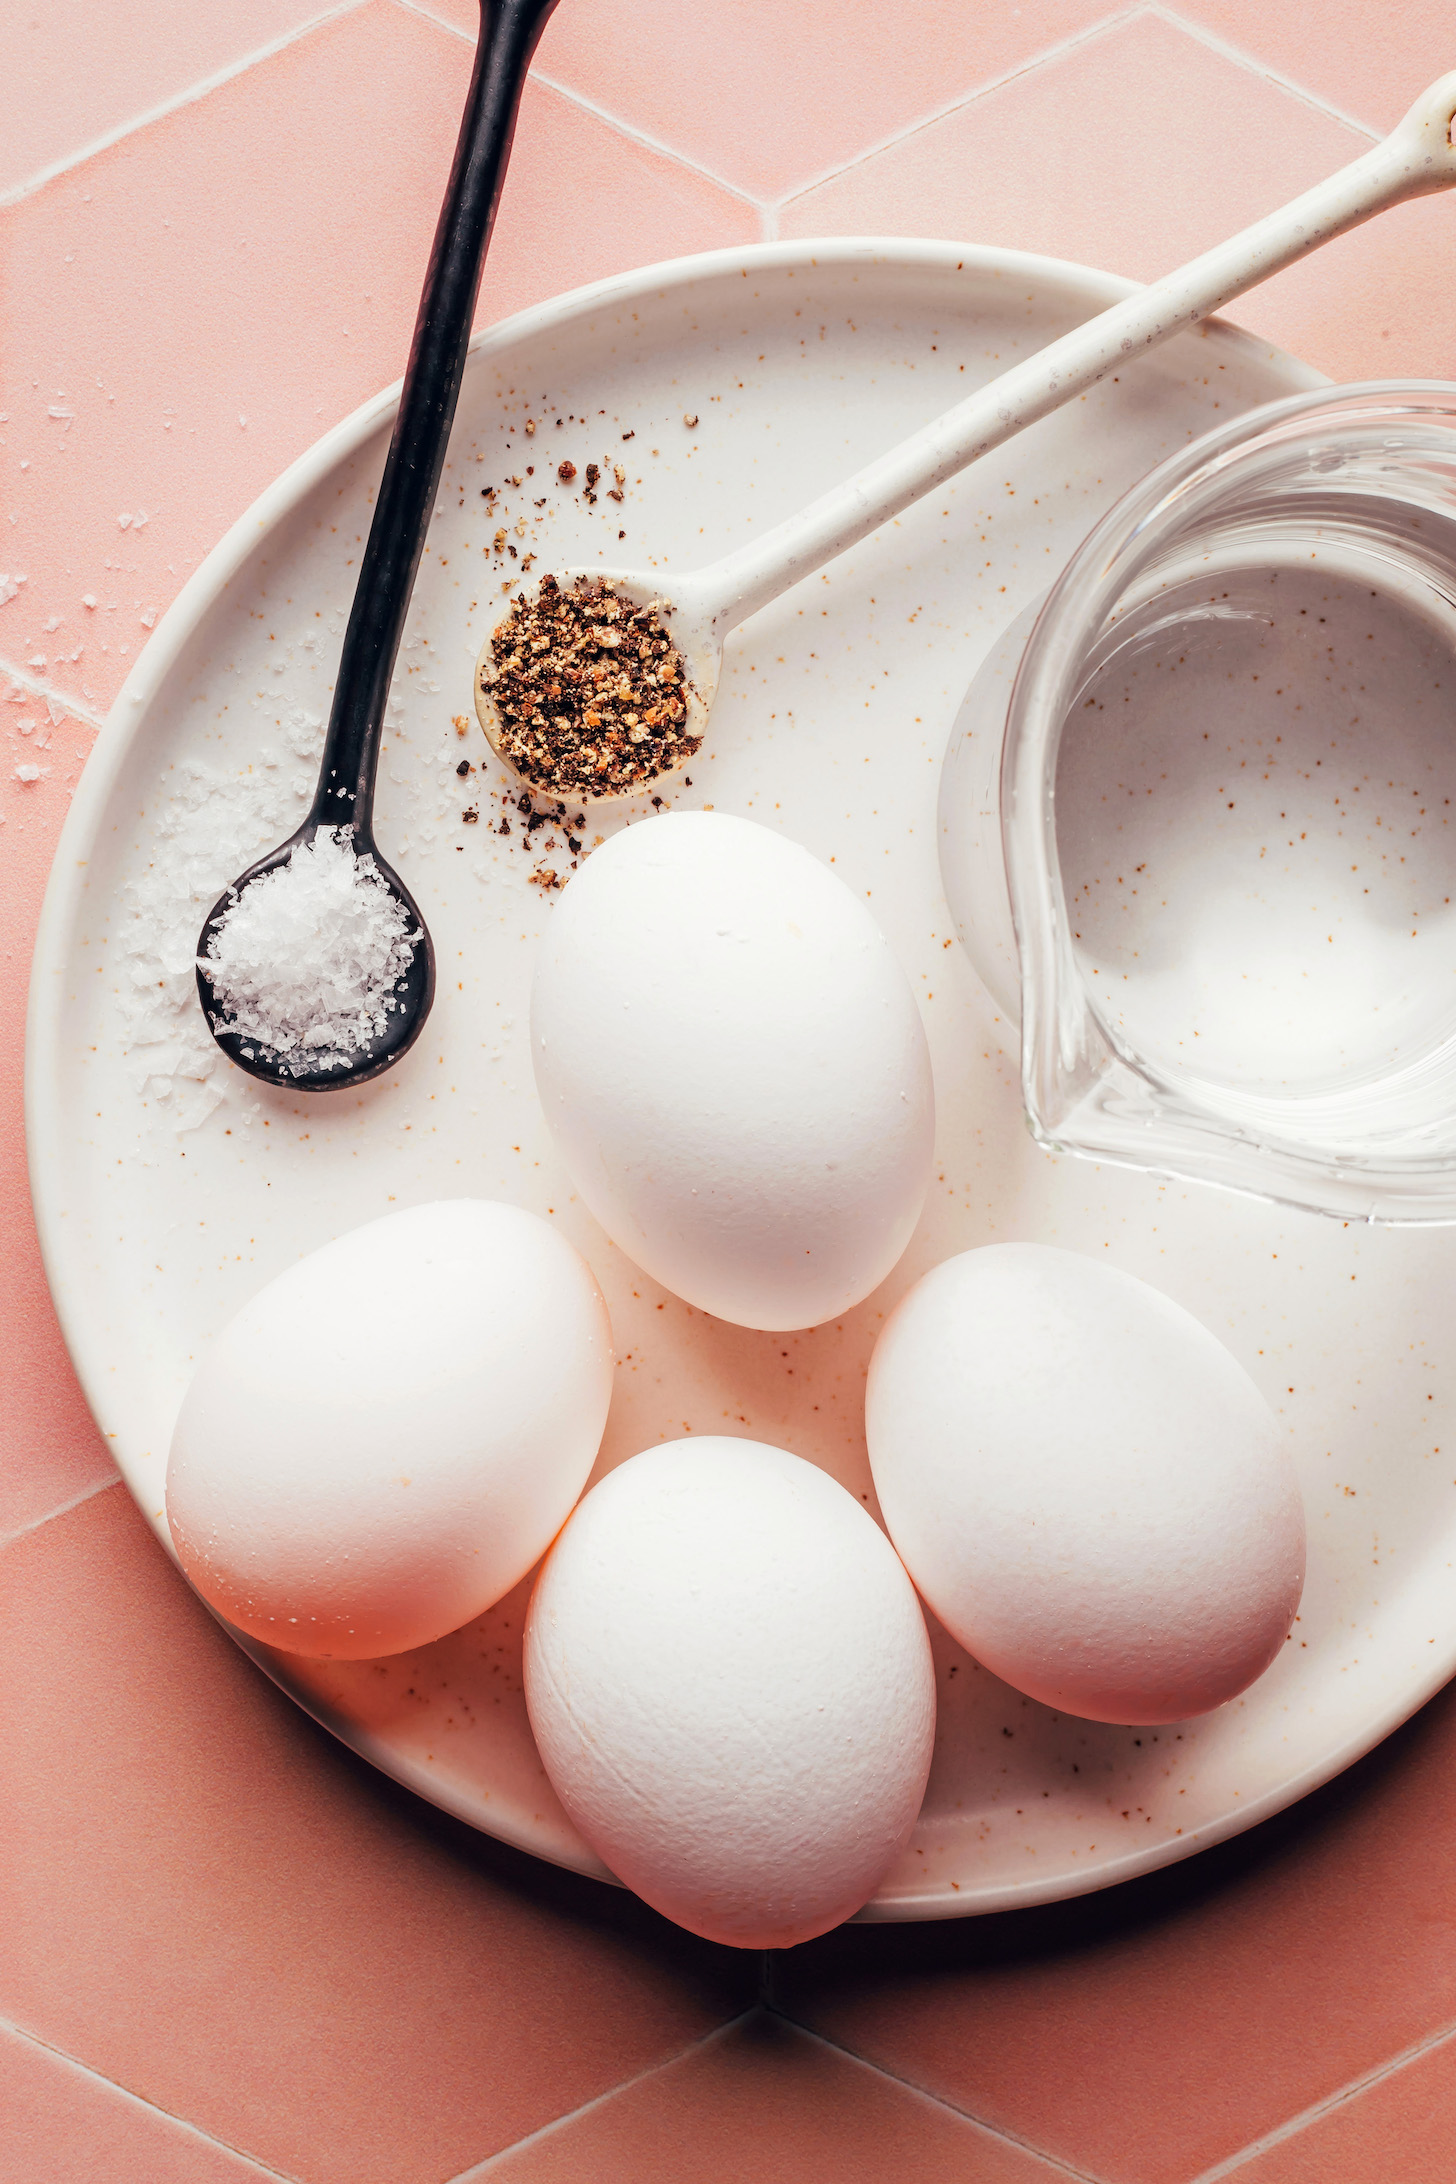
Ingredients
- 4 large eggs (pasture raised, organic when possible)
- Water to boil
FOR SERVING
- Sea salt and black pepper
Instructions
- Bring a medium pot of water to a full rolling boil. Place one of your eggs on a spoon and gently lower it into the boiling water (carefully to avoid cracking the shell!). If you do crack the shell it will still be usable, you will just lose some of the egg white. Repeat with the other 3 eggs.
- Once all of the eggs are lowered into the water, set your timer for 7 minutes and 30 seconds.
- Meanwhile, fill a medium bowl halfway with water and add a handful of ice cubes.
- When your timer goes off, use your spoon to carefully remove the eggs from the water and place them directly into the ice bath. Set your timer for 3 minutes.
- After 3 minutes, crack the eggs at one of the ends and try to get under the membrane beneath the shell. Be patient and work your way around the white, being careful not to puncture it.


Suzy de Silva says
Should the eggs be room temperature when put in the boiling water?
Nope! We use them straight out of the refrigerator!
Stacia says
These turned out perfectly as promised!
Yay! We’re so glad to hear it, Stacia. Thank you for sharing your experience! xo
Trish Scott says
Haven’t made these yet, but wondering if you should start with room temp eggs, or right out of the fridge.
Hi Trish, we used eggs that were straight from the refrigerator!
Shannon says
Am I supposed to use eggs straight out of the fridge? Or room temperature eggs? Thanks for your help!
Hi Shannon, we used eggs that were straight from the refrigerator!
Haley says
I followed instructions exactly and here are my variables as I see many things were discussed in the comments.
I used organic farm fresh eggs that are very healthy and truly pasture raised (not from a grocery store). I made a dozen at once, they came straight from the fridge to the boiling water. My water did slow down with the boil because I put a dozen eggs in. But boil recovered shortly after. One egg cracked because it slipped off my spoon but all others were lowered in gently with care and were completely fine, user error only. Peeled after the 3 minute cold plunge hehe and they were textbook jammy eggs!
P.s. I love all the recipes on this site! Haven’t tried one I didn’t like yet over the years. Thank you for such an awesome site!
Amazing! Thank you so much for sharing your experience, Haley! We’re so glad you’ve had success with our recipes :)
Toni says
I made these directly from the fridge and no crack or explosions. The water did stop boiling for a minute, but left them on the burner for the 7.5 minutes and the 3 minutes chill time and they came out perfect! The yolks were jammy and the whites perfectly and completely cooked. I enjoyed them thoroughly, and coming from someone with an egg-aversion, that’s a huge compliment!
Amazing! We’re so glad you enjoy the eggs prepared this way. Thank you for sharing, Toni! xo
Rick Saunders says
Worked perfectly. I don’t know how many hard-boiled egg recipes I’ve looked at, but it’s too many. Thanks!
We’re so glad this one worked out for you, Rick. Thank you for sharing!
Elen berwick says
Are the eggs refrigerated or room temp?
Hi Elen, we used refrigerated eggs.
Dan says
followed the instructions and got perfect jammy eggs!
Yay! We’re so glad you had success with the recipe, Dan. Thank you for sharing your experience!
Danielle says
Do you need to peel them while hot in order to attain the jammy yolk, or can you let them cool? I have a friend visiting who likes jammy yolks, but I never hard-boil eggs. So grateful for this recipe!
Hi Danielle, hmm, good question! We’ve only ever peeled them after the 3 minutes, but we think they should be okay unpeeled as long as you cool them down in water.
shawna gray says
My eggs exploded
Oh no! Sorry that happened, Shawna! Was it right when they went in the water? Did you lower them slowly/carefully with a spoon?
Snigdha says
I love how they are soft but still not messy to eat. Jammy are the perfect!
We totally agree! Thanks so much for the lovely review!
Angela Cooper says
Came out perfect, thank you!
We’re so glad you enjoyed it, Angela!
Jamie says
Europeans may wish to shave some time off this recipe’s suggested 7.5 minutes of boiling time since our eggs are NOT refrigerated (it’s true, look it up). Despite the warmer starting temperature, my eggs crack every single time they’re plunged into the boiling water. I imagine nearly everyone’s eggs are doing this. This is because, unlike many egg-boiling recipes, this recipe asks us to plunge the eggs in boiling water versus cold water that is brought up to the boiling point.
Ian says
I was thinking the exact opposite. Must have missed anywhere it said this was an American recipe because I was just thinking as I made this, how the cold eggs killed the boil for two minutes. So I just markedly didn’t rush anything, and got like a marble-sized runny bit in the middle, which I like enough but may be a bit under.
Kyfit says
Perfect on the first try. Thank you!
So glad you enjoyed it, Kyfit! Thanks so much for sharing.
Imani says
Used a large, fridge temperature egg and followed the instructions to the letter. The egg immediately cracked from temperature shock, but came out relatively well (albeit a little runnier than the typical jammy egg). Next time I’ll let the eggs come to room temperature and I imagine they’ll come out perfectly!
Sorry that happened, Imani! Thank you for sharing your experience.
Brian D says
I made this following the instructions, started with a rolling boil and boiled 10 eggs. After 7.5 minutes they came out soft-boiled, which is better for me than overdone, but I should have gone a little further, as 7.5 minutes wasn’t quite enough for the water to come back to temp after laying the eggs in. If you’re boiling more than a couple eggs I’d give it another 30 seconds or so.
Thank you for sharing your experience, Brian!
Lyn says
My eggs In invariably break if I leave the water boiling. What am I missing?
Hi Lyn, we wonder if the eggs you’re using don’t have strong shells? That can happen if the chickens are deficient in certain nutrients. Do the shells crack especially easily when you’re cracking them for scrambled eggs or other uses?
Lyn says
They’re pasture-raised, so I suppose it’s possible. I’ll try keeping it to a low bubbling and add 30 seconds—
Alicia says
Try letting the eggs come to room temp before you start cooking and see if that makes a difference. Straight from the fridge there is a big temperature and pressure difference between the inside of the shell and the boiling water, which can result in cracking
Casey Kivoka says
What should the temp of the eggs before submerging in boiling water? Straight from fridge? Cold or room temp? Thinking cold eggs would lower temp of water, so start time when added to boiling water or upon return to boiling?
Would cooking time change is preparing a dozen (large batch) jammy eggs? If yes, how would home chef adjust cooking time(s)?
Apologies if I missed this info in the recipe!
Hi Casey! The eggs can be straight from the fridge. We haven’t tried making a dozen at a time but as long as the pot is big enough and the water is boiling the timing should stay the same!
Candice Klies says
When I put the eggs in, do I cover the pot?
When I put the eggs in, do I leave the water boiling? Or turn it off?
When I put the eggs in, do I remove from heat?
Hi Candice! You can add the eggs, keep the pot uncovered, leave the water boiling, and keep the pot on the heat. Hope this helps!
CR says
Do you start the timer right after you add the eggs or wait til it comes back to a rolling boil?
Right after you add them. Enjoy!
David says
Time it from as soon as you put them in!
Jennifer says
My go-to!
I really love them over steamed or sautéed greens
Ooo that sounds lovely! Thank you for sharing, Jennifer!
Ronni P says
Could not have come out ant more perfect!
Yay! Thank you for sharing, Ronni! xo
JR says
Love these! Consistent every time!
Amazing! Thank you for sharing, JR!
brit says
how might you change cook time for medium sized eggs
Hi Brit, maybe 15-30 seconds less?
Tess says
Perfecto! Results are just like the photo.
Yay! Thanks for sharing, Tess!
Lauren says
Whites held together and yolks were jammy! Easy and reliable!
So glad you enjoyed them, Lauren! Thanks so much for the lovely review! xo
LisaB says
These were so easy with perfect amount of jamminess!
Thank you!
We’re so glad you enjoyed them, Lisa. Thanks so much for the lovely review! xo
Scott says
Hi, do you keep the rolling boil for 7.5 minutes or turn the heat down/off?
Keep it boiling!
Kim says
I have been trying to figure out for YEARS how to achieve this with boiled eggs! I have to admit I was skeptical when I took mine out of the water because 7.5 minutes seemed like a long time, but lo and behold – perfect. Thank you for this!
Yay! We’re so glad you enjoyed them, Kim! Thanks so much for the lovely review!
Johnny says
I would love to see the inside of a jammy egg that has a double yolk!
Cyndy says
How much time for extra large and/or jumbo eggs?
Hi Cyndy, we haven’t tried this method with larger eggs, but if you do some experimenting we would suggest increasing the time by 15-30 seconds!
susan says
Eggs look delicious. Can leftovers be reheated effectively without over cooking? If so,what would be the best method? Thank you!!
Hi Susan! We wouldn’t recommend reheating these, although they are delicious cold! If you want to enjoy the eggs warmer we would suggest just making 1 or 2 at a time! Hope you enjoy. xo
Julia E says
Q: do you use cold eggs from the fridge or room temp? I noticed it makes a big difference. Thanks!
Hi Julia! Use cold eggs straight from the fridge for this recipe! Hope you enjoy. xo