
My mom used to make her own bread and yogurt from scratch.
I mean, come on. How cool is she?
I remember learning that and thinking my mom was the most awesome hippie mom ever and I wanted to do the same if I was ever a mama.
The bread-making season in our house ended sometime around the arrival of 10-pound me. But can you blame her? She had two babies to look after and who has time to make bread with so much life happening?
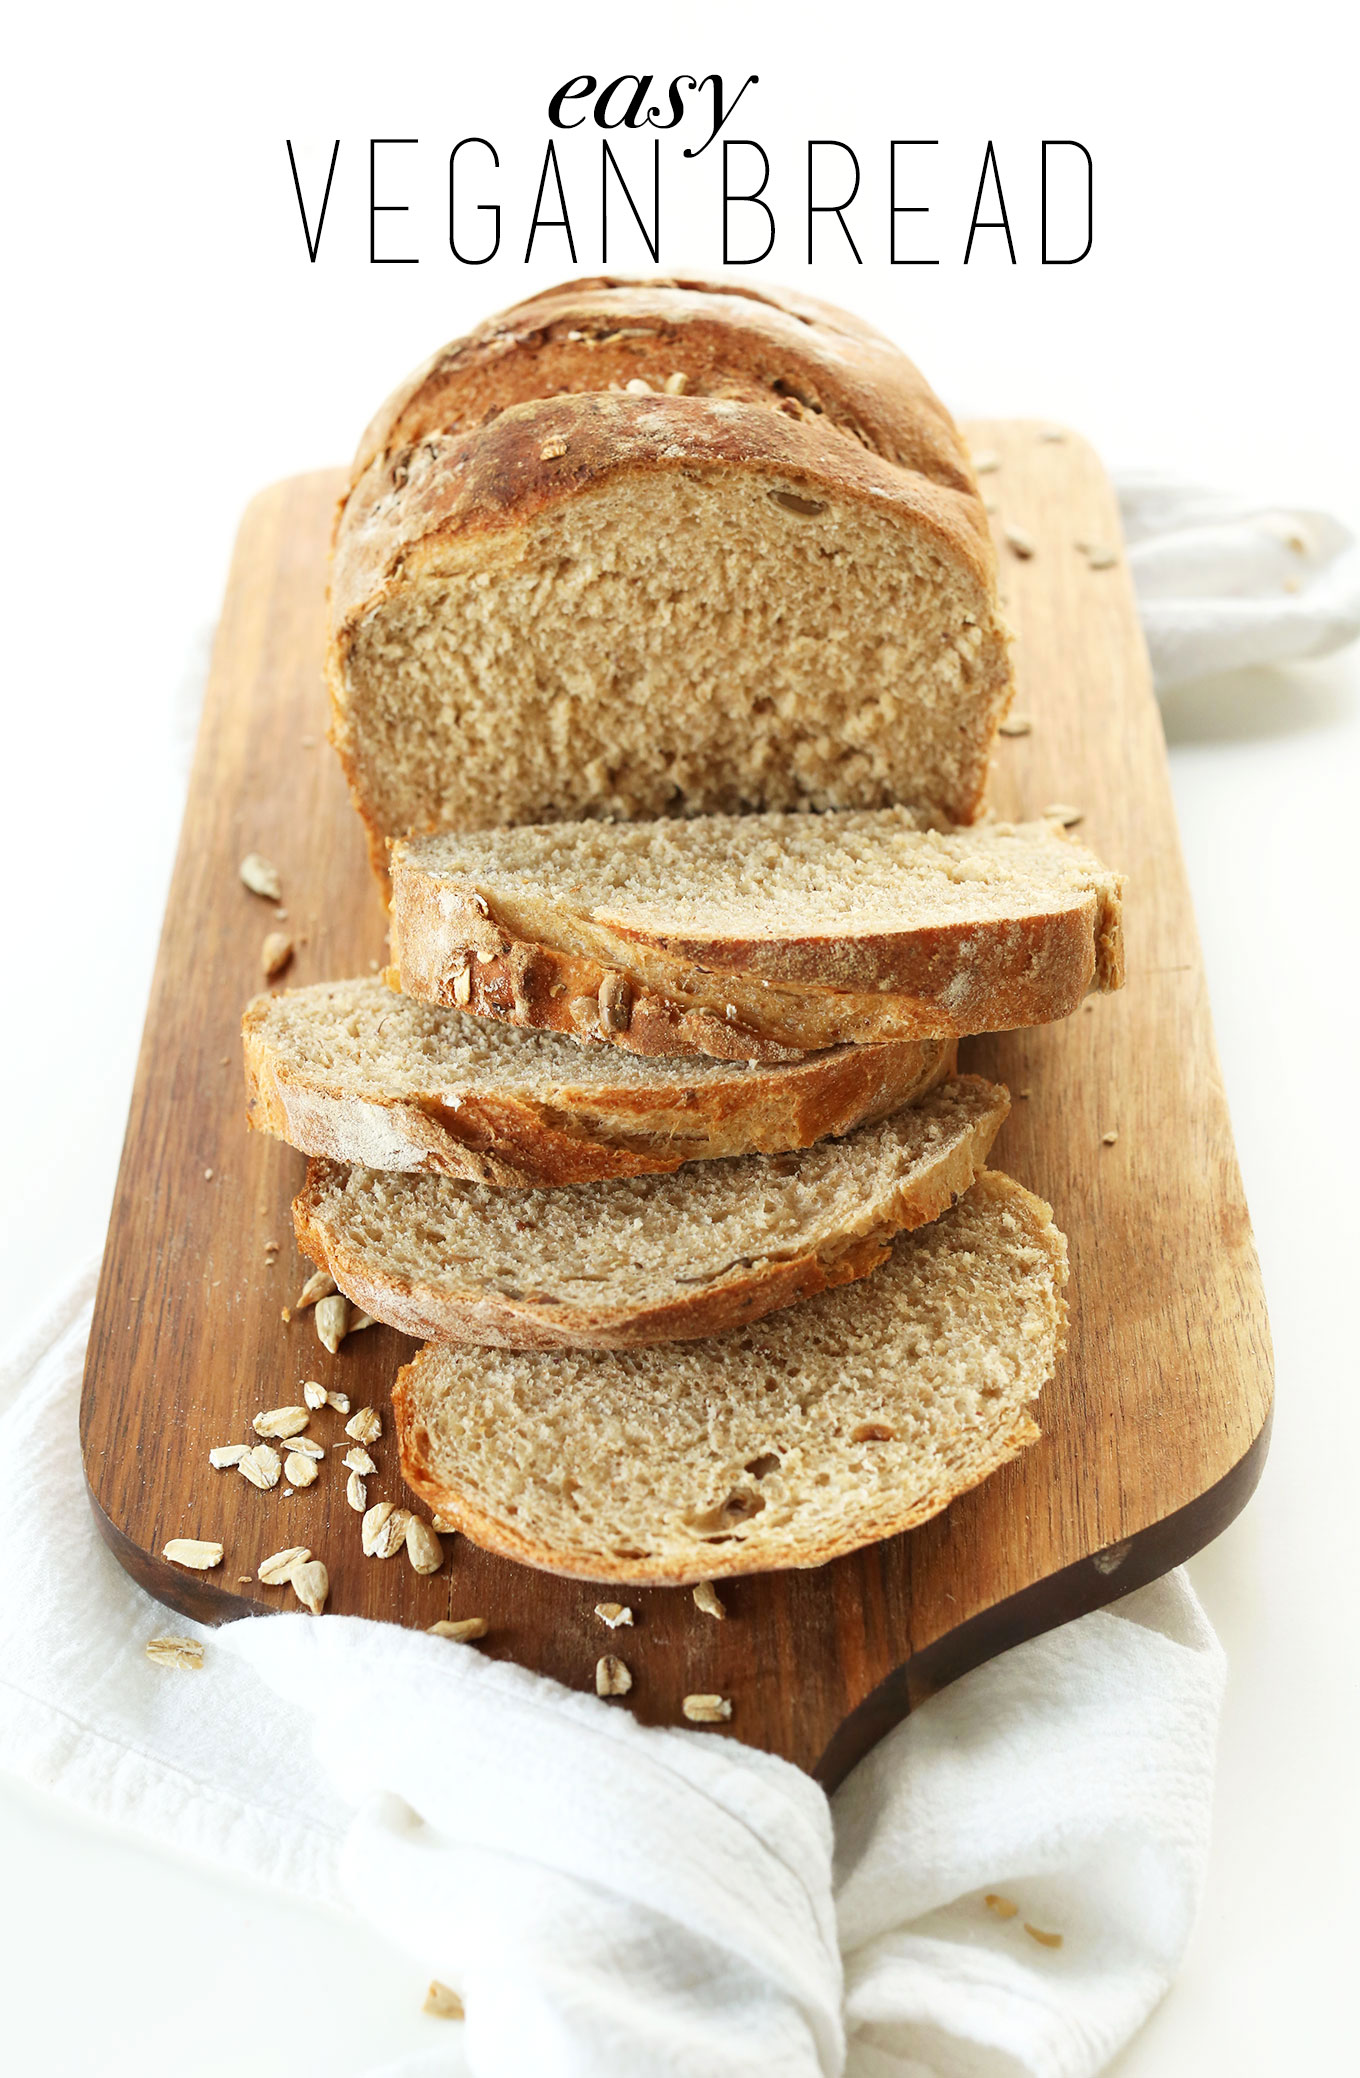
Well, the good news is, you do have time to make this bread. I even speculate you could make it with a baby on your hip because it is literally a dump, mix, rise and bake kind of bread! Let’s get to baking!

This recipe is simple in both preparation and ingredients.
Just 9 basic ingredients that are very forgiving. If you don’t have any of the seeds or oats on hand, just omit them! It’s still totally doable.
With a short 20-minute bake time, hands on prep time is only 15 minutes + the rise! Hello, free time.
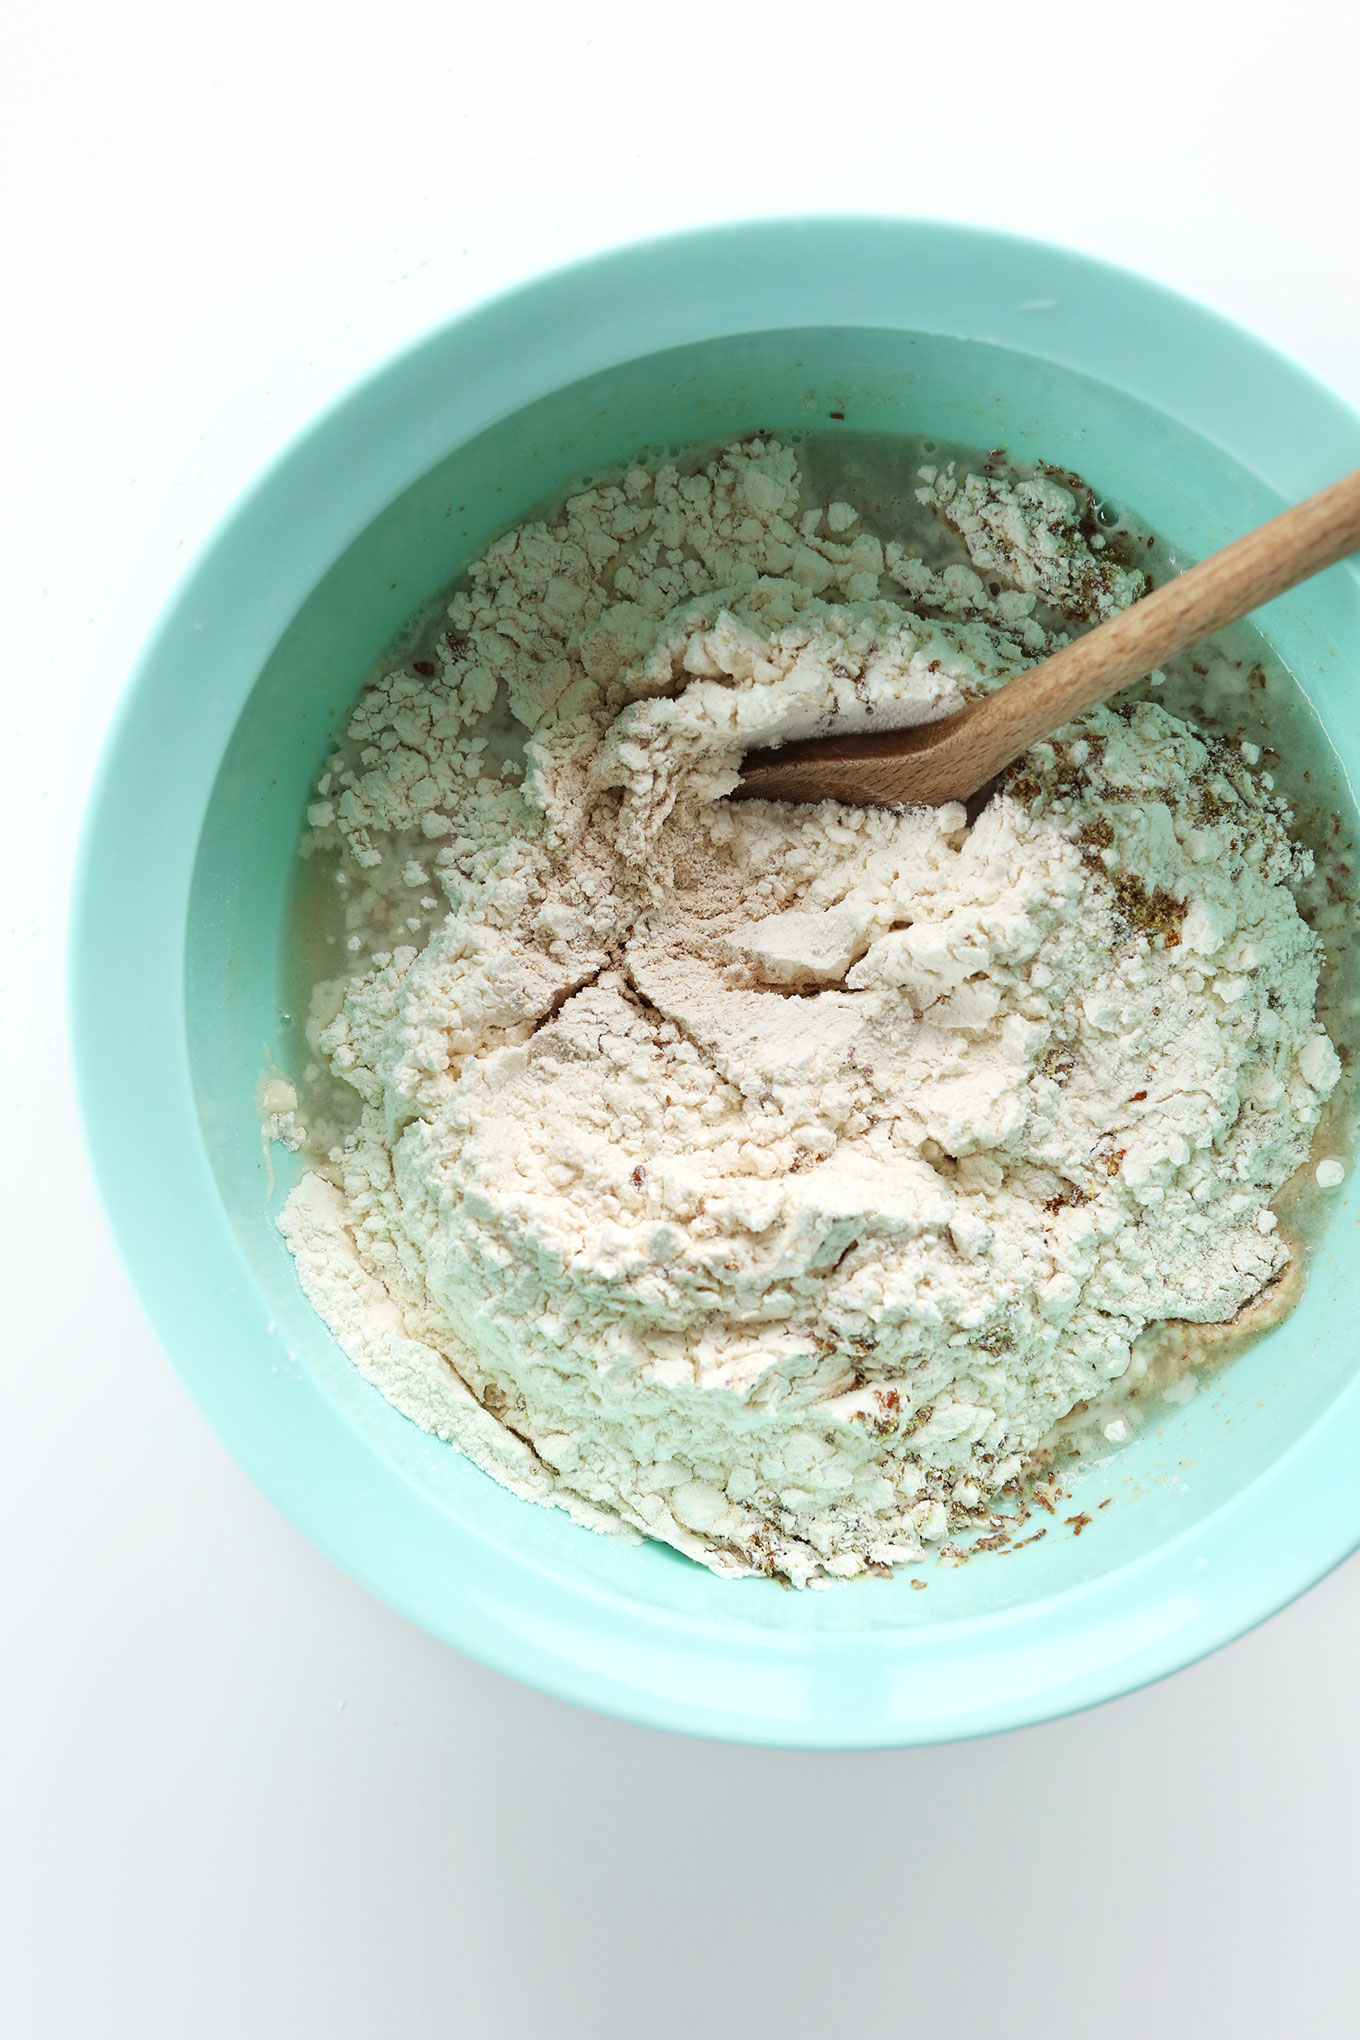
When I say dump, mix, rise, I mean it.
You literally dump the ingredients in a bowl, mix and let it do its thing in the fridge.
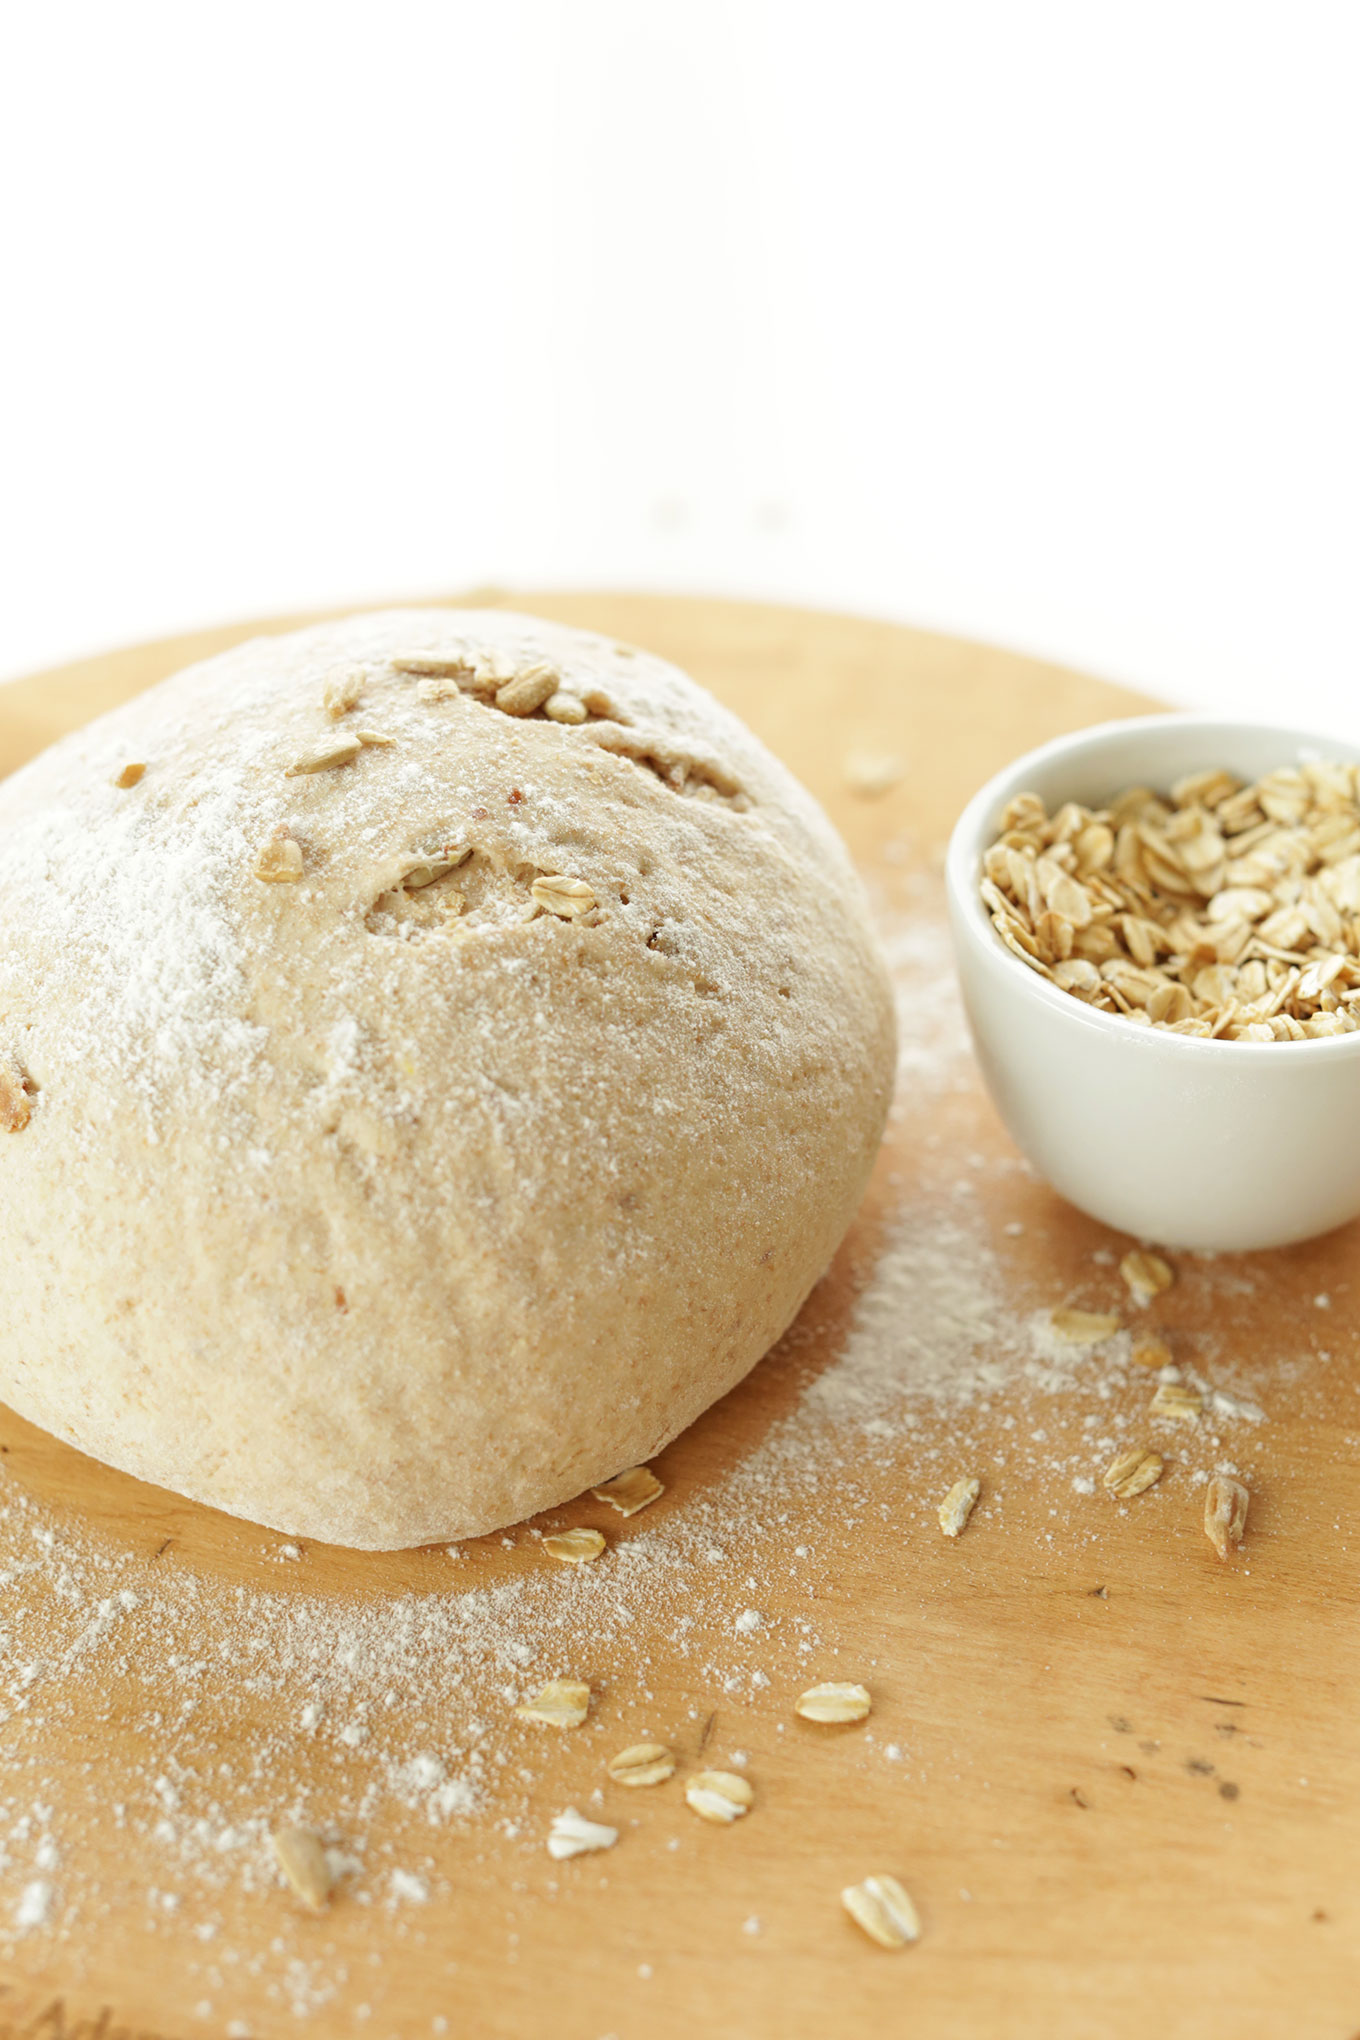
All that’s left to do is knead in the seedy and oat-y things and let it rise once more while the oven preheats.
Twenty minutes later and you have a perfectly delicious, seedy, whole grain loaf on your hands.
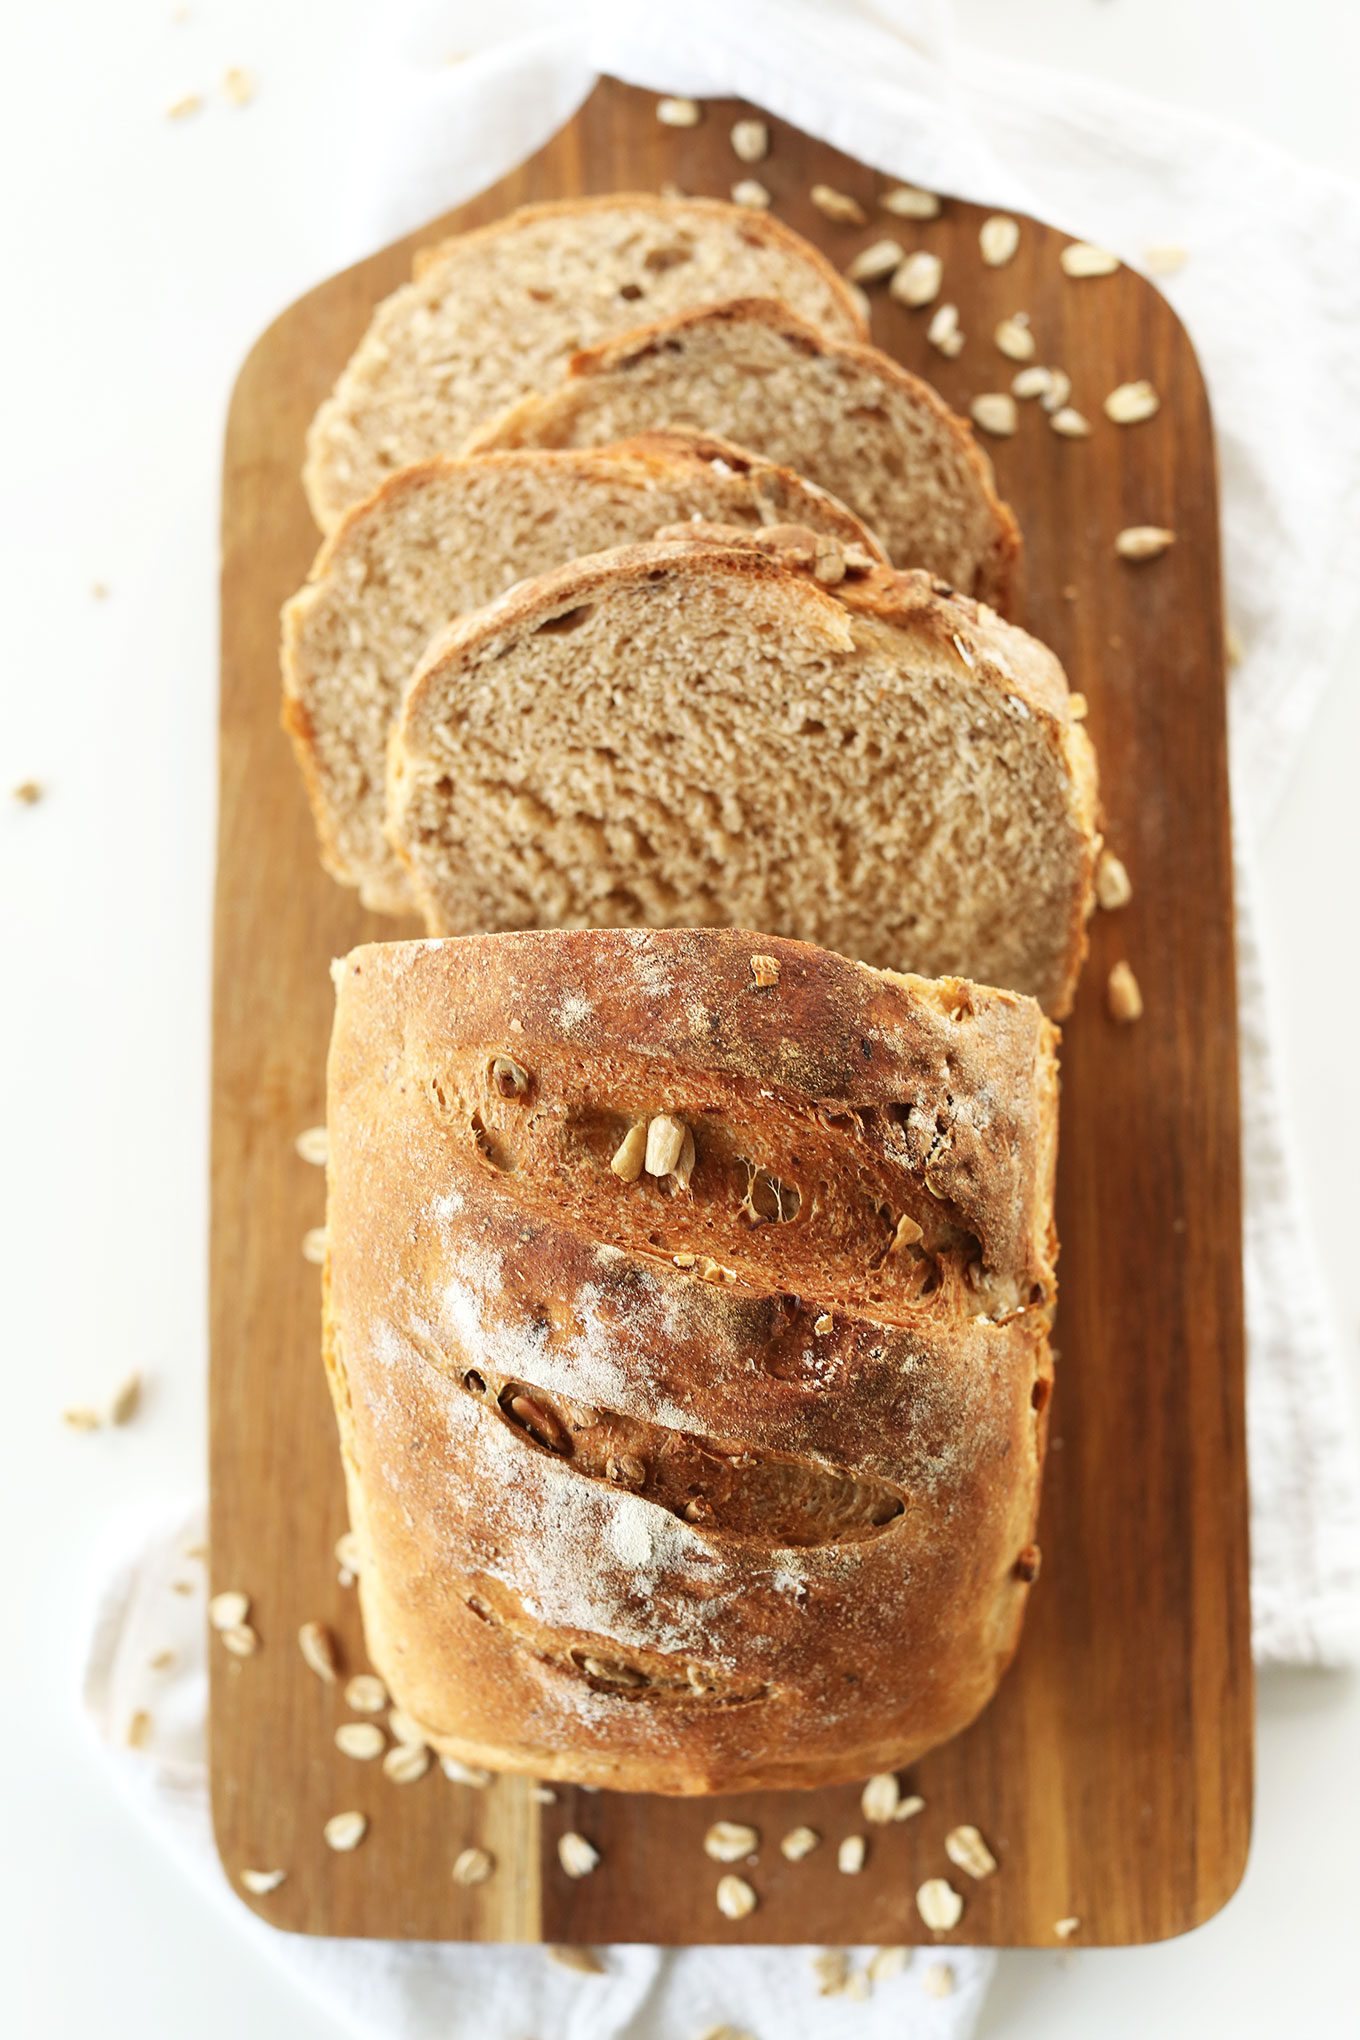
This loaf is magnificent; everything you want in a homemade bread. It’s:
Seriously simple
Tender on the inside
Crusty on the outside
Loaded with whole grains
Seedy
Dreamy
& Perfect
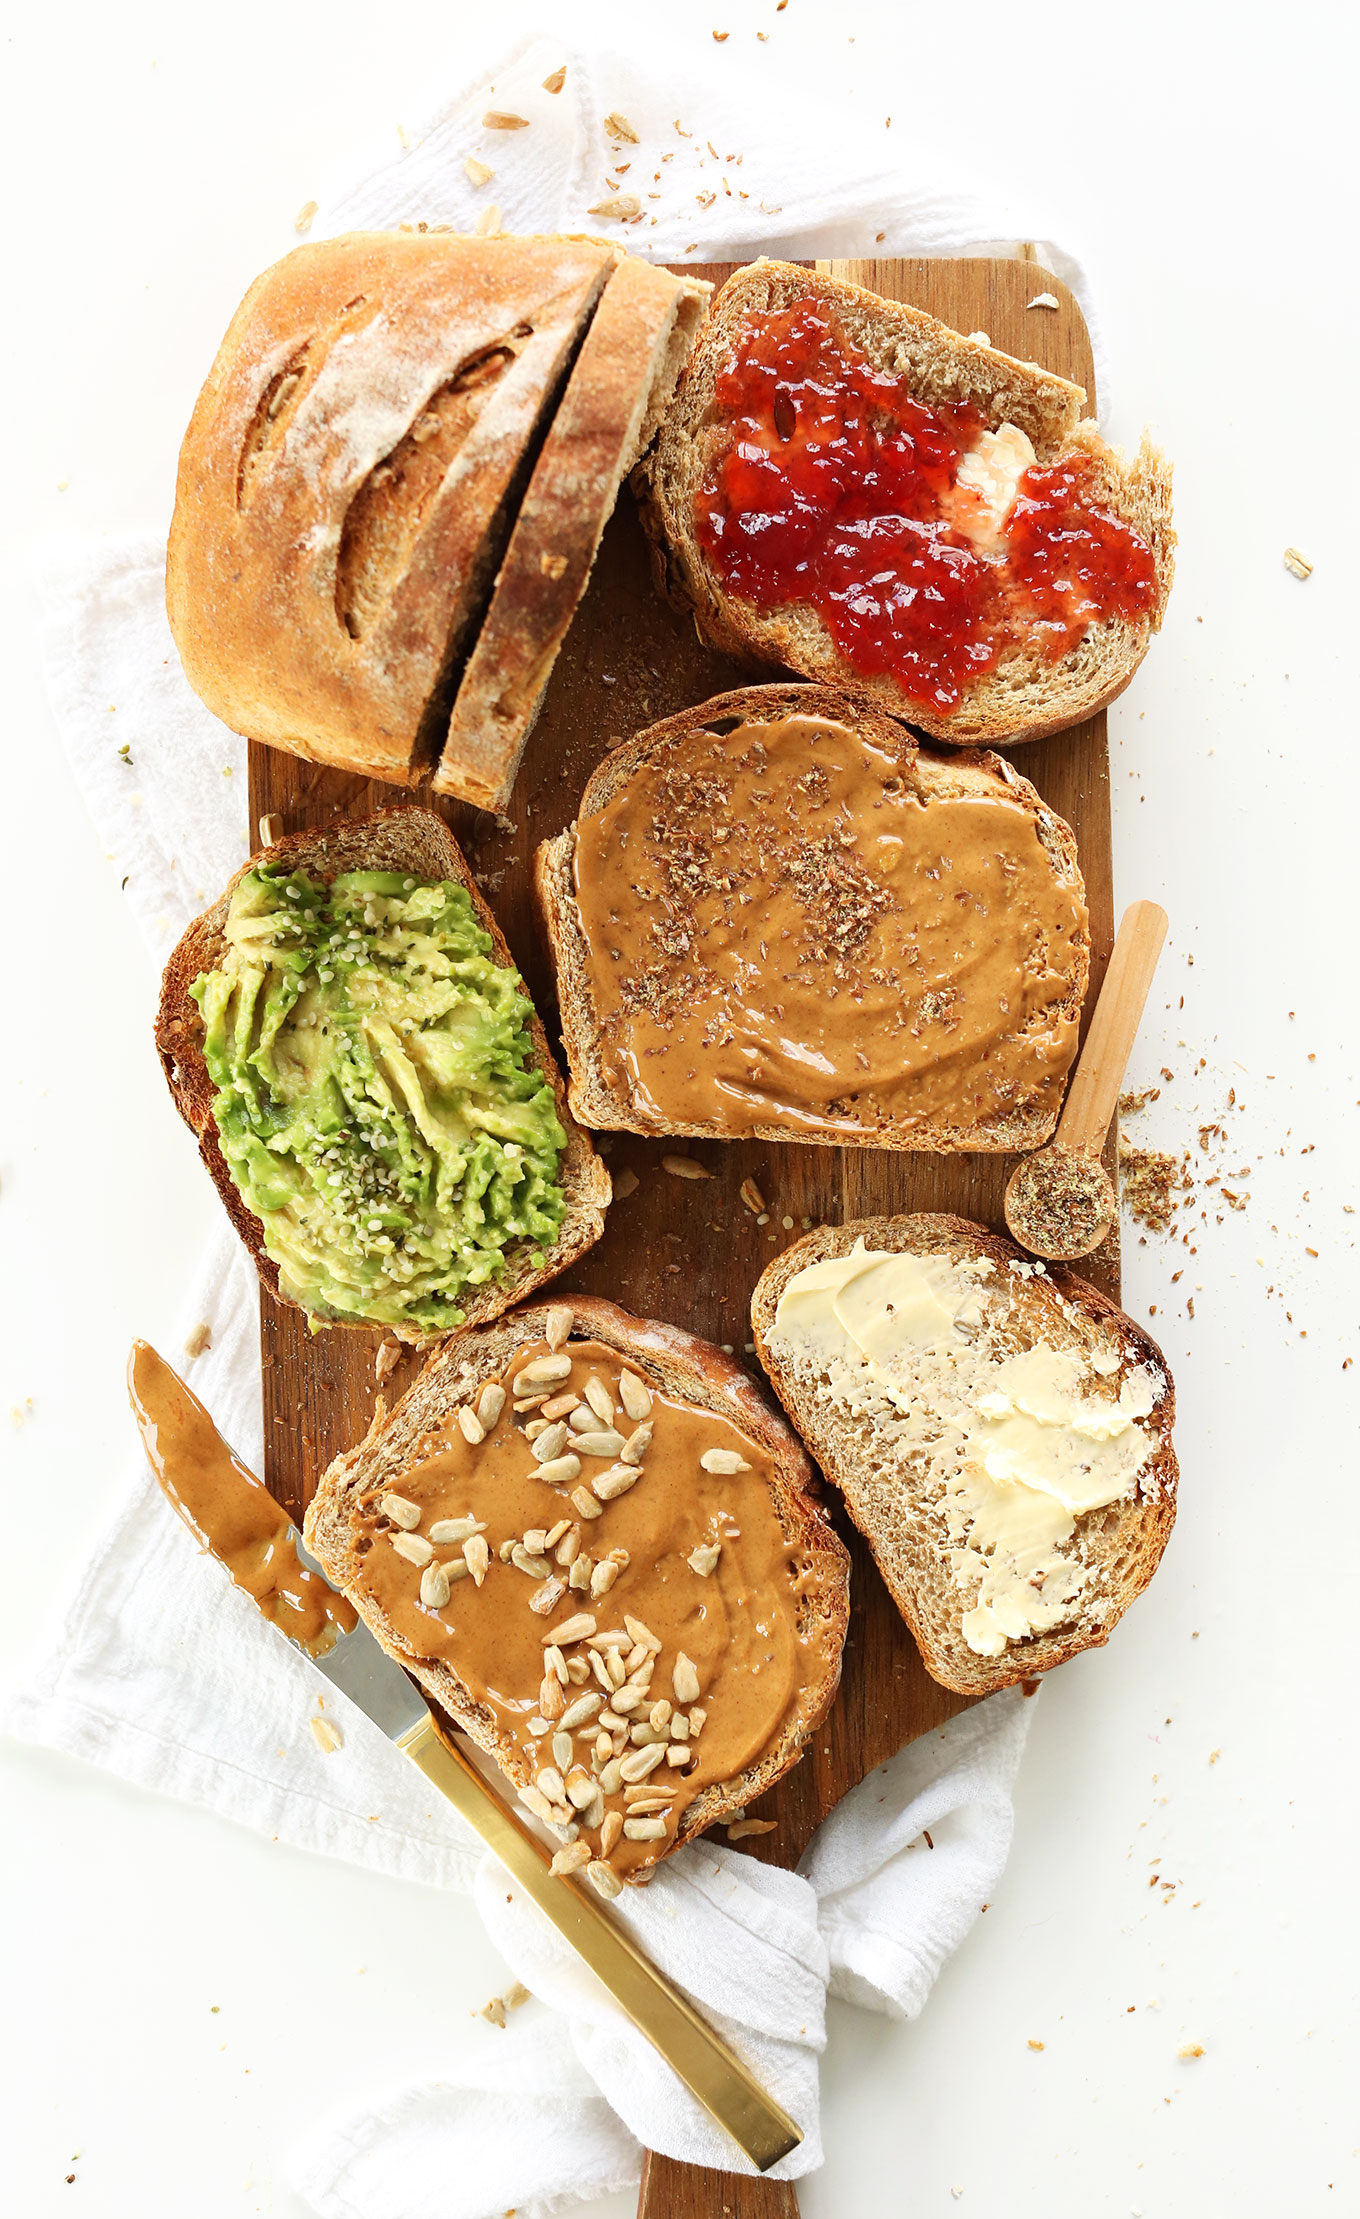
This makes the perfect bread for toast, sandwiches, french toast, and everything in between.
I’ve been loving it with smashed avocado and a little vegan parmesan cheese and hemp seeds, or with peanut butter and flax seed. You really can’t go wrong.
More Vegan Bread Recipes
If you give this recipe a try, let us know! Leave a comment, rate it, or take a picture and tag it #minimalistbaker on Instagram! We’d love to see what you come up with. Happy baking!
The Easiest Whole Grain Seeded Bread
Ingredients
- 1 1/2 cups warm water
- 3/4 Tbsp fast-acting yeast (1 packet yields ~3/4 Tbsp or 2 1/4 tsp)
- 2 Tbsp maple syrup, agave, or honey if not vegan
- 1/2 Tbsp salt
- 1 Tbsp flaxseed meal
- 2 cups Bob’s Red Mill Whole-Wheat Pastry Flour
- 1 3/4 cups Bob’s Red Mill Unbleached All-Purpose Flour (plus more for rolling / dusting)
- 2 Tbsp raw or roasted sunflower seeds
- 2 Tbsp rolled oats
Instructions
- Combine warm water (like bath water, or 110 degrees F / 43 C), yeast, maple syrup (or other sweetener), salt, flaxseed meal, and flours in a large mixing bowl and stir. The result will be a sticky, rough dough. If using a stand mixer, beat at medium speed for about a minute. Otherwise just use a spoon to stir until well combined and when it can no longer do the job, knead and turn it in the bowl with your hands. Add flour until the dough is no longer sticking to the sides – about 3 3/4 cups total (amount as original recipe is written // adjust if altering batch size).
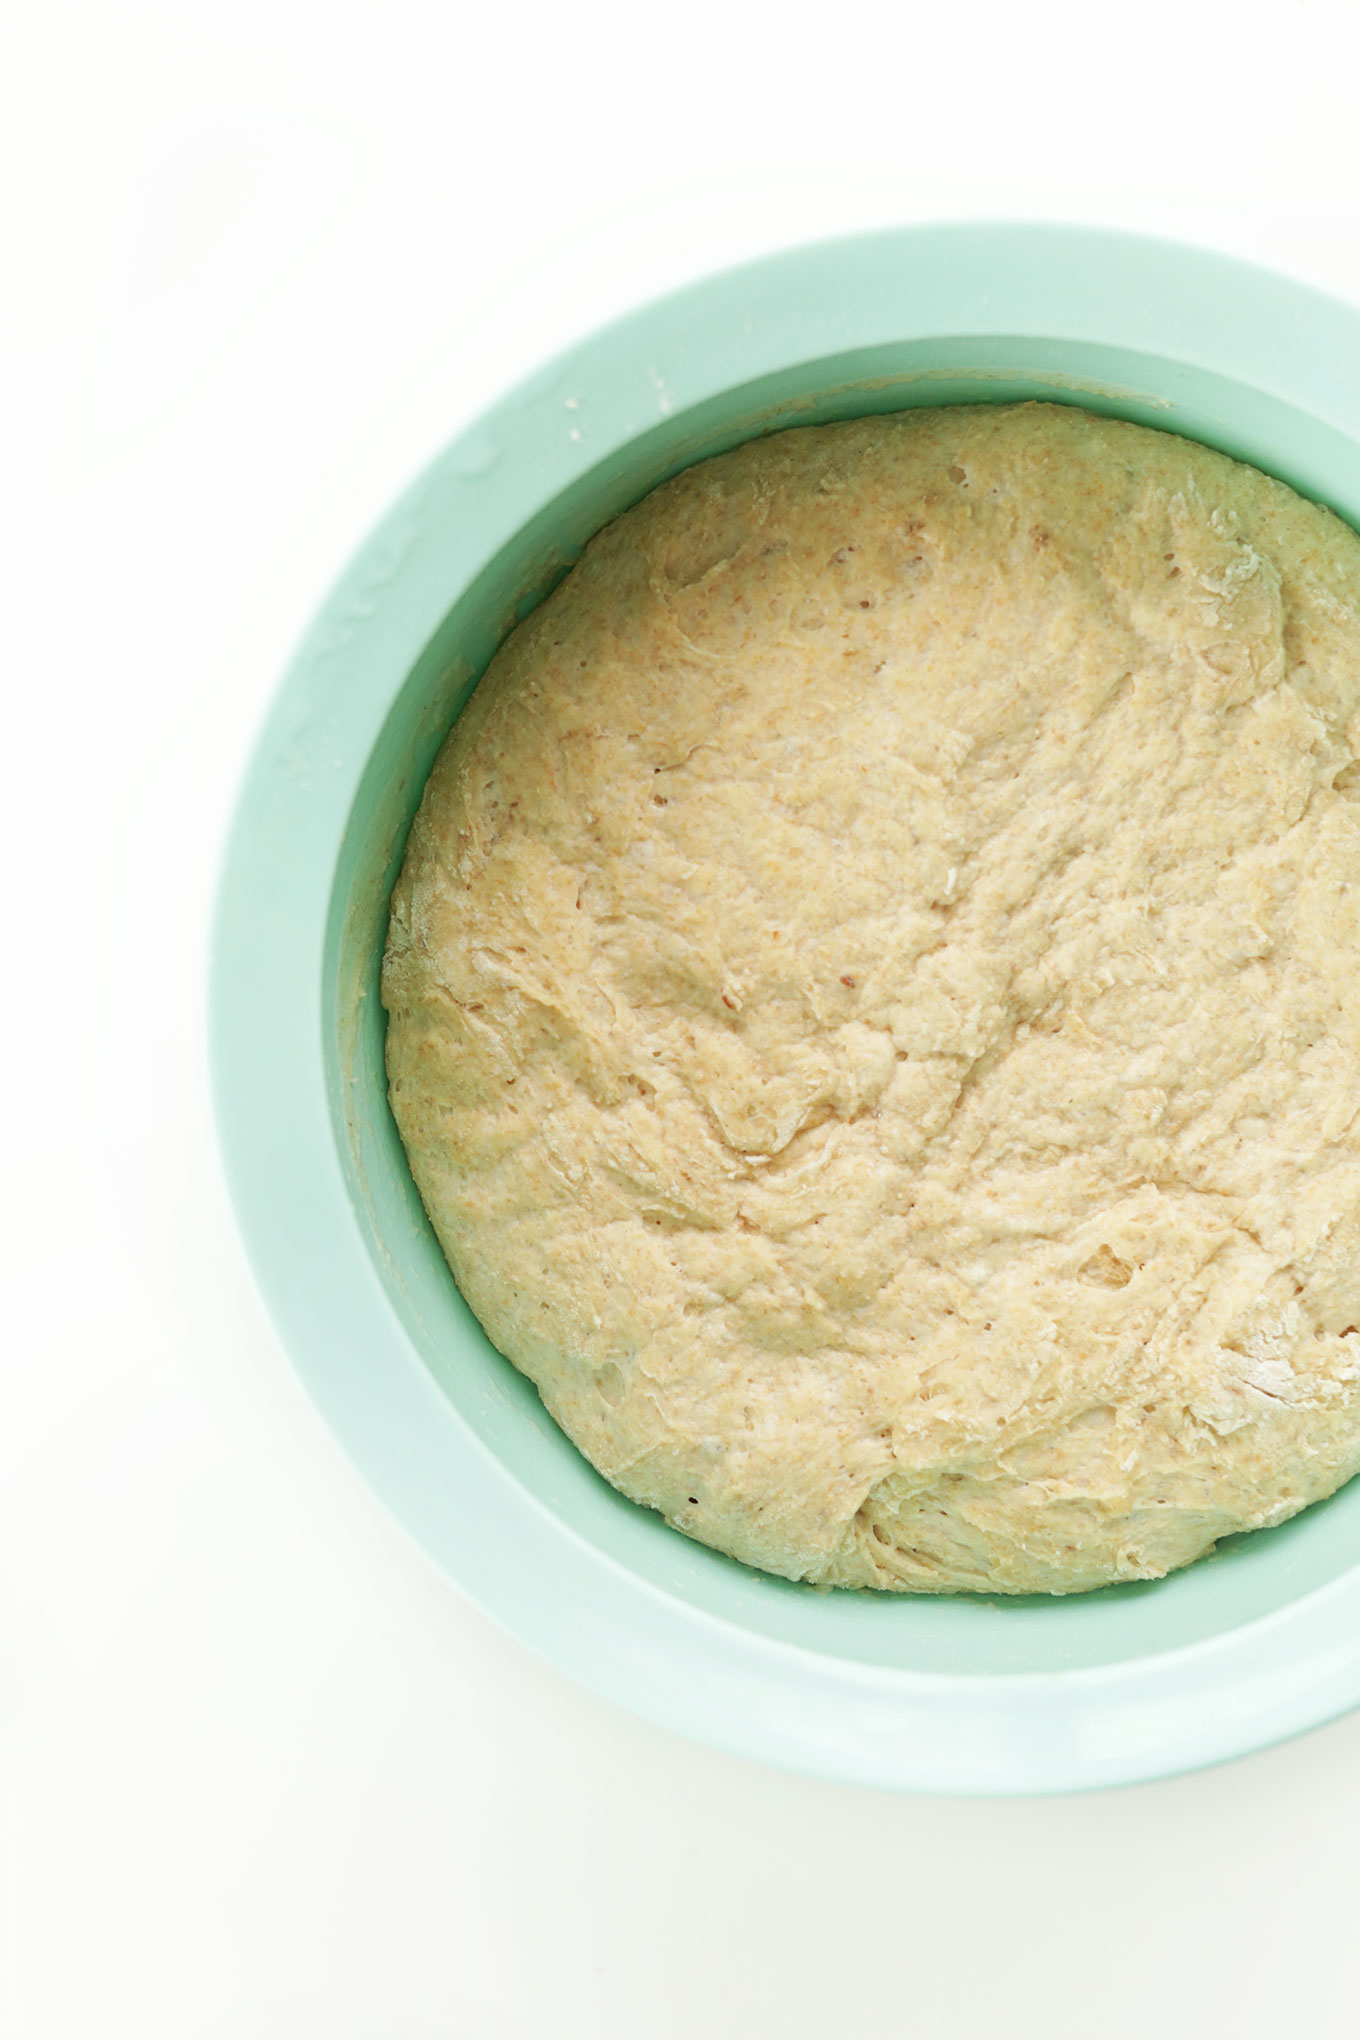
- Lift the dough out and lightly grease the bowl with nonstick spray or olive oil. Cover and let rise for 2 hours at room temperature and 2 hours in the fridge. Alternatively, if you only have 2 hours, let rise at room temperature and skip the fridge (though a longer rise is best).
- Use fingers to create a small hole in the dough and pour in sunflower seeds and oats. Transfer dough to a lightly floured work surface and knead about 20 turns or until elastic. Form into a loaf-like shape.
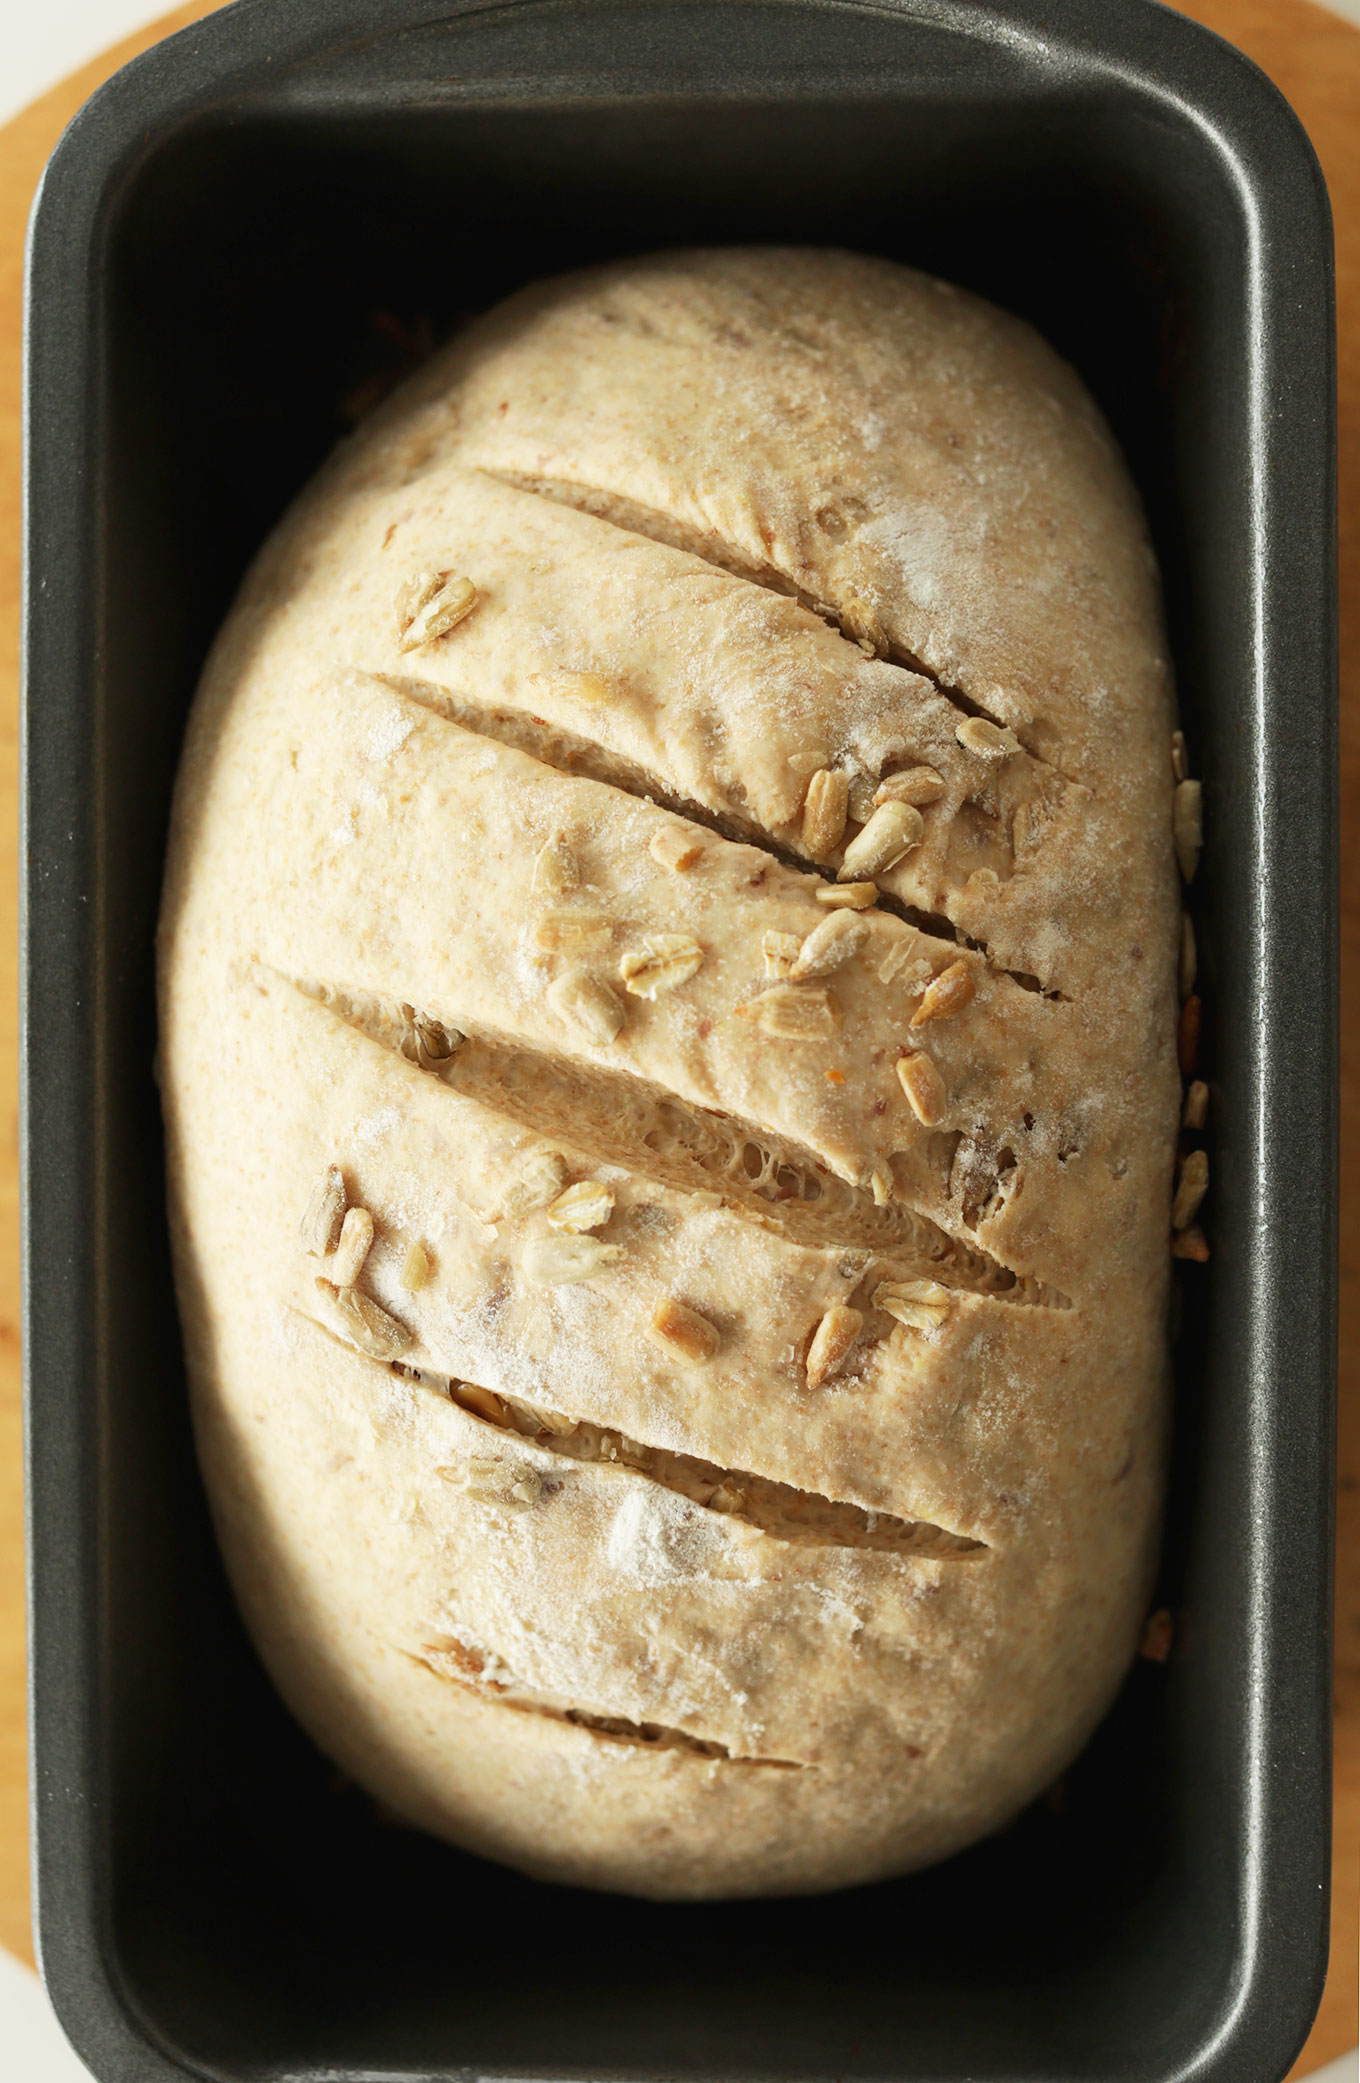
- Place seam-side down in a lightly greased loaf pan or baking sheet and sift a light coating of flour over the top to help keep the dough moist. Loosely cover with plastic wrap and let rest for 45-60 minutes.
- Preheat oven to 425 degrees F (218 C)* toward the end of the dough resting time and place a metal or cast iron pan (NOT glass, Pyrex, or ceramic) on the lowest oven rack. Also have 1 cup of hot water ready.
- When the oven is preheated, slash the bread 2 or 3 times with a knife, making a cut about ½-inch deep.
- Place in oven on middle rack. Then carefully pour hot water into the shallow pan on the rack beneath. Expect it to bubble and steam; then close oven door quickly.
- Bake the bread for 26 to 35 minutes, or until deep golden brown and risen.
- Remove the bread from the oven and let rest in the pan for 5 minutes. Then carefully remove from pan and transfer to a cooling rack to cool. Let it cool completely before slicing for best results (otherwise it can be doughy in the middle).
- Store leftovers in a plastic bag at room temperature for up to a few days. Transfer to freezer for longer term storage.
Video
Notes
*Adapted from my 7 Ingredient Muesli Bread.
*Nutrition information is a rough estimate.
Nutrition (1 of 12 servings)
This post was sponsored by the lovely folks at Bob’s Red Mill. Thanks for supporting the brands that support Minimalist Baker!


Noelle says
hi Dana, I was wondering if I could place the dough in the fridge and bake it the next day to have fresh bread in the morning without waiting so long?
That should work well!
Ana says
I made this bread and it came out absolutely gorgeous! Thank you so much! By far the prettiest bread I’ve ever made :)
Tam says
Would this bread be suitable for those on the low Fodmap diet/ibs sufferers?
Thanks,
Tam.
We don’t think so, but would recommend checking with your dietitian/nutritionist for specifics.
Aditi says
I tried making bread for the very first time and this is the recipe I used. It turned out really good, crusty on the outside and soft on the inside. And the best part was that it was so simple! I can’t wait to try baking some more bread!
Jen says
Hi! I have been making this bread through the winter almost every other day. I LOVE it, and it was part of my morning routine in the winter. Im not baking as much in the heat this month! Early on I adjusted the temp to 375 degrees and baked for 40min with great success. It’s perfect every time. I have even played with different flours and seeds. Hope this helps! Love love your recipes and website. I dont know why, but my phone will not let me select the stars. 5!
Jen says
Oh yea and I skip the refrigerated rise…i am impatient!
samantha says
Hi. Looks delicious….do you have any suggestions for adapting this for a bread machine? I feel safer leaving that on when we’re away. Thank so much.
Stephanie Taylor says
I made this today and it wouldn’t stop rising! It got absolutely huge by the time I took it out of the oven! It was wonderful and my mom wouldn’t stop raving about it! Thank you so much for such a great recipe!
We haven’t tried it in a bread machine, but some other readers have. We’d recommend checking the comments to see what they have tried.
Erin says
…can I use all whole wheat or is it necessary to have the 2 types of flour? I only have the one at the moment.
It will probably work, but end up more dense. Let us know if you try it!
Kara says
I just made this recipe this afternoon and love it. I love cooking but I’ve never been much of a baker so easy was key here. I did add some extra grains like amaranth and chia seeds for the protein boost but I only had to add a tiny bit more water to make up for that. Yep I’m going to need to make this as a double batches twice a week it seems.
George says
This was my first time ever making bread. The recipe was easy, and the outcome was a delicious loaf of bread that everyone in the family enjoyed. Thanks!
James says
Thanks! It’s wasn’t easy but I control myself to not eat the whole loaf ;)
Kara says
I think I may have just found the solution to my bread problem. The problem being all store bought bread tastes like cardboard boxes to me.
Madeleine says
Just had to add a comment after baking this as it was A-Mazing!! My husband and family loved it and we’ll for sure be making it again soon. Thank you for such a simple and GOOD bread recipe :))
Lovely! Thanks for sharing, Madeleine!
Maria Renee Soto says
Hi! i’m allergic to yeast and eggs.. do you know if i can do this recipe without yeast?
I don’t think so.
Hannah B says
I was in a hurry and wanted to speed it up a bit. Had some luck and thought I should share.
Notes:
– The original instructions are slightly confusing – when adding in the flour, you do NOT add an *additional* 3.75 cups of flour after the initial mix, you merely start with intentionally less white flour (ie approx 1.5 ish cups white flour) and continuing adding white flour until you get the right consistency (so your total flour measurement at the end should be ~3.75 cups, NOT 7.5 cups)
– I used whole wheat flour instead of ww pastry flour and the loaf was not too dense. Nice and fluffy!
How I cut off ~3 hours from the recipe:
1. Mixed the yeast, water, and honey together in a big bowl and let set 5 minutes until foamy and fragrant.
2. Then added all the dry ingredients and mixed.
3. Kneaded as instructed and let rise in a bowl in a warm spot until doubled in size (just shy of 2 hours)
4. Skipped the refrigerated rise and went straight to mixing in the oats and seed + kneading
6. Set formed loaf on a floured pan to rise a second time while heating oven
5. Because the loaf was already warm, the second rise only took ~25-30min instead of 45-60min
6. Once loaf was doubled in size (~25min), baked per instructions
7. The loaf took ~30-33min to bake and it came out crispy on the outside, very soft and fluffy on the inside.
Loved the loaf and since I was in a pinch for time, I’m glad I was able to make it still come out nicely with half the time! Another addition would possibly be an egg wash on top of the loaf and then sprinkled with some oats or seeds, or even a nice drizzle of honey on top prior to baking.
Jamie says
Ahh! Thank you so much for your amount of flour explanation. Now I get it. Did make the bread, my first time, and it is wonderful. I will def try the shorter resting time.
Elyse Sokoloff says
Thank you so much! I was among those confused by the instructions. I’m excited to make this!
Elbridge says
Can this recipe be adapted to bread machines? Can I use white whole wheat flour coupled with unbleached bread flour (King Arthur Flours)?
Hi Elbridge, we haven’t those modifications, but they might work! Other readers have mentioned success making it in a bread machine.
Maria says
Hi Dana,
Would it be possible to make this in a bread machine?
Thanks :)
Hi Maria, we haven’t tried it, but some other readers have done so with success. We’d recommend searching the comments for more info!
Telia says
In some vegan circles yeast is considered non-vegan, just fyi.
I’m non-vegan and I’m very excited make this, thank you for the recipe.
Newbie Baker says
I made this bread and it turned out wonderfully. Both appearance and taste were great. However, the middle of the loaf was undercooked and doughy, with a large hole in the center. I’m new to baking– can you recommend any ways in which I may have gone wrong? Could I not have baked it long enough? I baked the loaf in a glass pan, and my steaming pan was metal. My oven is electric. Any suggestions you can make will be appreciated.
KJ | Omnomherbivore says
Like a fool, while reading over this recipe on my phone I only caught “not Pyrex”. So I put a dish in my oven and it exploded into a million pieces!! I’d recommend putting *DO NOT USE* in bold. I know this was a careless skim on my part, but it could have really hurt my husband or myself! Thankfully none of the debris hit us. The bread was good though.
Alex says
This is only my 2nd attempt to make bread. This recipe looked easy and foolproof, and it IS! It’s also forgiving. I had everything all set out, measured and ready to go, except the flour. That is when I realized the recipe called for whole wheat “pastry” flour, not whole wheat flour. Oh oh. Looked up substitutions and found I could sub 1 cup cake flour plus 1 cup of whole wheat flour in place of the 2 cups whole wheat pastry flour. The results were awesome. And I used molasses instead of syrup or sugar. And I didn’t have oatmeal so I subbed wheat bran, and toasted first. I usually better stocked on baking goods, lol. Anyway, the bread is delicious. I”ll definitely be making it again.
Tiffany says
Hi Dana!
I just made this recipe with a few changes and it was amazing!! Thank you!!
Instead of all purpose flour I used white whole wheat flour.
I used active dry yeast instead of instant. I let the yeast bloom in the 1.5c of warm water and honey mixture for 10-15 min.
I baked the bread for 35min at 425. At the last 15 min I covered the bread with tin foil so the top wouldn’t get too dark.
The bread was 100% whole wheat and so light and tender! We loved it!
Emily says
I’m considering making this bread, but I only have regular Wheat Flour, no Pastry Flour. Is that going to be a problem? Also, what would happen if I used Wheat for both the pastry and white flour? I don’t normally keep white flour around.
Hi Emily, it might work, but will probably end up more dense. Let us know if you try it!
alex says
You weren’t kidding about the Pyrex! Making the bread with a bit of a cold, a little out of it and didn’t read directions closely enough, just broke a Pyrex baking pan into about 10 pieces pouring the hot water in to bake. Not your fault at all, but it might not be a bad idea to put a short warning in there to grab the attention of airhead amateurs like me!! Still looking forward to seeing how it turns out…
KJ | Omnomherbivore says
I did the exact same thing. My pan exploded into a million pieces!
crunchycake says
Thanks for posting this recipe! It was my first loaf of bread from scratch and the family loved it! I think it was a little on the dense side but otherwise great – I may have kneaded it too much after pouring in the oatmeal and sunflower seed. One question – the calorie count per slice listed seems high – is it really 163 calories per slice?
Alex says
Did you use whole wheat “pastry” flour, as called for, or whole wheat flour? There is a difference. There would be nothing wrong with using making with the 2 cups whole wheat flour, it’s just going to be dense. I noticed at the last minute it said “Pastry” flour, which I didn’t have so in addition to the 1 3/4 AP flour, I made a subsitution for the 2 cups “pastry” by using 1 cup whole wheat flour and 1 cup “cake” flour. It turned out great!
crunchycake says
Yep, I did use whole wheat pastry flour. I think maybe I handled it too much so I’m going to try it again without so much kneading. All in all a great recipe!
Luis Bermudez says
I am actually in the midst of trying this recipe. At the end of Instruction #1 it says to add flour until the dough no longer sticks to the sides. Is that approximate amount 3/4 cup or 3 3/4 cups? My dough stopped sticking after only 1 cup. Is that an omen of things to come? I’m making bread for the first time.
Annalise says
Lovely recipe! This bread is perfectly fluffy while having a robust and earthy flavor from the whole wheat, honey and seeds. It was a breeze to throw together and I will definitely be making it again!
cree says
Holy cow, best bread I’ve ever made. I will use this recipe forever!
olivia says
Loved the recipe! First time I made it, the bread remained a little doughy in the middle but too dark on the top crust. The second time, I kept the temperature the same, but added a piece of foil on top of the bread (for the first 15 min of baking) and increased bake time to around 30 minutes until I reached a temp of 190 F in the center of the loaf.
Liz says
This bread is soooo easy and delicious! I think I totally messed up kneading it (hey, I’ve never made bread before), used a food processor (with a dough “hook” – really a dull blade) to mix it initially, thought I’d totally ruined it, but it still turned out amazing. I was also confused by how much flour to mix in initially (3 3/4 total of both kinds of flour? or 3 3/4 of just the all-purpose flour?), but I ended up barely adding any more all-purpose flour than listed in the ingredient list because the dough already seemed dry enough, and it turned out perfectly. It came out really weirdly shaped though, I think next time I will split it up between my two small loaf pans. Yum!!!!
Kaitlin says
Okay so I’m an avid amateur baker, it’s my favorite hobby and I absolutely love to do but I’ve never made bread before, that was one item that I just thought too intimidating… but today I conquered my fear with this recipe and I must say it came out fantastically! A hearty crust on the outside, with a nice chewy center, it is such a lovely bread! I will definitely be using this recipe for a long time; super simple, super easy, super yummy. I always believe that home made is better than store bought and home made bread helps take that power back. Wonderful recipe!
alice says
I wish I could post a pic! The half whole wheat and half spelt flour turned out excellent! Ty for the recipe:)
alice says
This recipe works for my new found vegan diet, I’m using whole wheat flour and spelt for the other 1 3/4 cup. I’m excited to see if this works together. This is my first attempt at making bread!:) I’ll repost if the spelt worked with this recipe.
Nancy Nurse says
Hi, I’ve read through ALL the comments and I cannot find where you’ve answered the multiple people that continued to ask the same question about the “added” 3 1/4 cups of flour. You say: “Add flour until the dough is no longer sticking to the sides – about 3 3/4 cups total”. For us newbies, this is VERY CONFUSING and yet, I don’t see your answer anywhere (unless I missed it). Would you PLEASE explain that in easier terms for us first-time-bread-makers? Thank you… this looks very time-consuming and not very easy, but then again, I know nothing about bread making.. I’m looking for an ALL-GRAIN bread.
Hi Nancy! What I mean by that is, the dough should no longer be sticking to the sides of the mixing bowl. You’ll know when to stop adding flour when you can pick it up with your hands and it doesn’t stick to them. I found that amount to be about 3 3/4 cups. Hope that helps!
Aparna says
Hi there thanks for such nice recipe, I have been visiting your blog pretty regularly since few weeks… Love the pictures and recipes really look interesting. Also I have been through your tutorials on fizzle and wanted to extend my sincere Thank you…
I will try this recipe soon…
Lizabeth Craig says
This sounds wonderful Forgive me if this has already been asked somewhere in the extensive comments (!) but when Step 4 says, “Place seam side down,” what seam is it referring to? Is there a seam if the dough is just shaped into a loaf? Thanks!
Casey says
I made this recipe today (modded to what I had in my pantry at 8 AM on a random Saturday). It’s cooling on the rack now, and the scent is driving me crazy! The crust has a lovely firmness to it. Really looking forward to cracking it open soon!
Teresa says
I made this but the middle of the loaf was hollow and raw. ? I’ll have to try again!
Leda says
Failed the first time, probably because I used active dry yeast instead of fast acting yeast. Also I don’t think I kneaded it enough the first time and it didn’t rise at all.
Second time it rose! And the loaf was glorious and crusty outside, soft and chewy on the inside! The flavor is great and the seeds and oats really add a nice texture to the loaf. I did have one problem that there was a small hole through the middle fattest part of the loaf. My guess is that maybe it was a weird knead or possibly that I should have baked it at a slightly lower temp for a little bit longer since it’s kinda dense around the hole part. Any suggestions? I live in Florida and I’ve heard that baking bread is difficult here because of the temp and the low altitude…
Overall I love the recipe and will be experimenting with it again! Thanks!
– Leda
Em says
oh my goodness…i tried to make a bread last week and it went terribly, but thought I’d brave it one more time…and i am so pleased i did. This loaf is perfection, i didn’t have any wholewheat flour left as used it up on the last failed attempt so used a mix of plain, kamut and oat flours…this is my new absolute favourite!! thank you so much.
Andrea says
I just wanted to comment and say I love this recipe! I also had the issue with the bread not being cooked all the way in the middle but cooked on the outside. I followed your advice and lowered my oven temp to 425 and baked for 35-36 minutes. I also tried it without any sweeteners and it tastes just as good with no added sugar/ sugarfree.
I actually wrote a more detailed blog post about how I make it if anyone is interested:
http://pinemanzana.wordpress.com/2016/02/20/minimalist-bakers-easy-vegan-whole-wheat-bread/
Alex says
So long as it rises, sugar feeds the yeast.
Tom Dagley says
Thank you so much for this simple and great recipe! As I always have managed to make the worst choices when presented with vagaries in recipes, I discovered a slight syntax error on step 1. The principle action of “add flour” can throw some bakers off as you use the line “3 3/4 total” at the end of that sentence, which obviously references the ingredients list but ignores that all of the flower had been already added at the beginning of the step. I caught this as it stopped sticking to the sides right away, but I thought I’d let you know.
Brie says
I have made this bread several times. I love it. Today I’m going to try subbing in amaranth flour for some of the white flour. The first lime I made this I used what the recipe called for. 1 3/4 cup ap flour. Every time after that I have used the same amount of bread flour because it aids in gluten development. I also add about a tablespoon vital wheat gluten to improve rise and texture. Don’t get me wrong your recipe as is is very good. One of the best bread recipies I have made. But these additions make it great.
Alex says
Personally, I find the supermarket breads too chewey – almost dough like – because they all add wheat gluten, to each their own of course. Maybe I’ll knead it more this time to develop extra texture.
Angela says
Do you have to use both kinds of flour?
You could use one or the other, I just prefer the blend. All purpose will make the bread light and fluffy, and whole wheat will make it more dense and nutty.
Ruth says
I just made this bread. Sort of. I used white whole wheat and all purpose flour. It was in the refrigerator for 2 hours then out for two, shaped into a round and baked after the second rise — I did have to leave it in the oven for another 20 minutes to get the internal temp up to 190 or so (instant read thermo). The crust was looking dark so I put foil over it for the last 20. Came out fabulous. Nice crunchy crust and good texture. I will definitely make this again, maybe with the right flours and with a longer rise in the fridge.
Abby says
Yum-my! This bread is delicious and easy… or easy and delicious. Either way, it’s a must bake. Especially for those who are intimidated by the bread process. Thank you, Dana. No more store-purchased everyday bread for our house. High kick!
Cindirelly says
I made the one bowl WW seeded bread. I baked it for 21 minutes and later after it cooled discovered it was not done! I was very sad. Will the extra 5 minutes do the trick or is there a definite way to know it is done? I had to throw it away and will re-make today.
Thanks
The extra 5 minutes would’ve helped. You can cut into the middle and see before you pull it out!
Kristen says
I would love to make this but I was wondering if I could use flax seed mean instead of flaxseed?
Sure!
Tiffany says
Can I ask why you prefer the whole wheat pastry flour? I’m just curious.
Lauren says
This is the best bread recipe I’ve tried so far! It’s so delicious and was really easy to make. I made two loaves and in the second one mixed cinnamon and raisins – delicious! Thank you!
Jenny says
I think this is the best bread I have ever eaten. First day of being a vegan is going well! Thank you!
Diana says
I tried this recipe twice and the baking time and temp is causing my bread to burn on the top and be doughy in the middle. The first time I used a 8×3 or 4 inch cast iron bread pan (the instructions do not say what size to use). So the next time I used a 9×4, lowered the temperature and cooked for 18 minutes. I ended up with a burnt crust and undercooked center. Most whole wheat bread recipes call for baking at 350 for 35+ minutes. I might try that next and just spritz my oven with water when I put the bread in. I think the pan in the bottom is messing with the circulation of the oven.
mike says
Hi just tred this but turned in to rolls the temperature was to high for fan assisted burnt my rolls please advise.
Mike
Sorry to hear that, Mike! We haven’t tried in a fan-assisted oven, but perhaps try reducing the temp by 25 degrees Fahrenheit.
Lluvia says
This looks wonderful! Would it be possible to use only wheat and all-purpose flour for this recipe?
We haven’t tried it that way, but it should work! Let us know if you give it a try!
Priya says
When you say ‘flax seed’ do you mean whole seed or ground?
We used flaxseed meal, but either would work
Karen says
Bread looks delicious. Made the dough tonite and put it in fridge, but won’t be able to bake til morning. Should I let it come to room temp first, or continue as your recipe states when it has been the fridge for only the two hours with the kneading and rise in pan, etc.
Thanks for help and all your great recipes…Karen
Karen says
Anyone had issues with it being soggy in the middle? I’ve made it twice & baked it longer than recommended and it’s been doughy in the middle both times.
Marian says
In step one, you mentioned to add flour, about 3-3/4 cup total, until the dough is no longer sticky. Is this amount of flour an addition to the 2 cups of WW pastry flour and 1-3/4 cup AP flour already added into the dough initially? Also, thank you so much for sharing this recipe!! I absolutely love making homemade bread and this recipe seems so nice and simple! :)
Adrienn says
We don’t have the wheat pastry flour here. I ve been searching for a while and have everything else in the Bob Mills range. What could I use instead?
Thanks
Danita says
I just made this and it is so good. I didn’t have bread flour so I used regular so flour. Turned out great!! I needed breakfast options for my hubby and I. We are newly vegan so we’re looking for toast options. Thanks so much!!
Brionna says
Mine turned out dense and weird :( Not sure what I did wrong. However this was the first time I’ve ever made bread, and the flavor was quite delish!
2cairnterriers says
this is a little far down in the comments, but PEOPLE!!! before you ask the question, read ALL THE COMMENTS!!! most likely your question has ALREADY BEEN ASKED! and, hence, ANSWERED!!! for instance, CAN I USE ONLY WHOLE WHEAT FLOUR? WHY A PAN WITH WATER? CAN I OMIT X, Y, OR Z? sheezus, yahoos!!!
Bronwyn says
Hi Dana!
I’m really keen to try this recipe; I’ve just purchased all the ingredients except whole wheat pastry flour. I’m in Sydney, Australia, and I’ve just found out it’s very hard to get a whole wheat pastry flour here. There is a white one available in supermarkets, for bread, pastry, cookies, etc – should I try this? I was hoping to keep all the ingredients as unrefined as possible. Is there something else I could use as a substitute?
Thanks!
Bronwyn
Jen says
This was really, really good! You might want to specify though, that the water pan should be metal. I used a Pyrex glass one the first time and it broke when I poured the water in. But even with having to put the bread back in the fridge while the oven cooled down so I could clean up the glass, it was probably the best homemade bread I’ve ever made! I think I will be making this again for sure!
Ruth says
Any idea what would cause the middle of the loaf to come out uncooked? The edges and ends were lovely but as you get closer to the center it became doughy. I cooked the loaf as directed for 25 minutes at 450 degrees.
Hi Ruth, Some readers reported issues with it not cooking in the center at 450, so we have modified the recipe to fix this.
Jane says
Hi Dana! I made this recipe using pastry flour instead of the white flour (used what I had in my cabinets). It gave me a giant, beautiful scone that tastes great. I am excited to try it with vegan butter, preserves, or maybe even drizzled with maple syrup. Next time, I will report back on my efforts using regular white flour. Thank you for the recipe.
Justine says
So i let it rise at room temp and then in the fridge as well or just one or the other?
Both!
Emily Heffner says
I am confused. The time listed for prep or cooking time does not reflect the fact that it seems that the bread needs to rise for 2 hours out of the fridge and 2 hours in. Can you just do it at room temp for 2 hours and then go on to the next step? Does it need a shorter time for the room temp rise?
Hi Emily! That’s been updated. Sorry to confuse! I was calculating for a fridge-only rise, but I suggest both!
Mark Hillengas says
I used your recipe for Easy Whole Grain Seeded Bread. After baking, the crust was almost getting too dark (burnt) yet the inside was not fully cooked. What can I do to avoid this on my next try?
Hi Mark! It might have to do with the size of your pan. What I would suggest is lowering the temperature slightly and baking a little longer!
Allison says
Hi there! After 25 minutes mine was still quite gummy in the middle. I had unfortunately already dumped out the water, because I thought it was done. I put it back in the oven (sans water), checking it after 20 more minutes. It was still a bit gummy inside. Don’t get me wrong, we still sampled along the way and it was delicious. I’m just wondering if you have any thoughts as to the issue with my cooking time.
Samantha says
Finally a bread I made the actually turned out. It’s so delisious. Thank you!❤️
Linda says
My bread didn’t bake in the middle. It was raw in the centre. I followed every instruction. Will definitely try again because the part I could eat was amazing!
Carmen Yolanda Limparis says
Dana,
I am gluten-intolerant. I am not to eat wheat, rye, barley or oats. Can I substitute sweet white rice flour and brown rice flour for the wheat and all-purpose flour? Thank you.
Hi Carmen, we haven’t had success with a gluten-free version, but let us know if you do some experimenting!
Christie says
Thank you for this divine recipe. In 2016, I’m working to give up commercially produced bread, and your recipe has empowered me to do just that. The only ways I altered your original recipe were (1) I woke up the yeast with the warm water and maple syrup for 5 minutes before mixing with the other ingredients, (2) I omited the oats and sunflower seeds (only b/c I didn’t have them on hand), and (3) as the bread came out of the oven, I brushed the crust with some melted butter. My first try at this whole bread making thing was a HUGE SUCCESS with my family, and I plan to make this over and over. Thanks again!
Lisa says
Canyou use whole all whole wheat all purpose insread of pastry flour?
Yes! That should work.
Christina says
This bread turned out great! The texture was better than my usual loaves. I don’t usually give my bread such a long rise time – or do the step with it rising in the fridge – but it was worth it! Thanks for the great (and easy) recipe!!!
Rebecca says
Ground or whole flax seeds?
Always ground.
Ron says
Well, I just made the recipe last night and used whole flax seeds. This AM I am enjoying the “crunchy on outside, so soft and tasty on inside” toast. So I think either way would be OK.
Vanessa says
Sorry, I saw your reply above. I’ll probably leave it at room temperature but take it off the top of the fridge when I leave. My house is pretty cold.
Vanessa says
Hi,
I made the dough and it’s now rising but I have to leave and am not sure I’ll be back within two hours. Will the bread be okay if left at room temperature for three hours? More? Should put it in the refrigerator? Thank you.
That should be fine! Longer than three hours and I’d put it in the fridge…Good luck!
Vanessa says
Thank you Dana. I made this twice already and the taste is good but something went awry with the texture. I was trying not to overdo the flour but ended up kneading (by hand) for a very long time and still had sticky dough. How much extra flour would be needed? I always weigh my ingredients so I added the correct amount in the beginning.
Alex says
Fold in half, squash down, rotate, flip, repeat 20 times. It may help to sprinkle a bit of flour on top so when you flip it won’t stick to the kneading surface. If it sticks to your hands on top, again a very light dusting of flour before kneading. I soaked whole flax for awhile first and since it wasn’t ground added extra flour besides.
Ron says
I am not a professional baker but have baked a lot of bread. And I long ago gave up weighing and measuring flour. You add flour until the dough is soft, silky on the outside and relatively non-sticky. The amount can vary day to day based on temperature and humidly, etc. That is why baking bread is an art that you learn as you go rather than a strict science. BTW, I mad this bread last night without measuring any flour and it turned out GREAT!
Niki says
As a lucky recipient of half his loaf I have to agree!! It was amazing!!
Matt Ellis says
Perfect, except the loaf stuck to the glass bread pan I used, in a few places, tearing it. Even though I oiled it. Anyone have any advice on how to prevent this? I’m new to bread making. Thanks
Maybe lightly grease the pan beforehand?
Alex says
Also be sure to follow the “let stand for five minutes” direction after taking it out of the oven. If you try to dump it out right away it will almost always tear. After sitting for five minutes you might ease the sides with a butter knife before dumping onto the cooling rack. I use a heavy duty metal bread pan if that makes any difference.
I shared some of this bread with friends and they loved it, but mostly hoarded it to myself.
Sophie says
Thank you for this recipe! It was so easy to make and looks delicious! I put walnuts cause I didn’t have any sunflower seeds.
I forgot to make cuts on the top but it seems to have turned out ok. Can’t wait to taste it! ?
Patrick says
Oops! My apologies about the instructions comment, looks like my reading was what lacked detail.
Sorry, great recipe, bake on!
Patrick says
I’ll be using your delicious recipe again!
My only complaint was the big sell on it, then a few key details being omitted in the recipe instructions. For a novice baker it might be confusing, ie. When do I add the yeast?
I turned it into a sourdough bread, using 3/4 cup active sourdough starter, 3/4 warm water in place of the 1 1/2 cups warm water and quick yeast. I made the mistake of using ground flaxseed which thickened the dough, so that it only took 3 cups flour.
I extended the fridge time to overnight, then the final rise took another 8 hours.
Very good though, with a subtle sourdough taste.
Also I used all whole grain, mostly red fife, wheat, and a little rye.
I still don’t get how a bread can be called ‘whole wheat bread’ and use half white flour. All whole wheat is fine, if it’s a good quality flour.
Thanks for sharing your recipe!
Brianna says
I made this bread last week. It was soooo good. I made it again this morning but added 1 tbs of vital wheat gluten and an extra 1 1/2 tbs water. It improved the texture. Giving it chewier bite. This is a keeper.
Jessica Diaz says
Hi Dana! I tried this bread recipe today I followed instruction but At first I had troubled with kneading the dough was too tough and I can’t able to knead it then when it was baked the bread is too heavy inside but not as crunchy outside please enlighten me what went wrong.
Thanks and God Bless.
Michelle says
I made this yesterday, and my husband and I loved it! The recipe I was using had a lot of butter and sugar, so I’m glad to have a tasty bread that doesn’t use either. One question though, what would need to change to make two loafs instead of one?
Hi Michelle, it should double well without much modification. Maybe bake slightly longer if baking both loaves at the same time.
Chrissy says
Hi, made this bread today. I measured a T of whole flaxseed, then grounded it. Maple syrup was my sweetener of choice and I only had King Arthur flours on hand. I was also having a little confusion on the exact amount of flour added, I noticed a few others were too. Personally I kneaded in an additional 1/2 cup of whole wheat pastry flour. Didn’t have any sunflower seeds so I used double the oats. Messed up and let it rise first in the fridge then on the counter (I’m quite the amateur bread baker). I let it rise a little extra in the loaf pan until it was nice and tall. No joke, this recipe is indeed extremely forgiving. This bread came out absolutely stunning after 21 mins in the oven. A crisp crust and a wonderfully flavorful, tender crumb. Thanks for the recipe, Dana, and thank you to all the reviews/comments that helped me along my way.
Sona says
Can you use all whole wheat instead of mixed?
That should work, but it will turn out more dense and nutty.
Adrienn says
Hi!
I have two things here so far that are quite puzzling. So, your recipe states that the total time is 3 hrs 15 mins, but as Im going by the steps it turns out I should be resting the dough for 2 hrs room temp, 2 hrs fridge, and finally 1 hour before baking. That makes 5 hours rest time, am I misunderstanding something? Also, ingredient list calls for 3 and 3/4th cups of flour mixture. Then, after combining them as per instructions, there comes a part saying ” Add flour until the dough is no longer sticking to the sides – about 3 3/4 cups total”. So if we were to combine all the flour before then there should be none left? Im really curious now, Im going to have it rest 1 hour room temp, 1 hr fridge and maybe 30mins in the pan, see what happens. Looks amazing though!:)
Rachel says
Is the flax seed you mention in this recipe ground or whole? It looks like in the pictures you are using ground but the ingredients don’t specify.
By the way, I’ve been making this bread (instead of getting store-bought) for the past few months, and it is excellent!
Thanks!
Wonderful! It’s ground. But whole would work, too.
Samantha says
Why step 5 (place a metal or cast iron pan with hot water in it)????
It steams and adds moisture to the bread!
Elbridge Price says
Hello! I am a novice bread baker and came across your recipe. I have some questions: Do you have any low carb bread recipes? (1) Can this recipe be adapted for a bread machine? (2) Can the recipe use white whole wheat flour? (3) Can the carbs be reduced? Thanks so much!
1) We don’t have any low carb bread recipes at this time. 2) Other readers have had success using a bread machine. We’d recommend searching the comments for more info. 3) For lower carb, you could maybe play around with swapping some of the flours for more nuts/seeds?
stephanie says
Dana, I am wondering why you have to refrigerate the dough. Why not just let it rise at room temperature, kneed, then rise again.
Thanks
If it rises in the refrigerator it allows for a slower more methodical rise, versus a quick one which happens in a warmer environment. Hope that helps!
Rhea says
I have made this bread twice the past week. I omit the flax, oats, and seeds, because I end up using it for French toast. Maybe next time I will make it with them all. I’ve noticed I have to add a considerable amount of extra flour for the middle of my loaves to get done and I have to cook it for about 45 minutes. I’m not exactly sure why, but I think it is a combo of not using the flax seeds and maybe not kneading long enough? Any ideas? I do really love the flavor though. It’s the only home made bread I’ve ever tried and it is amazing!
Rhea says
I WILL keep trying until I get it right! It tastes too good not to
Thanks Rhea! If your center isn’t getting done, I’d recommend reducing the heat slightly and cooking it longer!
Denise says
Can I split this dough up and make rolls from it? If so, do I need to do anything different? Suggestion on what size rolls to make if that is doable? Need for Thanksgiving if it works. Please let me know. Many thanks.
I think that should work! However, can I suggest this recipe as a guide instead?
Denise says
Thanks for answering. I will just make the rolls. But if you ever get the chance, the reason I was interested in the other recipe was because it was more whole grain, so healthier for us. Perhaps you could try it sometime and let us know if it works. I have never made bread before so I will start with the simpler one.
Carol Ann says
Wanted to try to make homemade bread this week so I went with this recipe because it looked easy enough and had good comments (as usual)! Well I was not deceived! I used only unbleached all purpose flour and it did the job. I think I should’ve used a bigger pan though, because my bread reaaaalllly rised a lot in the oven and some parts in the middle are a bit undercooked (I was afraid to leave it longer because the top was getting pretty brown and hard). So I’ll be more careful next time but I’ll stay with this recipe!
Greg Wilson says
After you add the initial flour and beat it you add 3.5 cups until it no longer sticks to the side. Is that 3.5 cups wheat or regular unbleached flour?
Hi Greg, Up to 3 3/4 cups total flour between the two types.
Lynn says
I have recently found your blog and have enjoyed it so much. Have you tried this bread yet with gluten free flour? Maybe even Bob’s blend?
Thanks so much!
I haven’t! But if you do, let me know!
Lydia says
I can’t wait to try this! It looks so good. With the AP flour the “whole grain” title is misleading though…
Zainub Farooqi says
Hi, is it okay if you substitute the AP flour with whole wheat flour?
That should work!
sally says
followed the directions to the letter. came out doughy. sadly disappointed
Pam says
I have been making bread for over 20 years and today I made your recipe. It was both easy to make and very delicious.
Ginger says
Keep scrolling down and you’ll find them ?
Ginger says
Thoroughly thrilled with this luscious loaf ?✌️?☺️ Your recipe made my first loaf of bread ? I’m recommending you to all my vegan friends ?