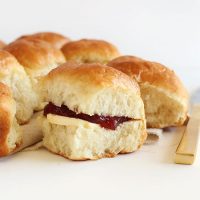
Enough teasing. It’s time to share these perfect, fluffy vegan dinner rolls with you guys. Thanksgiving can officially arrive any time now.
I’ve always been a sides kind of girl to be honest. The main dishes are great and all but green bean casserole? Dinner rolls? Mashed potatoes? Yep, that’s where I’m at.
It’s been that way ever since I was a kid. I guess that means I never grew up? Eh, I don’t care much as long as I can have two or three of these rolls to myself come dinner time.
If you’ve ever been intimidated by the idea of making rolls from scratch, don’t be! It’s a really simple process, especially this recipe.
These rolls require just 7 basic ingredients and very easy-to-follow methods. Nothing complicated or exhausting here. You know that’s not our game.
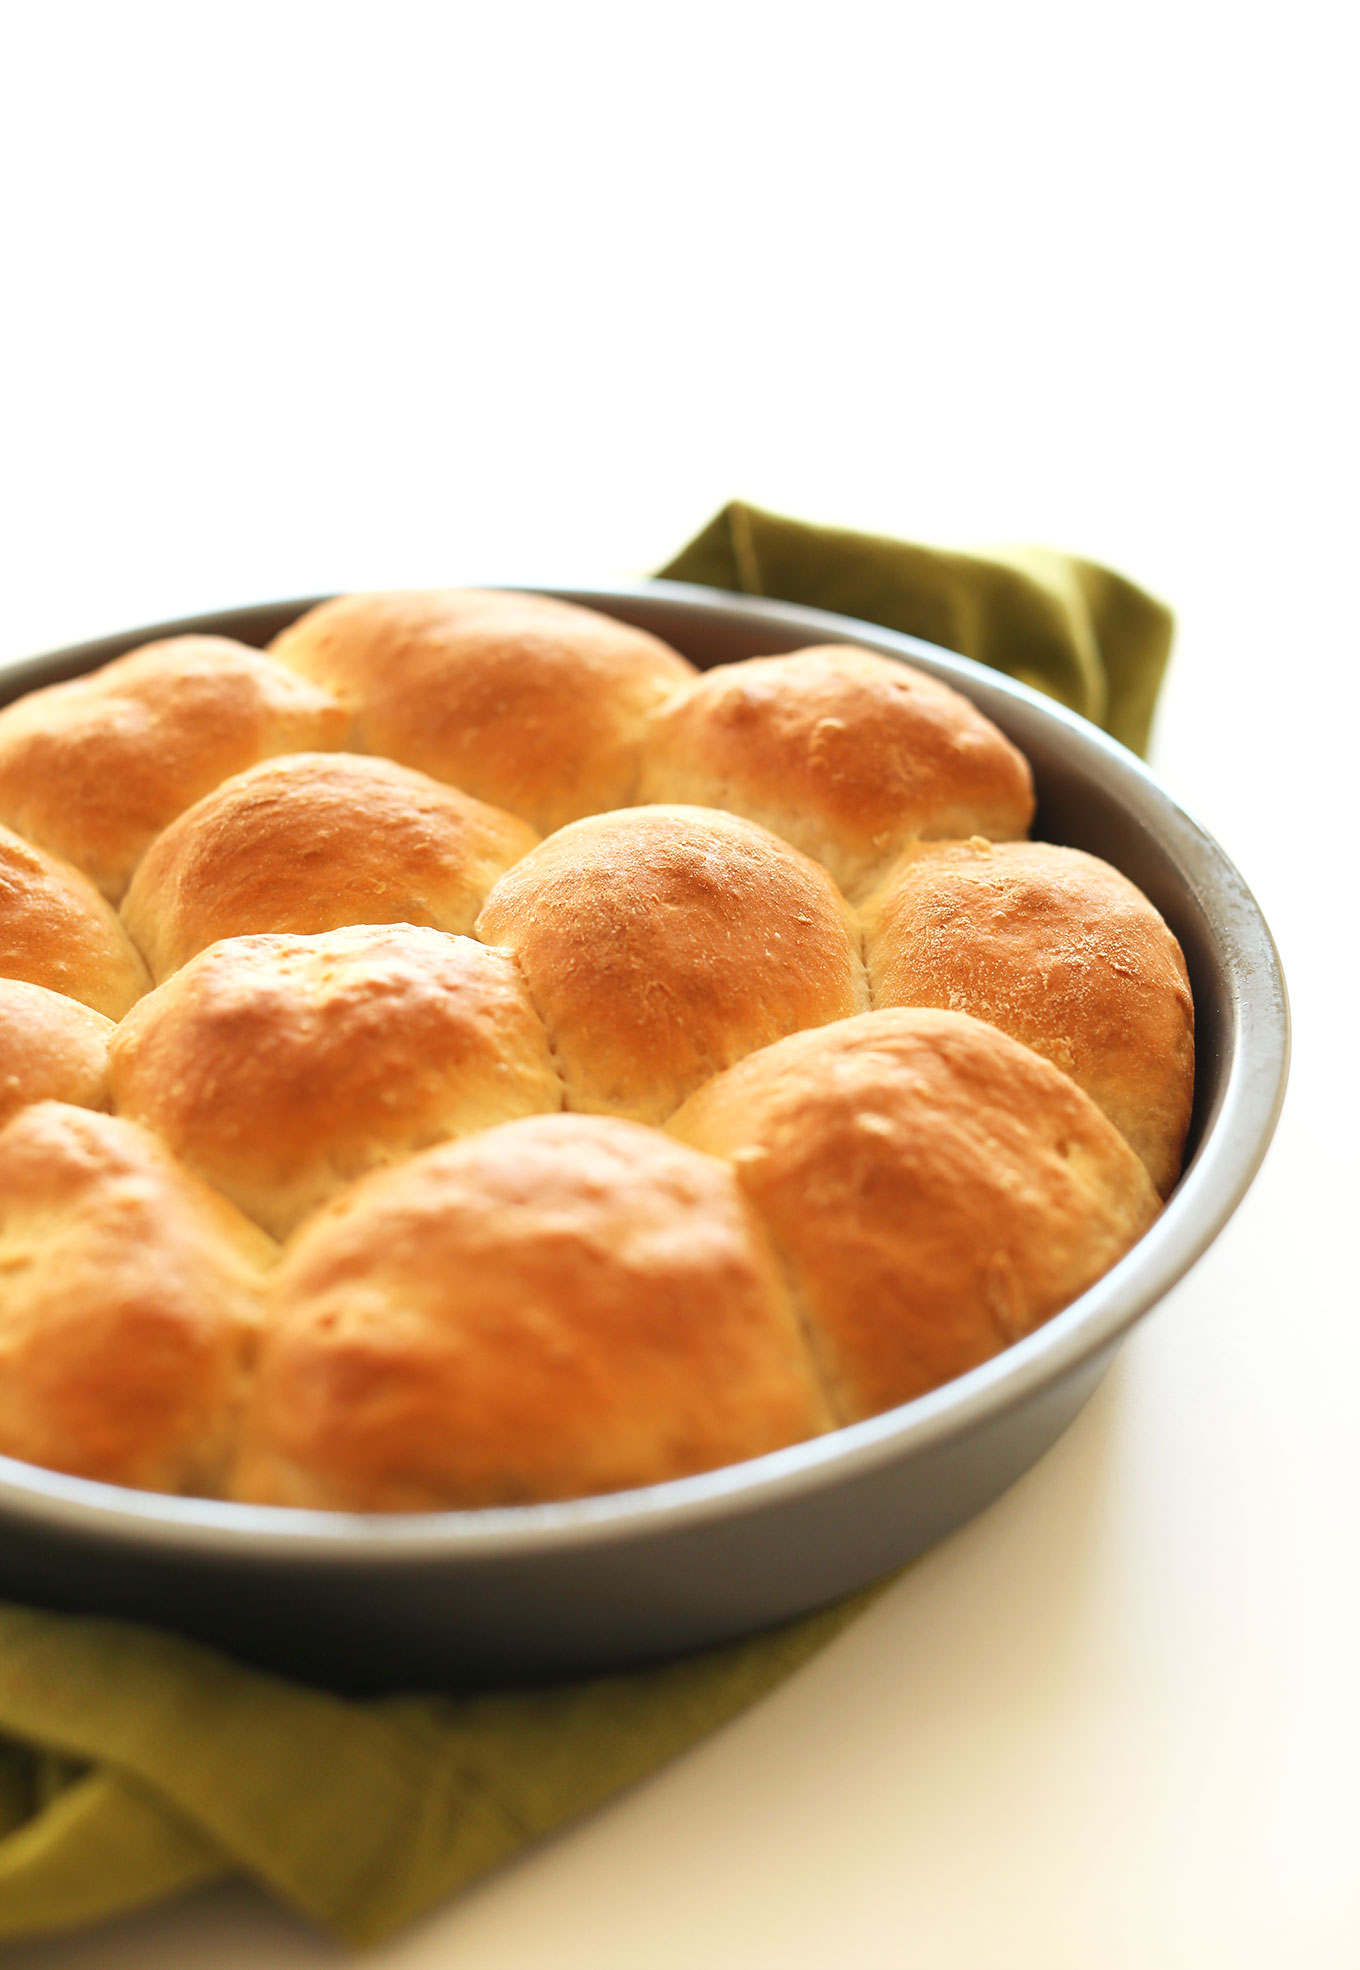
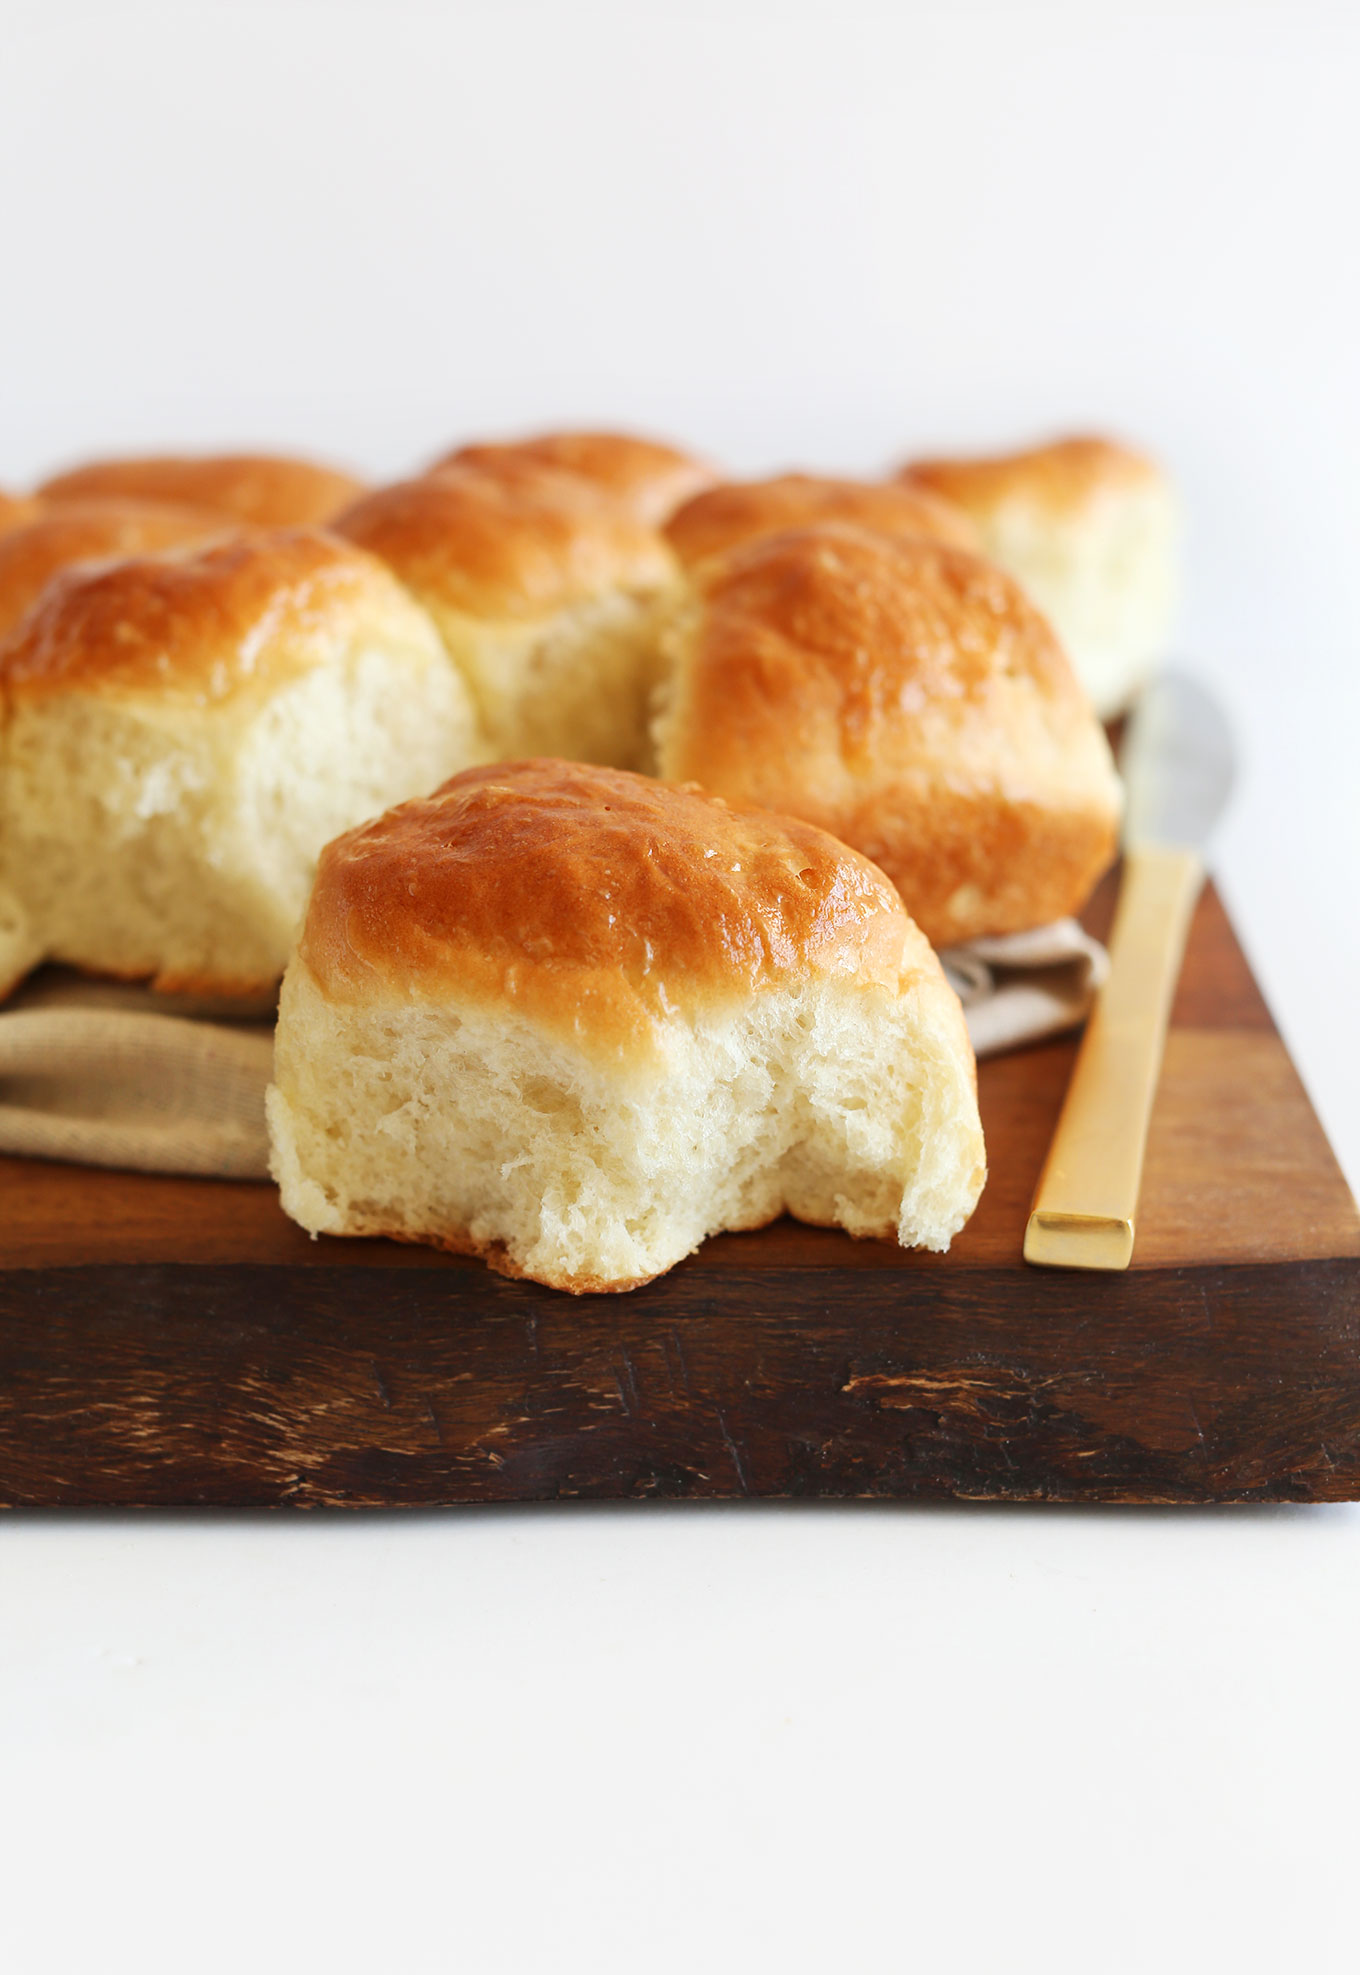
Despite being ridiculously simple, these rolls deliver big time in flavor and texture.
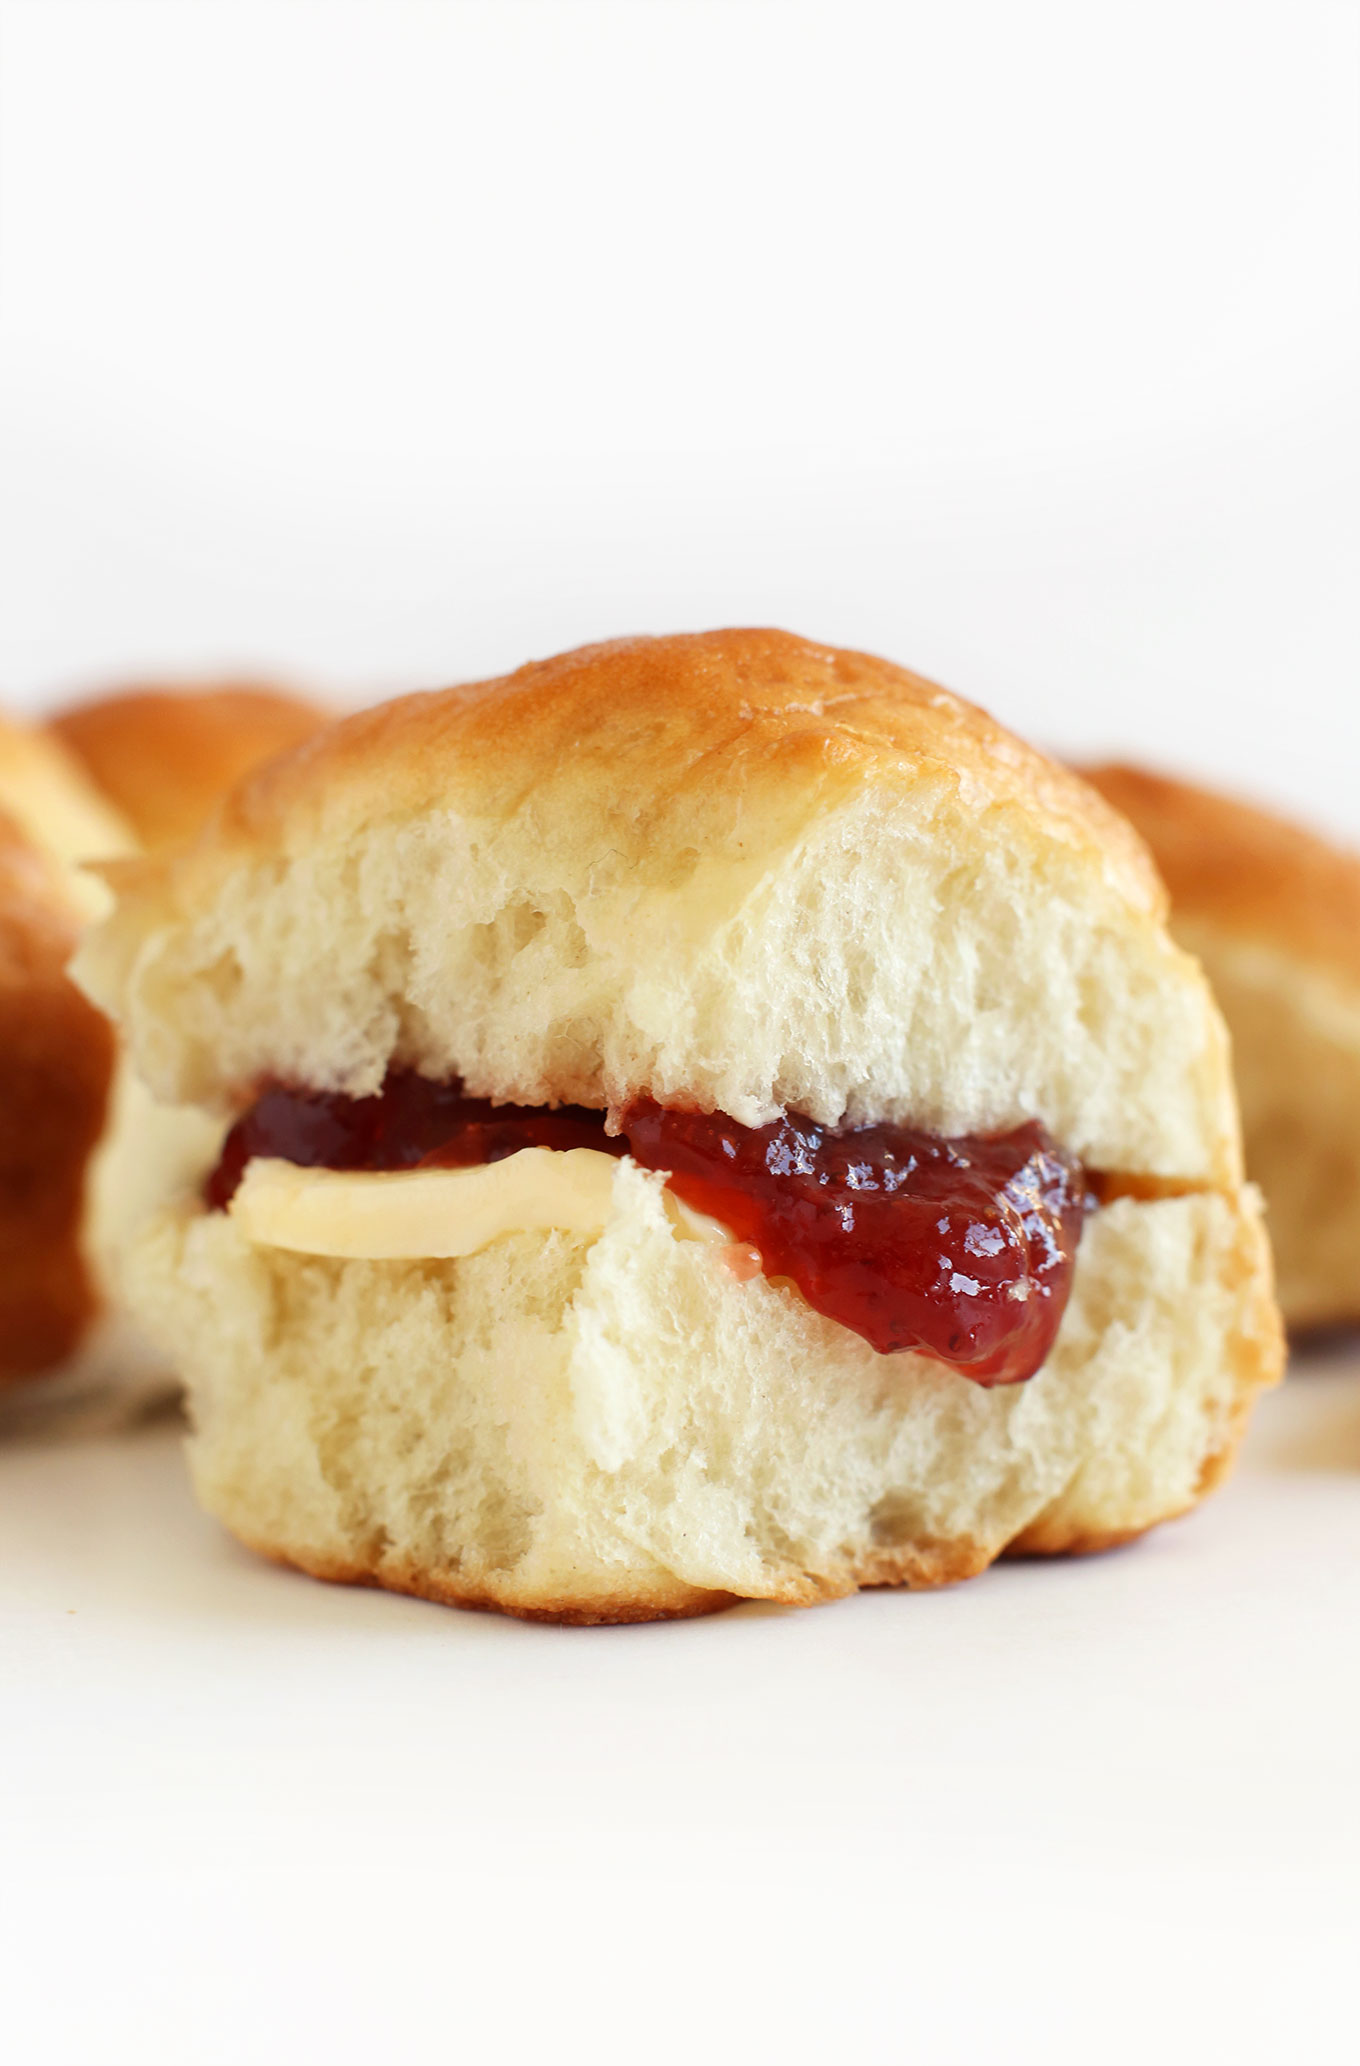
They’re fluffy, buttery, and perfectly tender, just begging to be slathered in some vegan butter and jam. (Don’t act like you’re above butter and jam on a biscuit, Rhonda. You’re not fooling anyone.)
Make these rolls this holiday season and ‘wow’ your family. They’re
Simple
Buttery
Fluffy
Tender
Savory
Flaky on the top
Mega soft in the center
& Perfect for scooping up sauces and jam!
If you guys give these rolls a try, let us know! Leave a comment below, on Facebook, Twitter, Pin it, or take a picture and tag it #minimalistbaker on Instagram! Seriously, we’re all over the internet and we love seeing what you cook up. Cheers!

Simple Vegan Dinner Rolls
Ingredients
- 2 cups unbleached all-purpose flour (sub up to 1/3 with whole-wheat pastry // plus more for kneading)
- 1 packet rapid-rise yeast
- 2 Tbsp organic cane sugar
- 1/2 tsp sea salt
- 1/4 cup water
- 1/2 cup unsweetened plain almond milk
- 2 Tbsp vegan butter + more for topping
Instructions
- In a large mixing bowl, combine 3/4 cup flour, yeast, sugar and salt.
- In a separate mixing bowl (or small saucepan over medium heat), microwave the water, almond milk and butter until warm – about 110 – 120 degrees F / 43 – 48 C (~55 seconds). It should be the temperature of bath water. If it’s too hot, it can kill the yeast.
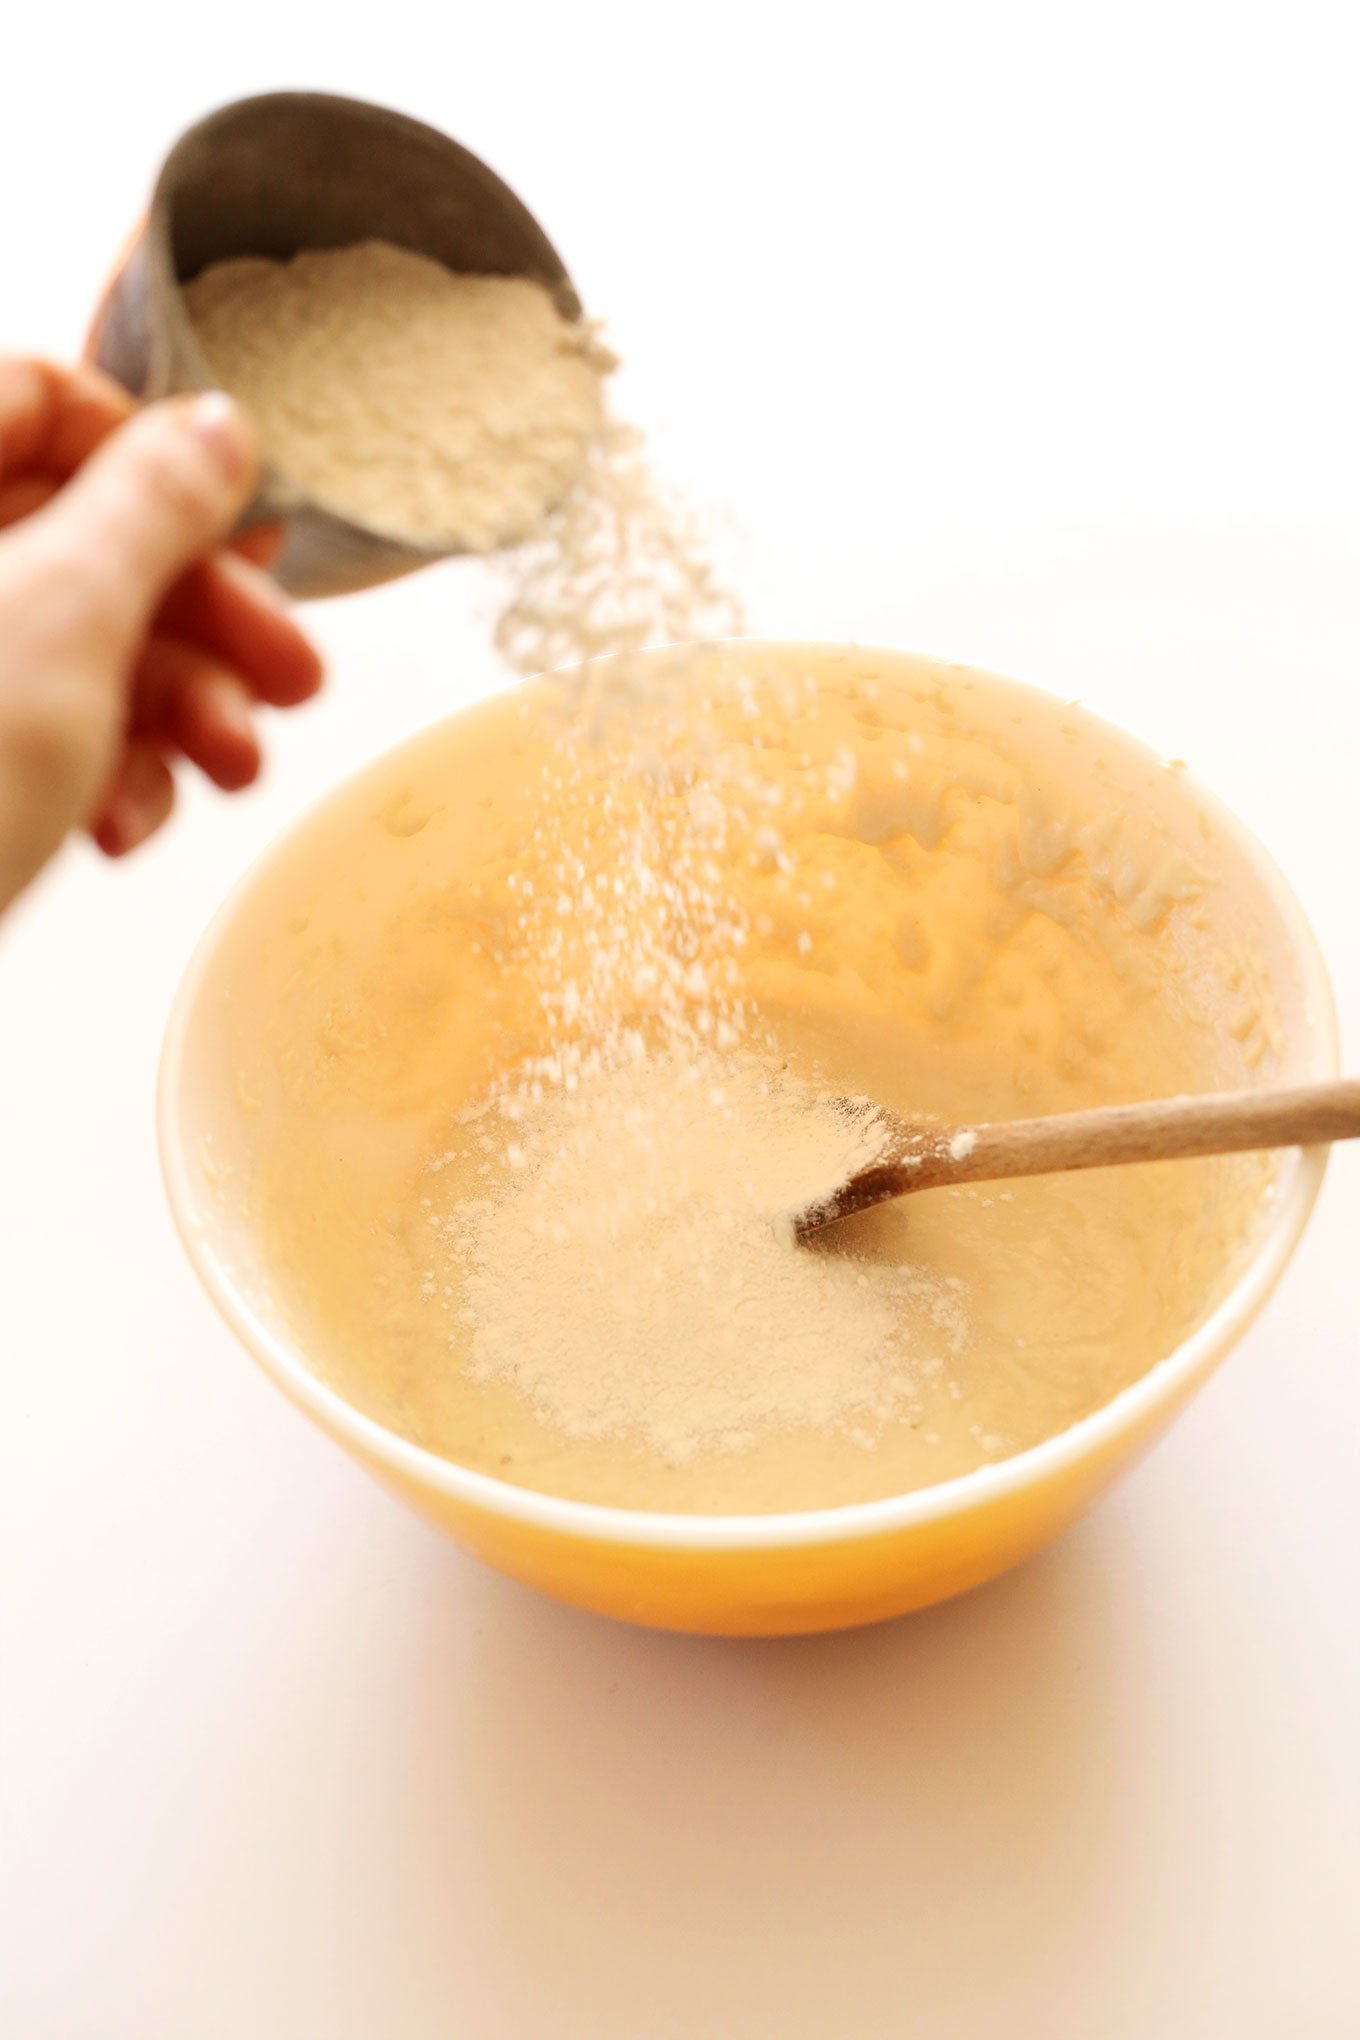
- Add wet to the dry ingredients and whisk or beat for 2 minutes, scraping sides as needed.
- Add 1/4 cup more flour and beat for another 2 minutes. Then, continue adding flour 1/4 cup at a time until you achieve a soft dough (we added the remaining 1 cup, but you can add more if it's too sticky to handle). Transfer to a lightly floured surface and knead until smooth and elastic. Then let rest 10 minutes.
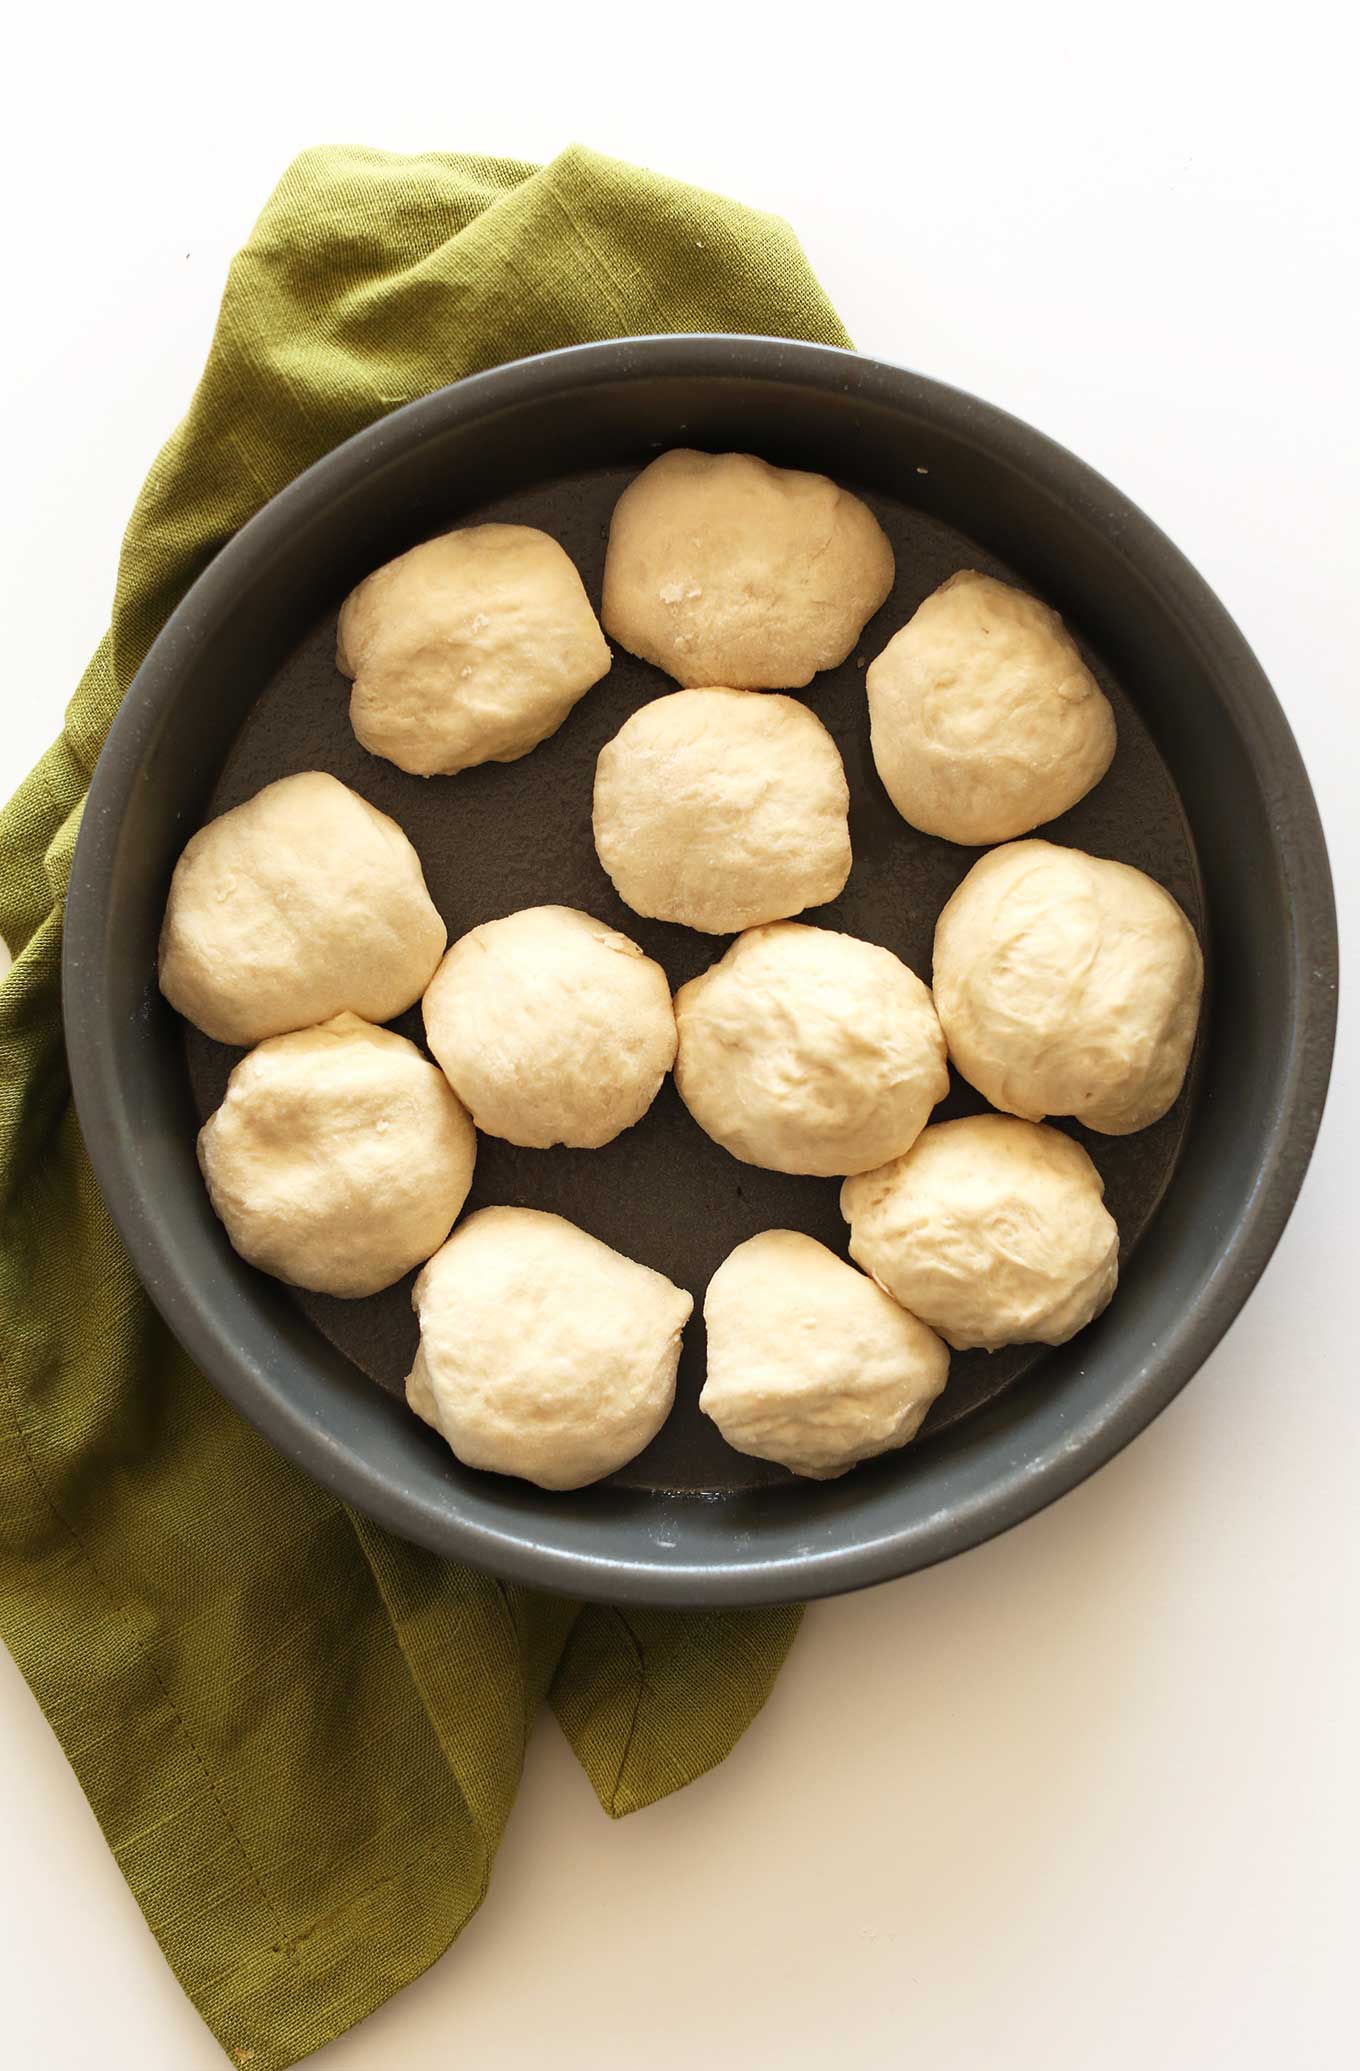
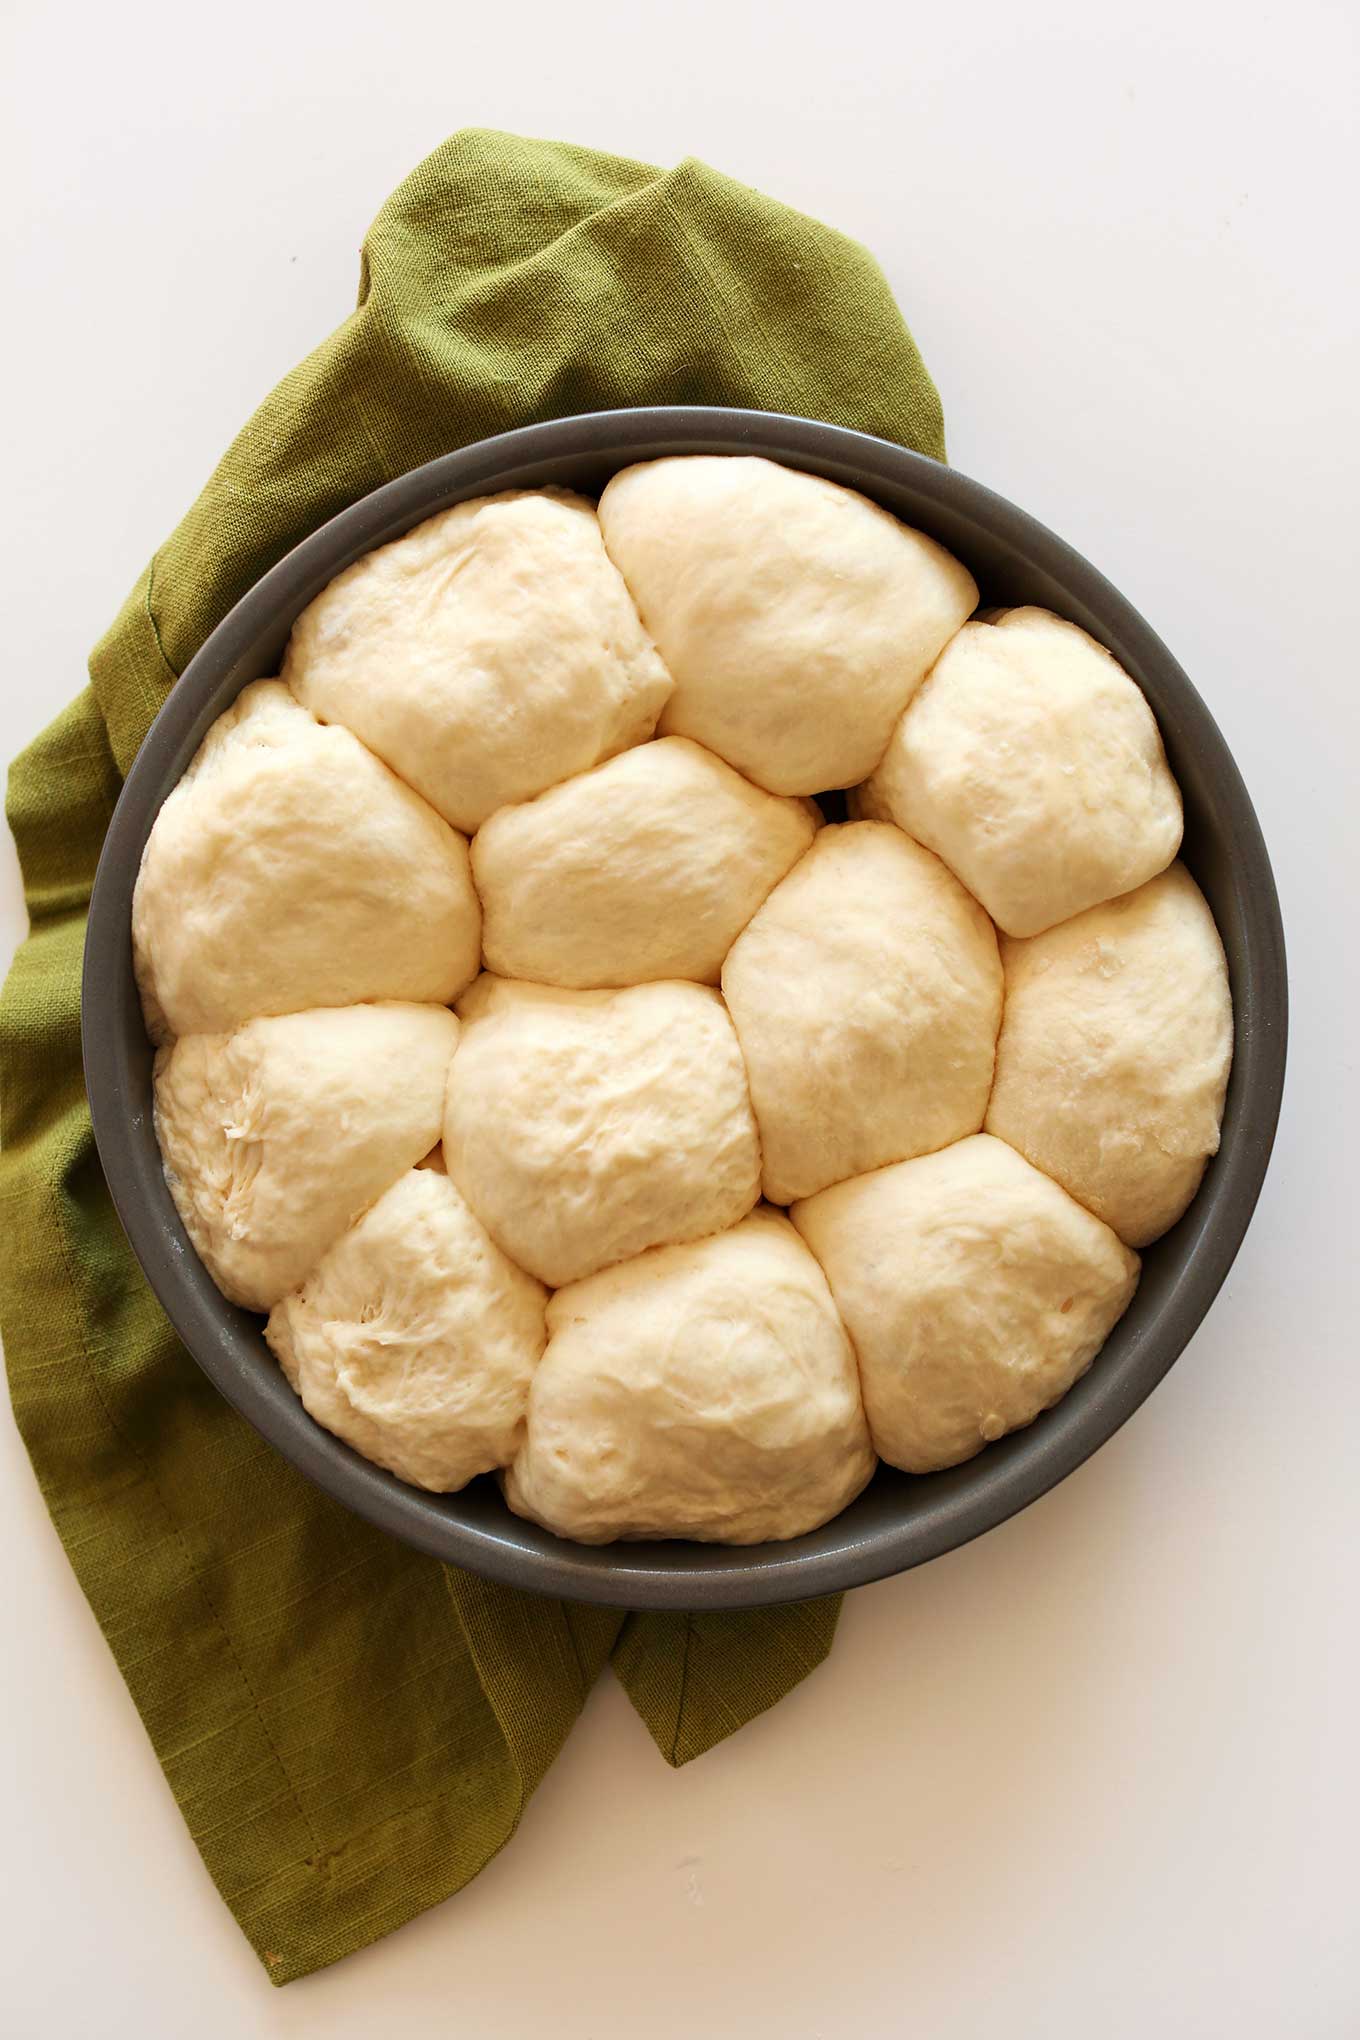
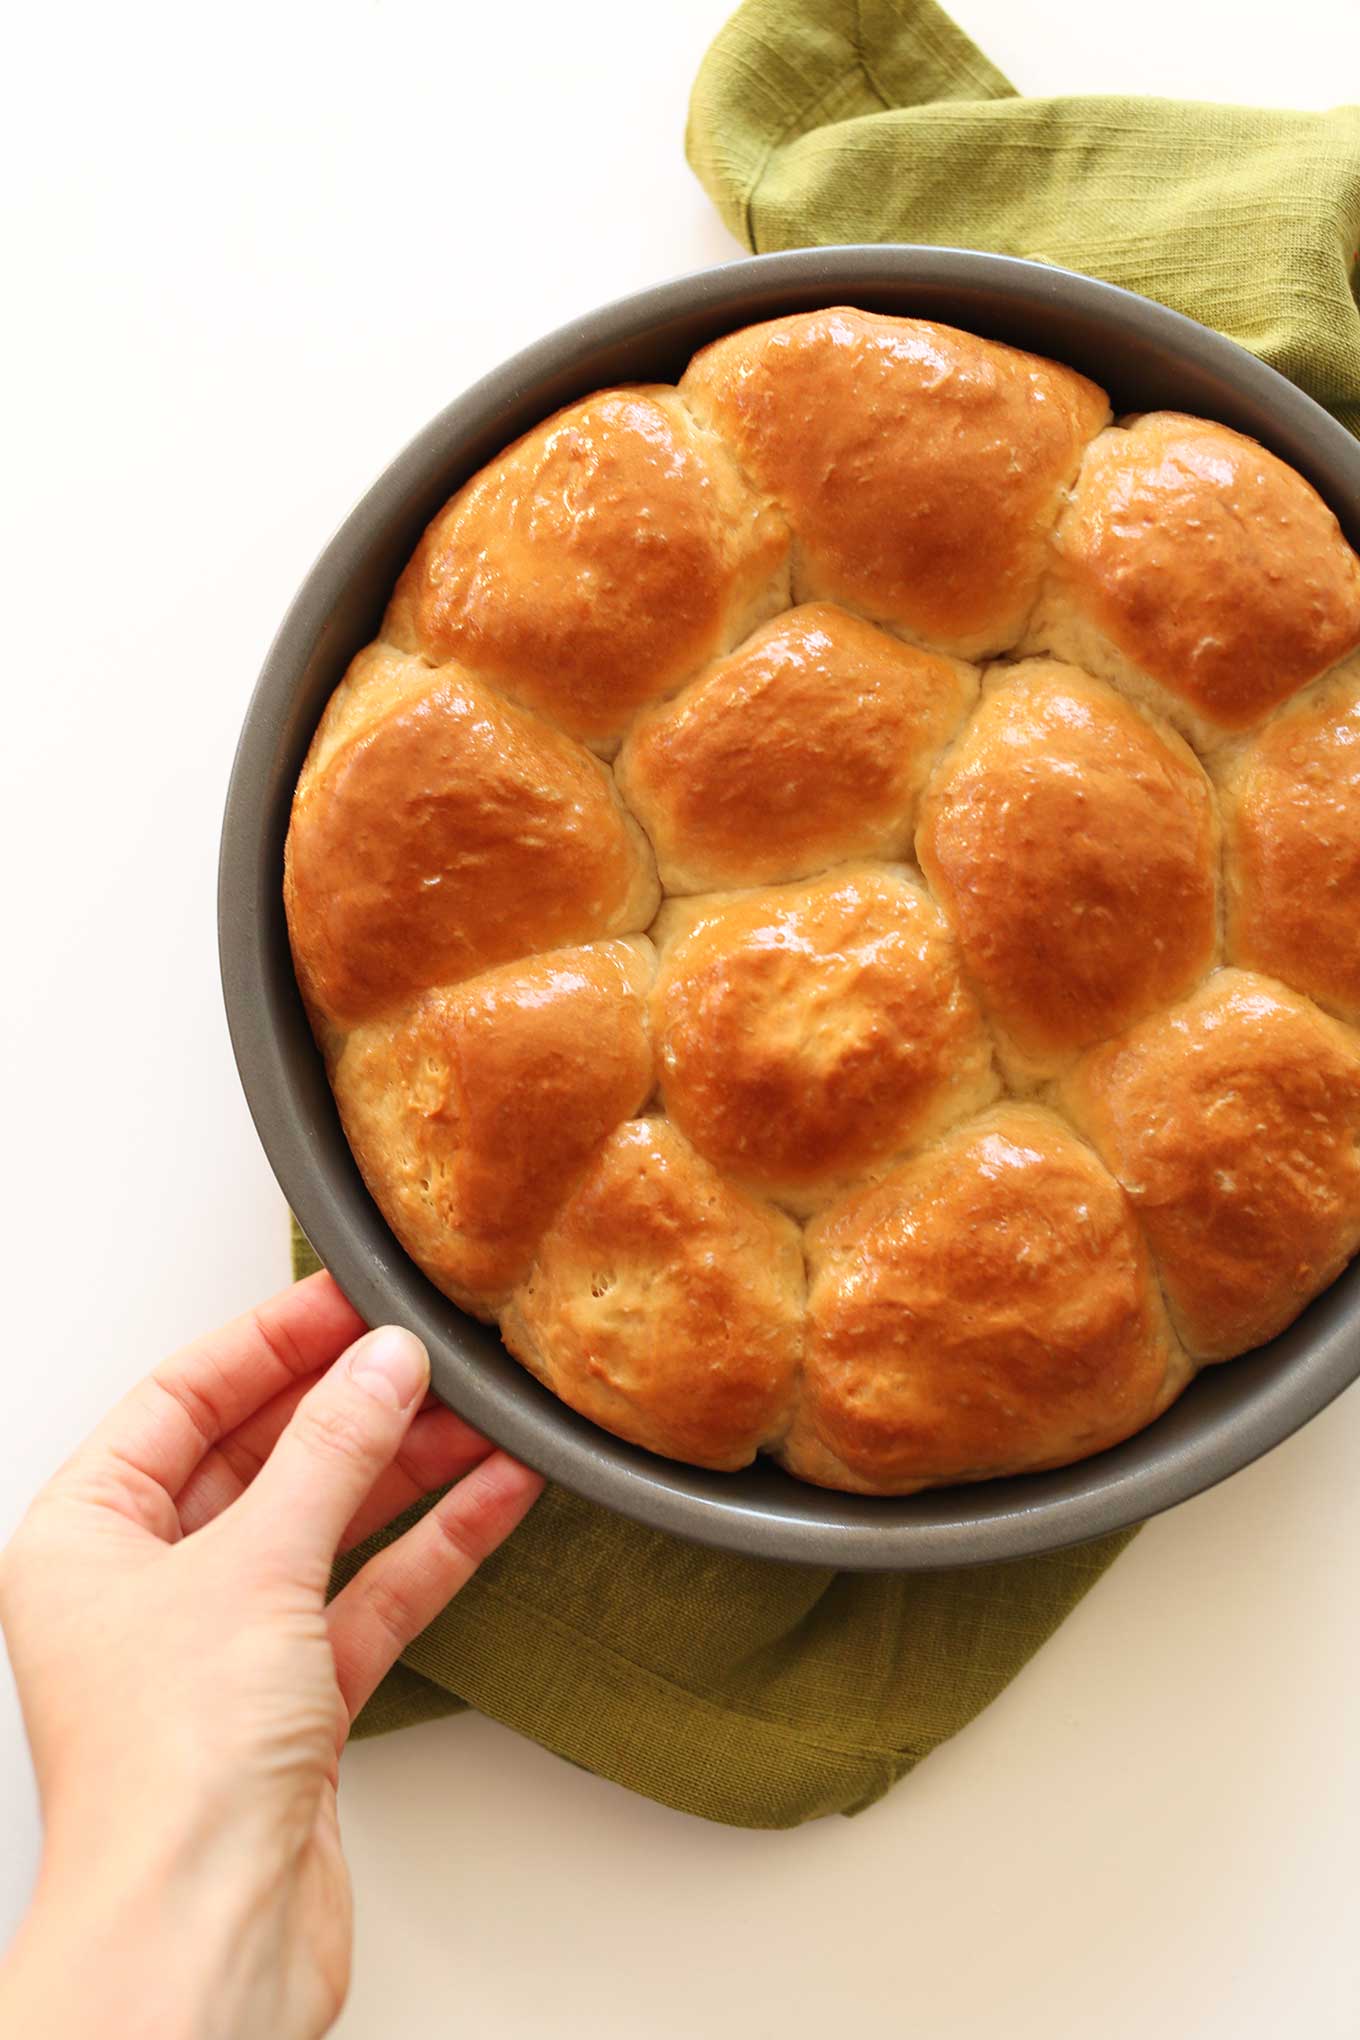
- Divide the dough into 12 pieces, shape into balls, and place in a greased 8×8 dish or 8-inch round pan. Cover and let rise in a warm place until doubled in size – about 30-45 minutes.
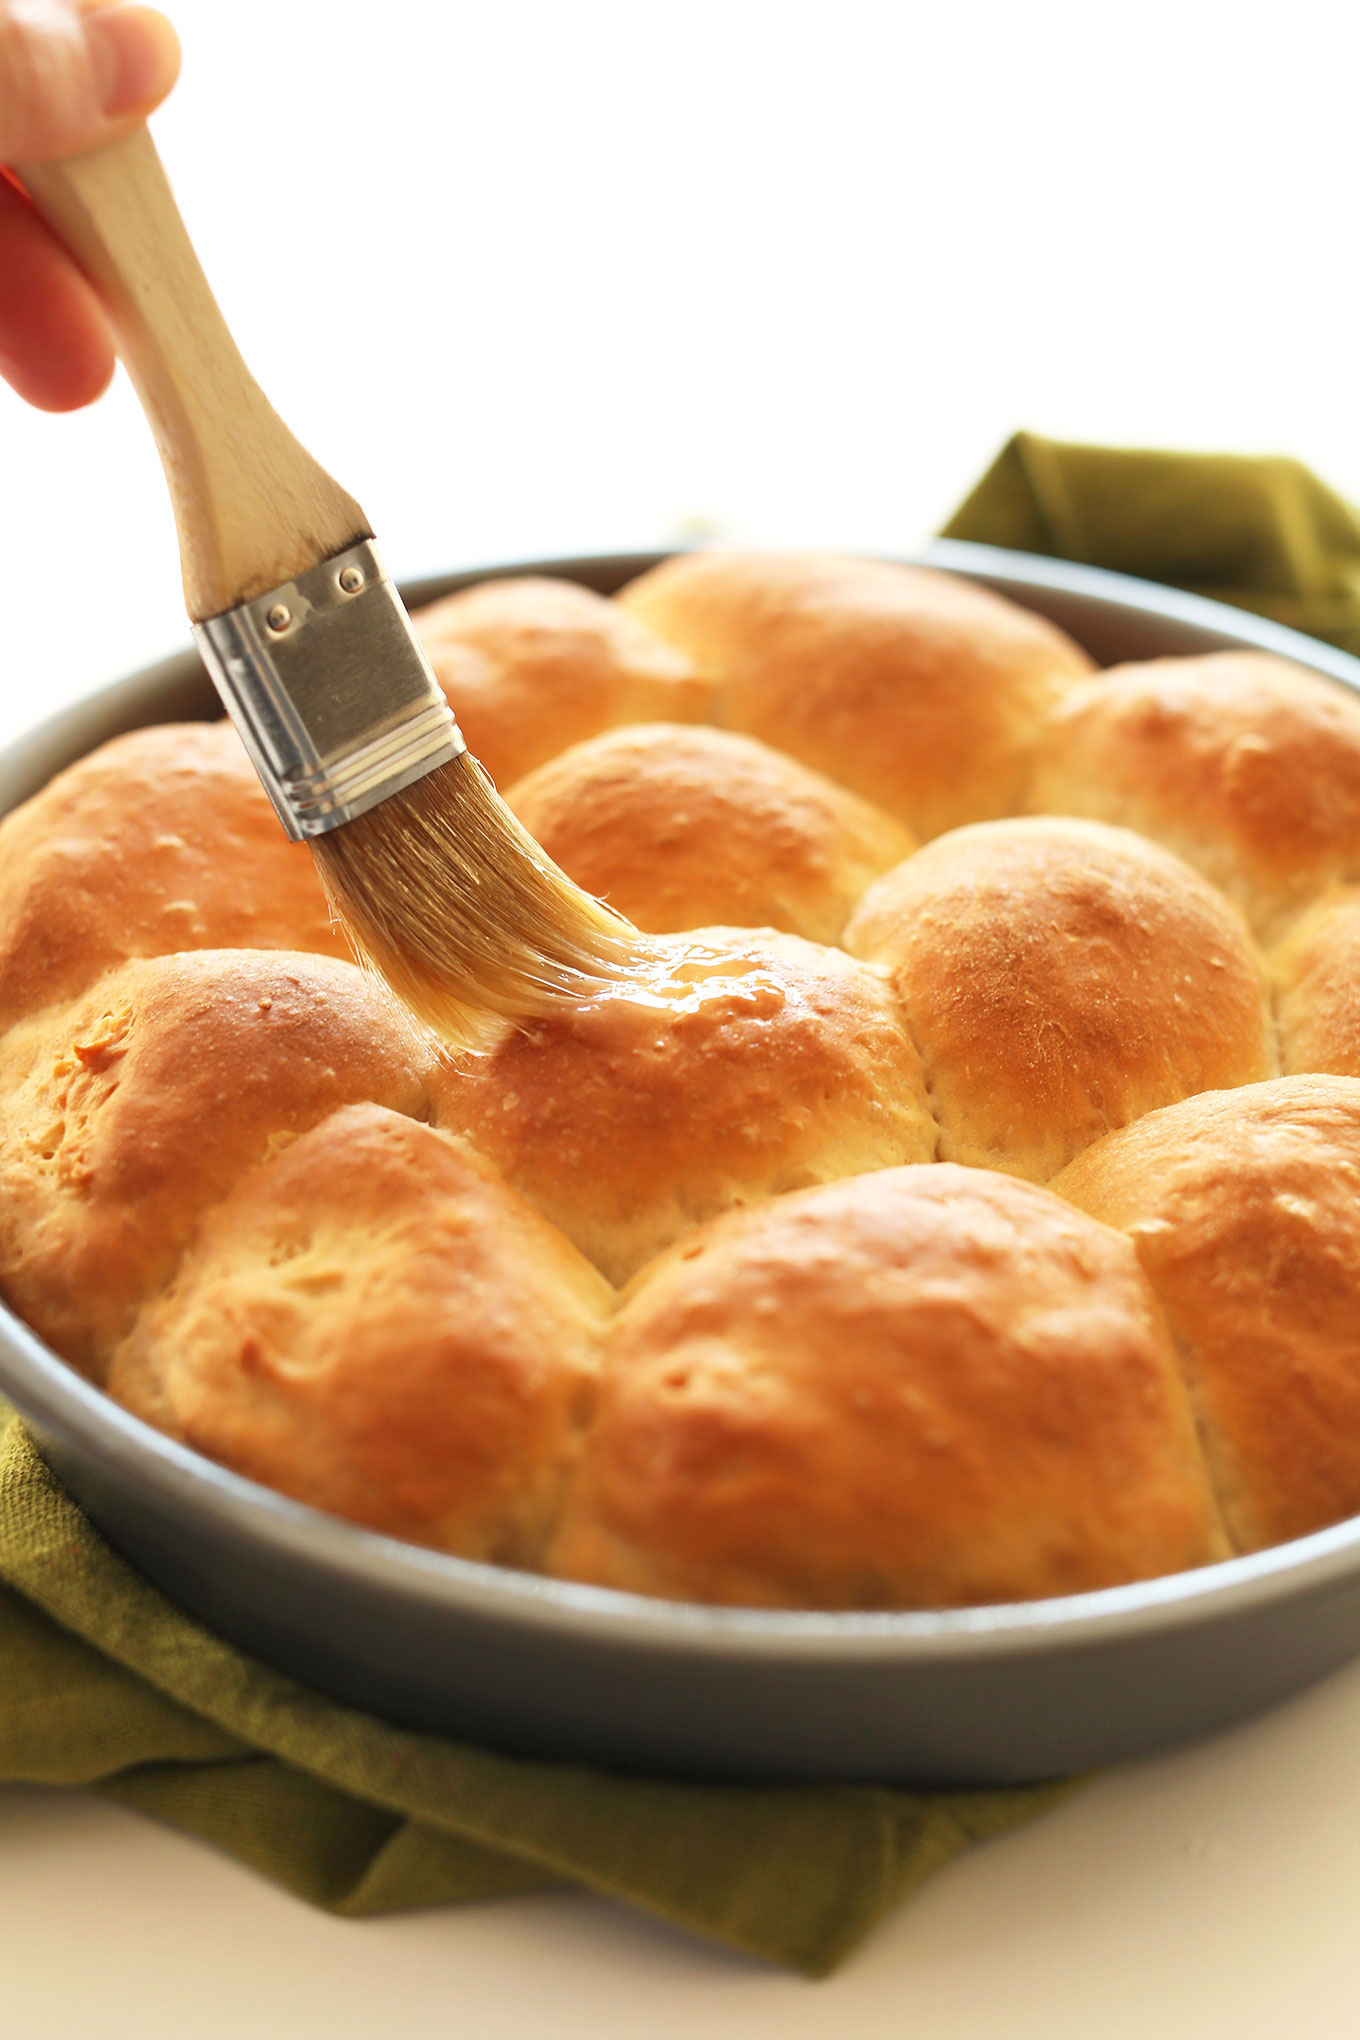
- Preheat oven to 375 degrees Fahrenheit (190 C) and brush the tops with additional melted vegan butter (optional). Bake for 18-20 minutes, or until fluffy and light golden brown.
- For best results, serve immediately as is, or with vegan butter and jam of choice, such as Orange Thyme. Alternatively, store them loosely covered with a kitchen towel for up to 3 days on the counter. For freezing, we recommend freezing pre-baked, then when ready to prepare, let them thaw, rise, and bake.
Video
Notes
* Heavily adapted from All Recipes


Chris says
Hi, can I use gluten-free all purpose flour 1:1 and what about monkfruit or coconut sugar as a substitute for cane sugar? Can’t wait to try these. Thank you.
Hi Chris, GF flour won’t work well in this recipe, unfortunately! Check out this recipe for a gluten-free dinner roll option. It would be okay to sub coconut sugar in that recipe. Enjoy! :)
Maria says
Easy, perfect. My kids devour them. Really great to use for lunchboxes too. I wouldn’t need to look for another recipe, this has me covered!
Yay! We’re so glad you and your kids enjoy these rolls, Maria. Thank you for sharing! xo
Kristina says
Has anyone made these wjth water rather than dairy free milk? Love the simple ingredients!
Hi Kristina, not to our knowledge, but they might be okay – just not quite as flavorful. Let us know if you try it!
C says
Delicious!! I made without any vegan butter by accident as I thought it was just for the top, still turned out great!!
Amazing! We’re so glad your rolls still turned out well. Thank you for sharing your experience! xo
Brittney R says
It was just me and my husband for Thanksgiving this year. I never made dinner rolls from scratch before, so I gave this one a go. I’m so glad I did because omg these were incredible. It was hard to resist not eating them all by myself. Definitely going to be making these again!
We’re so glad you gave the recipe a try and will be making the rolls again in the future! Thank you for the lovely review, Brittney! xo
Noisy says
I made 4 dozen of these for a veg/vegan Friendsgiving event at my cafe. I didn’t multiply the recipe bc I wasn’t sure if it’d work but I see from a comment before me that it would (should have read the comments!).
I did them in the Kitchenaid – first with the paddle and then the dough hook when adding the last of the flour. Go slow and don’t overmix.
They turned out great, really fluffy and tasty and they looked beautiful too.
We’re so glad you enjoy the rolls! How fun to have a Friendsgiving event at your cafe :) Thank you for sharing your experience! xo
JJG says
I trialed this recipe the Monday before Thanksgiving and plan to bring these! The rolls were so soft and yummy. It was easy to make even while mixing and kneading by hand. I substituted turbinado sugar for cane sugar along with oat milk for the almond milk and it turned out well. I do have a few questions: Does this recipe double? If so, could I bake it on a sheet tray and would I adjust baking time?
We’re so glad you enjoy the rolls and will be making them again for Thanksgiving! Other readers have reported success doubling the recipe! It would be best to bake in something like a 9 x 13-inch baking dish with sides (vs. a sheet pan) so the edges don’t dry out too much. Let us know if you give it a try!
Susan says
Hi, I am thinking of putting this mix in my bread machine on dough setting. Any thoughts or suggestions?
Hi Susan, we don’t have a bread machine, so we’re not sure! Let us know if you try it out!
Delia says
These rolls were so simple to make and so delicious to eat! Thank you for the recipe. I don’t think I’ve ever made rolls before, and these turned out perfectly. Minimalist baking is definitely for me!
Oh yay! We’re so happy to hear this, Delia. Thank you for making the recipe and sharing your experience! xo
Tammy says
Could I substitute the sugar with honey or maple syrup or applesauce? Is so, how much would I use?
Thank you!
Hi Tammy, yes! A similar amount of honey or maple syrup should work well.
Frankie says
Would this work with gluten-free flour?
Hi Frankie, It won’t, unfortunately! Check out this recipe for a gluten-free dinner roll option. Enjoy! :)
Dawn says
I just baked a batch of 48 for Thanksgiving dinner tomorrow. Multiplied the recipe x4 and used a very big mixing bowl. It was not hard to do ( and I don’t like math!) just divide the large ball of dough into 4 pieces, shape each into a ball, then cut each ball in quarters and each quarter into 3 pieces and shape them. 12 per 8×8 cake pan. You’ll need 4 pans. Voila! They came out super fluffy and golden brown. Last year they were very popular at Thanksgiving especially with the younger crowd. Thanks! Great recipe!
Amazing! We’re so glad these rolls were a hit last year and that making a larger batch worked well. Thank you for sharing your experience, Dawn! Happy Thanksgiving! xo
Belinda says
I made these, and they came out exactly as pictured. The only adjustment that I made, is I added the instant yeast into the milk and water as the proofing step I follow for other bread recipes. I decided to melt the butter and warm the milk separately, as I could control the temperature before adding my yeast to the liquid ingredients.
For something which I’ll probably make many more times, I like that there’s no unnecessary steps. My kids like the dinner rolls and they want me to make them again, so that’s a win.
A note on the rising step, I did need to allow extra time because it’s cold here at the moment. It pays to be patient so that the rolls don’t come out dense; give those rolls all the time they need to grow to the right size before baking. 🙂
Yay! We’re so glad you and your kids enjoy these rolls, Belinda. Thank you for sharing your experience! xo
Rielos says
I just made these and they came out perfect! I followed the recipe to a tee using the metric measurements.
Yay! We’re so glad you had success with the recipe. Thank you for sharing your experience!
Sara says
What is “a packet” of yeast? For those of us outside of the states
Hi Sara, 1 packet of yeast is ~2 1/4 tsp. Hope that helps!
Julie says
I make this recipe every month. I love it and it comes together beautifully each time.
Yay! We’re so glad you enjoy this recipe and keep coming back to it, Julie. Thank you for sharing! xo
Monica D says
I used half AP flour and half whole wheat. These turned out perfect! The best rolls I’ve ever made!
We’re so glad you enjoyed them, Monica! Thanks so much for the lovely review. xo
Lisa Martin says
I am an easy mark when it comes to soft dinner rolls! I’d love to try these but I am wondering if these could be made using a stand mixer? Perhaps doubling the recipe for enough volume to use dough hook to knead.
I have mild arthritis in my hands and kneading is a little difficult.
Hi Lisa, we think it’s worth a try! Some readers have reported success with a stand mixer, though one did report the rolls dried out a bit. We would suggest just being careful not to over-mix the dough!
Amber Yuen says
Hi, I’ve made this a few times and I love the results! Soft and fluffy, super delish! However, I was wondering if I wanted to freeze this, do I freeze before or after baking? How do I reheat? Can I rewarm in oven, or let it defrost overnight in fridge, or at room temperature?
Whoop! We’re so glad you enjoy this recipe, Amber. Thank you for sharing! We would recommend freezing before baking, then thaw the night before in the fridge. Once completely thawed, proof covered with a towel in a greased baking dish as your oven preheats, then bake as instructed. Hope that helps!
natasha says
is there something i could do to make active dry yeast work just as well here? like a longer or additional proofing step?
Hi Natasha, We’ve only used rapid rise yeast in this recipe, but we think active dry yeast will work. If using active dry yeast, you could add the yeast and the sugar to the warmed liquid ingredients instead of the dry, and let it proof (get foamy) for ~10 minutes before adding the wet ingredients to the dry. Hope that helps!