My mom used to make her own bread and yogurt from scratch.
I mean, come on. How cool is she?
I remember learning that and thinking my mom was the most awesome hippie mom ever and I wanted to do the same if I was ever a mama.
The bread-making season in our house ended sometime around the arrival of 10-pound me. But can you blame her? She had two babies to look after and who has time to make bread with so much life happening?
Well, the good news is, you do have time to make this bread. I even speculate you could make it with a baby on your hip because it is literally a dump, mix, rise and bake kind of bread! Let’s get to baking!

This recipe is simple in both preparation and ingredients.
Just 9 basic ingredients that are very forgiving. If you don’t have any of the seeds or oats on hand, just omit them! It’s still totally doable.
With a short 20-minute bake time, hands on prep time is only 15 minutes + the rise! Hello, free time.
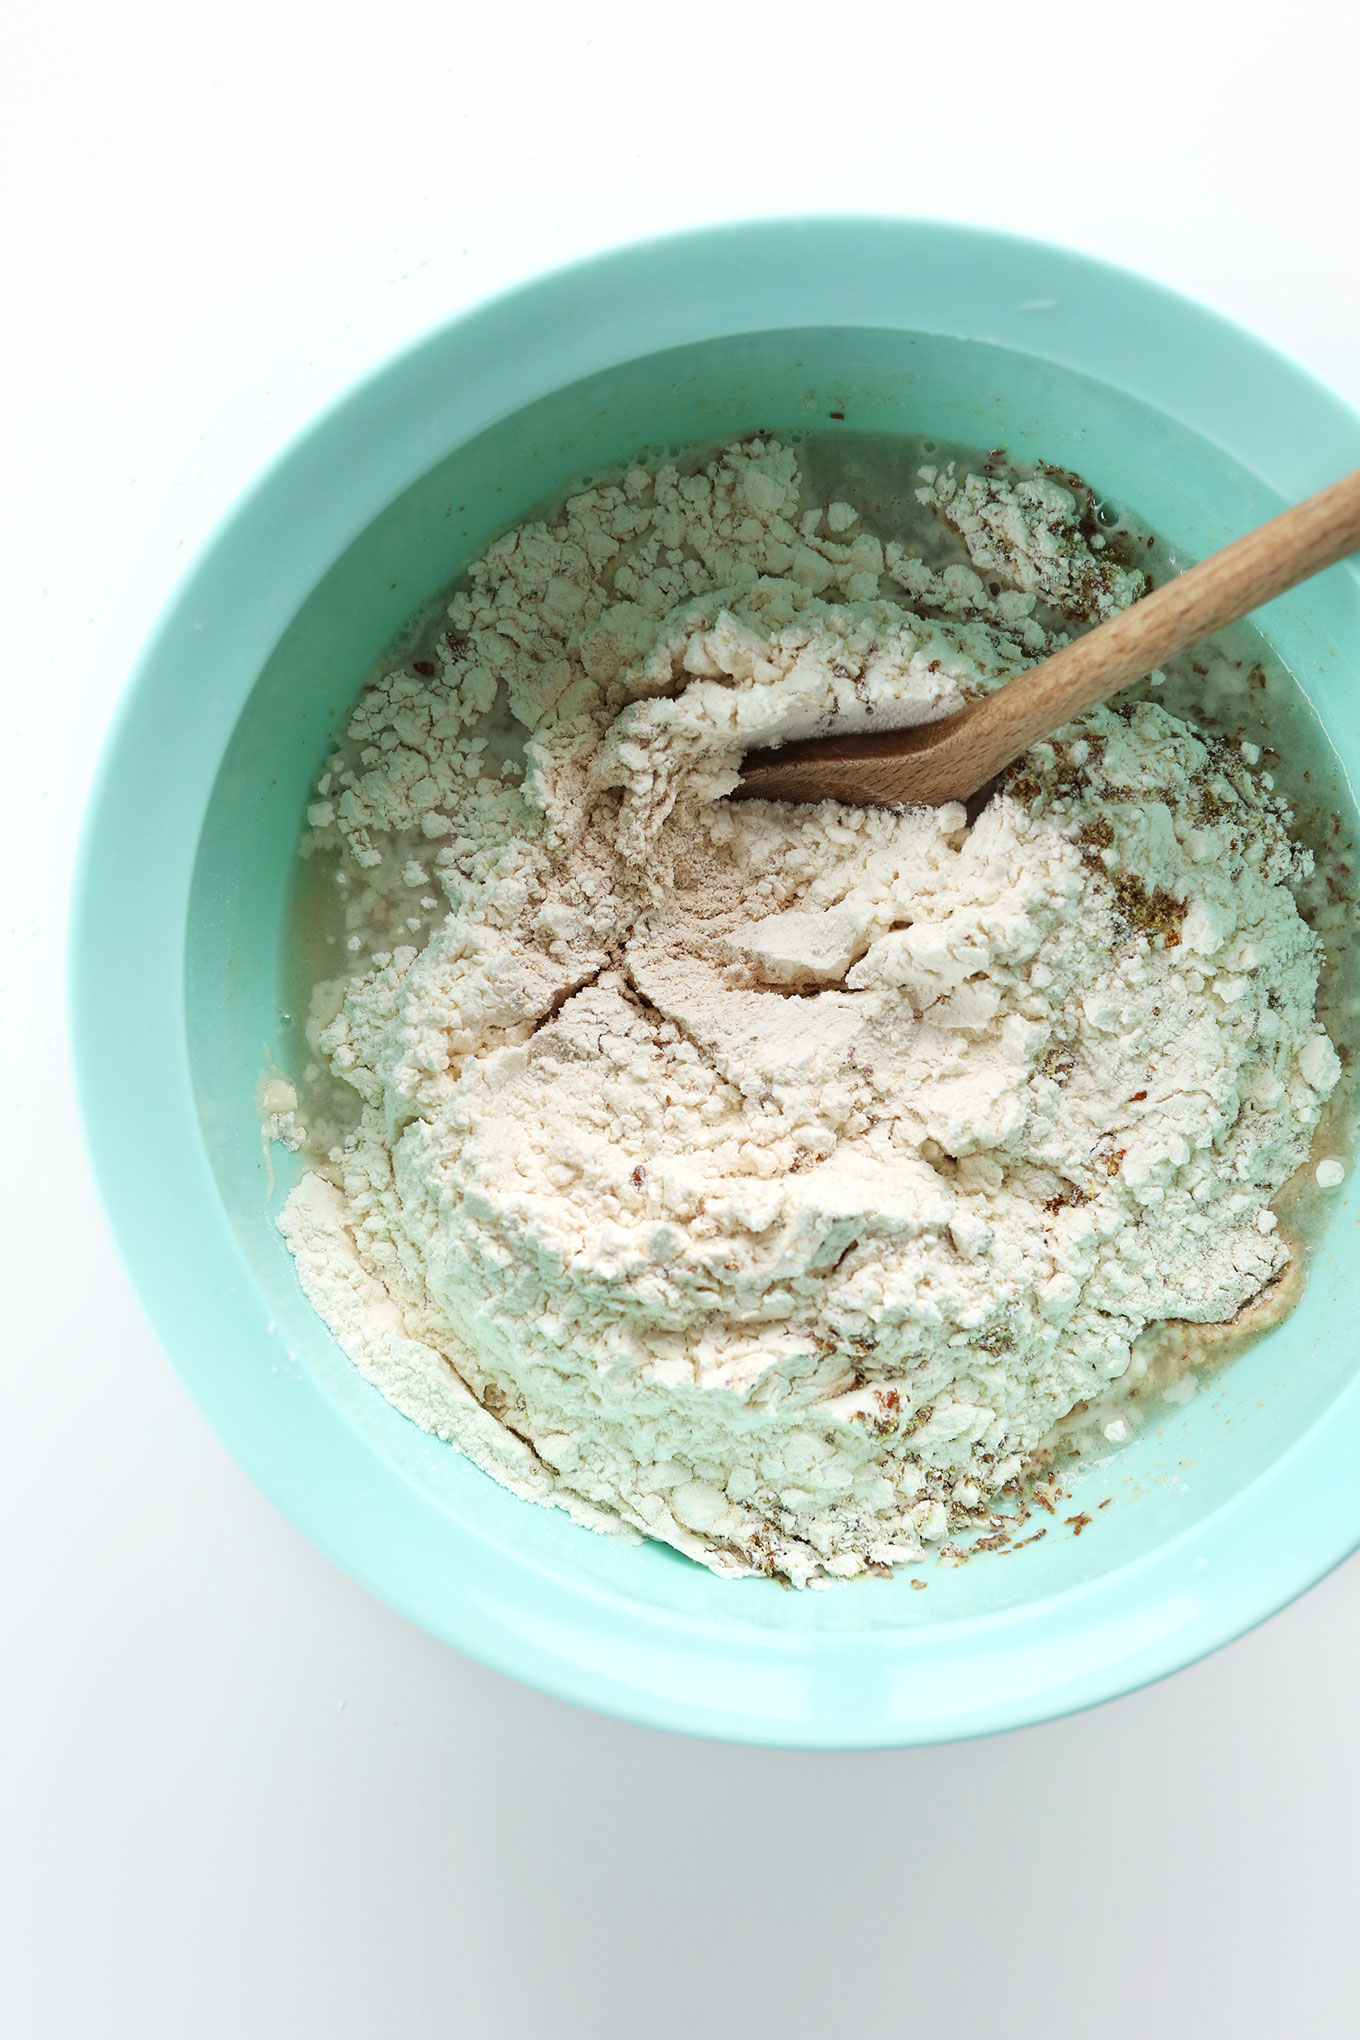
When I say dump, mix, rise, I mean it.
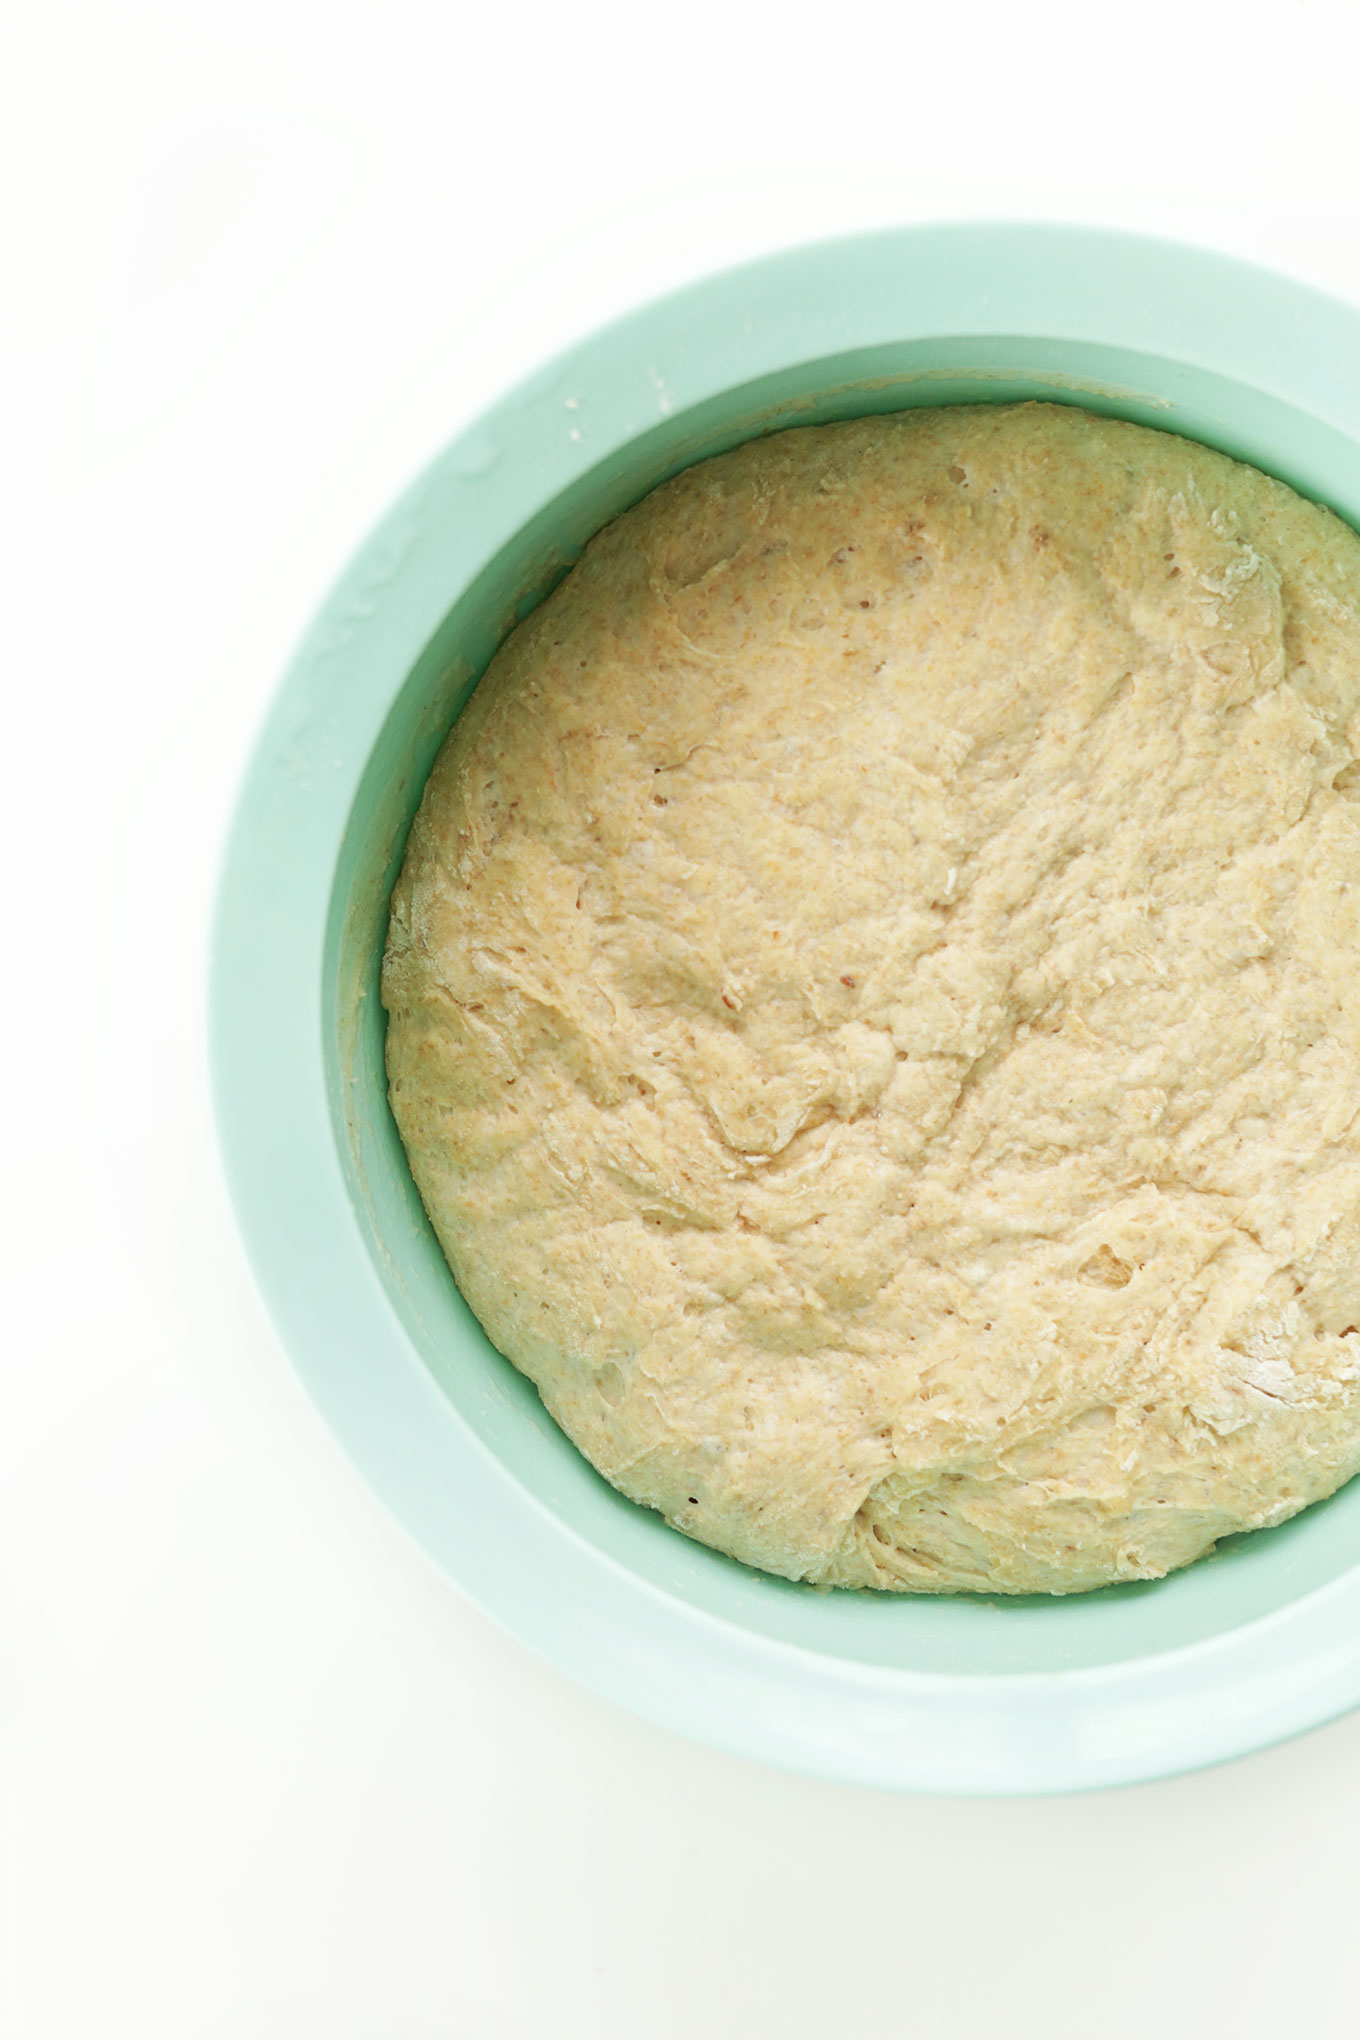
You literally dump the ingredients in a bowl, mix and let it do its thing in the fridge.
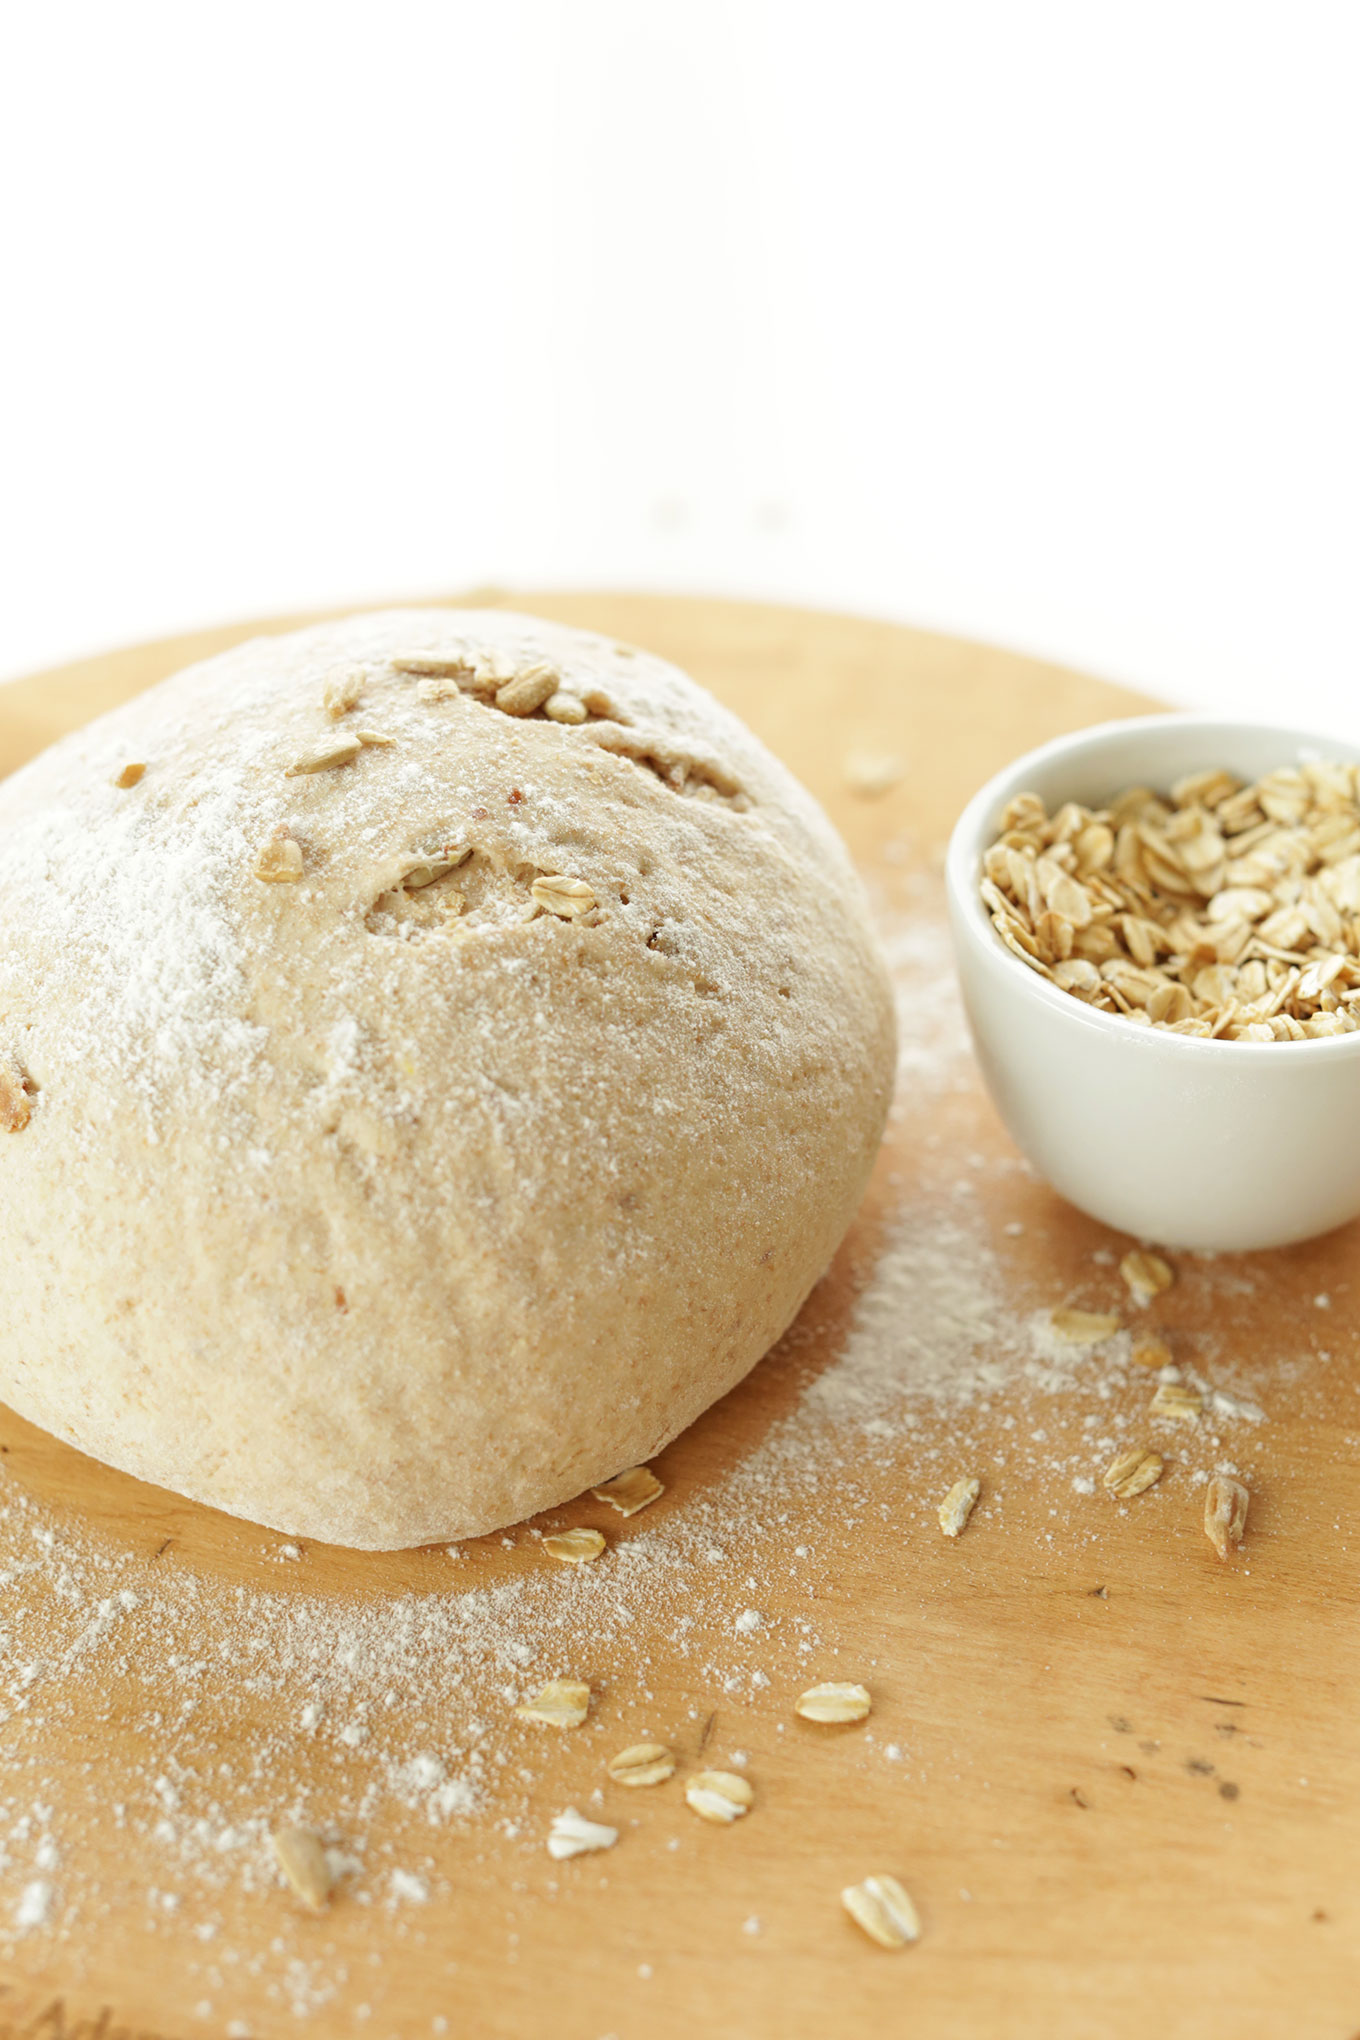
All that’s left to do is knead in the seedy and oat-y things and let it rise once more while the oven preheats.
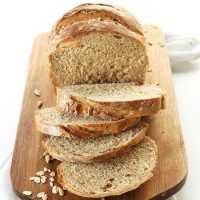
Twenty minutes later and you have a perfectly delicious, seedy, whole grain loaf on your hands.
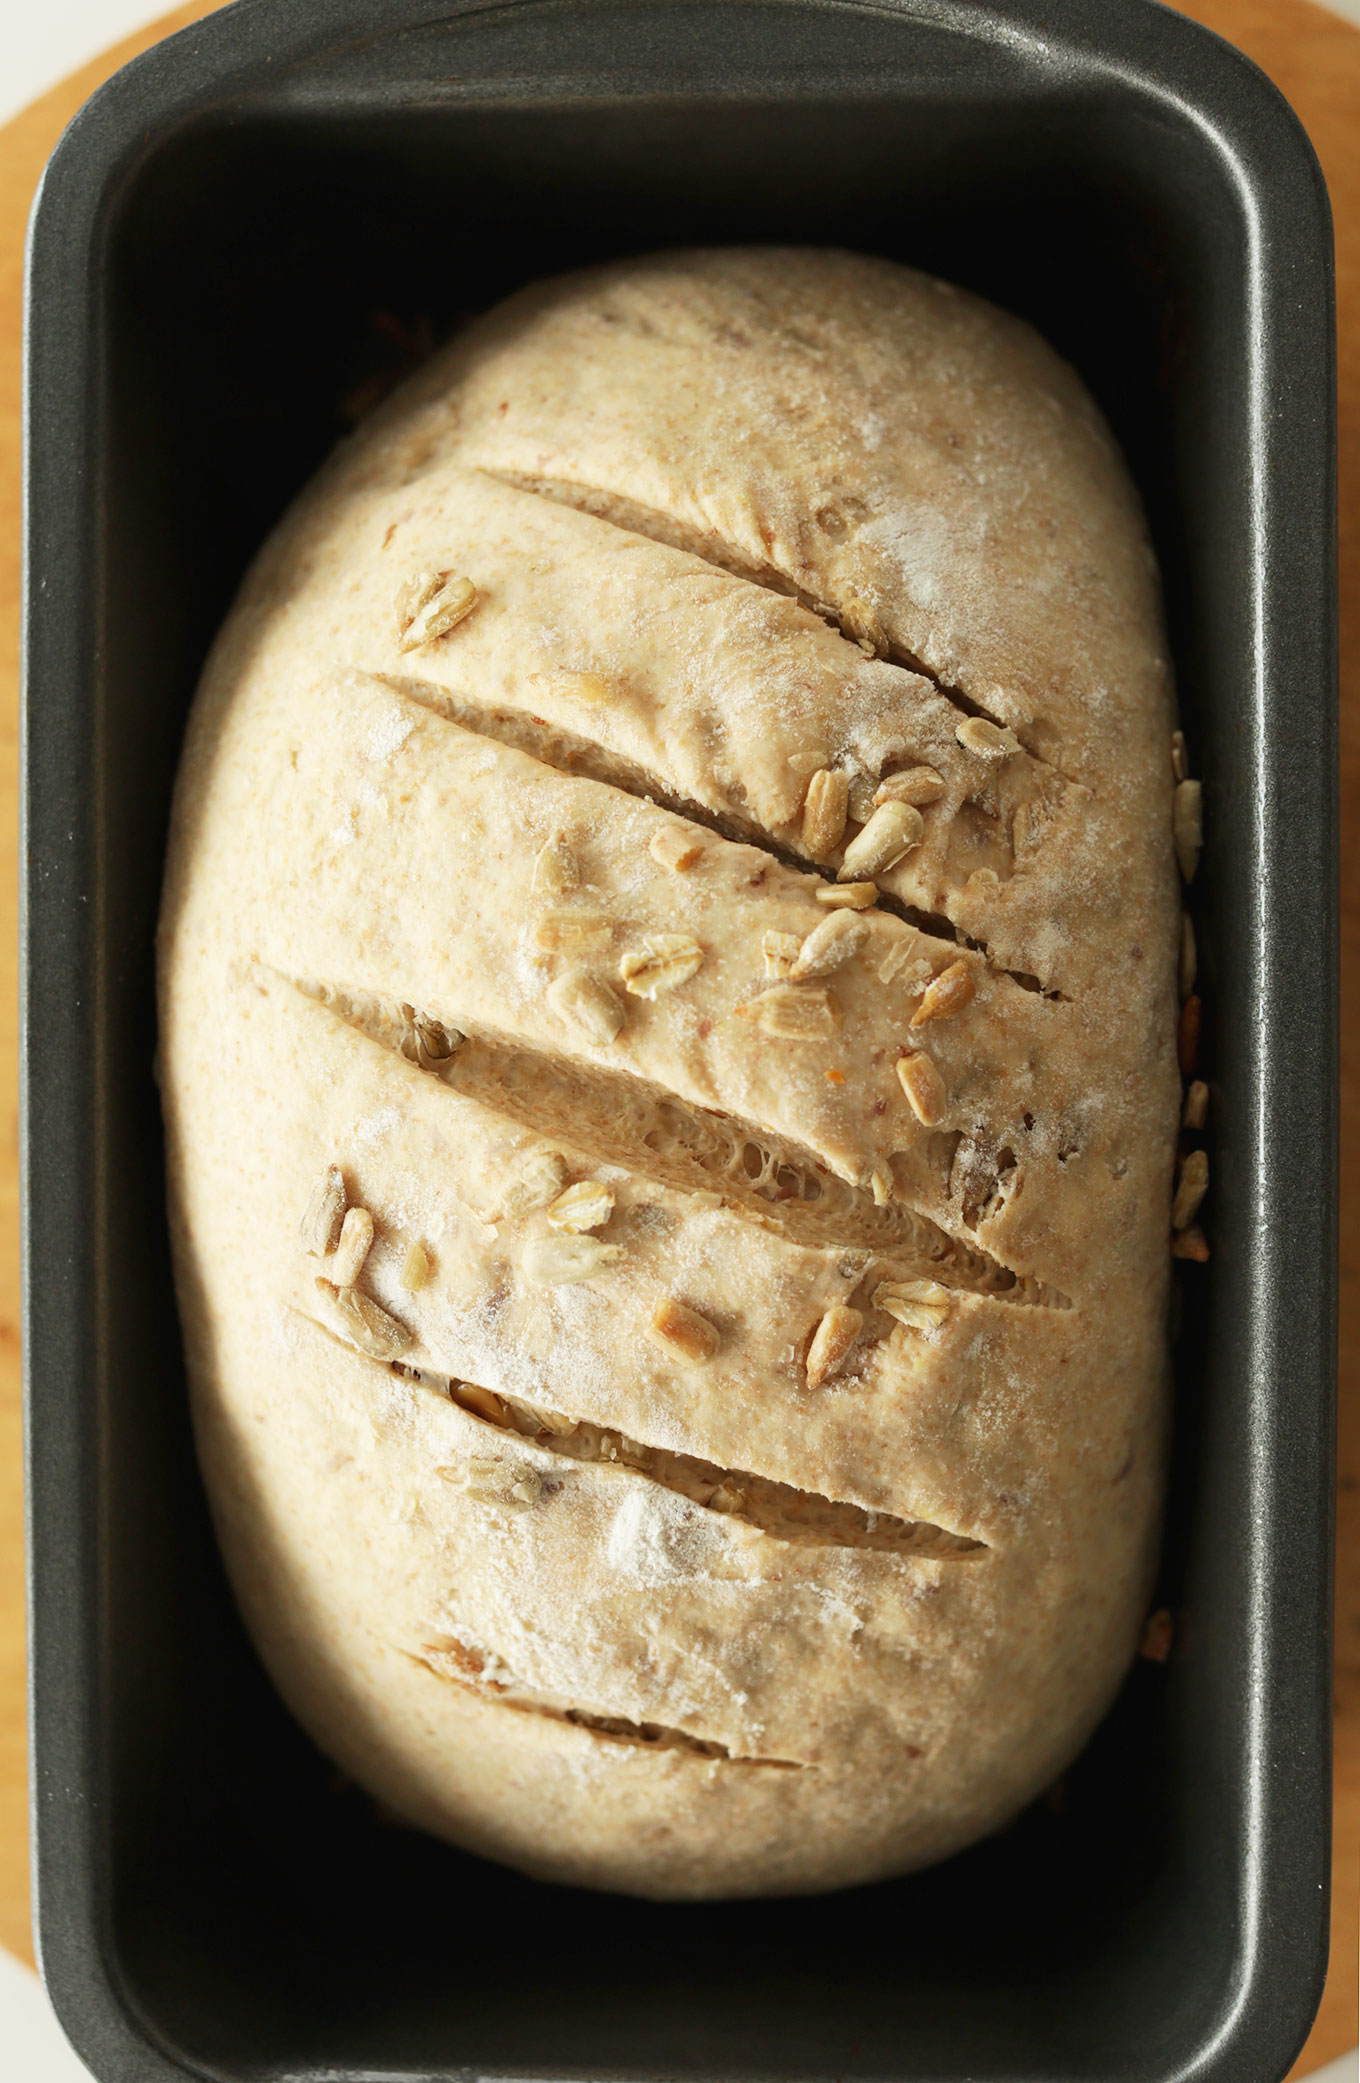
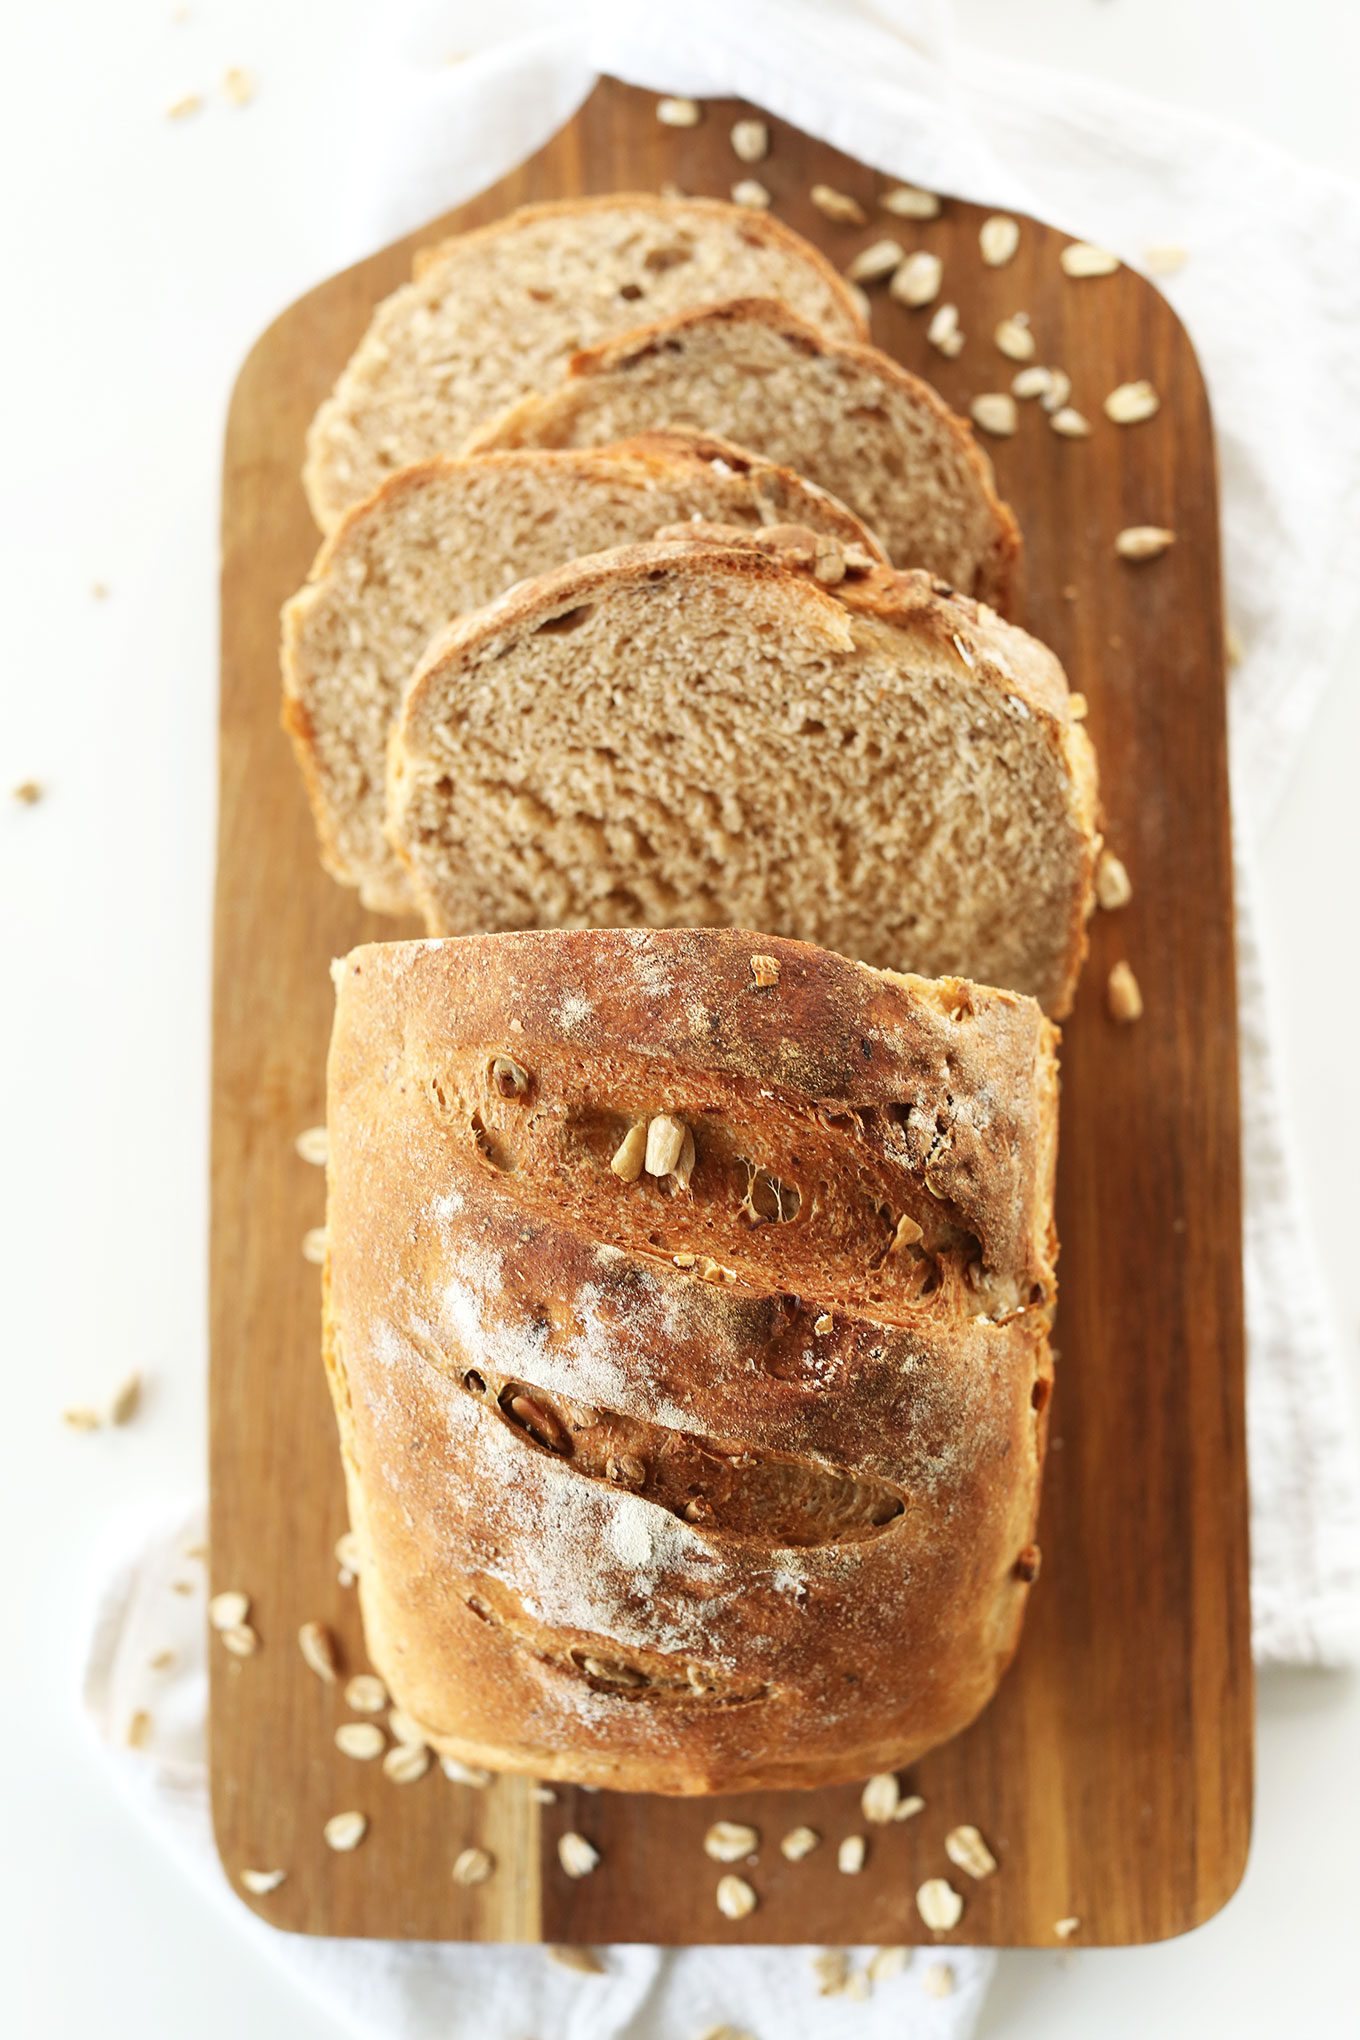
This loaf is magnificent; everything you want in a homemade bread. It’s:
Seriously simple
Tender on the inside
Crusty on the outside
Loaded with whole grains
Seedy
Dreamy
& Perfect
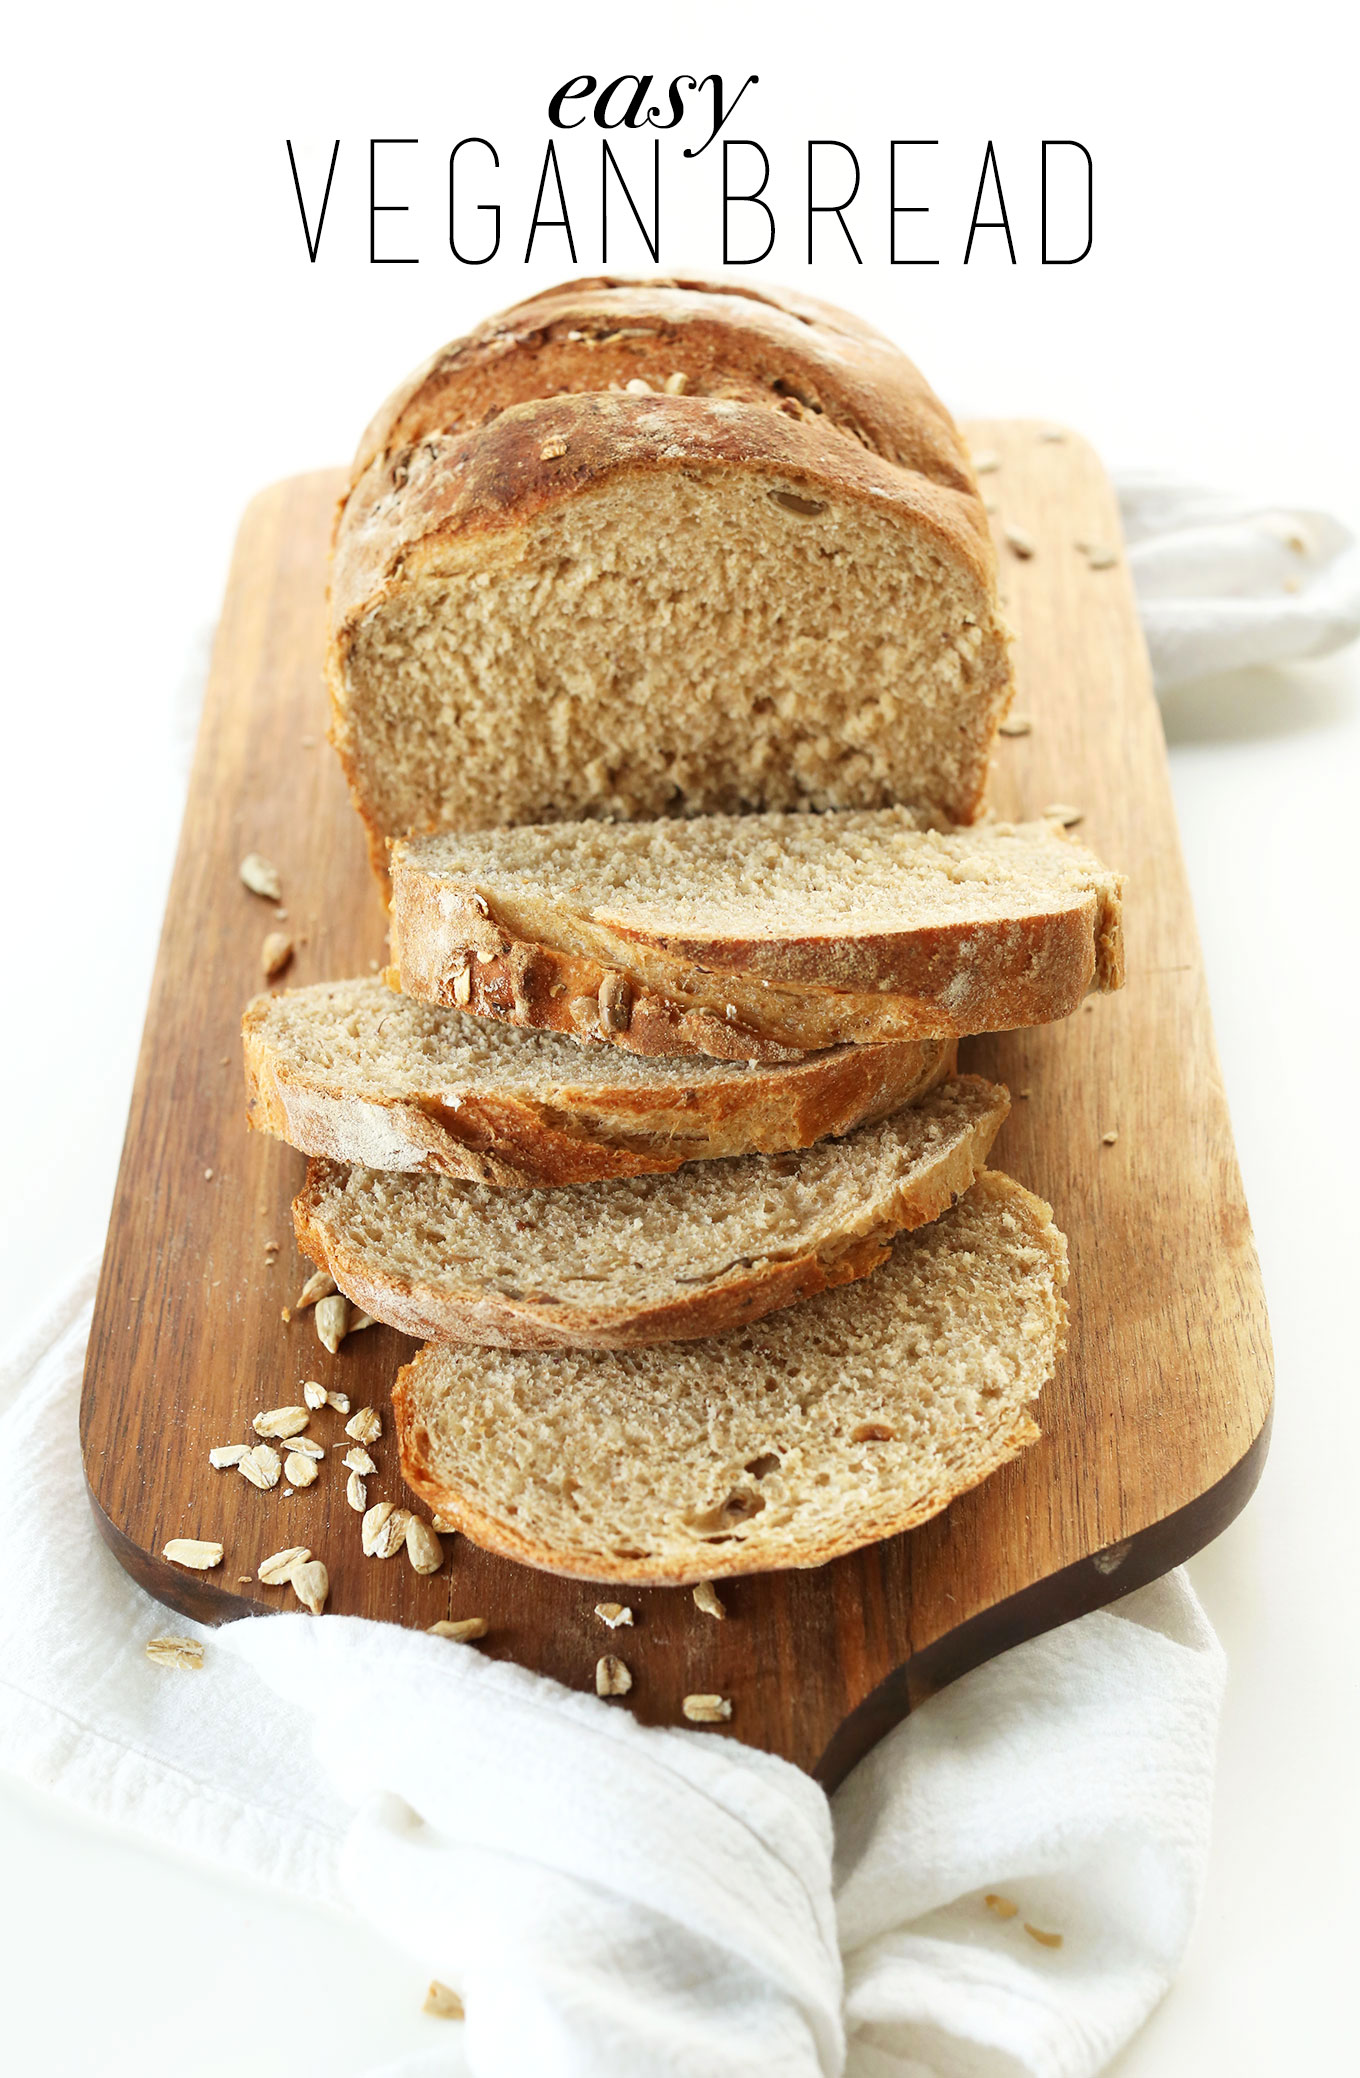
This makes the perfect bread for toast, sandwiches, french toast, and everything in between.
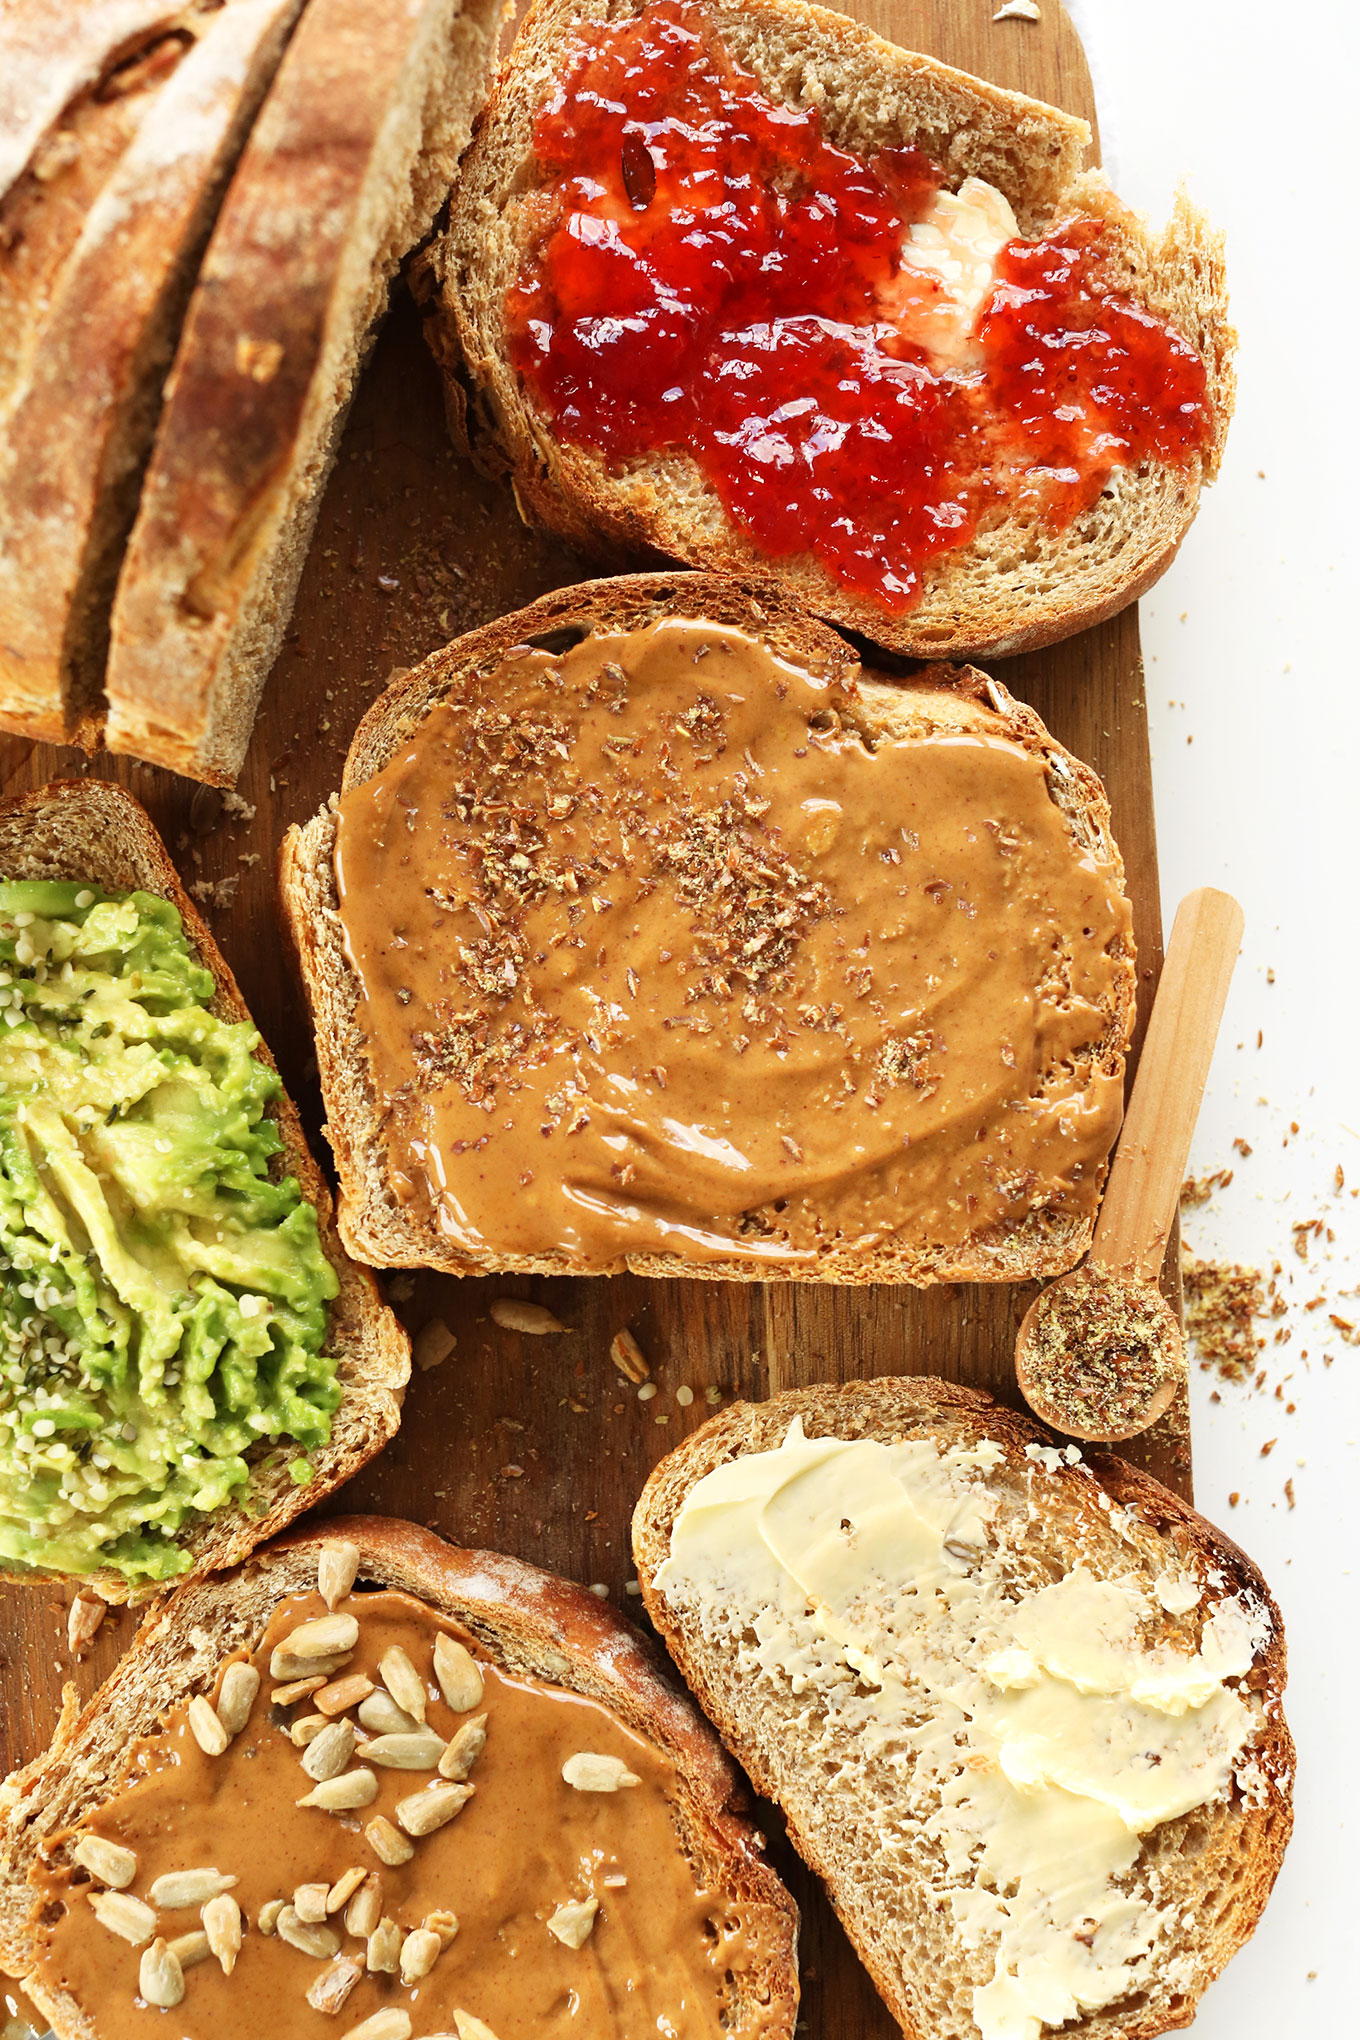
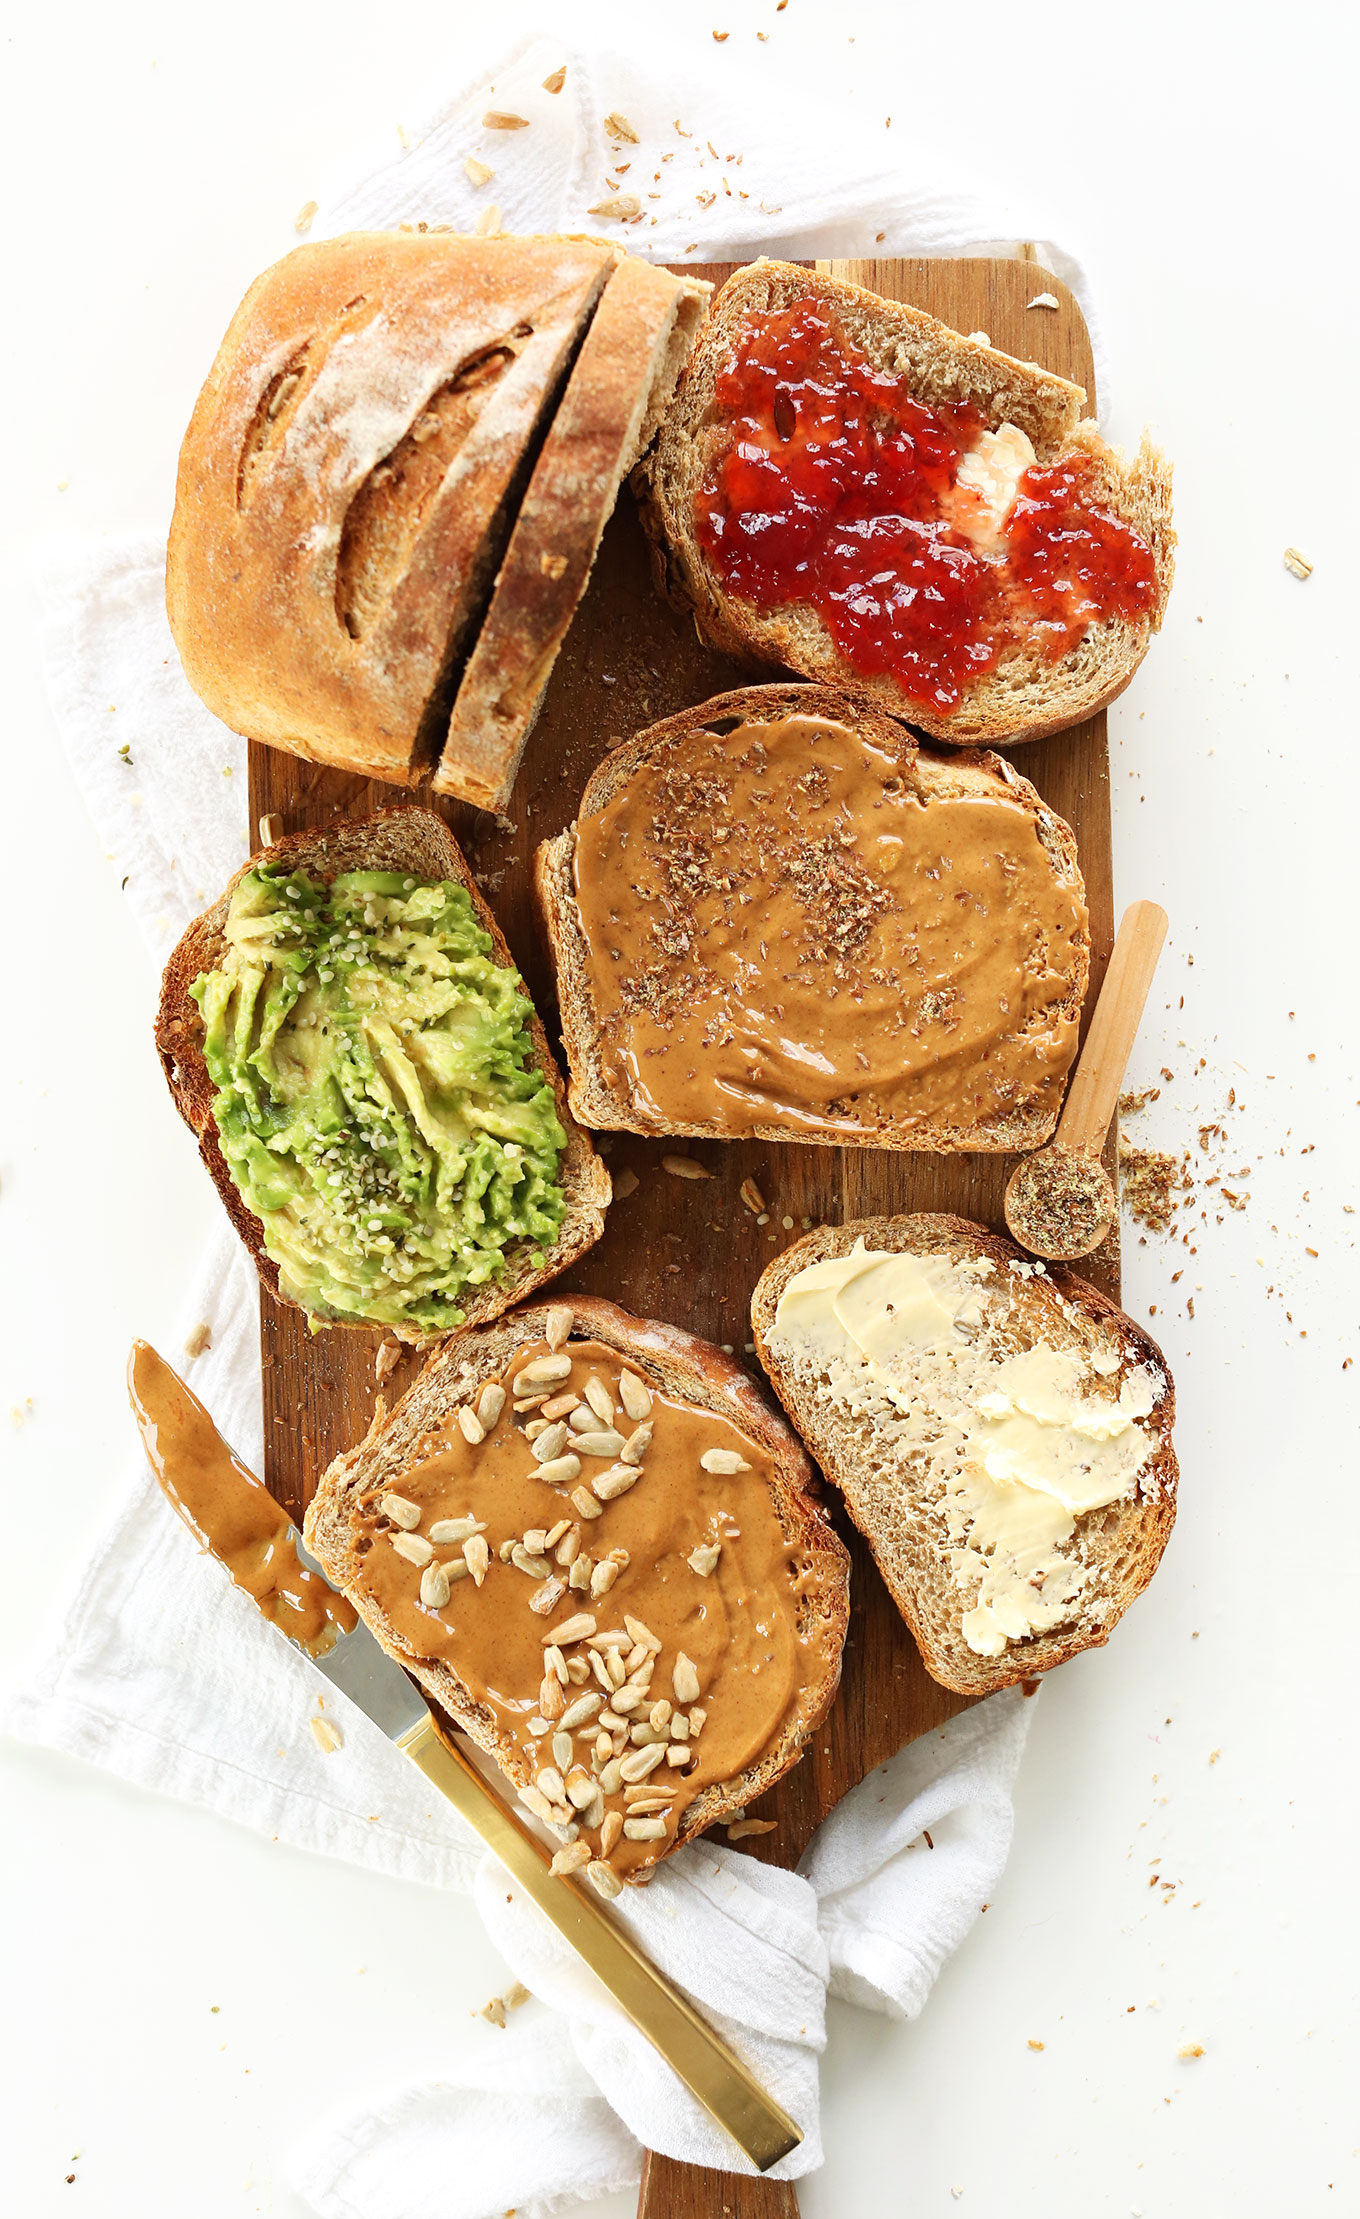
I’ve been loving it with smashed avocado and a little vegan parmesan cheese and hemp seeds, or with peanut butter and flax seed. You really can’t go wrong.
More Vegan Bread Recipes
If you give this recipe a try, let us know! Leave a comment, rate it, or take a picture and tag it #minimalistbaker on Instagram! We’d love to see what you come up with. Happy baking!
The Easiest Whole Grain Seeded Bread
Ingredients
- 1 1/2 cups warm water
- 3/4 Tbsp fast-acting yeast (1 packet yields ~3/4 Tbsp or 2 1/4 tsp)
- 2 Tbsp maple syrup, agave, or honey if not vegan
- 1/2 Tbsp salt
- 1 Tbsp flaxseed meal
- 2 cups Bob’s Red Mill Whole-Wheat Pastry Flour
- 1 3/4 cups Bob’s Red Mill Unbleached All-Purpose Flour (plus more for rolling / dusting)
- 2 Tbsp raw or roasted sunflower seeds
- 2 Tbsp rolled oats
Instructions
- Combine warm water (like bath water, or 110 degrees F / 43 C), yeast, maple syrup (or other sweetener), salt, flaxseed meal, and flours in a large mixing bowl and stir. The result will be a sticky, rough dough. If using a stand mixer, beat at medium speed for about a minute. Otherwise just use a spoon to stir until well combined and when it can no longer do the job, knead and turn it in the bowl with your hands. Add flour until the dough is no longer sticking to the sides – about 3 3/4 cups total (amount as original recipe is written // adjust if altering batch size).
- Lift the dough out and lightly grease the bowl with nonstick spray or olive oil. Cover and let rise for 2 hours at room temperature and 2 hours in the fridge. Alternatively, if you only have 2 hours, let rise at room temperature and skip the fridge (though a longer rise is best).
- Use fingers to create a small hole in the dough and pour in sunflower seeds and oats. Transfer dough to a lightly floured work surface and knead about 20 turns or until elastic. Form into a loaf-like shape.
- Place seam-side down in a lightly greased loaf pan or baking sheet and sift a light coating of flour over the top to help keep the dough moist. Loosely cover with plastic wrap and let rest for 45-60 minutes.
- Preheat oven to 425 degrees F (218 C)* toward the end of the dough resting time and place a metal or cast iron pan (NOT glass, Pyrex, or ceramic) on the lowest oven rack. Also have 1 cup of hot water ready.
- When the oven is preheated, slash the bread 2 or 3 times with a knife, making a cut about ½-inch deep.
- Place in oven on middle rack. Then carefully pour hot water into the shallow pan on the rack beneath. Expect it to bubble and steam; then close oven door quickly.
- Bake the bread for 26 to 35 minutes, or until deep golden brown and risen.
- Remove the bread from the oven and let rest in the pan for 5 minutes. Then carefully remove from pan and transfer to a cooling rack to cool. Let it cool completely before slicing for best results (otherwise it can be doughy in the middle).
- Store leftovers in a plastic bag at room temperature for up to a few days. Transfer to freezer for longer term storage.
Video
Notes
*Adapted from my 7 Ingredient Muesli Bread.
*Nutrition information is a rough estimate.
Nutrition (1 of 12 servings)
This post was sponsored by the lovely folks at Bob’s Red Mill. Thanks for supporting the brands that support Minimalist Baker!






Cindy says
This recipe is healthy and spot on! I made it exactly following the recipe, except added chia seeds because all I had was flex seed and chia seed mixed. It came out perfect and this is now my to go recipe!
Yay! We love to hear this. Thanks so much for the wonderful review, Cindy!
Nancy says
I am wondering why the choice was made to use whole wheat pastry flour. My understanding is that it isn’t a good choice for yeast breads. I did use it and the dough was very dense and I could not knead in the seeds. The dough wouldn’t come together especially just out if the refrigerator. What did I do wrong?
Hi Nancy, sorry to hear it didn’t turn out right! We haven’t had an issue with whole wheat pastry flour and find it helps prevent the bread from being too dense. It sounds like either the yeast didn’t proof/activate enough and/or there was too much flour. We recommend adding just enough in step 1 so the dough is no longer sticking to the sides. Depending on your location and other factors, it might not need the full amount of flour. Hope that helps if you decide to give it another try!
Jbird says
Excellent turn out!! I appreciated your straight forward steps. I ended up using 1 C wheat flour and the rest white bread flour because I really didn’t want another trip to the grocery. So beautiful!! I’ve tried a lot of recipes. Interesting that vegan bread and pancake dough tastes better than ANY thing else I’ve tried.
Amazing! Thanks so much for the lovely review and for sharing your modifications!
Kaila says
Any suggestions for making/baking this at high altitude? I live at about 10,000 ft above sea level.
Big fan of your site & recipes! I’ve loved everything I’ve made so far!
Aw, we’re so glad to hear it, Kaila! We don’t have experience baking at altitude, but another reader mentioned having success following the recipe as written.
Laurel Fitzhugh says
My experience with high altitude is that it takes a LOT LESS Kneading than recipes say. This one isn’t kneaded much anyway, but I’m going to try putting the oats etc in with everything else to cut it down more.
Ang says
Hello! I’m wondering what can be substituted for the AP flour in this bread recipe? Thank you so much!
Hi Ang! Are you looking for a gluten-option?
LeeAnn Clark says
❤❤ so good, didn’t change a thing.
We’re so glad you enjoyed it, LeeAnn. Thanks so much for the lovely review! xo
elizabeth matthews says
hello,
i’m about to make this bread, but quick question: i’m wanting to go sugar free for a while (to see how it affects my health). Is the honey or syrup absolutely necessary? can it be reduced? anyway, if i have to use it, it’s good to know that for one slice of this bread–just 2 grams of sugar, it’s way way less than the bread sold in the stores–a whopping 7 grams per slice.
Hi Elizabeth! The honey/maple syrup is important in this recipe because it activates the yeast which gives you a beautifully fluffy bread. Hope this helps! xo
PJ says
Can this be made with caraway seeds? I love rye bread!
Hi PJ, we think that would be delicious!
Katie Chambers says
I was looking for unprocessed whole grain bread since the Ezekiel bread I buy often is expensive.
However, your recipe calls for unbleached all-purpose flour since this flour isn’t made from whole grain wheat, it is a processed flour and not a whole grain. Is that correct? Could anything be substituted for that that isn’t processed and is a whole grain?
Hi Katie, you can replace if with more whole wheat flour – it will just be more dense. Hope that helps!
Pam says
Excellent bread. Super quick and easy. I did make a few changes to the process based on prior experience. I added 1T EVOO for flavor. I also bloomed the yeast with the honey to accelerate the process (and check that the yeast was good.) I mixed/kneaded with the dough hook in my Kitchen Aid for 5 or 6 minutes on medium speed for texture and gluten development. I did two rises, one hour at room temp. covered, punched down and added oats and sunflower seeds, then another hour rise in the loaf pan covered at room temp. Baked at 350 for 40 minutes to an internal temp of 200 degrees. Let it cool in the pan for about 5 minutes and turned out to cool on a cooling rack before slicing into a pretty healthy, PERFECT loaf of bread.
Amazing! Thanks so much for the lovely review and for sharing your modifications, Pam!
liz says
I made this, except I added pumpkin seeds and flax seeds and cooked it in a Pullman loaf pan with the lid on, no water steam pan. Absolutely delicious and the crust is out of this freaking world, PERFECT avocado toast toast
Love it! Thanks so much for sharing your method, Liz. So glad you enjoyed!
Annie says
Wow! This recipe produced wonderfully light and fluffy bread. I used regular whole wheat flour in place of the whole wheat pastry flour and it worked great. Probably one of the best batches of bread I’ve ever made. Thanks for another healthy and delicious recipe!
Wow!thank you SO much for the lovely review! We’re so glad you enjoyed it, Annie! xo
Kathy Q says
Can I add the seeds & oats at the beginning so they get more evenly distributed, or will that affect the rise?
Hi Kathy, good question! We haven’t tried that, but another reader has reported it works well. Hope that helps!
Alena says
Best multi grain bread! Comes out super soft and fluffy, looks beautiful and the taste is amazing. So much better than store bought bread + much healthier and cheaper. I will definitely make this again.
Thank you for this delicious recipe!
We’re so glad you enjoyed it, Alena! Thank you for the lovely review! xo
Bill says
Being diabetic I want to avoid white flour. Can some other flour replace AP flour?
Hi Bill, you can replace if with more whole wheat flour, but just know it will be more dense. Hope that helps!
Marie says
Hello, I have two questions. Could you use less salt in this recipe? Also, if you are using a silicone loaf pan how long will it take to bake? Thanks
Hi Marie, the salt adds flavor, but you can definitely cut it back, if preferred! We think you would bake the same amount of time with a silicone pan, but the exterior of the bread likely won’t get as crispy. We haven’t experimented much with silicone pans though!
Sheryl says
I’d love to try this recipe, but I have three questions.
1. Can I substitute regular whole wheat flour for the pastry flour?
2. I don’t have flaxseed meal, but I have whole flaxseed. Can I blend the flaxseed to make flaxseed meal?
3. I also have chia seeds. How could I incorporate those into this recipe?
Thank you!
Hi Sheryl, we haven’t tried this with whole wheat flour but it should work, and you can definitely blend your flax seeds for flaxseed meal, that’s how we do it! For chia seeds, they might add a dense or gummy texture if you add them in whole, so we’d suggest making it without them the first time and then experimenting once you’ve tried the bread. Hope this helps!
LiNDA says
You can create the flax seed meal by using your coffee grinder to create the meal from the seeds.
I haven’t made this recipe yet but plan to in the future.
Shelley says
I have made this recipe many times now, and it is fantastic! I usually only make “no-knead” bread, and have adapted this recipe to that process with great results. I also vary my recipe with every loaf and my family & I enjoy a delicious surprise each and every time. Thank you for this & your
many other delicious recipes.
Amazing! Thank you for your kind words and lovely review, Shelley! xo
Lisa says
I’d love to try this as a no knead bread, would you mind sharing that technique?
jen says
This bread rocks! It is so delicious and moist! I love it! I used a combination of King Arthur whole wheat white and bread flower since that it was I had on hand. Will make this a staple in our house!
Yay! Glad you enjoyed this bread, Jen. Thanks for the review!
Susan Lambert says
How many days would the bread last in the refrigerator (not freezer)? I am looking forward to making the bread but would like to spread out eating slices over more than your recommended time of 3 days.
Hi Susan! The texture will firm up slightly in the refrigerator (we like toasting it after refrigerating for best texture) but it should last for about 1 week. Hope this helps!
Dilara Duarte Correia says
May I ask why no bread flour is used and why you would use pastry flour?
Hi Dilara, it’s what we had around, but bread flour should work too!
Erin says
I’ve been using this recipe to make bread for my family for many months now. The recipe makes perfect slicing bread and everyone loves it!!
Amazing! We’re so glad you enjoy the recipe, Erin! Thank you for sharing! xo
Courtney says
Can you sprinkle seeds and oats on top of the loaf before baking for presentation purposes?
Definitely! The seeds might get pretty toasty, though!
Laurie says
Am I reading directions right? It has to rise 2at room temperature,2hours in fridge & then an hour after you knead seeds in& make the loaf? 5 hours before baking? 2nd question; can I break it into hard roll size buns after kneading? Timing for that? Thankyou
Hi Laurie, we haven’t tried it as rolls, but think it could work. And yes, you’re reading it right. The 2 hours in the fridge can be skipped if you’re short on time!
Esther says
Thanks so much for this recipe, I’ve made it a number of times changing up the add-ins. My query – after mixing and sitting at room temperature for 2 hours can I then refrigerate overnight and finish off the next day? If so, would I shape while cold or bring to room temperature first? Regards from Melbourne Australia
We’re so glad you enjoy it, Esther! It should be fine to refrigerate overnight. We’d suggest bringing it to room temperature for ~20-30 minutes. Hope that helps!
Tricia says
Looks like a great recipe, but before I try, I have a couple of questions I haven’t seen asked in the comments – maybe my inexperience making bread are the problem! Here goes:
(1) for a 12 slice quantity, the ingredients list out 3 3/4 cups flours (2 cups WW + 1 3/4 AP). The directions (step 1) say combine ALL ingredients, stir, and then add flour until no longer sticky – you state to add up to 3 3/4 cups total.
Those instructions are conflicting in my brain!
Do I add the entire 3 3/4 cups of flours at first, then add MORE than that total to remove stickiness, or do I add not all 3 3/4 cups flour (how much less?) and reserve the rest to use to eliminate stickiness so that I only use 3 3/4 cups total flours?
(2) I only have a 9×5 loaf pan – you say in the readers comments to use a 8.5×4.5 pan. I ‘think’ my larger pan size may make the resulting bread not rise as well, so should I go buy the 8.5×4.5 size before making this? And, as a suggestion, can you add the pan size which should be used to the recipe?
Thanks so much, I’m looking forward to your replies so I can make this bread!
Hi Tricia! In step 1, add the total amount of flour (3 3/4 cups), then add more 1 Tbsp at a time if the dough is too sticky. For the loaf pan, we think this recipe will work well in a 9 x 5, but it will naturally be a bit shorter than in a smaller pan, so it’s up to you! Let us know what you think if you give it a try!
L. Zara says
Hi, just wondering if you can make this with sugar instead of honey or maple syrup. I really want to make this lovely looking loaf but I just ran out of honey. Can you make this with sugar instead?
Yes!
Vickie says
I made this bread today. It’s delicious. I will make it again. I used 1T each of sunflower seeds, sesame seeds and sunflower seeds as well as 1T oatmeal. Yummy
Yay! Thanks so much for the review, Vickie. So glad you enjoyed!
Donna says
This bread was so easy and so delicious! It stays fresh for a few days in the bread box and freezes really well. I will be making this regularly. Thank you for this wonderful recipe!
Yay! We’re so glad you like it, Donna! Thank you for sharing! xo
Mom says
First & most, thank you for your easy to do recipe. My husband & I love it. I don’t even have words to explain my happiness. It’s easy, tasty and time saving for me because I have two children under 4. Thank you again and guess what I am making another one now.
Yay! So glad you enjoy this recipe. Thanks so much for the wonderful review!
Linda Capps says
Can you use this recipe in a bread machine? I just got one for Christmas and am looking for whole grain recipes i can make in it. Thanks!
Hi Linda! If you follow the manufacturer instructions on the bread machine, it should work in there. Let us know how it goes!
Clancy says
I’m sure this is a wonderful recipe and I can’t wait to try it again. I missed the instruction to let it sit for another 45-60 minutes when it’s in the loaf pan. The hazards of baking with a toddler wanting attention! I’m left with a beautiful looking loaf that’s raw in the middle. I’ll try again tomorrow, but perhaps the ‘prep time’ and the ‘cook time’ at the beginning of the instructions could be updated to reflect the actual prep and cooking times found in the instructions? Just so another slightly distracted baker doesn’t make the same mistake I did. Thank you for all the wonderful recipes on your site, my family and I are very appreciative! I’ll come back and leave another rating tomorrow, I’m sure it will be 5 stars if the taste of the crust is anything to go by!
Oh no! So sorry the first round didn’t work out for you, Clancy. We can definitely take a look at the recipe timing and adjust. Thanks so much for your feedback, we can’t wait to hear what you think!
Wendy says
This is a wonderful bread. I’ve made it exactly as written several times and it turns out every time. I’m in high altitude, for what it’s worth. I’ve found the long rise times are completely worth it. I just love this recipe!!
Amazing! We’re so glad you enjoy it, Wendy! Thank you for sharing your experience! xo
Barbara Kamen says
This was my 1st time making homemade bread without a bread machine & in a long time period. It was easy to make & came out perfect! Just wondering what other add ins may work well with this bread. Can you use walnuts or dried fruit? Orher suggestions?
Yay! Thanks so much for the great review, Barbara. We haven’t tried adding walnuts or other fruit, but other readers have done so with success. Maybe check out the comments to see what they did!
Tracey says
I love this recipe! It turns out well all the time. Thankyou for sharing it!
Yay! Thanks so much, Tracey!
Miranda says
Very tasty bread, definitely a keeper!!
I used 2C white bread flour, 1C whole wheat all purpose flour plus white AP to bring it together. Just wondering, if I wanted to double the recipe..would I need to double the maple syrup and yeast ?
Yay! Thanks for sharing, Miranda! And yes, if you make a double batch we would suggest doubling all ingredients.
MISS TAMMY STEVENSON says
What size tin shall i buy?
Hi Tammy! This recipe will work well in a traditional size loaf pan, 8-1/2 x 4-1/2 x 2-1/2 inches. Hope this helps!
Pam says
Disingenuous calling it whole grain when 50% of it is all purpose flour. But then everyone does it. All purpose flour recipes are considered healthy! Looks like a tasty recipe though.
Maria says
Great recipe -easy and so hearty!! Just froze some slices so I don’t eat it all at once!
Thanks so much for the review, Maria!
Danielle says
I made this the other week and now I’m on my third batch! I’ve been using 2 1/2 tsp of active dry yeast and each batch has come out beautifully. Thank you for this recipe! Will definitely be making this more often.
Woohoo! Thanks so much for the lovely review, Danielle. So glad you’re enjoying the bread!
Zahraa says
Hello,
Would this work for 3 cups of whole wheat flour and 3/4 cup of AP flour?
Yes, it should work!
Suzana says
Best bread I’ve ever made!!! So tasty! I make it tree times a week. My family loves it.
Amazing! We’re so glad you and your family enjoy it! Thank you for the lovely review, Suzana! xo
Donna says
I found your recipe a few years ago and it never fails to please! I’ve given it as gifts and the recipients always ask for the recipe. Sometimes I use different flour ratios and am currently using pumpkin seeds. I LOVE this recipe! And can we talk about how good the house smells when it’s baking?!!
That’s amazing, Donna! We’re so glad you enjoy it! xoxo
Cassandra says
I made this and am not ashamed to say ky sister and I ate the whole thing in about 2 days. Only had pumpkin seeds and whole wheat bread flour . The bread came out perfect with the flour substitute however all my sees ended up in one spot at the end. Not sure but I must have not kneaded it right? Trouble shooting tips for that appreciated. Will definitely make again
Easy to make but definitely took all day with rising times so make ahead
Hmm, that’s strange! So glad you liked the end result, though! Next time maybe try sprinkling the seeds in evenly (versus placing them in one spot in the bowl). Hope this helps!
Carolina says
I clocked it yesterday, and it can’t me easier and tastier. My little son loves it, he says “pan” “pan” all the time, as spanish word.
Thanks for your amazing job, I always trust on your recipes.
Aw, that’s adorable! We’re so glad you both enjoy it. Thank you for your kind words and lovely review, Carolina! xo
Cassandra says
Hello
Can I just use whole wheat bread flour instead of pastry flour? Also LOVE all your recipes been making them for 3 years now so delicious and love how many vegan recipes you have
Hi Cassandra! Yes, that swap should work out well. So glad to hear you enjoy so many recipes! xo
Kim says
I am a first time bread baker and this turned out great. I can hardly believe that I made this delicious bread myself with so little effort.
Woohoo! We’re so glad to hear it turned out well. Thank you for sharing, Kim! xo
Penny Haugen says
Can L use gluten free flour instead of the wheat flour?
Hi Penny, gluten-free flours can be a little finicky, so we don’t think a GF blend would sub well 1-1. We do have a gluten-free bread recipe coming this summer =) Stay tuned!
Leslie says
Easy and the recipe measurements are right on perfect. Not dry or super sticky to knead and shape. Smells amazing when it’s baking, too!
So glad to hear it, Leslie! Thank you for the lovely review! xo
Kristin says
I have made this bread a handful of times and absolutely love it. It is perfect for avocado or nut butter toast. I’ve had most success using my kitchen aid stand mixer using the dough hook for +/- 3 minutes. I let it rise 2 hours at room temp and 1 hour in the fridge. I knead in the oats and sunflower seeds by hand and allow 1 hour for the final rise. I bake it for 30 minutes. The bread needs to cool completely or it can be doughy in the middle. Letting the bread cool is probably the most difficult step because it smells so delicious!
Wonderful! We’re so glad you enjoy it, Kristin. Thank you for sharing! xo
Simone says
Whole wheat pastry flour isn’t common in my country :( I do have whole wheat flour though. Do you know what I can use instead of whole wheat pastry flour? :)
Hi Simone! Though the flours are somewhat different, we think this bread should work with regular whole wheat flour, since there is also all-purpose to lighten it up. Let us know how it goes if you give it a try! xo
Leila Wahba says
I made this bread using grounded multigrain flour & omitted rolled oats,sunflower seeds & flaxseed. Left it to rest on the counter for five hours because it was a cold day . Put it in the oven 425 on middle rack for about 15 minutes then it was getting dark. I put foil & covered it & put on top rack for about 20 minutes took it out left the foil on till cooled completely. I sliced it with a serrated knife. My husband loved it & he said it was better then the bread we buy & pay $6.00 for every three days. Thank you very much for an amazing recipe
Wonderful! We’re so glad you both enjoyed it, Leila. Thank you for the lovely review! xo
Jaime says
Curious why your recipe specifies to NOT use glass pans?
Hi Jaime, we don’t suggest glass/pyrex for the water dish because it will break.
B. Maurene White says
Anh suggestions for hacking this recipe to Gluten Free for this os us sensitive to gluten and all wheats?
I used to make WW bread and yogurt too. Now make Soy ‘yogurt’ and am working on GF Vegan Sourdough breads.
Thanks,
Maurene White
Hi Maureen, we don’t have any tips, but we do have a gluten-free bread recipe coming this summer =) Stay tuned!
Bee says
I made this today. It’s good! My family really liked the texture. And I’m super excited that my picky 2 and 4 year old children would eat it. We’re trying to cut salt intake. Is it possible to reduce the salt and add more maple syrup without destroying anything important? I’m new to making bread.
Hi Bee, We’re so glad you and your kiddos enjoyed it! And we think that should be fine. Thank you for sharing!
Nicole says
I am heartbroken! I finally tackled bread, which had always intimidated me, with this recipe, and it didn’t turn out – it was doughy inside. I took it out at the 26 minute mark as it was beautifully dark all over, and the bottom was getting quite dark so I don’t think the outside could take much more, but it apparently didn’t cook/bake all the way through as per the doughy-ness – it’s not edible besides the crust. Where did I go wrong?! I hesitate to rate because maybe it was me. My yeast was brand new and I proofed it and it was quite active, but the dough didn’t rise at all during the two hours on the counter or the two hours in the fridge – not until it was resting in the pan for the final rise. My loaf was smaller and seemed to be denser than the photos too. I would be grateful for any pointers – I refuse to be defeated.
Oh no! We’re so sorry to hear that happened, Nicole. As for being doughy inside, some others have experienced this and we wonder if it has to do with different oven temperatures / size of loaf pan being used. We’d suggest slightly reducing the oven temperature and baking for 10-15/20 minutes longer. Also, make sure to let it cool completely before slicing. We hope that helps for next time!
Jessica says
I love this bread! So easy to make and very fast too. Love it with crunchy peanut butter fresh from the oven :)
Yay! We’re so glad you enjoy it, Jessica. Thanks so much for sharing! xo
Maggie says
I’ve been using this recipe for a few years and love it so much! Like others, I had trouble kneading in the oats and seeds so now I just mix them in before the first rise and it still turns out beautifully. I never have pastry flour on hand, but regular WW flour works great. I also double the oats and sunflower seeds and add pumpkin seeds to make it a little heartier. Thanks for the recipe!
Thanks for sharing your experience, Maggie! We’re glad you’ve had continued success with the bread! xo
Carolyn says
Hi Nicole,
As you mention it didn’t raise at all the first four hours, I wonder if you forgot to use warm enough water. It really seems like a yeast issue. Either no or not enough yeast, or not warm enough water. I hope you give it a try again. Not rising enough could definitely cause a dense doughy unbaked loaf.
Carolyn
Patricia says
I’ve been trying, throughout the entire pandemic shutdown, to find the perfect bread recipe. And now, 13 months and some epic fails later, I finally find it. Not only is delicious and the loaf shape I’ve been after–it’s also incredibly easy! And it’s the favorite of my husband, who’s the big bread consumer in the family! My only variation is to sub some spelt flour for the whole wheat. Thanks so much for this recipe!
Woohoo! Thanks for the lovely review, Patricia. So happy the bread is such a hit! xo
Jane D says
Delicious! After second rise I shaped into a tight ball and put on parchment for last rise. I pre-heated my cast iron Dutch oven (with cover) at 425°. After slicing top of bread and spraying it with warm water, I put bread (still on parchment) in Dutch oven and covered. After 30 minutes I took off cover and baked for 10-15 minutes more – until 190°. Perfect! Has anyone tried assembling bread at night and just leaving in fridge to rise until morning to bake?
We’re so glad you enjoy it, Jane! Thanks for sharing! You can definitely leave it in the fridge overnight.
Melly says
I’m confused on total resting time. step 2 let dough rise for 2 hours on counter then 2 hours in refrigerator. But then in step 4 it says to let rise in a greased pan for 45- 60 minutes? So is the 45-60 minutes in addition to the 4 hours in step 2?
Yes!
Hazelle says
Can I omit the hot water in the oven? I don’t have metal or cast iron pot
Yes!
amy says
I made this bread for the first time as a test run to see if it was easy enough to make with my 4-year-old granddaughter as a birthday present for her mom. And it passed the test! So we’ll do it together. Question: am I supposed to punch down bread after the 2-hour rise before putting it in the refrigerator for another 2 hours?
Thank you and for all your fantastic recipes.
Wonderful! Thanks for sharing, Amy! No need to punch down the bread unless it’s already overwhelming the bowl. Glad you enjoyed!
Mariah says
I’ve been making this bread for a few months and I absolutely love it! I generally follow all of the directions, except I generally just let the bread rise for 4 hours on the counter as there is not always room in the fridge. Anyways, I’ve been having an issue with the bread smelling alcoholic (kind of like old beer or kind of vinegary). It seems to bake off a bit in the oven, but not completely. From looking online, it says that this could be due to overfermentation. Do you have any advice on this matter? I’m new to bread baking and am not sure what I should attempt to change. Thanks so much!
Hmm, I’d be surprised if it was over-fermenting on the counter (but maybe the fridge proof helps counteract that). But you could also just begin working with the proofed dough as soon as it’s doubled in size! Thanks for the kind review and feedback, Mariah!
Robin says
Can I use all whole wheat flour? I grind my own and prefer to avoid white flour, but will use it if it is really important to the success of the recipe.
I think it will be more dense, less fluffy. But if you try it let us know how it goes!
Cindi says
Can a bread machine be used at least for the first rising?
Hi Cindi, other readers have mentioned using a bread machine with success!
Lindsay says
This bread is delicious! I’m fairly new to making bread and it went well – I used active dry yeast and my kitchenaid stand mixer. As other reviewers have suggested, I worked the oats and seeds in small batches right before the refrigerator step. My husband, two year old son, and I just obliterated half of the loaf with Earth Balance and jelly as soon as it was safe to cut it! This is definitely going into the weekly rotation.
We’re so glad you and your family enjoyed it, Lindsay! Thanks so much for sharing your experience!
Su says
Hi, I used active, dry yeast and bread turned out super tasty. Even my husband, who doesn’t like the phrase ” Whole grain ” liked it.
So great! Thanks, Su!
Antoinette says
I made this and it came out really good. I added a little more seeds as well. Can you also use bread flour in place of the All Purpose flour?
We’re so glad you enjoyed it! We haven’t tried, but it should work.
Rachelle says
Made it in a bread machine on the quick setting and it turned out great! The only thing I changed was adding sunflower seeds; I didn’t have any so I added a tablespoon each of chia, hemp and sesame seeds. Crusty outside and soft inside. Thanks for sharing!
Amazing! Thanks so much for sharing, Rachelle! xo
Stef says
Oh amazing, have just gone through all the comments to see if this could be thrown in bread machine, excited to see I can do that! :) so excited for this bread !
Patrick Costello says
I don’t have much experienced making bread, but this was easy and delicious. I’ve made it a few times and no longer use the seeds or oats. Everyone, including my kids, love this bread. Thanks for sharing your recipe!
So great! Thanks for sharing, Patrick!
Kat says
For step 1, is it normal that the dough still sticks to the sides after adding the amount of flour stated here? I ended up adding so much more to get it to not be sticky which may have affected the texture after baking it. Still tasted good tho! Thank you in advance.
Hi Kat, it shouldn’t still be sticking at that point. Did you make any modifications to the types of flour?
Angie says
I’ve made this countless times. I love this recipe. I tweaked it a bit to make it include more whole wheat flour than white flour.
All the ingredients and measurements are the same, except I add 2 tsp of salt for more flavor, and my flour is 3 cups of whole wheat flour, and 1/4 cup white wheat flour. I also don’t add the oats and seeds. I let it rise on the counter for 4 hours. I bake it at 425 degrees F for 35 min and it comes out of the oven smelling amazing, golden brown, with a decadent crust and soft in the middle. Perfect for toasts in the morning or sandwiches.
Thank you so much for the recipe!
Amazing! Thanks for sharing, Angie! xo
Katie M says
This is my go-to basic bread recipe! I love it and my husband loves it even more :)
Recently I haven’t been able to find any flaxseeds, so I’ve been subbing chia and it still turns out great.
Lovely! Thanks so much for sharing, Katie! xo
Kyrie says
I really enjoyed making this! Easy, but complicated enough for me to get the joy our of the homemade bread process. I had a hard time kneading in the oats/sunflower seed and would have liked more guidance on that – they tended to stay in one place or poke through and I definitely had to knead more than 20 times. It may have been because the dough was chilled. It turned out beautiful! I used whole wheat flour instead of pastry because that’s what I had on hand. Thank you! :)
Thanks for sharing, Kyrie! We’re so glad you enjoyed the final result, but sorry for the trouble with the seeds. We’re planning to revisit this one as others have mentioned that issue. We’re thinking it might be easier to knead them in before chilling.
Breneé says
Made a double batch of this bread and using my own whole wheat grain that I milled fresh and it turned out soo good!
I used Honey for my sweetener and only had oats on hand so that was the only “seed” i added.
I also used my kitchen aid to initially mix everything and then again to kneed the bread. I did the 4 hour rise time. (2 on the counter and 2 in the fridge)
After the fridge rise it was really hard to kneed, next time I may just leave on the counter for 4 hours. Once the bread “warmed up” a bit it became easier to kneed.
Super happy with this recipe and looking forward to continue making it!!!
Lovely! Thanks so much for sharing, Breneé. We are so glad you enjoyed it! Next time, would you mind leaving a rating with your review? It’s super helpful for us and other readers. Thanks so much! Xo
Julia says
Made this recipe once already and am planning on doing it again. I’m a novice and 9 don’t think I kneaded the bread enough the first time. I have a stand mixer… How long (approximately ), do I knead it for the first time? Any tricks or hints?
Until the dough has fully come together and is slightly tacky. We don’t have a stand mixer so we don’t have a ton of experience with them!
Lucipud says
What is the secret for the crispy crust? It’s heavenly. I’d like to achieve the same crust on other breads I make.
Hi, it’s a combination of factors! Primarily the high temperature and steam.
Julia says
Hi! Can a different type of flour be used in place of the pastry flour?
Hi Julia, other readers have mentioned using white whole wheat flour, bran flour, or even regular whole wheat flour. Let us know how it goes!
Emily says
How would this recipe change if I use active yeast?
Hi Emily, we’ve never tried using live active yeast! But would guess it would be similar to how the recipe suggests. Let us know how it goes!
Amanda says
I used active yeast when I made this on Sunday and it turned out great. Add the yeast, the water, and the honey per the recipe to a bowl and gently mix together until all combined. Let sit at room temp for 15 minutes. When you come back, the mixture should have a heavy foam, indicating your yeast is alive and well and ready for the rest of the ingredients. Add the rest of ingredients (except for the yeast, water and honey, of course) and follow the recipe as directed. I only did a room temp rise for two hours because the dough had doubled in size by then and looked ready to go. I let it sit in pan for just 45 mins as well.
Thank you for sharing, Amanda!
Buffie Faes says
This looks so good! Can I use less salt? I’m on a low sodium diet (not by choice). Thanks!!
Sure!
Rose says
Would quick rise yeast work for this recipe?
Yes!
Jo-Anne Sutherland says
Hello,
I have been looking for a decent whole grain loaf and I believe this is it. I love the texture and the taste of this loaf. I didn’t put the tray in the oven and it still turned out fine. I have never done this with any other loaves so wonder if this is necessary? Thanks for a great recipe!
Hi Jo-Anne, we’re so glad you enjoy it! Are you referring to the pan of water? The water helps add moisture to the bread, but isn’t essential.
Josie Miranda says
Followed the recipe exactly as stated. It looks beautiful. I cut a few slices from the ends and it is delicious! As I kept slicing the middle was very doughy :(. Now, I have to say I was afraid to burn it because the top looked very golden so I took it out after 30min. I think I should of left it another 10 minutes. Will try it again. I am currently putting the semi raw slices on a pan to cook the middles. But flavor wise it’s amazing 👍🏻
Hi Josie, it does sound like it needed to bake longer. You could try turning down the temperature and/or covering with foil part way through if it’s browning too much. Hope that helps for next time!
Mallory H says
Love the recipe because it is super easy to follow, but I don’t understand the step to knead after letting the dough rise. My bread came out good but a little dense and I think next time I’m going to knead in the seeds before it rises so I don’t lose the air.
That sounds good! Let us know how it goes!
Mary says
Made the loaf on a whim. Easy to get together. Went about day and baked while we ate dinner. Waiting for it to cool was the hardest. Had a slice with goat cheese and strawberry jam, before bed. Wonderful!
We’re so glad you enjoyed it, Mary. Thanks so much for the lovely review!
Elle petty says
I slashed my bread And it completely deflated, what did I do wrong?
Strange! Did you cut it a bit too deep perhaps?
Naeema Nazeer says
hi, I’ve tried this recipe twice and both times my bread came out on the flat side. The dough rose nicely first round, left in fridge second round, when I slashed it before baling it deflated. Also did not slash the second Loaf just to check, but it also came out flat. Any ideas why?
1) is your yeast fresh?
2) did it foam / bubble initially?
3) did you modify anything else?
I’m guessing either the yeast wasn’t fresh, the water was either too hot or too cold, or something else was modified to affect the rise.
Anne says
This bread took me 3 tries to get right, but it does feel like it was worth it. As others have mentioned, the top keeps real brown – so the first time it was still a bit doughy and chewy, even though the outside looked almost overdone. I covered the top with foil about 20 minutes in, and turned the heat down to 375 for the last 8 minutes this time. The end result was a nicely browned top but an inside that wasn’t mushy. Highly recommend playing with the recipe and heat until it works for you.
Thanks so much for sharing, Anne! We’re so glad you enjoy it!
Nicolena says
Yummy and easy, the only issue I had was it was hard to cut. When I was cutting, it kind of smashed the bread down. I used a bread knife to cut it – could it have been something about the way I cooked it? I used maple syrup this time but have a honey one rising in the fridge right now – maybe that’ll make the difference? lol.
Hi Nicolena! Glad you enjoyed it! Did you let it cool before slicing?
An says
I don’t know how to rate this because it’s not what I was expecting. My only modification was to use just 2 tsps of yeast. The flavor was good but the crust was hard and got dark brown quickly while the dough remained very soft. I covered the bread in the oven once I saw how dark the top was while the bottom of the loaf was not even brown yet. It did not burn, but it almost did.
This bread is not soft-crust sandwich bread and it’s not a boule; rather, it has elements of both but could satisfy my craving for neither. If I were to make it again, I would make it in a dutch oven or on a cookie sheet as a boule (like the muesli bread recipe from which this recipe comes). As it is, I would describe it as very crusty sandwich bread. I was looking for regular sandwich bread with a soft crust.
My advice for anyone who might make it is twofold: either cover the bread 10-15 minutes in, reduce yeast to 2 tsps, and cook at a lower temperature for longer, or just make it as a boule, maybe in a dutch oven so you could cover it for the first part (or last part) of the baking process.
In response to comments about the difficulty of kneading the refrigerated dough: I thought it was interesting to make a hole in the dough and work at it. At first I didn’t think it was going to work––all the seeds and oats seemed to stay in one little pouch tucked in the dough. After some patient kneading, however, all the seeds were distributed evenly. It took me many more than 20 folds.
Very help feedback, An! Thank you for sharing. Well consider modifying the cook time and do some retesting!
rachel ng says
Is there a substitute for Flaxseed? It’s very hard to get flaxseed in my area . I googled and it said chia seed but my mum is alleged to chia seed :(
You can omit and sub for more of the other seeds!
Luciellenc says
Aside from being delicious and easy, this bread has another feature that I really like: When you toast it, the crusts become crunchy rather than thick and dry. I don’t know the reason but it’s delightful, especially the heels.
If you find that when you are mixing in the flour the dough is really sticky and messy, add more flour a little at a time. But definitely don’t add so much flour that it makes a firm ball. It should still be really soft. Also try using a little oil on your hands
We’re so glad you enjoy it! Thanks so much for the lovely review!
Christina says
I’ve been making this bread twice a week every week for the last few months. This is my first bread recipe I’ve tried and this recipe is super easy. I add the seeds in the beginning and instead of the fridge part, I leave on the counter. Love, love this recipe!
We’re so glad you enjoy it, Christina! Thanks so much for sharing!
Amanda says
I can’t find ww pastry dough. Can I just use regular whole wheat flour?
Yes, that should work! Or use white whole wheat.
Tessa White says
Can you make this loaf in a dutch oven?
Hi Tessa, we haven’t tried it, but another reader mentioned doing so with success.
Katie says
Hi. This recipe is tagged as gluten-free. It most certainly isn’t.
Hi Katie, agreed- definitely not gluten-free. But we’re not finding anywhere that says it’s gluten-free. Would you mind sharing where you see that?
Katie says
I see what happened. I chose gluten-free and then searched bread and it came up. The search is global apparently, and does not relate to the category one has chosen.
Ah, yes! Sorry for the confusion there!
Sabrina says
Easy and delish! Thank you so much for an excellent recipe :)
We’re so glad you enjoyed it, Sabrina! Thanks so much for the lovely review!
Diandra says
Hi,
I really like this recipe, but for some reason, something went wrong for me, the dough didn’t come together we’ll, it had no elasticity and I don’t know what I did wrong. The yeast is fine, my mom used it for pizza today. I used the same flour, recommended and exact portions. What could have caused this?
Hi Diandra, our best guess it that it needed more kneading. Hope that helps for next time!
Amanda says
My family loves my homemade white bread but recently I have started changing our diet for our health. I came across this recipe and it was exactly what I was looking for.
I used active dry yeast because that’s the only yeast I’ve ever used and, for the first rise, I put the dough in the fridge overnight and it made for a super easy bread. It rose beautifully, the texture was perfect, and my whole family enjoyed it. It went perfect with our Curry Chicken Salad. Next time, I’m going to add some everything bagel seasoning to the dough, as well. This is going to be my new go to bread recipe.
Yay! We’re so glad you enjoyed this one, Amanda! Thanks so much for the lovely review!
Marilyn Czech says
I started making this bread in August, 2016 & have not gone back to buying store bought bread. Over this time I have tweaked it a bit to suit us. We make it a couple times a week & love it. My husband says that when he puts honey on it, it’s like he is having dessert. Thanks for sharing the recipe because I had been looking for a single loaf recipe. I do have a question … I sent this recipe on to a friend of mine & she said that she is gluten intolerant, so what other flours could be used? Thanks again.
Love it! Thanks for sharing, Marilyn! What tweaks have you made over time? Always curious what improvements are made! I haven’t tried this with GF flours and can’t make any recommendations. However, scan the comments for any advice as I believe some others have attempted it!
Hollie says
I made it using whole wheat flour, spelt flour,some unbleached AP flour and added more oatmeal, flax seeds and sunflower seeds. Each time I make it, I play with the amounts. I also bake in a preheated dutch oven, since it stuck to my my glass bread pans
It is delicious every time! My husband is German, so he really enjoys heartier breads. Luckily my kids like it, too!
Love the experimentation, Hollie! Thanks for sharing!
Nira says
I can tell by looking at this recipe that it’s just what I’m looking for… But I’m wondering can I make this recipe as it is using a bread machine? Thanks
I believe others have tried it? Search the comments using control+F (control find). If you try using a bread machine let us know how it goes!
Yuri says
Sorry if someone already asked this (looked through 6months of comments and didn’t see it :)) but do you have any recommendations for a bread pan or the size used for this recipe? I don’t have a bread pan and looking for some ideas in which one to get…
Hi Yuri, the pan we used was 8″ x 4 1/2″ x 2 3/4″. Hope that helps!
Yuri says
Perfect! Also, how long do you recommend to let the loaf cool?
We’d suggest at least 45-60 minutes, but it’s best to monitor by touch.
Lynette says
Would it work to use a granulated sweetener instead of honey, agave, etc?
That should work!
Megan says
I made this bread last night and it is truly one of the BEST wheat breads I have made. I misread the recipe and didn’t have time for the second rise so I popped it in the fridge and cooked it the next morning. It turned out great! I’ll definitely be making this again!
Yay! We’re so glad it turned out well! Thanks so much for the lovely review, Megan!
Joanne says
Best and easiest bread recipe I’ve ever used! On my second try, I followed suggestion in comments to add the oats and seeds (Used raw pumpkin seeds) before the first rising. I also put a small pan of boiled water on the bottom rack at the same time as putting the bread in (instead of putting the pan in first and then adding water). The bread was just as good. Thanks Minimalist Baker!
Whoop! Thanks so much for sharing, Joanne!
Laurie says
Easiest bread recipe I have ever followed, and the loaf came out perfectly. The detailed instructions were most helpful. A Healthy and tasty bread as well. Will definitely make this again!
Lovely! Thanks for sharing, Laurie!
carol sara says
Great recipe! Can you put olives instead of seeds?
I think that would be delicious!
Laurey says
This is a regular in our house. We can’t buy bread anymore. It’s all covid fault. So delicious. That’s all my husband wants.
haha yay! Thanks, Laurey. Next time would you mind adding a rating to your review? It’s super helpful to us and other readers! xo
Anya says
THIS BREAD IS SO GOOD. THIS BREAD IS SO GOOD. THIS BREAD IS SO GOOD. I will say it over and over and never do it justice. It’s some of the best bread I’ve ever made and yet also the easiest bread I’ve ever made. I followed everything exactly except for I had to replace some of the whole wheat with all purpose because I ran out, and I did use the maple syrup. It’s incredible. I wish I had made 50 loaves because it’s so hard to stop eating.
haha yay! Thanks for sharing, Anya!