
Do you have a leftover pumpkin on hand from Halloween or from pumpkin dishes (like this amazing Pumpkin Curry or Pumpkin Soup!)?
Don’t toss the seeds! Let me show you how to roast them in this easy tutorial.
How to Make Roasted Pumpkin Seeds
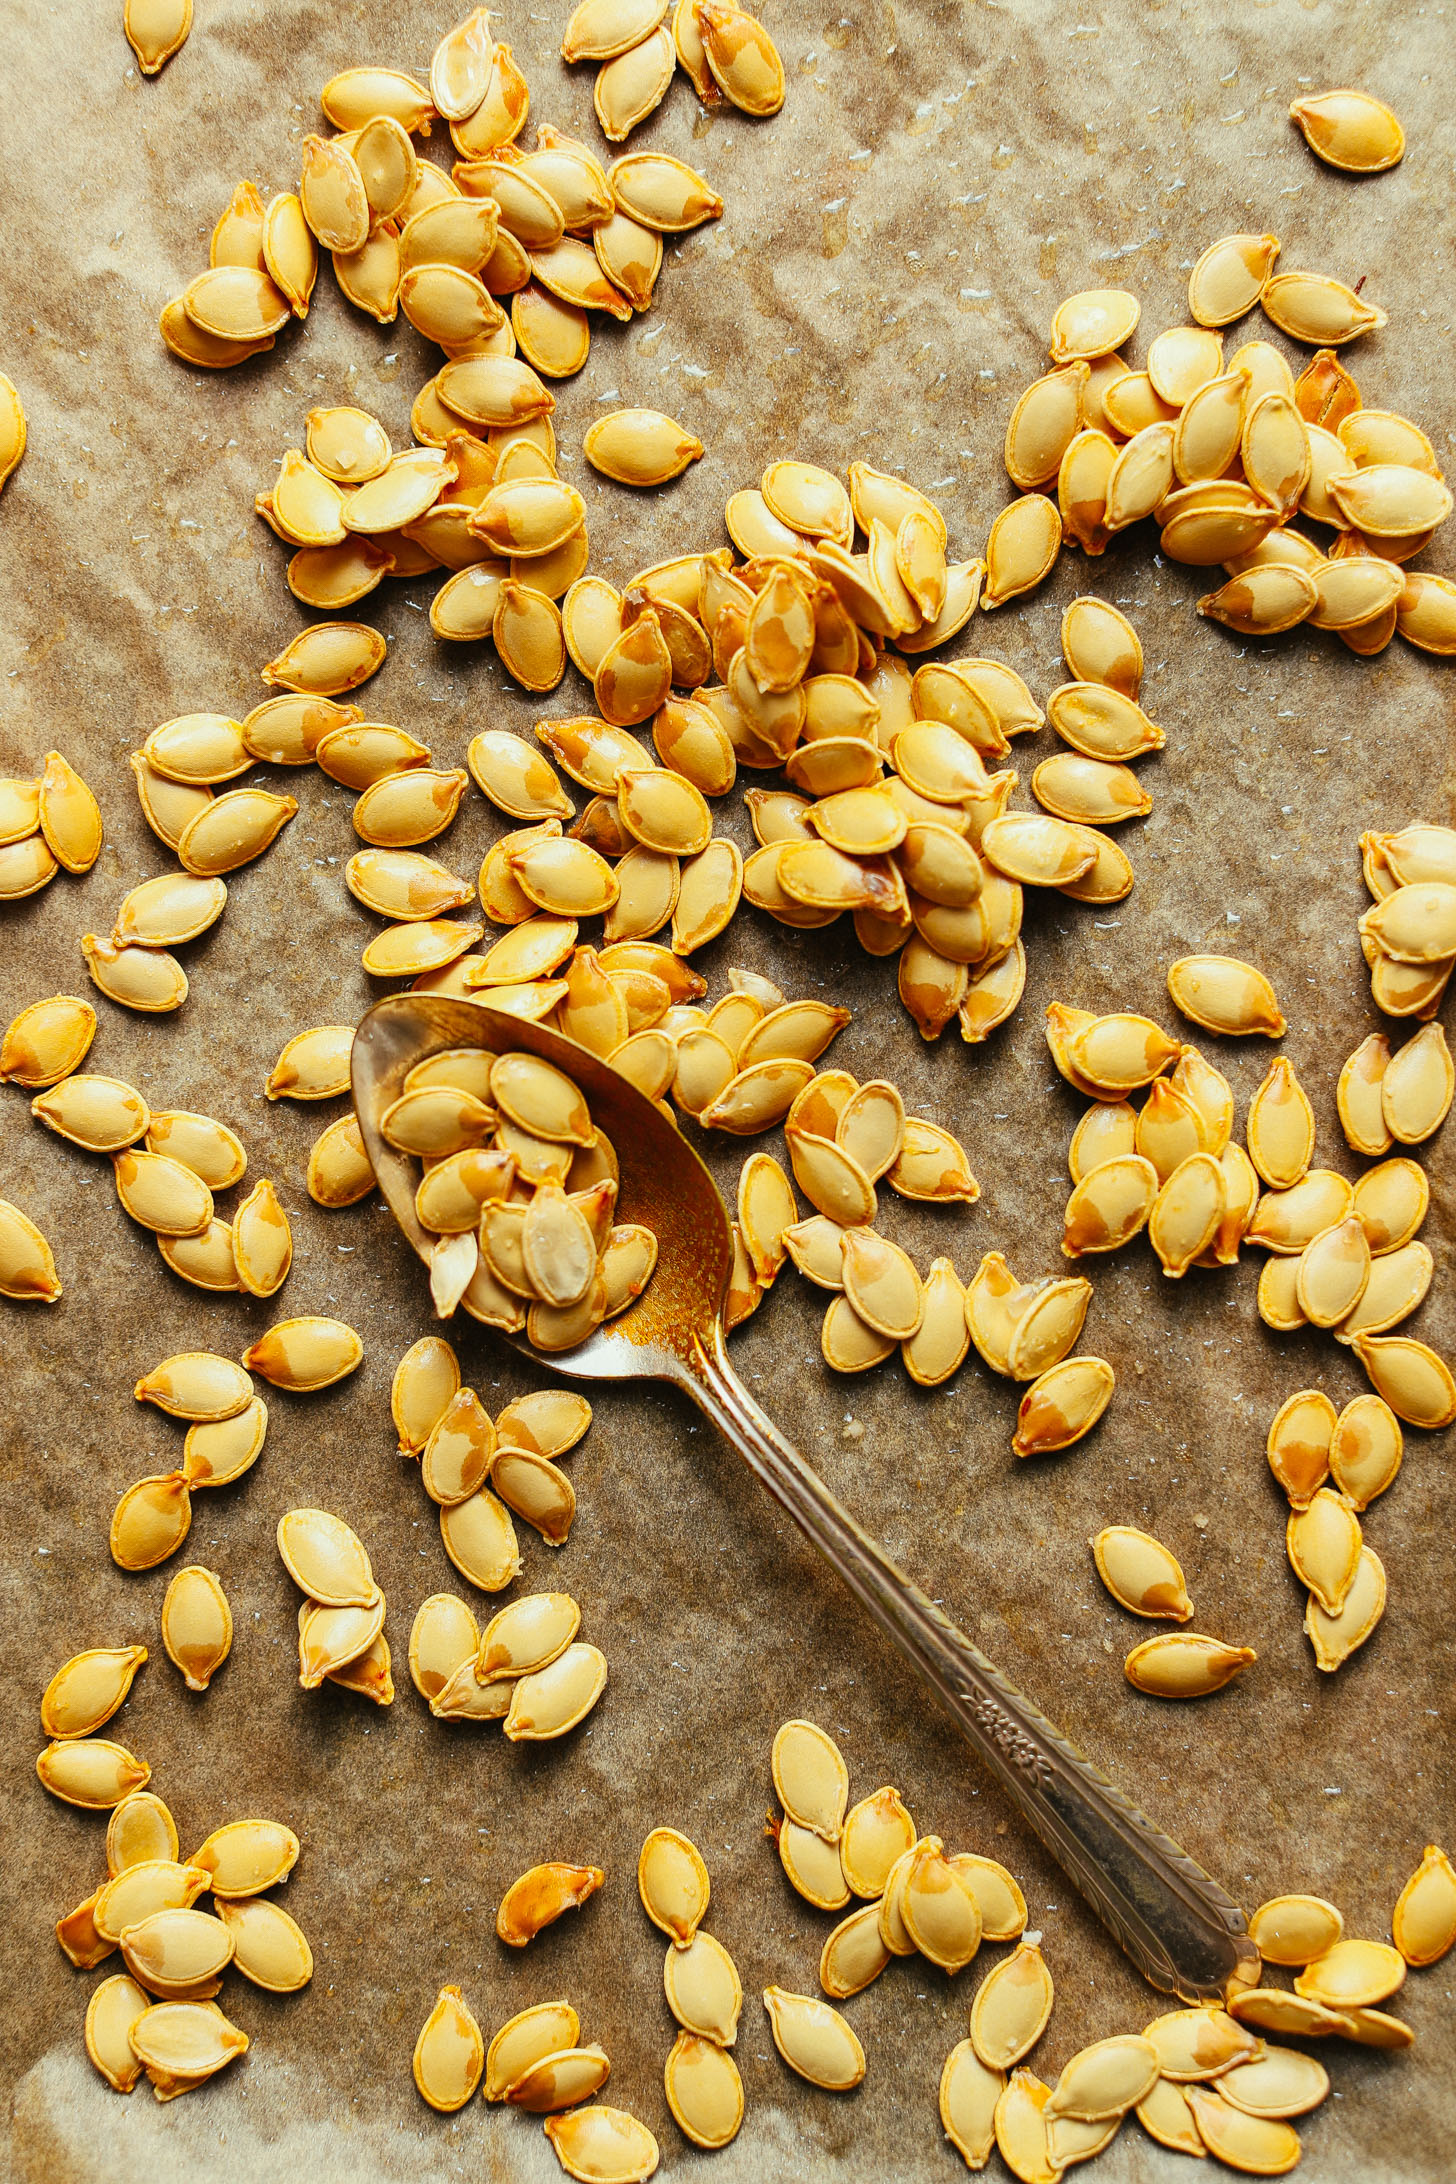
- Remove & clean seeds– It starts with scooping the seeds from the pumpkin (we prefer sugar pumpkins which tend to yield smaller, crispier pumpkin seeds) and removing the stringy parts. Rinsing in a colander or fine mesh strainer helps remove any remaining goop.
- Dry seeds– Using a towel, dry the seeds thoroughly. This helps them crisp up in the oven.
- Add oil, salt, and seasonings– We like to use avocado oil in a ratio of 1 Tbsp oil to 1 cup seeds. Season with salt and add other seasonings (such as Shawarma, Curry Powder, or Pumpkin Pie Spice) for an extra boost.
- Bake– Bake for 20-30 minutes at 325 degrees, or until the pumpkin seeds are crisp and light golden brown. Smaller seeds will need less time than larger ones.
- Let cool– As the seeds cool, they will crisp up a little more. Make sure to let them cool completely before transferring to a sealed container. Otherwise, they may get soggy from the steam.

Ways to Enjoy Roasted Pumpkin Seeds
- Enjoy by the handful as a delicious & nutritious snack!
- On salads (such as our Roasted Squash Salad with Crispy Shallot & Balsamic Reduction)
- On soups (such as our Curried Butternut Squash Soup)
- Season with Pumpkin Pie Spice and serve on sweet dishes such as Vegan Vanilla Ice Cream or Pumpkin Pie Oats.
More Pumpkin Recipes
- How to Roast Pumpkin
- 1-Pot Pumpkin Yellow Curry
- 1-Bowl Pumpkin Pie (Vegan + GF)
- Vegan Pumpkin Mac ‘n’ Cheese
If you try this recipe, let us know how it goes! Leave a comment, rating, and don’t forget to tag a photo #minimalistbaker on Instagram. Cheers and happy baking, friends!
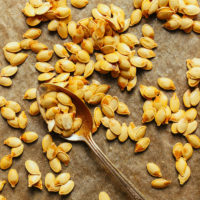
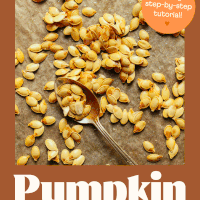
How to Roast Pumpkin Seeds
An easy, step-by-step tutorial for how to roast your own pumpkin seeds! Versatile with what seasonings you add, but crunchy and delicious every time.
Servings 4 (1/4-cup servings)
Ingredients
- ~1 cup pumpkin seeds from 1 sugar (pie) pumpkin (sugar pumpkins are best for yielding the crispiest roasted pumpkin seeds)
- 1 Tbsp avocado or melted coconut oil
- 1 healthy pinch sea salt
- Seasonings (such as Shawarma or Curry Powder // optional)
Instructions
- Preheat oven to 325 degrees F (162 C) and line a baking sheet with parchment paper (or more if making a larger batch).
- Scoop the seeds from your pumpkin and try and remove most of the stringy parts. Then place in a colander or fine mesh strainer and rinse thoroughly to remove any of the leftover goop from the pumpkin. (If using store bought, measure out seeds and place directly on baking sheet.)
- Arrange cleaned pumpkin seeds on a towel and dry thoroughly. This will help the pumpkin seeds crisp up in the oven.
- Arrange dried pumpkin seeds on baking sheet and drizzle with oil (~1 Tbsp / 15 ml per 1 cup / 64 g seeds). Add salt and any other desired seasonings (such as Shawarma or Curry), and toss to thoroughly coat.
- Bake for 20-30 minutes (this will depend on how big your seeds are), or until crisp and light golden brown.
- Let cool completely before transferring to a sealed container, such as a mason jar. Will keep at room temperature for 1 week or more, or in the freezer up to 1 month.
Video
Notes
*Nutrition information is a rough estimate calculated with oil and salt.
Nutrition (1 of 4 servings)
Serving: 1 quarter-cup servings Calories: 102 Carbohydrates: 8.6 g Protein: 3 g Fat: 6.5 g Saturated Fat: 1 g Polyunsaturated Fat: 1.87 g Monounsaturated Fat: 3.37 g Trans Fat: 0 g Cholesterol: 0 mg Sodium: 295 mg Potassium: 147 mg Fiber: 2.9 g Sugar: 0.4 g Vitamin A: 0 IU Vitamin C: 0 mg Calcium: 10 mg Iron: 0.5 mg


Briony says
Soooo easy, wish I had seen this years ago!
Thank you :)
We’re so glad you found it and enjoyed the result, Briony! Thank you for sharing! xo
Anna says
These are oddly good. They were fibrous in a good way that is hard to describe. (I’ve only ever had the green pumpkin seeds purchased at the store or on baked goods, so there isn’t a point of comparison for me with white seeds.) I had a cup of Sugar Pie pumpkin seeds and made this with the avocado oil and the pumpkin pie seasoning mentioned above the recipe. Separating, cleaning, and drying the seeds was tedious, but good for mindful work. For drying after rinsing, I used a cloth towel and a paper towel and was surprised with how much additional pumpkin came off. Because I’m terrible at drizzling, I coated the seeds in a bowl first, then took the extra time to separate them out on the sheet. These are a lot of work for a little outcome, but I’ll make them again and am glad I found this recipe.
Thank you for sharing your experience, Anna! We’re glad you tried it out and will be making the pumpkin seeds again! xo
Samantha says
Easy to follow instructions, I gutted my pumpkin, picked out the seeds and rinsed them. Now I have never done this at home, that is making pumpkin seeds, so I was suprised they don’t really dry. I used just salt and olive oil and they turnt out great.
Thanks so much for the lovely review, Samantha!
Barbara Oatway says
These are the best and easiest I’ve ever cooked. I added salt and garlic powder. Delicious!!!!
We’re so glad you enjoyed them, Barbara. Thanks so much for the lovely review! xo
Alyssa says
Wow, these were delicious!! I was a little hesitant to try these because was unsuccessful in roasting other types of squash seeds, but I’m so glad I did! I didn’t wash my seeds, just patted them dry with a kitchen towel before I put them in a bowl with some oil and salt before putting them in the oven.
We’re so glad you enjoyed them, Alyssa. Thanks so much for the lovely review! xo
Cheryl says
This is y rating which I forgot to give.
Thank you for the update, Cheryl! xo
Cheryl says
I tired the recipe and the seeds were amazing. Unfortunately they were not very big, I bake them on a tray with salt and a avocado oil then when they were almost finished I sprinkled All Spice on them. Soooooo good.
Thanks so much for the lovely review, Cheryl. We are so glad you enjoyed them! Next time, would you mind leaving a star rating with your review? It’s super helpful for us and other readers. Thanks so much! xo
Jacqueline says
This recipe is perfect! I absolutely love my roasted pumpkin seeds. I’m writing this review 2 months after making a large amount of the seeds. I stored them in Ball jars with the Ball leak proof screw caps I purchased from Walmart. It is still as fresh as it was 2 months ago! I didn’t know I could freeze them…but it’s super fresh anyway:)
Amazing! Thanks so much, Jacqueline!
Sarah says
We made these from two sugar pumpkins and they turned out great!
I had trouble drying them so I actually put them in the oven for 3 min twice, turning them in between, to get them super dry before putting oil on them, and they turned out perfect! Crispy crunchy perfection 😋
Woohoo! Thanks so much for the lovely review and for sharing your experience, Sarah!
Cat says
Made this yesterday and it was a success. I always feel bad for throwing away the seeds and now won’t have to anymore. I served it as a garnish to pumpkin soup and everyone loved it.
We’re so glad you enjoyed it, Cat! Thanks so much for sharing! xo
Carol Back says
I made these today using seeds from an orange coloured pumpkin and used olive oil and pink Himalayan salt, absolutely delicious. The first time I have tried this. Yummy.
Woohoo! Thanks, Carol!
Nicola Griffiths says
I made this today and I have none left! Nutty snack is yummy
Woohoo! Thanks, Nicola!
Arpita Patel says
Your pieces of pumpkin must have been very, very small. I roasted my pumpkin for 60 minutes and it still wasn’t cooked. After Halloween many of us are looking for recipes to use up our pumpkin. The soup was good, but it takes a LOT longer to roast than 35 minutes.
Hi Aripita, we suggest using a sugar pumpkin, which are smaller.
John says
I wouldn’t suggest drying them off with paper towel. Most of my seeds after drying had paper towel stuck to it, so I threw them away prior to baking. A kitchen towel would have worked better or even air dry on a sheet pan.
We’ll make that note!
Pauline Eales says
I had roasted a whole pumpkin to make soup. after cooling i cut up the pumpkin, scooped out the seed and proceeded with your recipe. I also added to the seeds the thinly peeled skin. The skin and seeds were delicious, and no waste.
Thanks so much for sharing, Pauline. We are so glad you enjoyed it! Next time, would you mind leaving a rating with your review? It’s super helpful for us and other readers. Thanks so much! Xo
Teju says
Do we need to remove the skin of each roasted seed before eating ?
Nope! You can eat the skins.
Sherilyn says
Hi I tried making these but we couldn’t eat them, it was like trying to eating wood. I was gutted because the flavour is delicious!
So strange! Sounds like they got slightly overbaked?
Ott says
I placed them in my oven tray right after I baked my frozen French fries (French fry oil ingredient is sunflower oil only. None of that nasty palm oil.) they smell taste so good. didn’t need any salt too.
Patti Greene says
How do you shell the seeds?
Hi Patti, we don’t shell them. Just eat whole =)
El says
I made it and left it in the jar in the cupboard for 3 wks now, can I still eat it? Didn’t know I can freeze it. Otherwise, how long is it good left in the glass jar in the cupboard for?
Hi El, we think it would only keep for 1 month in the cupboard. But it will depend on the room temperature.
El says
Ok. Thanks. So it keeps well in the fresh freezer?
It should
Linda Richmond says
These were SO good and super easy. Thank you for the recipe! I used a bowl to mix the seasonings and oil, but next time might try mixing them right on the sheet, as directed. We had 2 and 1/3 cups of seeds, so we split it into two batches. Seasoned one with Trader Joe’s garlic salt, onion powder, dried parsley, pepper, Krazy Jane’s mixed-up salt… The other one we did lots of chili powder and a dash of cayenne and sea salt. … I used a sugar baby (mini) pumpkin, so the seeds were smaller, and I liked them much better than the big seeds that come out of big pumpkins…
We’re so glad you enjoy this recipe, Linda! Thanks so much for sharing your experience! xo
Ellen Wallace says
I tried this once before not very successfully, so read through the comments this time – very helpful: I dried the seeds better but left a bit of pumpkin, shook them in a bag to completely cover with good quality colza oil and salt, spread them out on the tray and halfway through the roasting I stirred them around a bit. Terrific! Thanks ?
Yay- we’re so glad they worked for you better this time! Thanks for sharing your experience!
Becky says
So easy and tasty!
Yay! We’re so glad you enjoyed them! Thanks for sharing, Becky!
Liz says
Great recipe! I tried a few different varieties, chili, curry, dill, and plain salt. So delicious!
Yum! Love all your spice variations. Thanks for sharing!
Danielle Brady says
Great recipe! I used salt, tandoori spice and a bit of brown sugar…they were delish!
Thanks so much for the lovely review, Danielle. We are so glad you enjoyed it! Next time, would you mind leaving a rating with your review? It’s super helpful for us and other readers. Thanks so much! Xo
Ws says
I loved them so much!!! Thanks Dana,these made an excellent snack.
Ruth says
I made a slight modification to your instructions and opted to toss the seeds while in a bowl prior to spreading on the baking sheet. This was to save myself picking dog hair off all the ones that would have landed on the floor; at least a half hour’s labour. lol ;P
Thanks for sharing, Ruth!
Cindy H says
Thank you Ruth. This is too relatable. As well as dog hair on the floor, I also cover the containers so floating cat hair doesn’t have a chance to light.
In my case, Dana, I used olive oil and a bit more salt. I also just eat the innards of the seed. ?
Thank you for an easy to follow recipe!
Matija says
Sea salt and olive oil – perfection!
Thanks for sharing, Matija!
Konnie says
We tossed in cinnamon, cardamom, nutmeg, salt and pepper. Soooo good!
Great! Thanks, Konnie!
Nina says
What temperature is the oven on?
You can find that in step 1!
Lindsey Phelps says
I made these following your recipe but used my air frier instead! It only took 12 minutes at 350 degrees to crisp up. Such a good snack.
Yum! Thanks for sharing, Lindsey! xo
Gisela de Hollanda says
Hi, I followed recipe, although I dried the seeds overnight as they were very slimy. In the oven some of them started to pop. Out golden brown after 24 minutes but impossible to eat. When are you supposed to crack them open or do you eat them entirely with the shell on??
Hi Gisela, sorry to hear you had difficulty with this recipe! It is normal for them to pop in the oven. Maybe drying them out overnight dried them too much. Naturally, they are a bit chewy or fibrous and are different than shelled roasted pumpkin seeds from the grocery store. They are intended to be eaten with the shell on. Hope that helps!
Heidi says
All four of us liked these!
We’re glad to hear that, Heidi!
Michelle says
Yum! I was out of Avacado oil so used olive oil and sea salt. Will definitely use this recipe again. Thank you!
Karen Parent says
Super tasty with some guts left on – don’t rinse them! ??
Jeanine Robinson says
I agree! Leave on the guts! Gives extra flavor taste delicious!
Wendy Edgell says
My new favourite snack! I didn’t rinse them and some ‘gubbins’ was still attached! Didn’t mess about just a little of olive oil and sea salt on a tray. Ive used various squashes, all varieties so far have been delicious, a little more salt after cooking to taste. What is the calorie content please!?
Thanks, Wendy! Find the nutrition information just below the recipe!