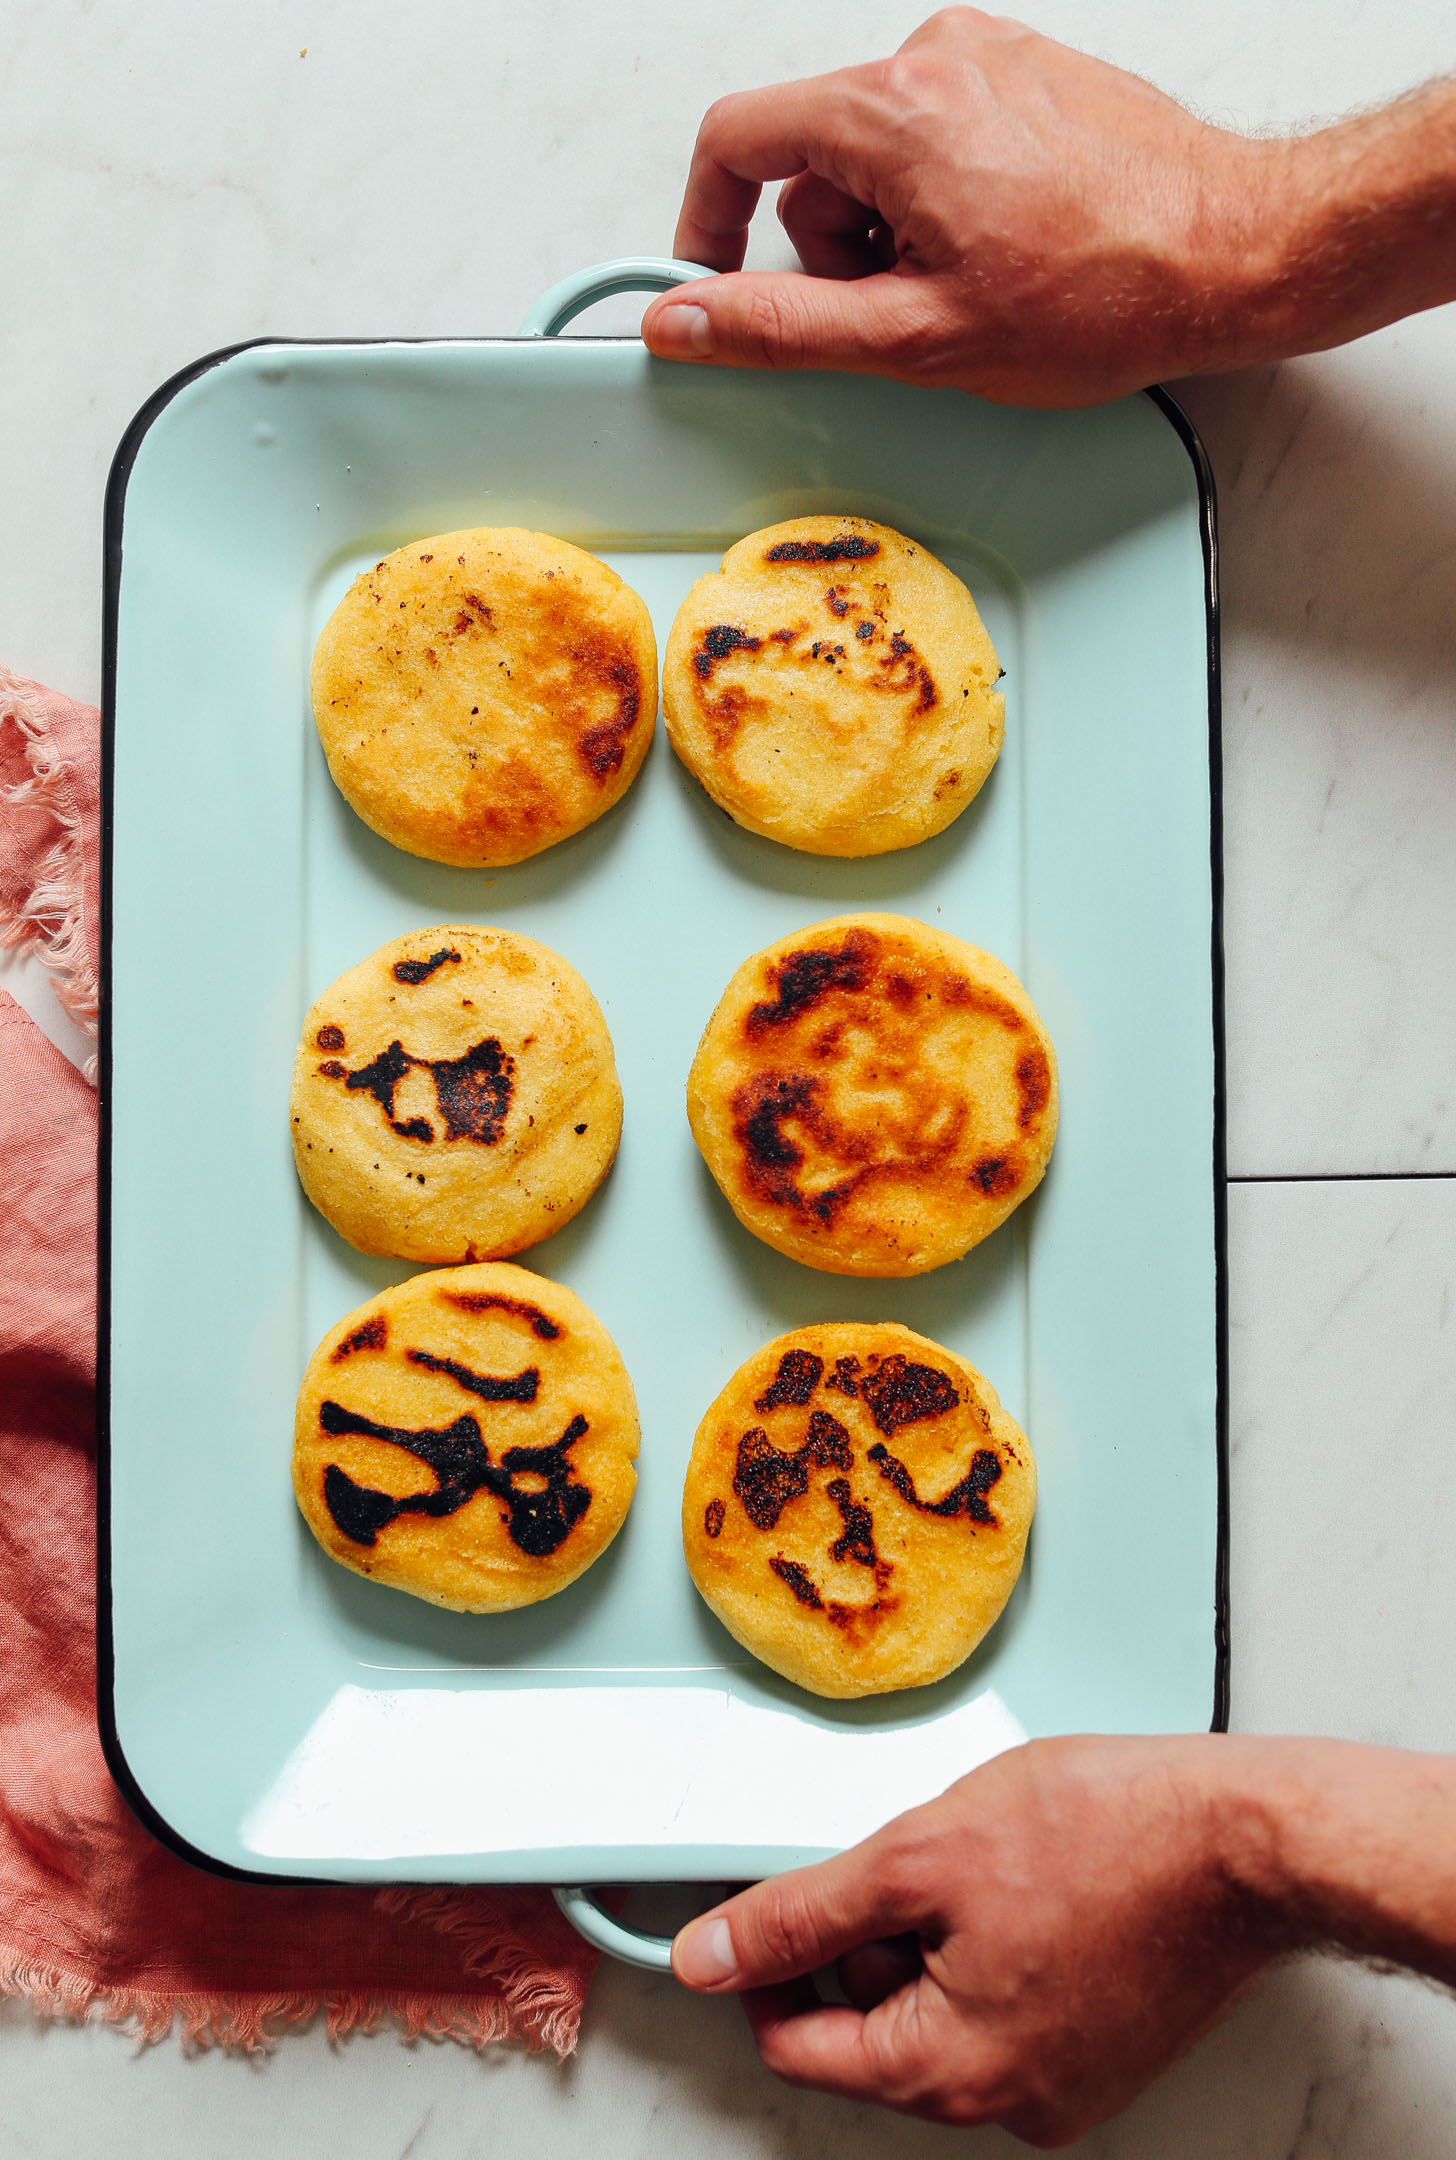
We have a serious thing for the Portland restaurant Teote. It’s Latin American-inspired and celebrates the arepa in all forms.
I’d never had an arepa before dining there, but since that first bite, I’ve been back almost weekly. (It doesn’t hurt that they have a killer vegan bowl there, which inspired this Vegan Black Bean Plantain Bowl!)
I started testing arepas of my own recently, but all of my attempts fell slightly short of Teote’s glory. So I did what any sane, normal human would do: I called them and asked for their recipe. And guess what? They basically gave it to me. Well, at least their secrets. And I totally ran with them.
So this, my friends, is it. The key to unlocking perfectly flavorful, crisp-on-the-outside, tender-and-fluffy-on-the-inside arepas! Let’s do this.
What are Arepas?
Arepas are cornmeal cakes that originated hundreds of years ago in a region that now makes up Colombia, Venezuela, and Panama. Traditionally, they were cooked on a pan called a budare. But they can also be grilled, baked, or fried.
Venezuelan arepas tend to be smaller and thicker, while Colombian arepas tend to be sweeter, thinner, and stuffed with cheese. Our version more closely resembles Venezuelan arepas. You can find more traditional recipes for Venezuelan arepas here and Colombian arepas here.
How to Make Arepas
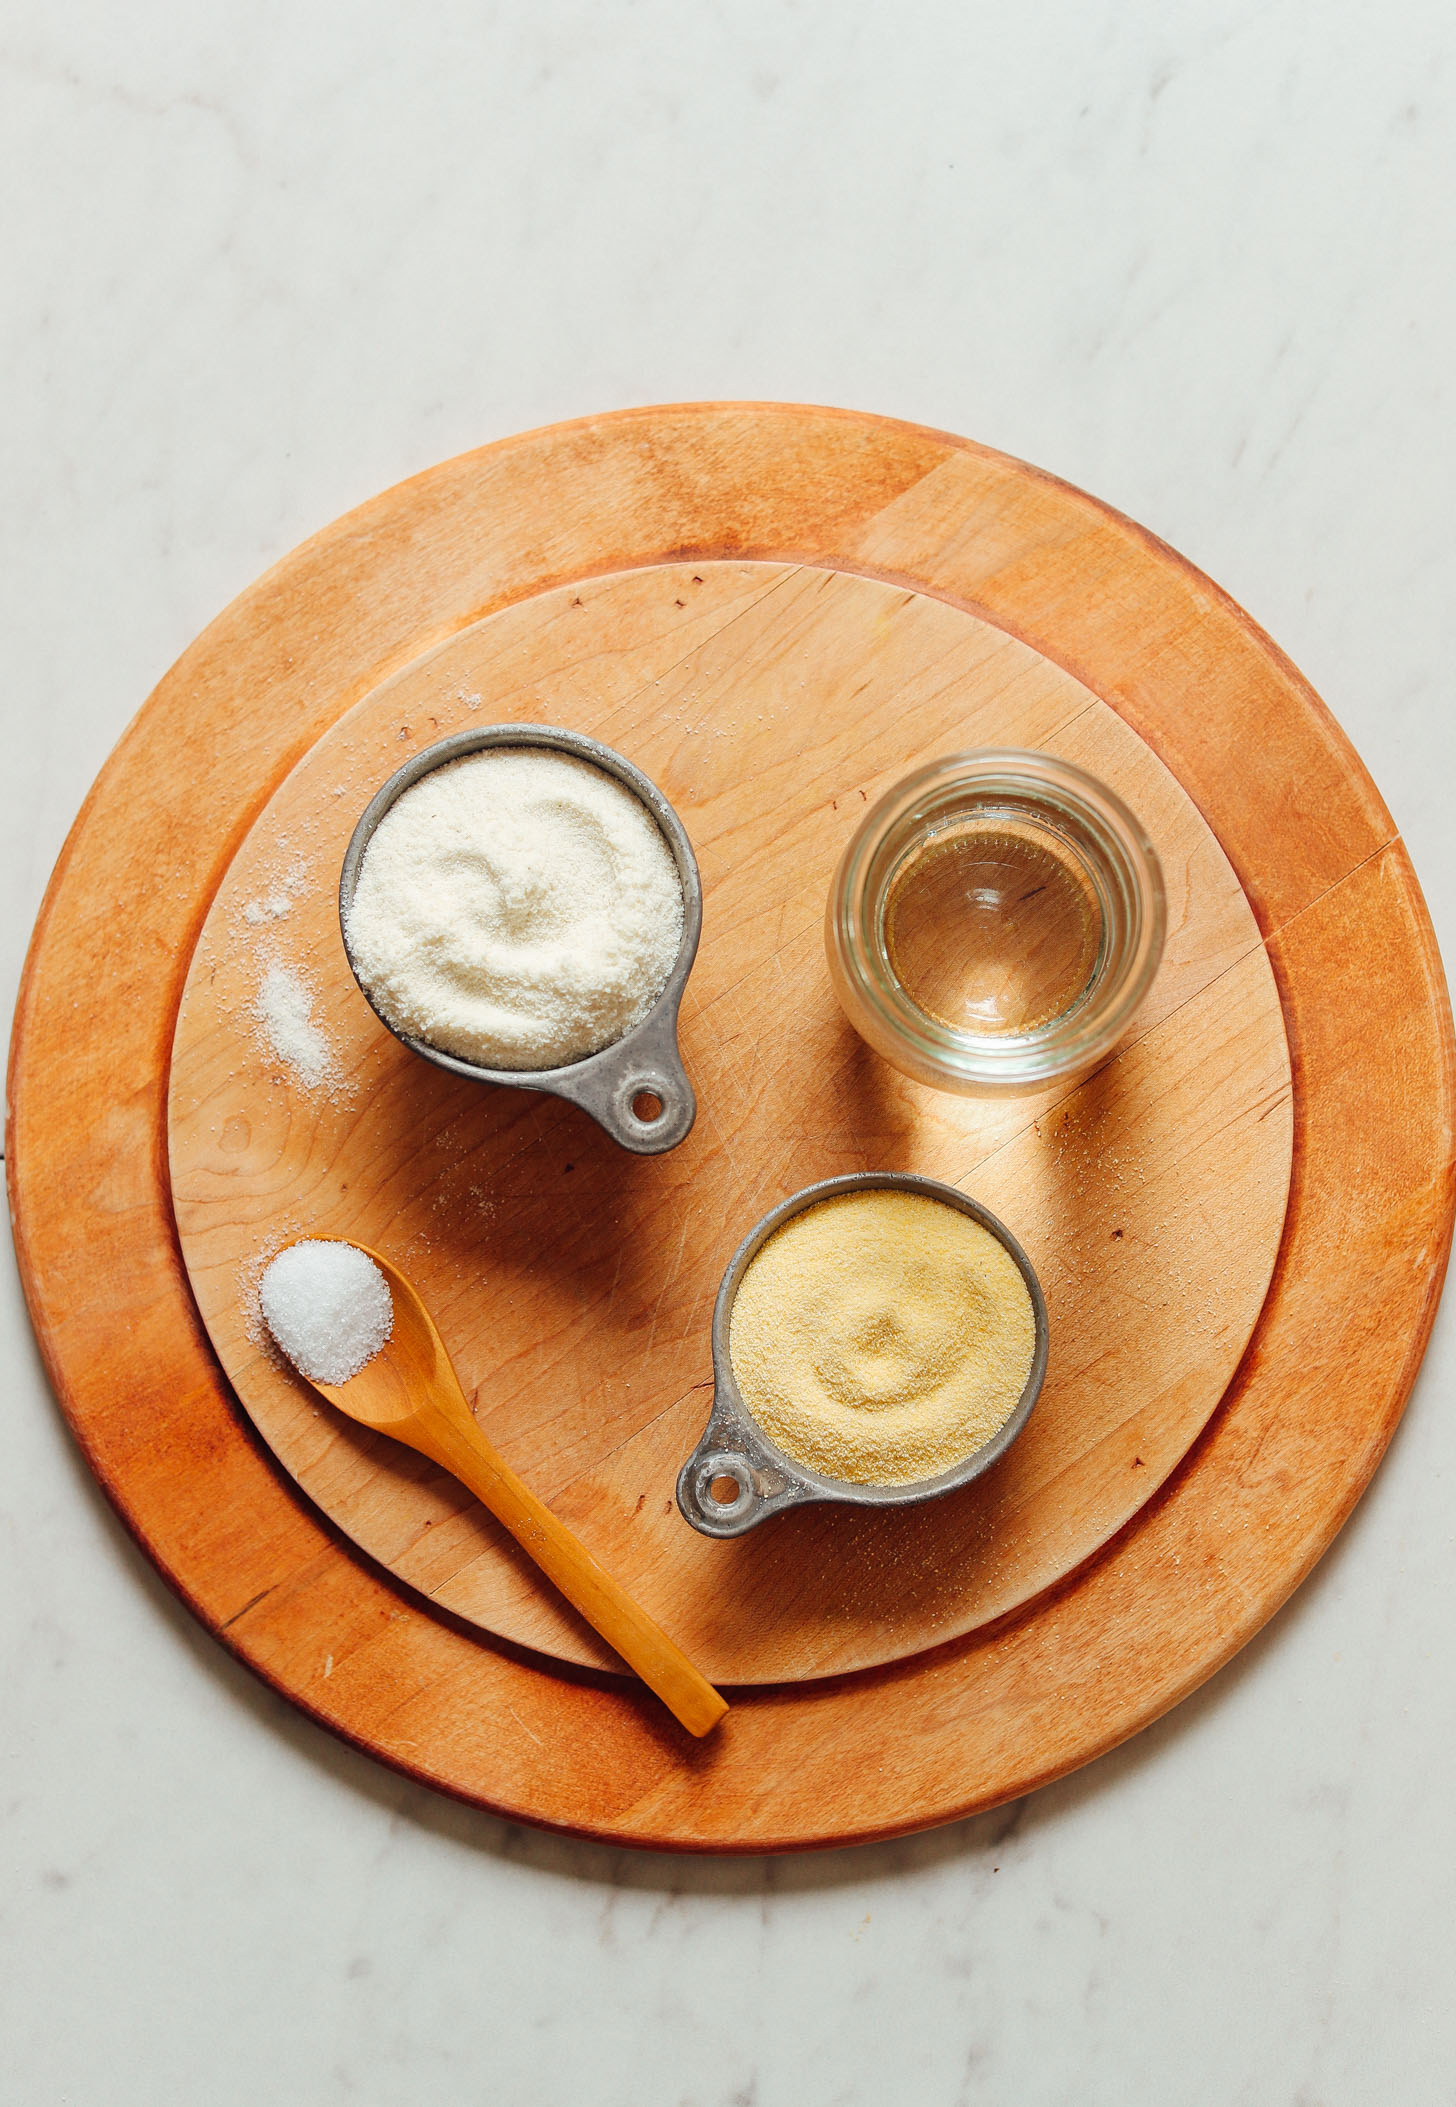
This recipe requires 30 minutes, 1 bowl, and just 3 ingredients: salt, water (which we don’t count as an ingredient), oil for cooking, and areparina or masarepa, which is a special pre-cooked corn flour specifically for making arepas.
How to Make Arepas with Masa Harina
If you don’t have masarepa (an ingredient that can be hard to find, especially organic and non-gmo), I’ve found a workaround that keeps these gluten-free! (Please note it’s not traditional.)
Simply sub the full amount of masarepa (2 cups as the original recipe is written) for 1 1/2 cups masa harina (works far better than cornmeal, but cornmeal can also work), 1/4 cup coconut flour, and 1/4 cup gluten-free flour or arrowroot starch. I also like adding ~1 tsp baking powder when I add in the flours for some rise. Add more gluten-free flour or arrowroot starch as needed until the dough is moldable and not tacky or crumbly. Proceed with the recipe as instructed.
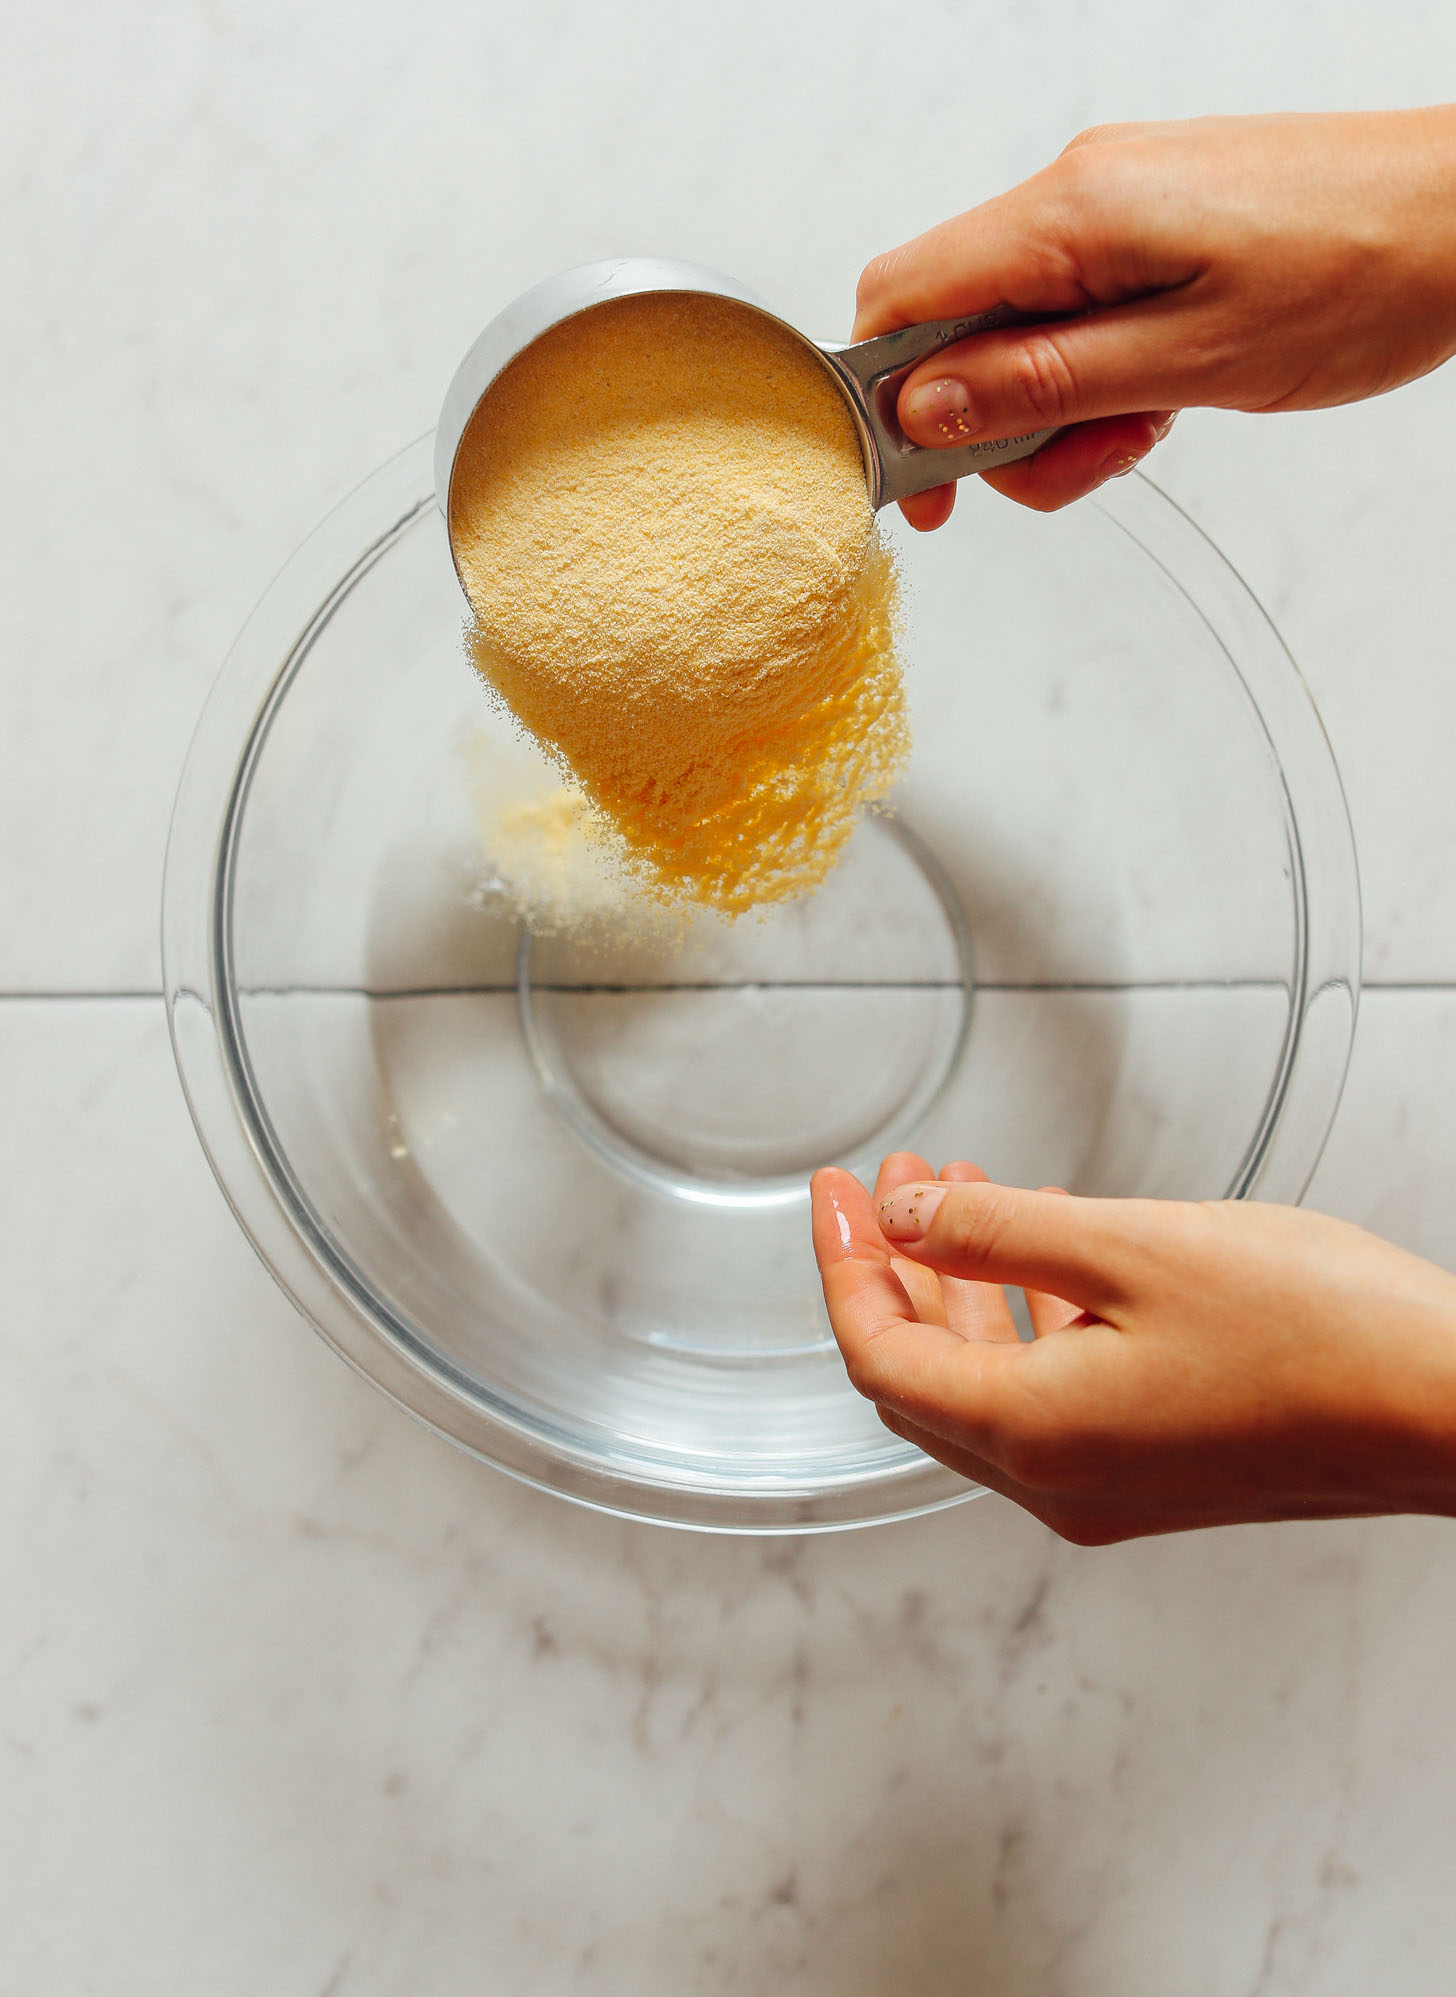
The process is simple: Dissolve salt into the water and slowly add the masarepa until a loose dough forms, stirring with a spoon or your hands.
I use my hands because, when Colombian and Venezuelan grandmas use their hands, you follow suit.
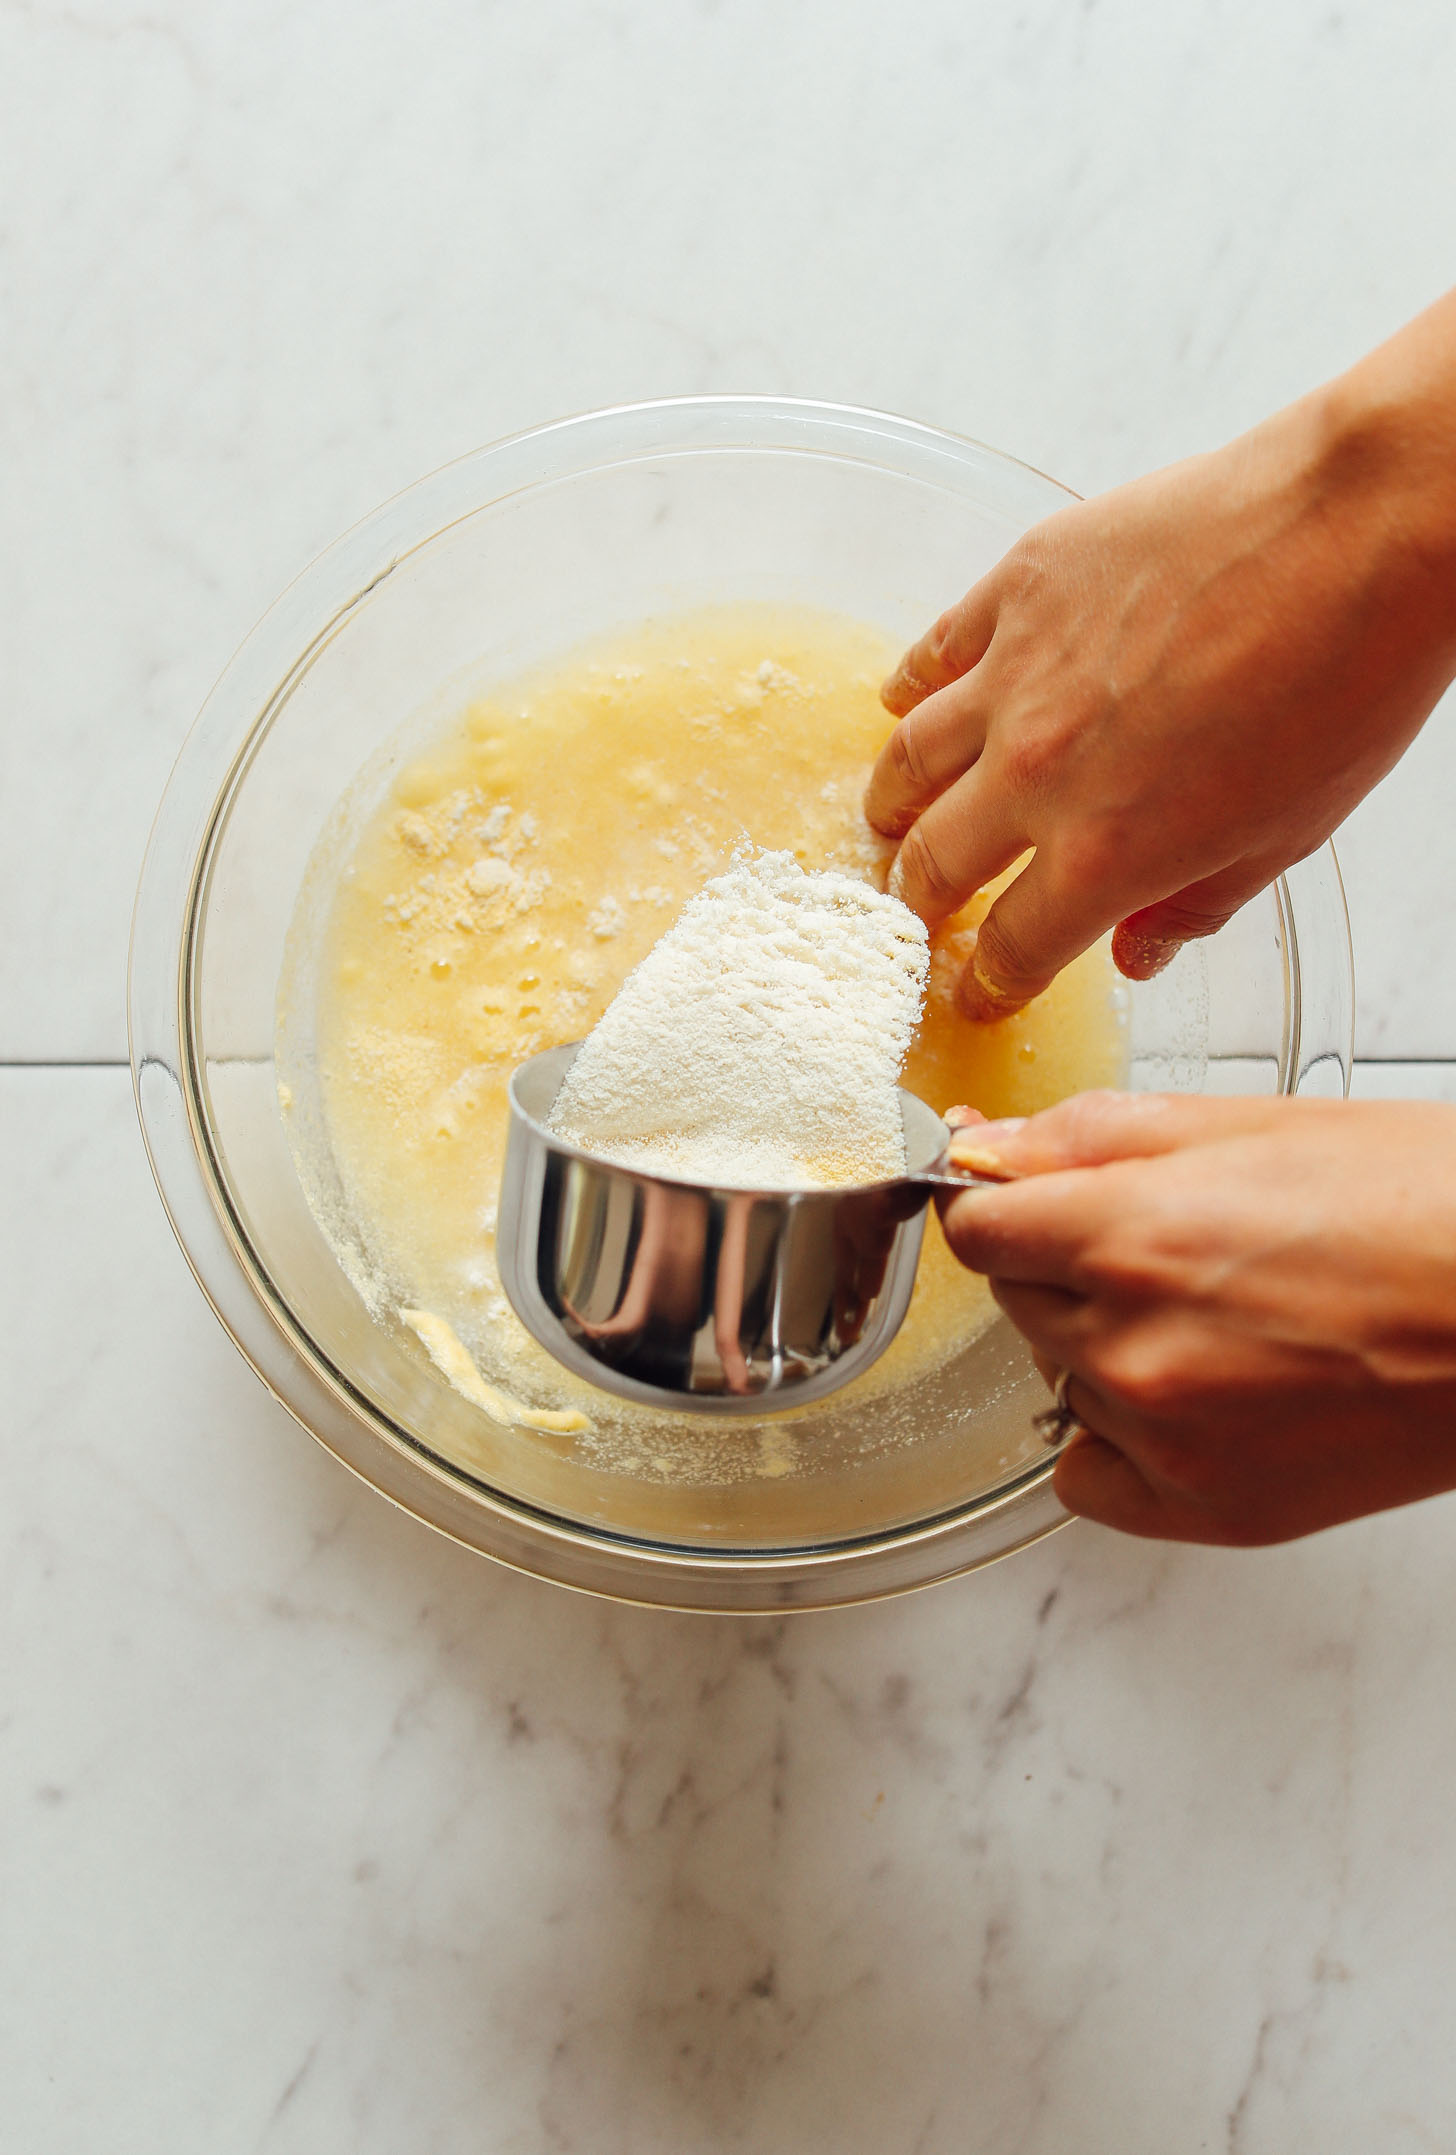
Now, the Teote secret lies in two deviations:
1) Mixing both white and yellow masarepa (which I also recommend doing, as it creates a nice golden color but a light texture and a slightly less bitter flavor).
and
2) Deep frying (no wonder they taste so good). We did opt for pan frying and then baking to cook the middle all the way through, but by all means, fry away if you want!
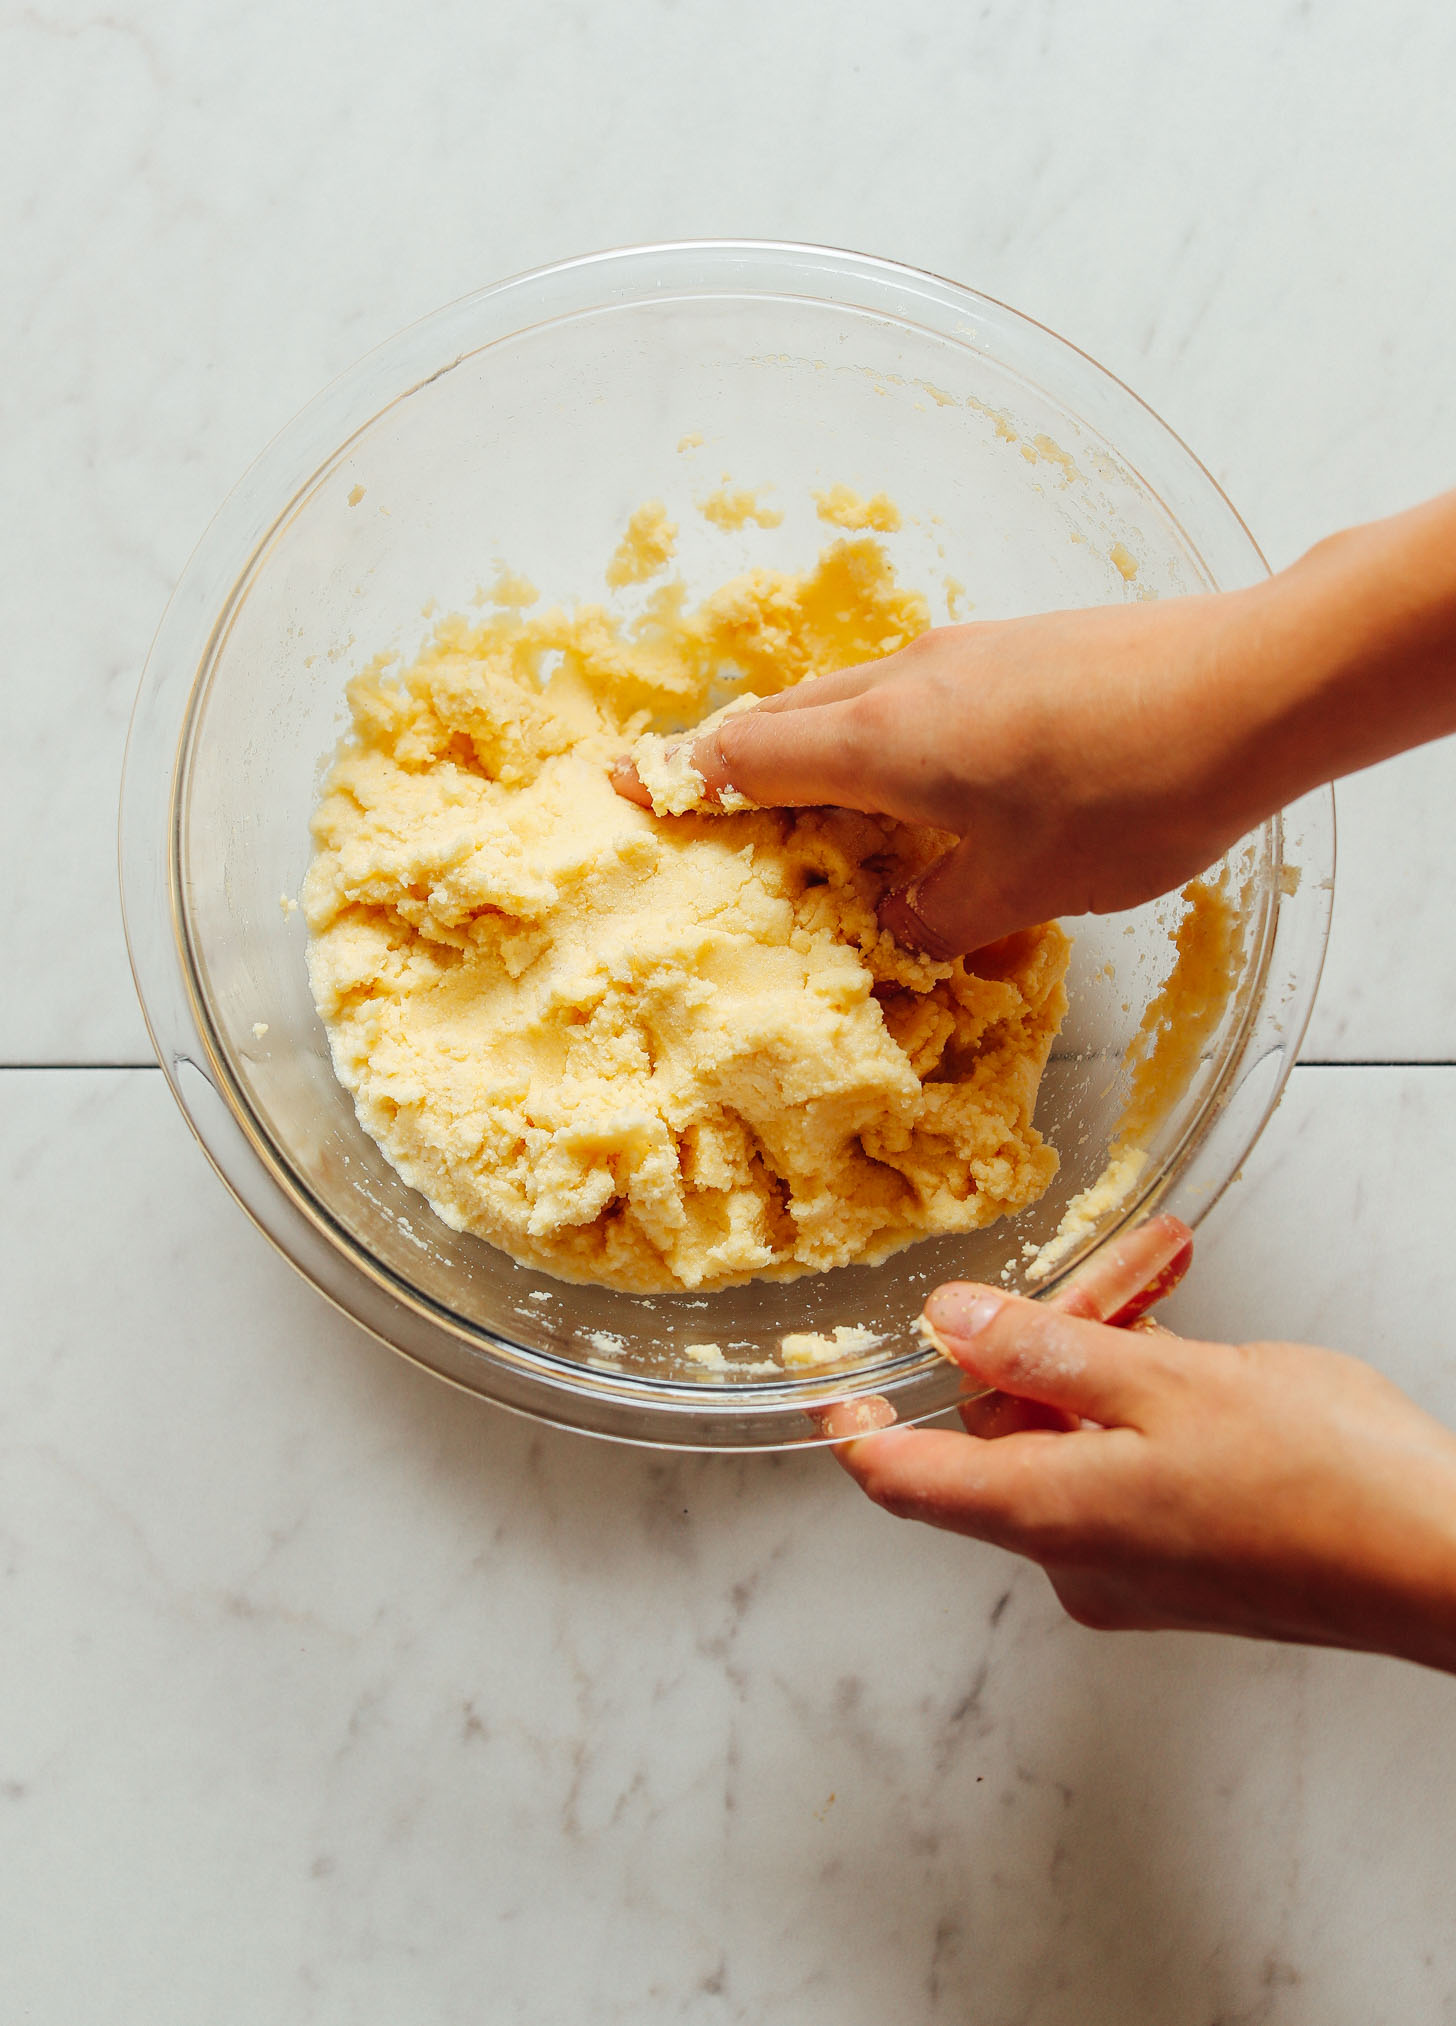
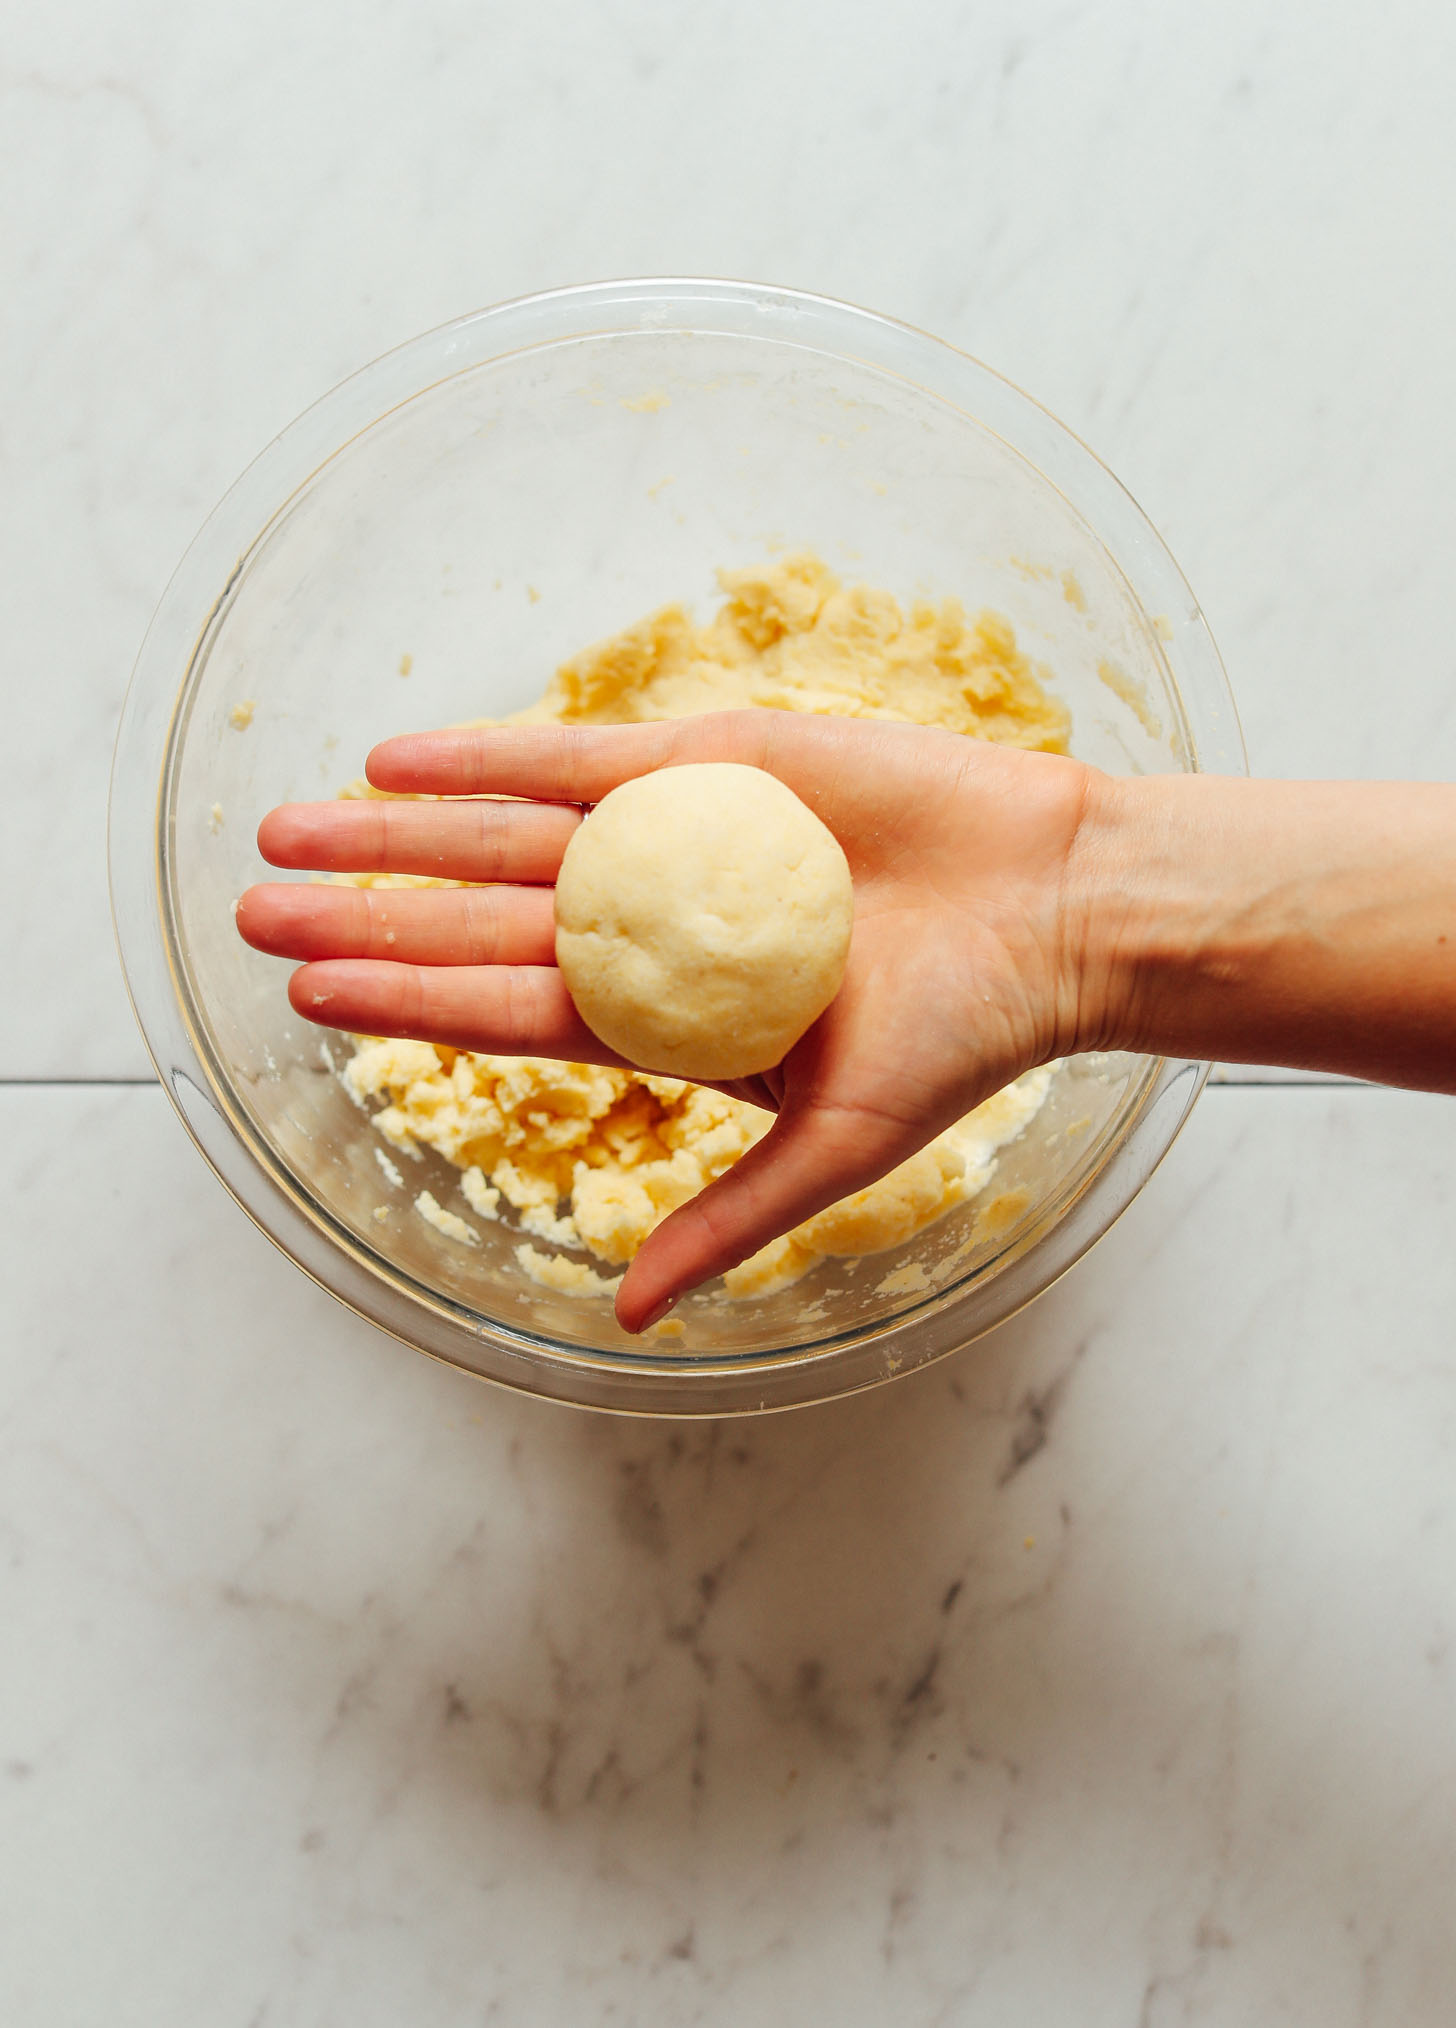
Once you get your dough where it should be, let it rest for 5 minutes. Then scoop out fist-size portions and form into a ball.
If the edges crack easily or it feels too dry, add a little more water to moisten. It’s a simple dough to work with. Then it’s as easy as rolling into balls and gently forming / smashing into discs.
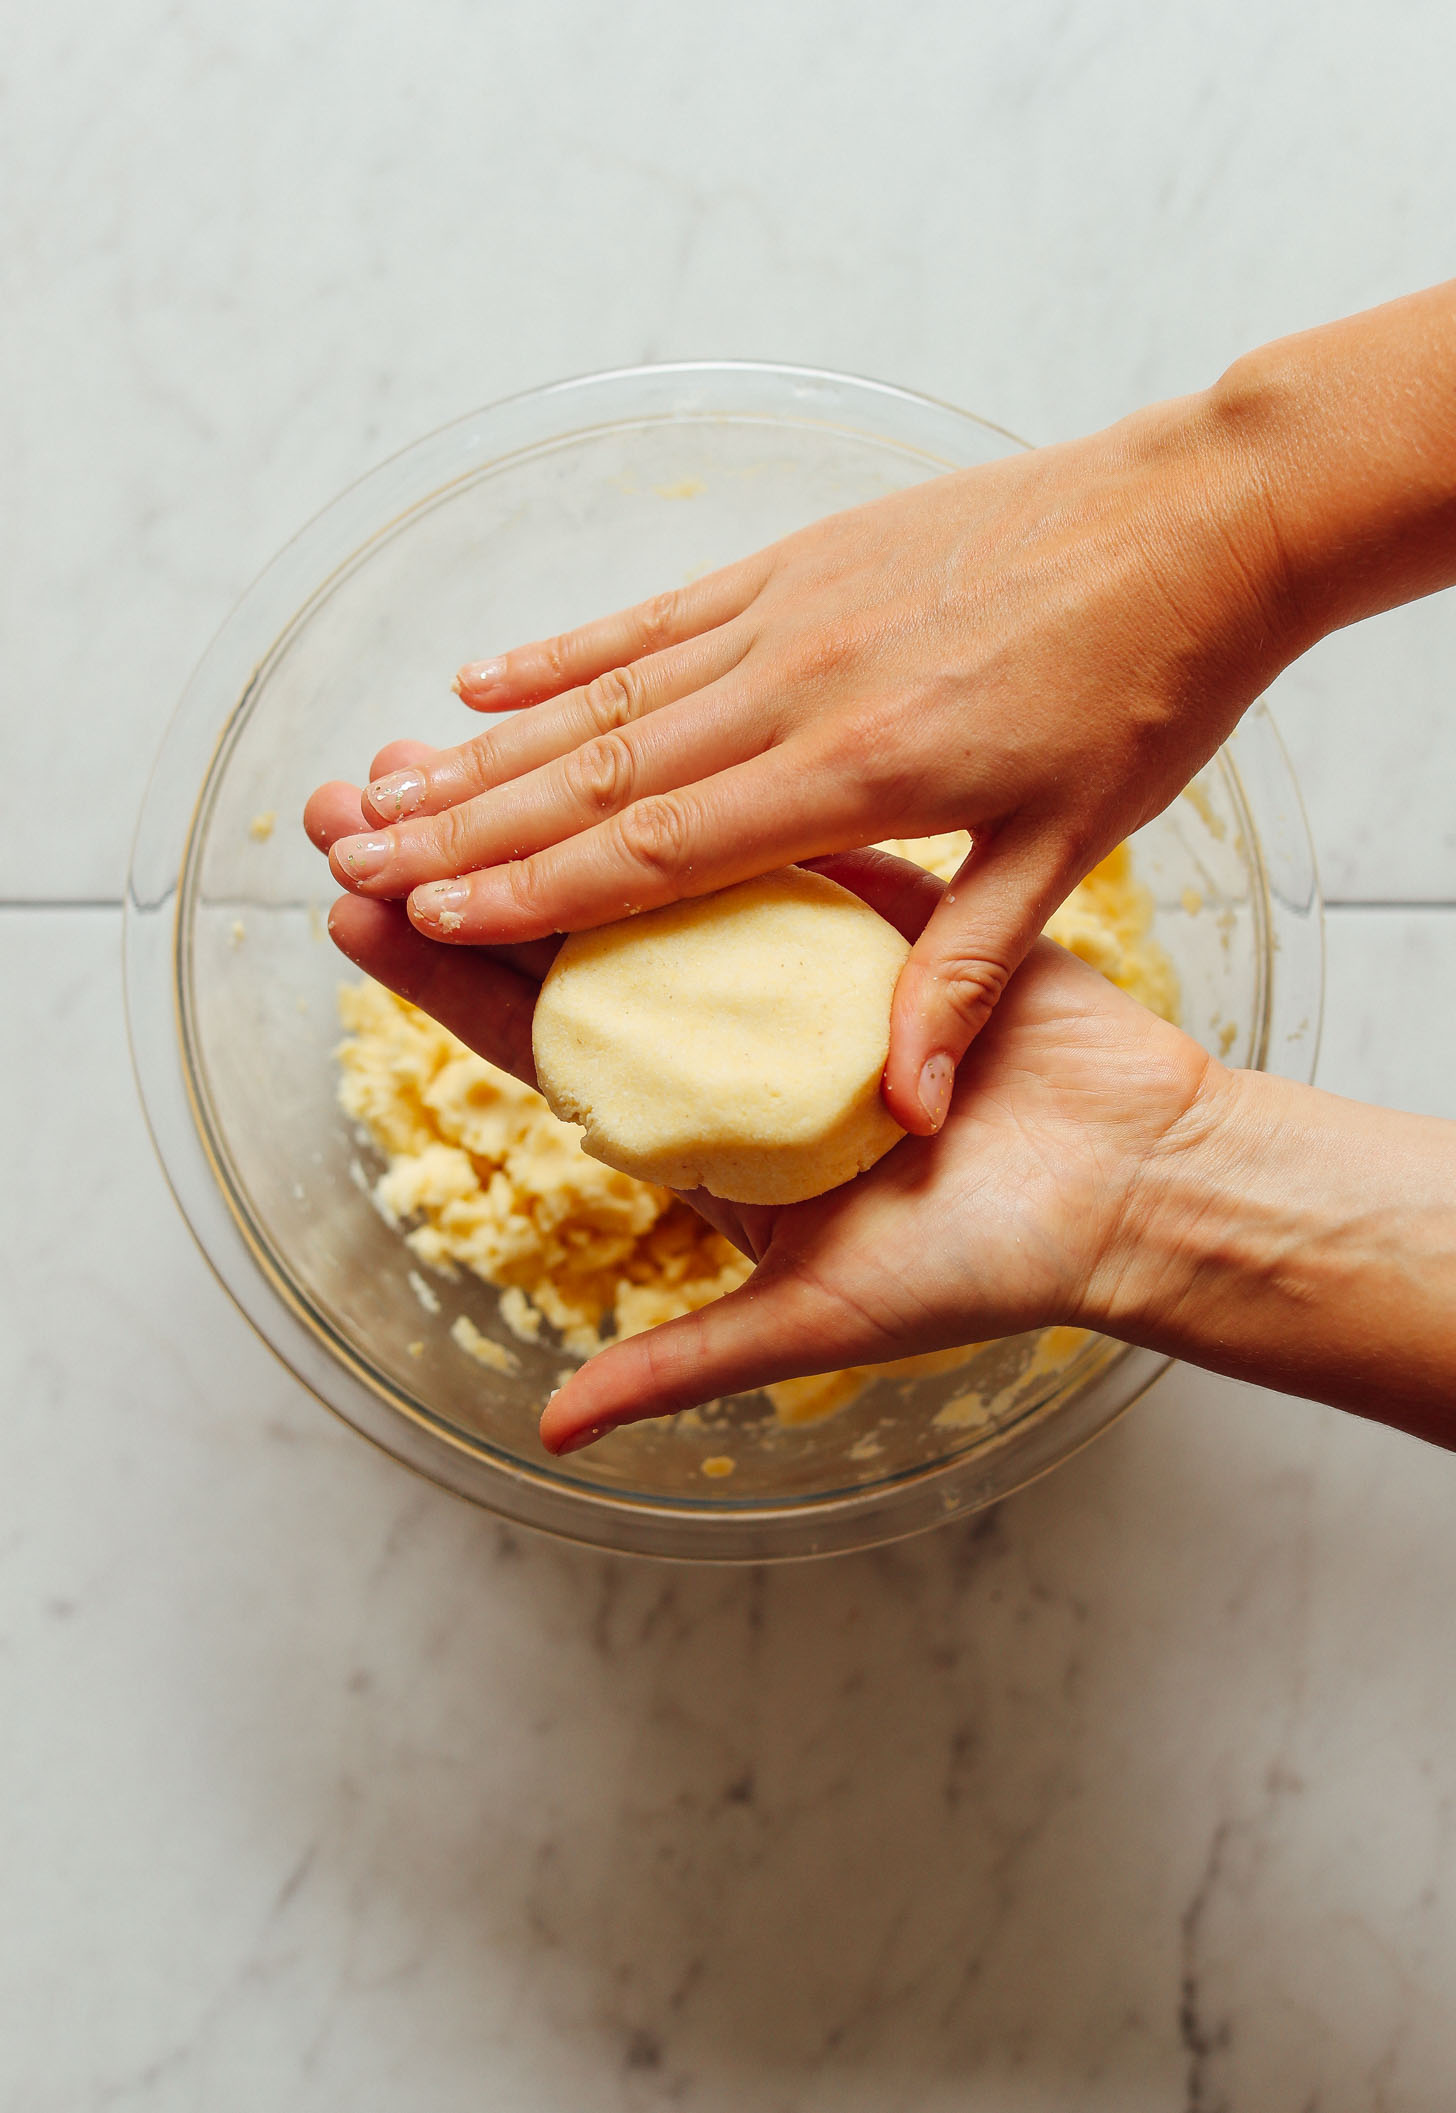
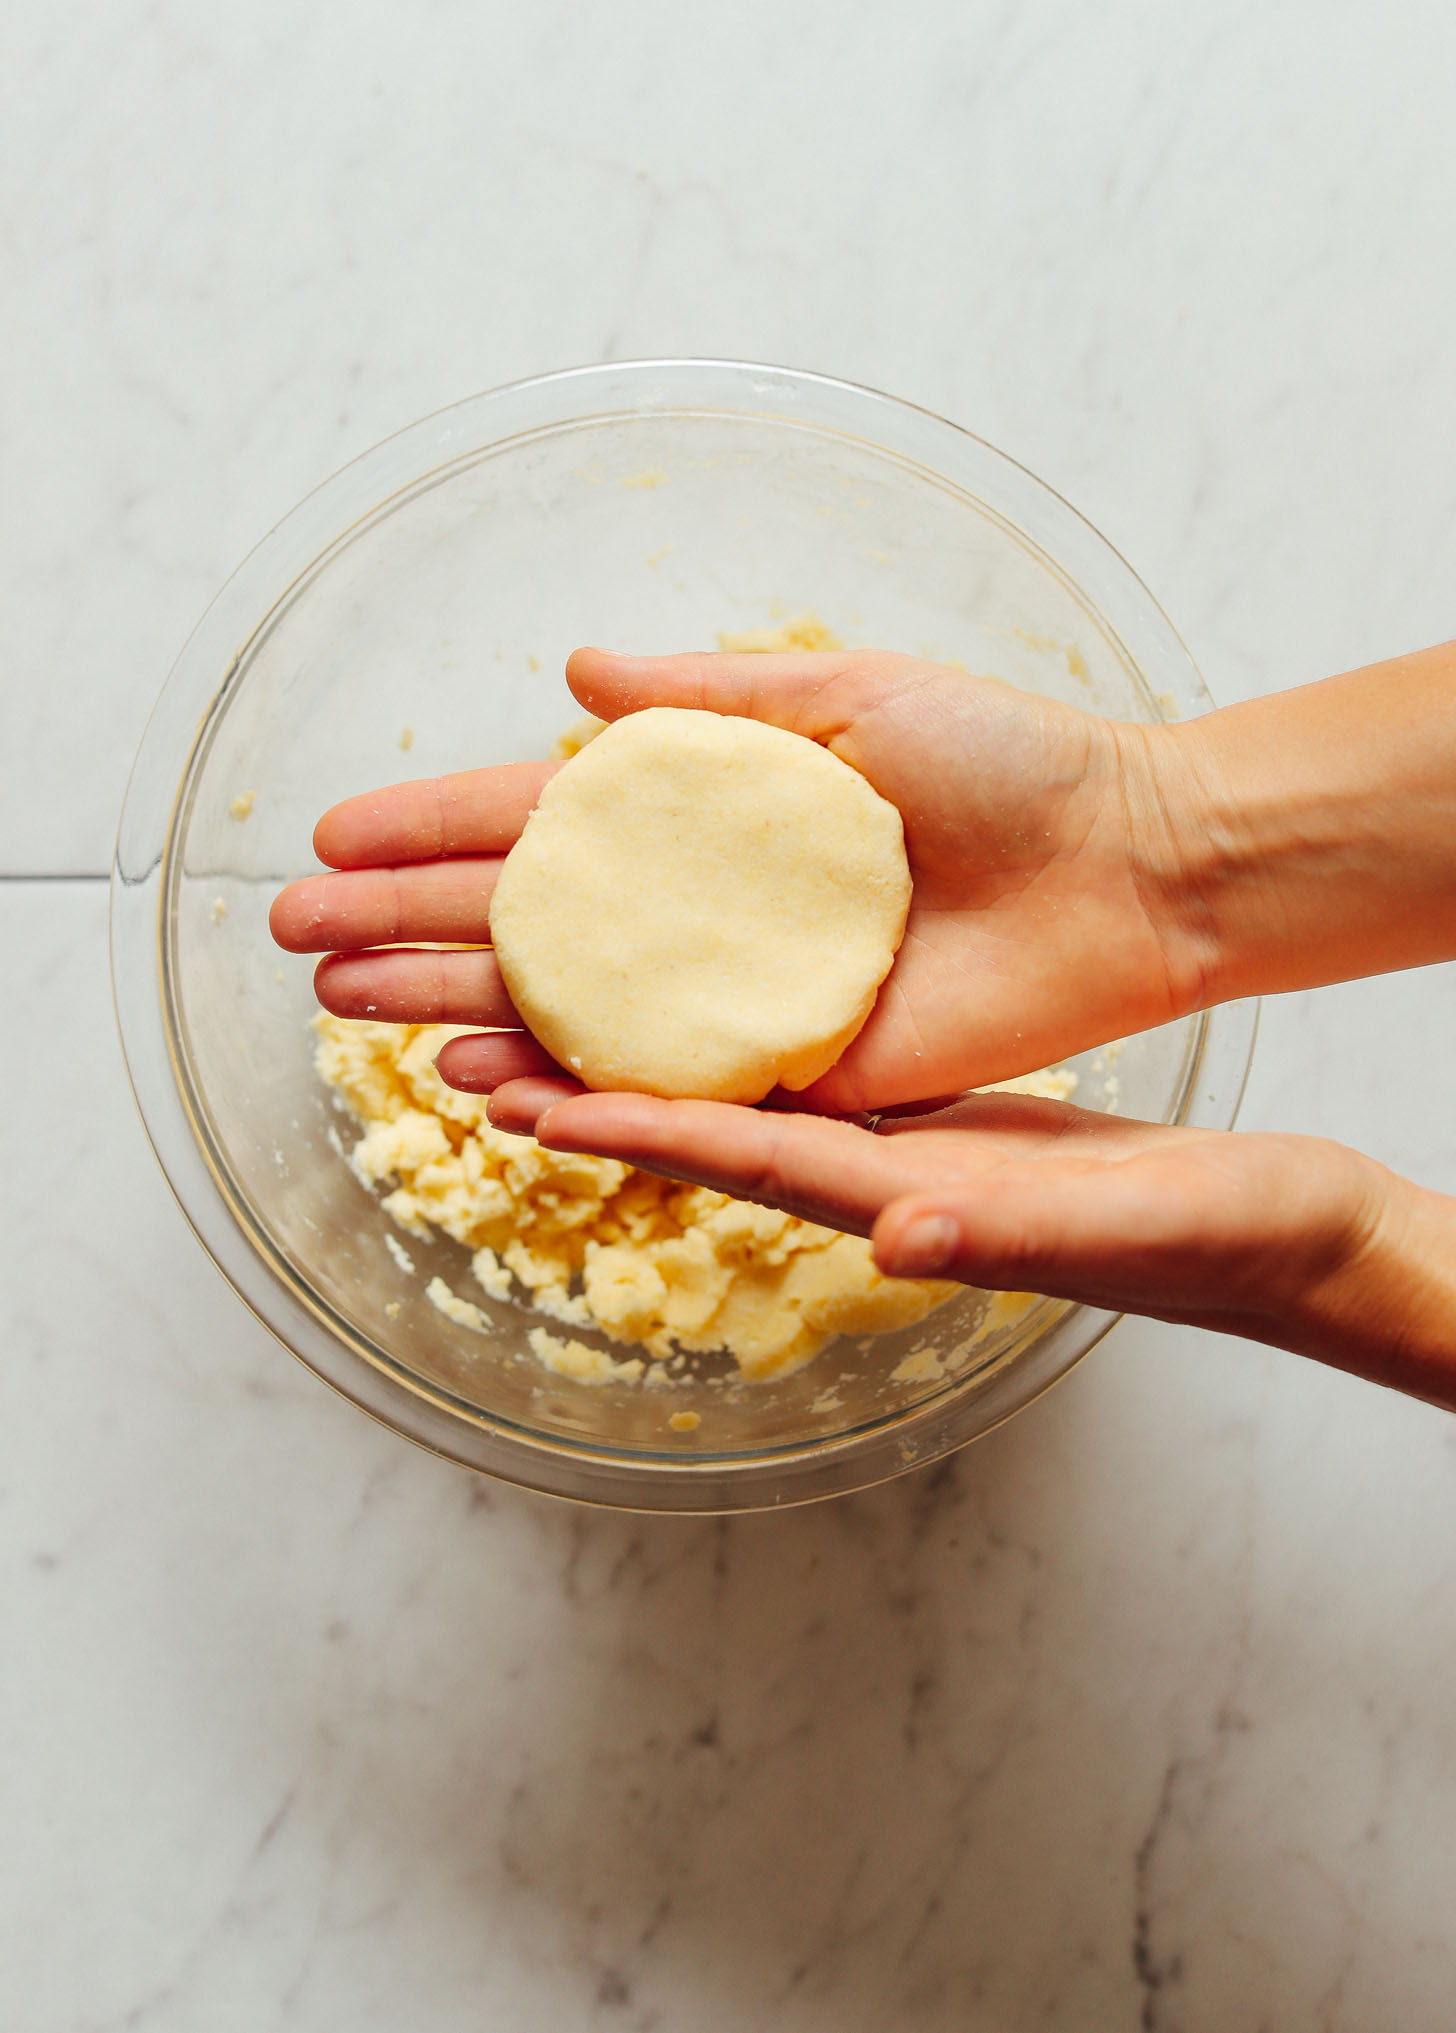
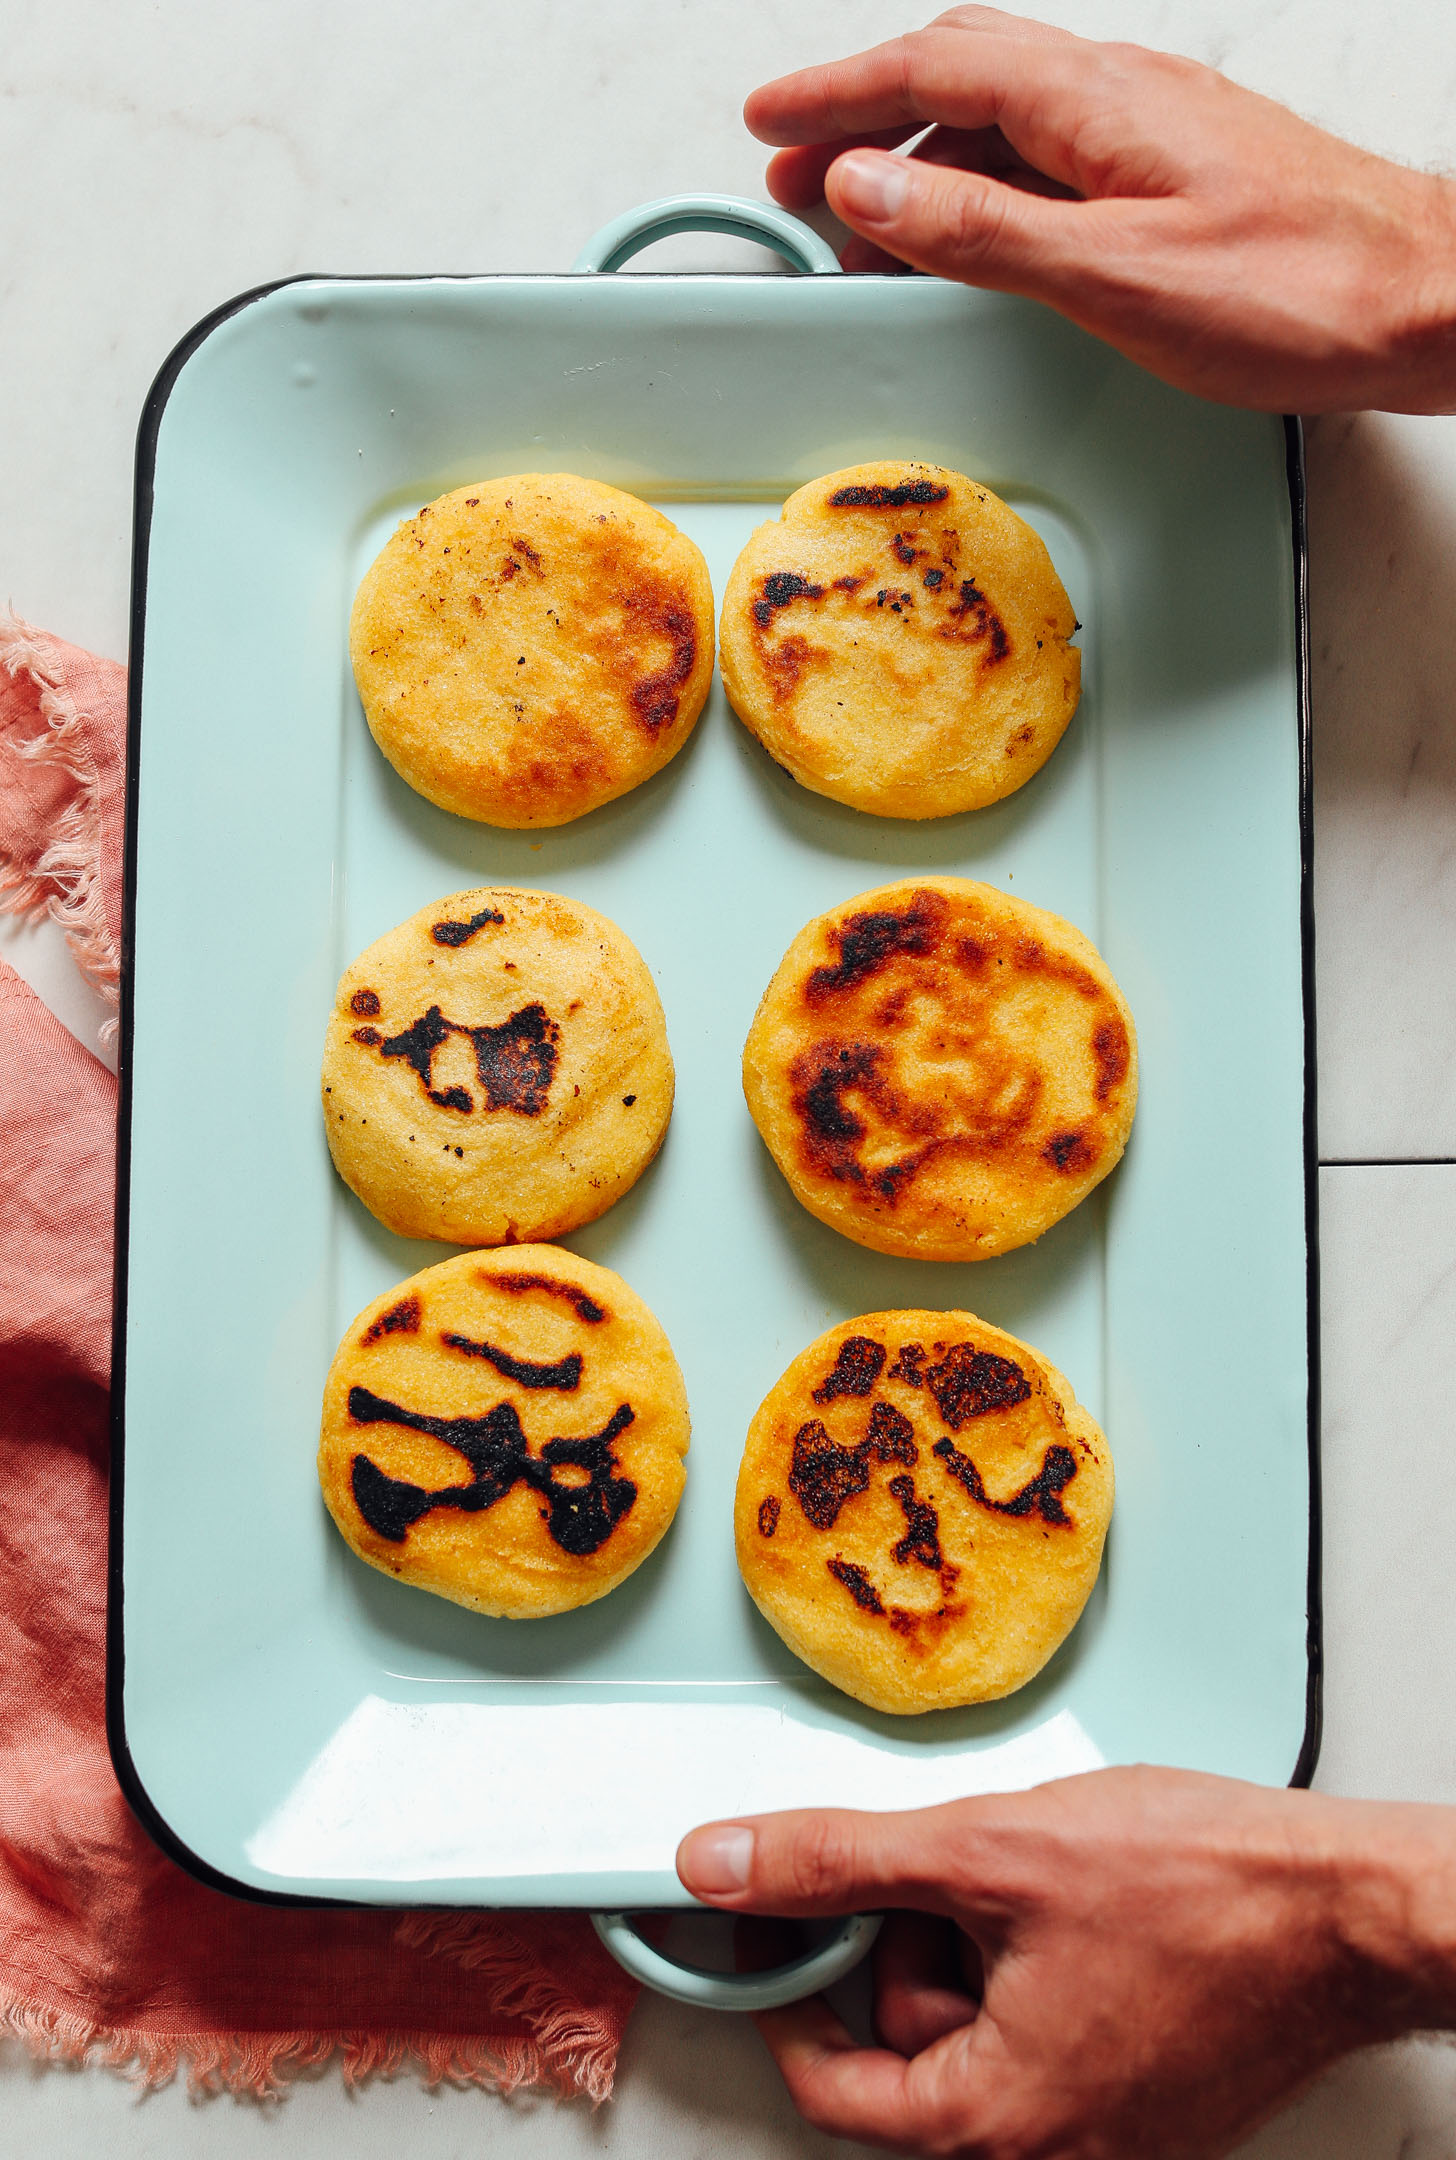
Once your arepas are formed, simply pan-fry in a little oil to form a crust (a little deep blackening is OK!), and then finish in the oven to ensure the centers are cooked through (optional but recommended). Then enjoy!

We hope you all LOVE these arepas! They’re:
Crispy on the outside
Tender on the inside
Savory
Satisfying
Easy to make
& SO versatile
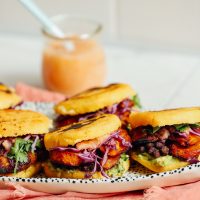
Arepas can be enjoyed plain, on the side of dishes like our Plantain Black Bean Bowl, or cut into a “pita pocket” and stuffed with just about anything, including rice, Black Beans, Vegan Barbacoa, Jackfruit Taco ‘Meat’, or Guacamole (the options are endless). You could also enjoy them with a little vegan butter and maple syrup as a special treat. Mmm.
If you’re into arepas, also be sure to check out our Fluffy Cornmeal Pancakes, Perfect Vegan Cornbread, and Blackberry Cornmeal Muffins! And stay tuned, as we have an arepa sandwich coming up that’s gonna blow your minds.
If you try this recipe, let us know! Leave a comment, rate it, and don’t forget to tag a photo #minimalistbaker on Instagram. Cheers, friends!
How to Make Arepas (3 Ingredients!)
Ingredients
- 2 cups warm water
- 1 heaped tsp sea salt
- 2 cups areparina* (a.k.a. masarepa – not cornmeal or masa harina // we mixed white and yellow from PAN and GOYA brands – see notes for masa harina modification)
- 1 Tbsp avocado, coconut, or vegan butter for cooking (if avoiding oil, just omit and be sure your pan is non-stick)
Instructions
- Preheat oven to 350 degrees F (176 C). Set out a baking sheet and line with parchment paper. And to a large mixing bowl, add water and salt. Stir to combine and dissolve salt.
- A little at a time, add the areparina and stir with a whisk or your hands (our preferred method). You may work your way all the way up to two cups, although we typically have 1-2 Tbsp leftover. You’re looking for a dough that doesn’t easily stick to your hands, is moldable and moist, and can be rolled into a ball. Once you have that consistency, cover with a towel for 5 minutes. We did mix both white and yellow areparina as inspired by Teote (optional).
- Uncover, grab a large handful of dough, and roll into a ball (as the recipe is written, our batch made 6 large arepas, but it could also make 8-10 smaller arepas).
- Carefully press the ball between the palms of your hands to form into a roughly 1/2-inch thick disc (for thinner, crispier arepas, press closer to 1/4 inch). If it cracks a lot on the sides, your dough may need 1-2 (15-30 ml) more water. A little cracking is OK – just use your hands to close the cracks by gently patting along the edges (see photo).
- Once the arepas are formed, heat a large cast-iron or non-stick pan over medium-high heat. Once hot, add a little oil and swirl to coat. Then add arepas, giving them a little room in between so they don’t touch. Cook for 2-3 minutes or until deep golden brown (a few blackened spots are OK). You’re looking to form a crust. Then flip and cook for 2-3 minutes more or until the underside is also browned.
- Transfer to your parchment-lined baking sheet and bake for 15-18 minutes or until slightly puffed up and a little more golden brown in color. Some people like to slice into them immediately, but I find they can be a little doughy in the middle at that stage, so I prefer to let them cool for 5-10 minutes and serve while they’re warm but not piping hot.
- To enjoy, slice in half and enjoy as is, spread both sides with vegan butter and a little maple syrup (YUM), or cut the arepa 3/4 of the way around, leaving a seam on the edge so you can “stuff” it like a pita. Fillings could include everything from black beans to rice to guacamole or even our Vegan Barbacoa!
- Best when fresh. Store leftovers covered in the refrigerator up to 3-4 days or in the freezer up to 1 month (cooked or uncooked). Reheat in a 350-degree F (176 C) oven until warmed through. If reheating frozen uncooked arepas, I’d recommend letting them thaw first and cooking them as instructed.
Video
Notes
*Nutrition information is a rough estimate based on 1/6 of the recipe (as written) calculated with 1 Tbsp avocado oil for cooking.




Vicky says
You’re GENIUS. I’m Colombian and I can’t get decent masarepa that is not filled with a whole bunch of nonsense. Thanks to you I can enjoy my arepas once again. Thank you!!!
Aw, thank you for your sweet words, Vicky! We’re so thrilled that you’re enjoying arepas again! xoxo
Vicky says
I came back to say, I just tried them and they are truly amazing! In Colombia we eat them with cheese and also stuffed with all sorts of fillings. I like to put crumbled feta on the dough, then I divide each portion in half, fill them with a tablespoon or two of mozzarella, cover the mozzarella with the other half, so it is a pocket full of amazingness, and finally I put them in the grill. These are the best cheese arepas in the world! Aww. Thanks so much for all your amazing recipes and all you share with us. I’ve learned a ton!!!
Yay! Thanks so much for reporting back and for sharing your expertise with us! xoxo
Nonya says
What else can you do with white pre-cooked flour besides Arepas? I have 4 bags of PAN and won’t be making arepas more than maybe once a month. Anything else I can use it for?
Hi Nonya, we haven’t experimented with other ways to use masarepa, but you could look up recipes for Colombian Empanadas or cornbread made with masarepa. Hope that helps!
Christina says
Do you think I could use corn flour or a mix of corn flour and corn meal instead of the masa harina? Masarepa is out as I’m trying to use least processed ingredients at this time but I love arepas :-) Thank you!
Hi Christina, we’d recommend using the mixture in the notes section as an alternative to masarepa. You could possibly use corn flour instead of the GF blend/arrowroot, but you may need to play around with the amount. Let us know if you do some experimenting!
VeggieT8r says
I was looking for a quick recipe to feed a bunch of people with what meager ingredients I had on hand because I couldn’t get to the store. So I went looking for ideas and these sounded like a good start. I knew I had some masarepa, but turned out there was barely a cup, not near enough for a crowd. So… I created some hybrid Frankenstein monster that turned out to be a big hit!
Into a mixing bowl I dumped a can of corn, (liquid and all) 1/2 can of beans I had in the fridge, also with the liquid (aquafaba), threw in some diced onion and bell pepper, cilantro, and a bit of taco seasoning and nutritional yeast (vegan cheesy flavor). I try to maximize nutrients and fiber when I cook, so instead of using processed white flour to extend the single cup of masarepa, I mixed in around 1/2 cup of whole quick oats, and 1/2 cup chickpea flour, and let it soak up the liquid and soften for a few minutes. Finally, I mixed in the Masarepa until I had a good consistency, then made it into little patties. I pan fried them to get a crust, then baked them in my little convection oven for 12-15 minutes at 350 F. I only had a small amount of salsa left to top the patties with, so I mixed it with some homemade plain oatgurt and a bit of tabasco, and garnished each with a dollop. Good thing I got to taste one before I put the platter on the table because they were gone before I even got to sit down! LOL Thanks for the inspiration!
Love the creativity! Thank you for sharing! xo
Tan says
Can I bake these in the same cast iron pan I fried them in, instead of transferring it to a sheet? One fewer thing I’ll have to wash haha
Hi Tan, We know the feeling, but we think they will get too crispy! If you want to try it, make sure to wipe out any excess oil so it doesn’t start smoking in the oven. Hope that helps!
Alice says
I am in Australia and can’t get the right kind of flour. I did the substitutions (though used polenta :s, gluten free flour and coconut flour) but the dough is so sticky!! What can I do to make it less doughy? Thanks :)
Hi Alice, try adding more of those three flours. If your polenta is more of a coarse grind, it won’t absorb as much liquid as masa harina.
Kirsty-Ann Nicholls says
You can get the flour at African and south American food stores its called “pan”
Kay Pea says
Colombian here, and grew up eating arepas AND helping my mother make them. The “Colombian” arepas that you are referring to in your Colombian vs Venezuelan comparison are arepas de choclo, which is only one type of Colombian arepa.
My mom used to cook the corn by boiling it on the stove and then grind the cooked corn using a hand-crank grinder to make the dough. Nowadays, I cook my corn in an electric pressure cooker and grind it with an electric stone grinder. She used to shape them by hand. I use a hamburger press. Technology marches on, after all.
I love making a bunch to freeze and reheat as needed. We reheat our arepas on a griddle. I can’t remember exactly time and temp, but I do it on fairly low heat on both sides until heated through.
When using Harina P.A.N. to make the dough, you can keep a small bowl of water next to you while working. When the dough starts cracking while you shape them, dip your fingertips in the water to smooth out the cracks. Also, keep the dough covered while you work. This helps to keep the dough from drying out as you’re forming your arepas.
Thank you SO much for sharing your expertise, Kay! xoxo
Peter Vermilye says
Wow. I made this for my roommate who wanted them to impress his Venezuelan girlfriend with a Venezuelan dish for her birthday. I found the P.A.N. white corn meal locally. I whipped the whole thing up in nothing flat and do they taste delicious! I love the fried outer layer with the cooked interior. Perhaps using the flour would improve things but I can’t see why I would want to. Thank you so much.
Peter
We’re so glad you enjoy them, Peter! Thank you for the lovely review!
James Tomlinson says
ROFL!
I looked up this arepas recipe, because I have been absolutely craving them lately, a restaurant I used to work at had the best arepas I’ve ever had.
That restaurant was Teote, the one in SE.
That made me laugh out loud.
Because of that, I’ll definitely be using this recipe tonight.
How fun! We’d love to hear how you think these compare :)
anna says
Have you tried stuffing them BEFORE baking? If so, what ingredients? I guess that cheese and beans would work well, but if I wanted to add ground beef should I cook the beef prior or would it get cooked during the baking process?
We haven’t!
Ashley says
So good!! I used yellow corn flour, 1/4 cup coconut flour, 1/4 arrowroot, subbed in 1/2 cup of milk with water and they turned out great. I love this bread, best recipe I’ve tried. I make small balls and use my waffle maker, 4 at a time.
Amazing! Thanks so much for the lovely review and for sharing your modifications, Ashley!
Knitbunnie says
I love arepas! Best, easiest way to reheat them that Ive found is to put them in the toaster – warms them up and re-crisps the outside without needing to heat the oven.
Yum! Thanks for sharing!
Robyn Bray says
You can use tapioca flour instead of corn starch or arrowroot. I think it might be from the Yucca tree.
Meagan says
Hello! I lost my comment.
I first found arepas, in a program I am following. The ingredients were the same as yours. I’ve made them 3 times now. They are delicious, but I felt I was making them wrong. So I went searching for a video with the steps how to make them. I definitely was doing it wrong. I’m thankful I found your blog. Next time I make them, I will use your method! Thank you for sharing and providing a visual tool!
We’re so glad you enjoyed them, Meagan. Thanks so much for the lovely review! xo
Shuri says
hii~ if i get De Cecco Polenta istantanea, how do i make arepas?
Hi Shuri, we’re not familiar with that product, so not sure what to recommend!
Sharmain says
Made these tonight using the masa harina modification, arrowroot and coconut flour. After pan frying, I placed in air fryer, 385 for 11 minutes. Middle was doughy so I scraped out, lightly pan fried to crisp up, then served with spiced mashed black beans, feta cheese and fried plantains. Overall very tasty, but didn’t like the doughy innards, user inexperience! But will try one more time and let air fry for longer. Thanks for your creativity in suggesting alternatives, much appreciated!
We’re so glad you enjoyed them overall, Sharmain! Thanks so much for sharing! xo
Jessica says
I love this recipe (and honestly all your recipes). I used to date someone from Venezuela and I fell in love with arepas because we made and ate them so frequently. I’m happy I can follow this easy recipe to make them time and time again, they are so versatile and taste amazing
Yay! We’re so glad you’re enjoying them, Jessica. Thank you for sharing! xo
Emily says
What oven temp are you finishing at? It doesn’t seem to be mentioned in your recipe.
350 degrees F, it’s in step 1!
Jen says
I tried this and dough was perfect. I used the pan precooked cornflour. But, somewhere between frying and baking I messed something up. I let it cool completely cut into it and it was very very dense and Doughy . Not fluffy at all. Any ideas?
Hi Jen, Sorry to hear they didn’t turn out for you. Did you use the suggested brands of areaparina? Or did you make any modifications? If you used the same brands and method, an idea for next time: you could try baking longer in the oven, reducing the heat as needed if the outside is cooking too quickly.
Cassandra says
I wanted to make arepas like my mom. This recipe is pretty spot on. I followed the recipe to the letter and had no issues. I like it thicker – crispy on the outside and soft on the inside. It’s easier to cut and stuff. I’m so happy it’s an easy and tasty recipe. I’ll admit, I ate 4 out of the 6. I’m used to stuffing it with butter, cheese, and some kind of meat. I’ll have to try black bean, sweet potatoes, and avocado in the future. Thanks!!
Whoop! We’re so glad you enjoyed them, Cassandra. Thank you for sharing! xo
Edward Worth says
I was looking for an authentic recipe for arepas, and this is not it. Gluten free is for people w/ diet restrictions.
Hi Edward, arepas usually don’t contain any gluten. They are made from masarepa which is naturally gluten-free.
Kate says
Hello! I’ve been searching for something to keep me busy, and since cooking has always been a favorite – today I’m looking for making scratch tortillas…and arepas popped up too! Yay, I’m so excited to try these, and have a question. I’m a bit confused over the “gluten free” ingredient. Is that a requirement for successful arepas, or more of a health thing? It really doesn’t matter to me one way or the other, health thing doesn’t apply – but I do want to make them right :). I’ve already bookmarked several items from you, I’m a fan! Thanks so much!
Kate
Hi Kate, we’re so glad you’re excited about our recipes! Thank you for sharing! Arepas are made from masarepa which is naturally gluten-free. Whether or not you consume gluten, we would suggest making the recipe as written for best success :)
Grace says
Haha. What did you think? Corn doesn’t have gluten in it.
Leesh says
These did not work out for me. I made them with the masa harina modification and it was waaayyyyy too much water. I ended up having to dump half the bowl and add about double the amount of dry ingredients. I quadruple checked my measurements and i did everything according to the directions… Was finally able to work into a dough but they came out very dense and not very enjoyable. If i try this again (i probably won’t) i will wait until i find the masarepa. Giving two stars because i usually love your recipes but in all honesty, my experience only earned this recipe one.
Hi Leesh, we’re so sorry to hear it didn’t work out. With the masa harina, did you also add the coconut flour and gluten-free flour blend or arrowroot starch? The coconut flour specifically should absorb a lot of moisture.
Jen says
Hi! You said corneal will work? All I have is bobs red mill polenta. Can I makes these and wait to cook until tonight?
Hi Jen, cornmeal can work in a pinch but even cornmeal is usually finer than polenta. We haven’t tried this with polenta and we suspect it will not work because polenta is very coarse in texture. Hope this helps!
Mike says
I made Arepas following the recipe, to the letter. . I used P.A.N. flour. When I cut into an arepa the knife got stuck on the sticky doughy interior.
Should I fry them in a hotter pan? Should I bake them at a higher temperature? They look good but..
TIA, Mike.
Hi Mike, sorry to hear they were a little doughy on the inside. How long did you let them cool after baking? We recommend at least 5-10 minutes, otherwise, the centers will be a bit doughy. Hope that helps!
John says
My mother grew up in the deep south during the 1940s. They were very poor, and this is very similar to something they often ate. I grew up simply calling it “corn bread”. Both my mother and grandmother made it. I learned later that they were more properly called “corn pones”. My mom said she would often have corn pones in a glass of buttermilk for dinner.
Of course, they used regular corn meal rather than masarepa, but otherwise, the recipe and cooking methods are almost identical.
Charlie says
Hello Minimalist,
Good coverage of Arepa but for the pics.
You burnt the areas!!
My spouse is Venezuelan & she prepared a lot of Arepa over the years. I know of what I speak.
So don’t burn or char part of the exterior arepa. You can brown it unevenly, with some parts more well cooked than the rest, that is fine. But charring it as pictured is a mistake.
My best,
Charlie
Lissa Cook says
Love Teote but live in San Francisco Bay Area so I only get to go when visiting Portland. Due to Covid it had been a while. These were better than the last ones I had from Teote. To be fair it was just after Christmas this year and we got take-out. They definitely are best served up fresh. I am so excited to have this recipe to make them at home. I make my own tortillas and now can add arepas to my repertoire.
Thanks for the recipe and alternative to deep frying – they turned out beautifully. Fantastic recipe.
Woohoo! So glad these live up to the restaurant quality, Lissa. Thanks for the review!
Anita says
I’ve been eyeing this recipe for awhile but I’m not a baker and tend to shy away from making breads. A doctor’s recommendation to go gluten-free finally pushed me to try it. I found masarepa at a store around the corner. These are so amazing and so easy. I can have sandwiches again!
Woohoo! So glad you enjoyed this recipe, Anita. Thanks so much for the great review!
Fatemeh says
Do they even make a organic or at least non gmo masarepa?
Kristin says
I couldn’t find any online but I found a couple of brands with Masa Harina (Bob’s Red Mill and King Arthur) so I am going to use that!
JP says
I’m so excited to make these!! Do you think these would work in the air fryer?
We haven’t experimented with an air fryer, but another reader mentioned this: “I’ll recommend cooking the arepas on the pan for a few minutes until they have a thin and not so crunchy crust and after that you can put them into the air fryer at 280-300 for about 10 minutes.” Hope that helps!
Gene says
My daughter (12 y/o vegetarian) wanted to make an arepas con queso – we settled here as a good recipe… and it is! We followed directions exactly then stuffed with shredded mozzarella. Pan fried then baked for 15 minutes. She swooned and shared process with her friends – think we will have an arepas party for the girls next weekend. Very gratifying having her do the work and see the results.
Yay! We love this! Thanks so much for the wonderful review, Gene. So glad the recipe worked well for you and your daughter! (also, an arepas party is our kind of party!)
Barbra says
This is yumm mmm y uh 9.78/10 kinda was sticky needed lotta water.
Matt says
Oh! I wrote a long comment, not sure if it cleared modertion yet. One thing I forgot to mention with my Venezuelan family…
They don’t add salt to the mix!
Now, my wife did say a lot of people and restaurants do, but they don’t. I never knew. I love them all the same!
Just in case anyone cares to lower their sodium intake or want to make this an even simpler 2 ingredient recipe, the salt is not necessary. Probably more than enough salt in whatever you put inside the areap, whether cheese, meat or whatever.
Thank you for all your great comments, Matt! SO helpful!
Mark says
Thank you for that info! My friend has Menier’s disease and has to be very low salt, I was hoping someone would comment on a salt-free version!
Matt says
Didn’t try the recipe. My wife and mother-in-law are from Venezuela. I was first introduced to the arepa 10 years and 7 months ago. I can tell you this much, just like going from a chain restaurant in one part of town, to the same chain in another part and having a different experience, the same is with arepas. There is great variety in taste. I don’t exactly know why, as the ingredients are the same. But my wife’s aren’t as good as my mother-in-laws. I suspect it has to do with density.
Anyhow, their arepas are typically thinner. They typically used an appliance by Oster (for some reason Oster / Sunbeam won’t sell them here…so dumb) to save time and add convenience. Makes no difference in taste vs. a pan though. You can buy arepa makers here on Amazon, but you can’t get the Oster one. What makes Oster special? It has a timer on it, and it makes the “perfect” size (width and thickness) that my wife likes. The IMUSA was close in size, but no timer, so they often got burned. The one that does have a timer, Brentwood I believe, has nothing but complaints about it not working. Surprisingly I can’t even find an electric cooking timer that you plug in and it automatically shuts off the appliance. You’d think that would be a common thing given all the panini presses and Geroge Foreman grills out there. They should all work like a microwave to be honest. Anyhow, I’m way off path here.
Arepas. As for the arepa flour, there are a few brands out there. Goya’s Masarepa. Harina P.A.N. (also Goya). And Donarepa. There are probably a few more, but these are the only ones I can semi-regularly find. All three have yellow and white versions. There’s a distinct difference between yellow and white, just like there is between brands.
In Venezuela, amarillo (yellow) Harina P.A.N. is the most commonly used. However, here in the US, the yellow Harina P.A.N. tastes drastically different. Apparently because it comes from Colombia and not Venezuela.
Goya Masarepa was much closer to Venezuelan Harina P.A.N. in taste and texture. Then I found “Donarepa” a couple years ago in a “Compare Foods” store in Charlotte. I’ve only found the white, yellow is always sold out. But the white tastes the closest yet to Venezuelan Harina P.A.N. including texture and crispness.
Anyhow, since my wife finally got her green card in December 2012, I have been eating arepas for breakfast nearly every day. We typically split them open enough to butter them and stuff a slice of American or any other sliced deli cheese that melts well. On weekends we often add eggs and sometimes even bacon. We have friends that prefer them for lunches instead, stuffed with deli, or shredded meats. It’s all what you prefer.
My favorite is for breakfast as follows:
Without ever finding the yellow Donarepa, my list is
1. White Donarepa
2. White Masarepa
3. Yellow Masarepa
4. White Harina P.A.N.
5. Yellow Harina P.A.N.
If I ever find the yellow Donarepa, I imagine I’ll still favor the white. White is lighter, sweeter taste. Yellow has more hiints of toritilla taste to me. Grittier. My wife is the opposite. She prefers yellow.
We both prefer white American cheese over yellow American. We also like Mozzarella, Oaxaca, Provalone, Havarti, Muenster. Any easy melting cheese, though Oaxaca doesn’t melt well…but is really tasty nonetheless.
We both prefer thinner, crispier, wider versions. My mother-in-law likes them a bit smaller / thicker. She likes the wet “guts”. She often reminds us that her brother (wife’s uncle) only ate the guts. He considered the crispy shell “dirty”. So weird. lol
Anyhow, arepas are awesome! Try different brands / colors. It makes a difference.
With not being able to buy an Oster Tostiarepa maker here in the US, my wife and mother-in-law “sear” them in a pan a couple minutes and then put them in the toaster oven on broil for around 15 minutes I think. Flipping halfway. I had a grilled one once in Venezuela. It was OK. Fried ones are really good too, but like anything fried…not good for you.
Next you all can forray into the cachapa territory! They’re really good too! I prefer arepas, but it’s nice to shake it up a bit. The hard part is finding (and then paying $$$$ for) the queso de mano.
Alicia says
Can I premake and form the Arepas the night before ?
Store them in the refrigerator to make the following morning?
Hi Alicia, we think that would work! Let us know how it goes!
Matt says
Absolutely! My wife used to premake them for the week to save time. That said, by the end of the week there was a glaring difference, but almost entirely visual. The nice round arepas at the beginning of the week slowly turned into “ninja throwing star” shapes by the end. We figure the refrigeration had something to do with how it cooked out. Hard to say if there was a noticeable taste difference. I was just always so grateful to gobble them up. If there is a difference in taste it;s not as noticeable as it is byy color or brand. Maybe texture was a biut different…the crispy shell was thicker / harder. But still very good!
Barbra says
Idk but that’s what I’m doing lolz
Tracy says
Very nice, Thanks! Used the alternate flour mix as trying to use up bag of Maseca instant corn masa from a school project. Made 8 thinner ones as used kind of like tostadas.
Great! Thanks for sharing, Tracy! xo
Chelsea Allen says
I cannot eat gluten and have gone out to eat arepas many times, loving the fact that I could eat a sandwich and not be sick after. I looked up how to make arepas and found this recipe. I used the substitute version with the masa flour and coconut flour. I didn’t have arrow root flour and gluten free flour mixes don’t work for me because they usually contain rice which I can’t eat either, so I substituted the arrow root for tapioca flour instead because they are similar and it worked very well! I am very excited to have found this recipe and can’t wait to use it more often! I was very pleased to find that these are alot like English muffins and I could probably use these when I make eggs benedict or just want some toast and jam. Thank you for this recipe!
Aw, yay! We’re so glad you enjoyed them, Chelsea. Thanks so much for sharing! xo
Danica says
These turned out so well! I only had masa harina so did the variation provided in the notes, adding a little extra gluten free flour so that the dough was not too sticky.
We’re so glad to hear it! Thanks for sharing, Danica! xo
Cat says
This recipe made a delicious dinner. Thank you!
We’re so glad you enjoyed it, Cat! Thanks so much for the lovely review! xo
Mary says
Hello there!
If you’ll like to make arepas using the air fryer I’ll recommend cooking the arepas on the pan for a few minutes until they have a thin and not so crunchy crust and after that you can put them into the air fryer at 280-300 for about 10 minutes.
Thanks for sharing, Mary!
Ron Sonnevil says
Has anyone tried these in an air fryer? if so how what temp and for how long? Are there any Minimalist Baker air fryer recipies? I couldn’t find any when I searched. We use a lot of recipies from this site and we are glad the instant pot has been incorporated into the newer recipies.
Thanks
Ron
Hi Ron, we haven’t experimented with an air fryer yet. It took us a while to come around to the Instant Pot because we’re reluctant to add new items to the kitchen, but it has been a helpful addition! Maybe the idea of an air fryer will grow on us too!
Cindy says
Great recipe. Just like I remember as a child
Yay! Thanks Cindy!