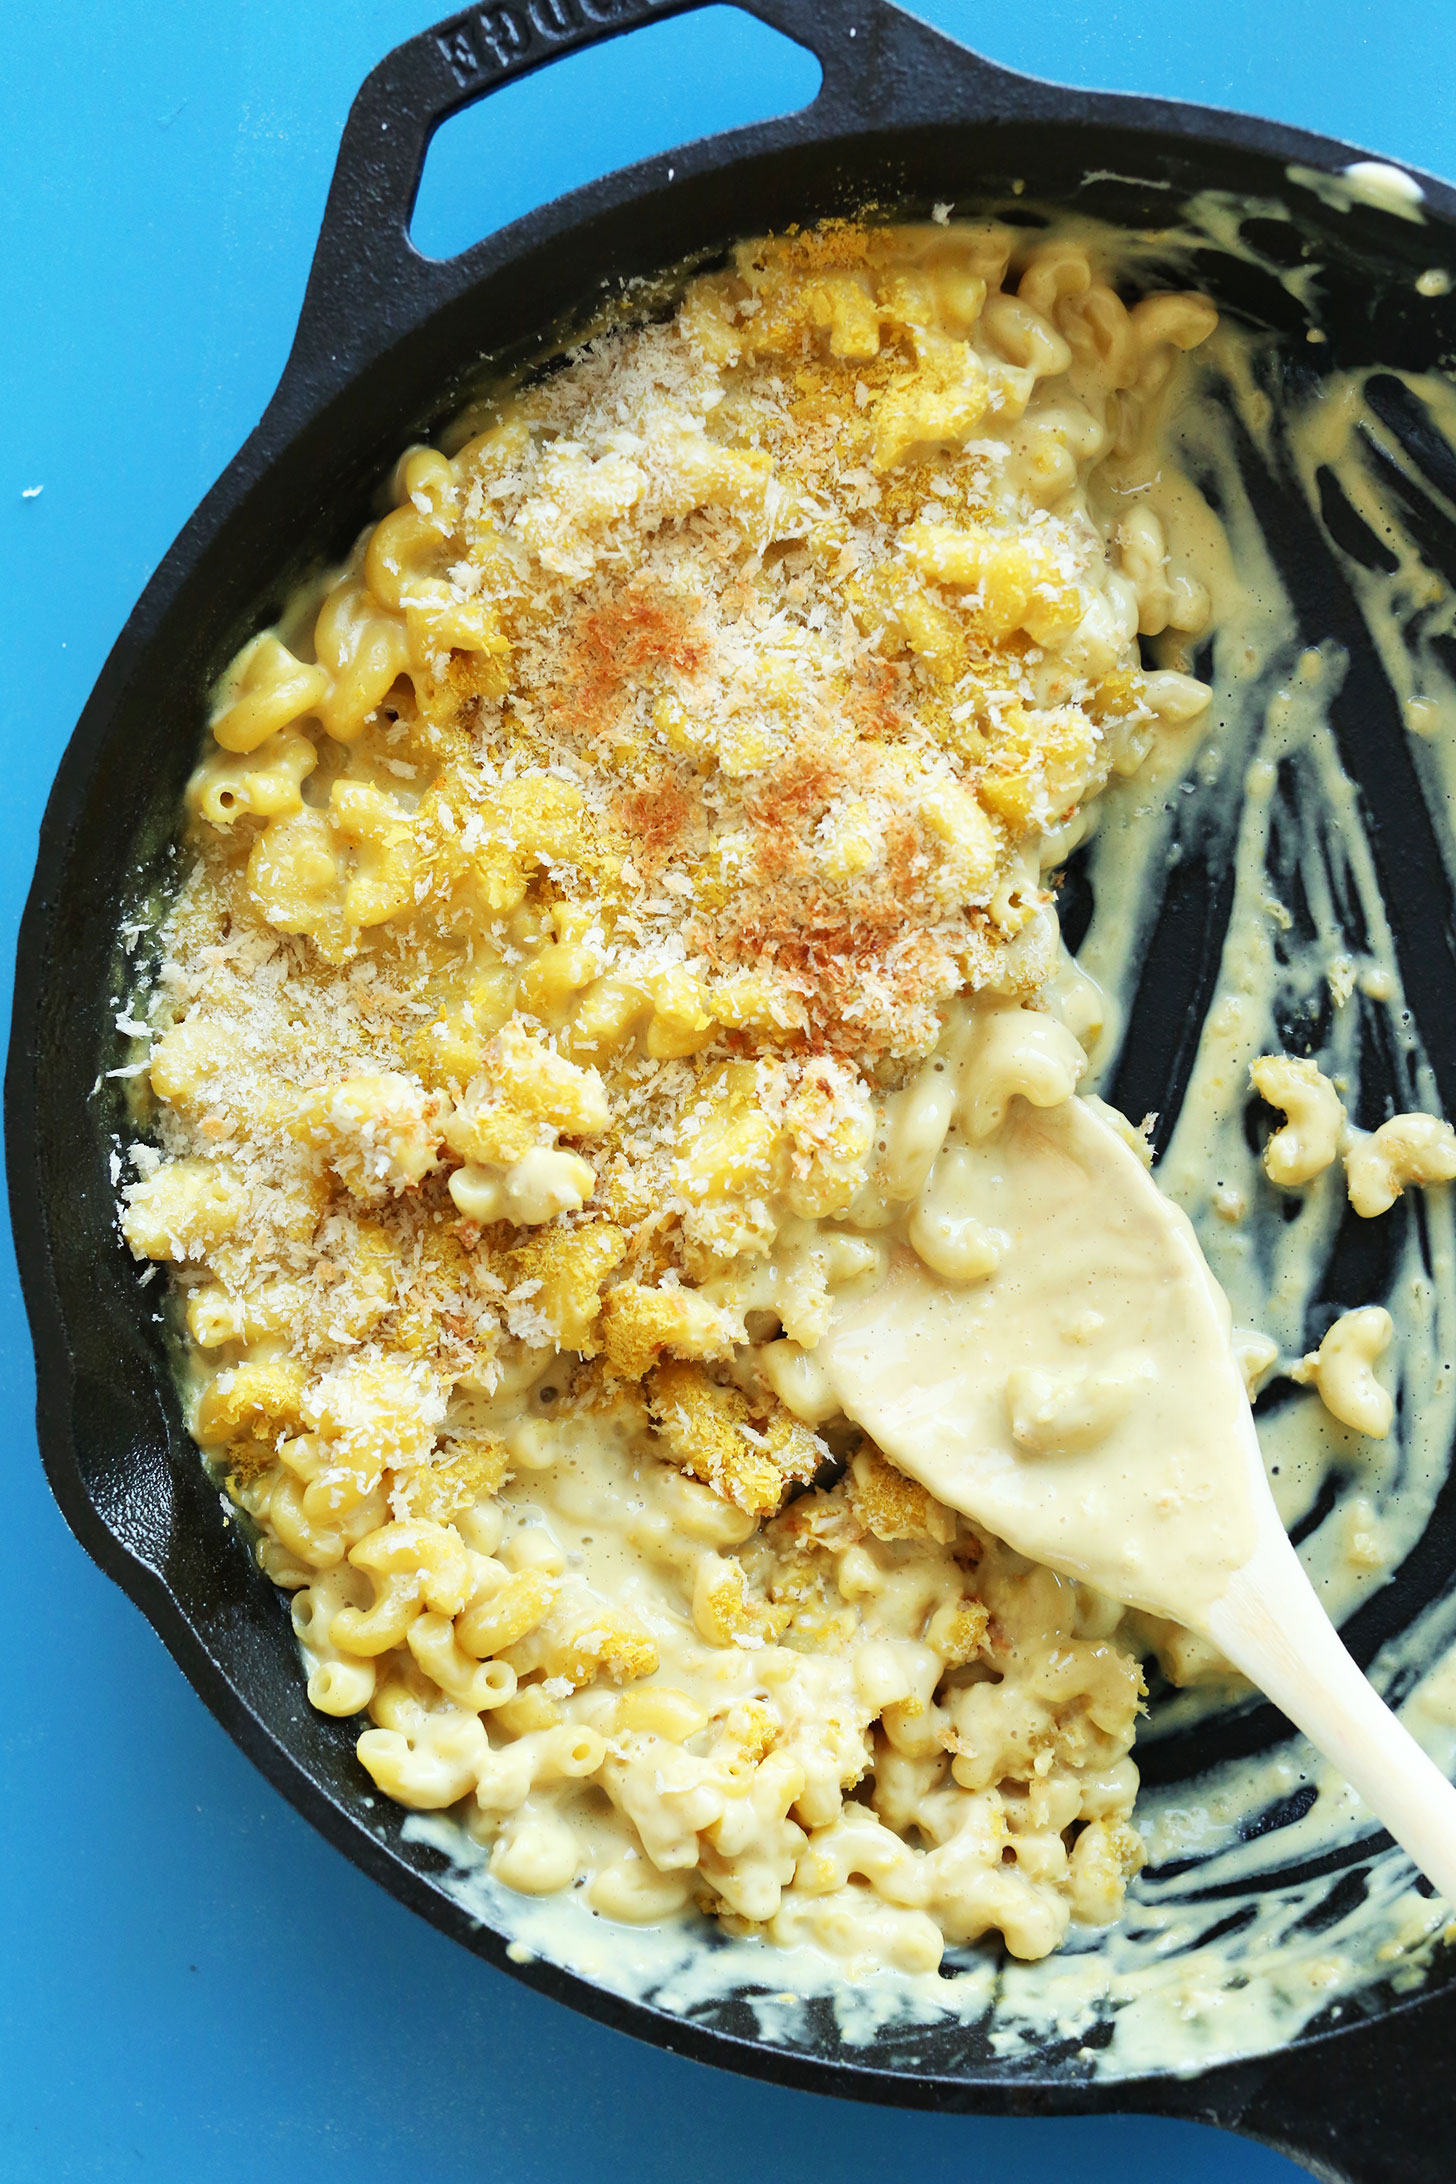
It’s that time again.
Time for a new vegan mac ‘n’ cheese recipe (because, delicious), and a new recipe VIDEO!
Be stoked.
Origins of Mac ‘n’ Cheese
Mac ‘n’ cheese is the ultimate comfort food! But where did it come from?
It’s believed that the earliest written recipe for a dish resembling mac ‘n’ cheese comes from a 14th century cookbook. The dish (named de lasanis) was made with squares of pasta layered with cheese.
But maybe that’s not what you picture when you hear mac ‘n’ cheese? The dish has been modified in many ways over time!
It’s thought that the introduction of mac ‘n’ cheese in the US came after Thomas Jefferson’s enslaved chef, James Hemings, recreated a dish Jefferson had enjoyed in his travels in Paris. It was then served at a state dinner and popularity spread. By 1937, Kraft released their boxed mac ‘n’ cheese and it quickly gained popularity because of its affordability.
Our garlicky, plant-based version has all the comfort but without the dairy!
Vegan Garlic Mac ‘n‘ Cheese
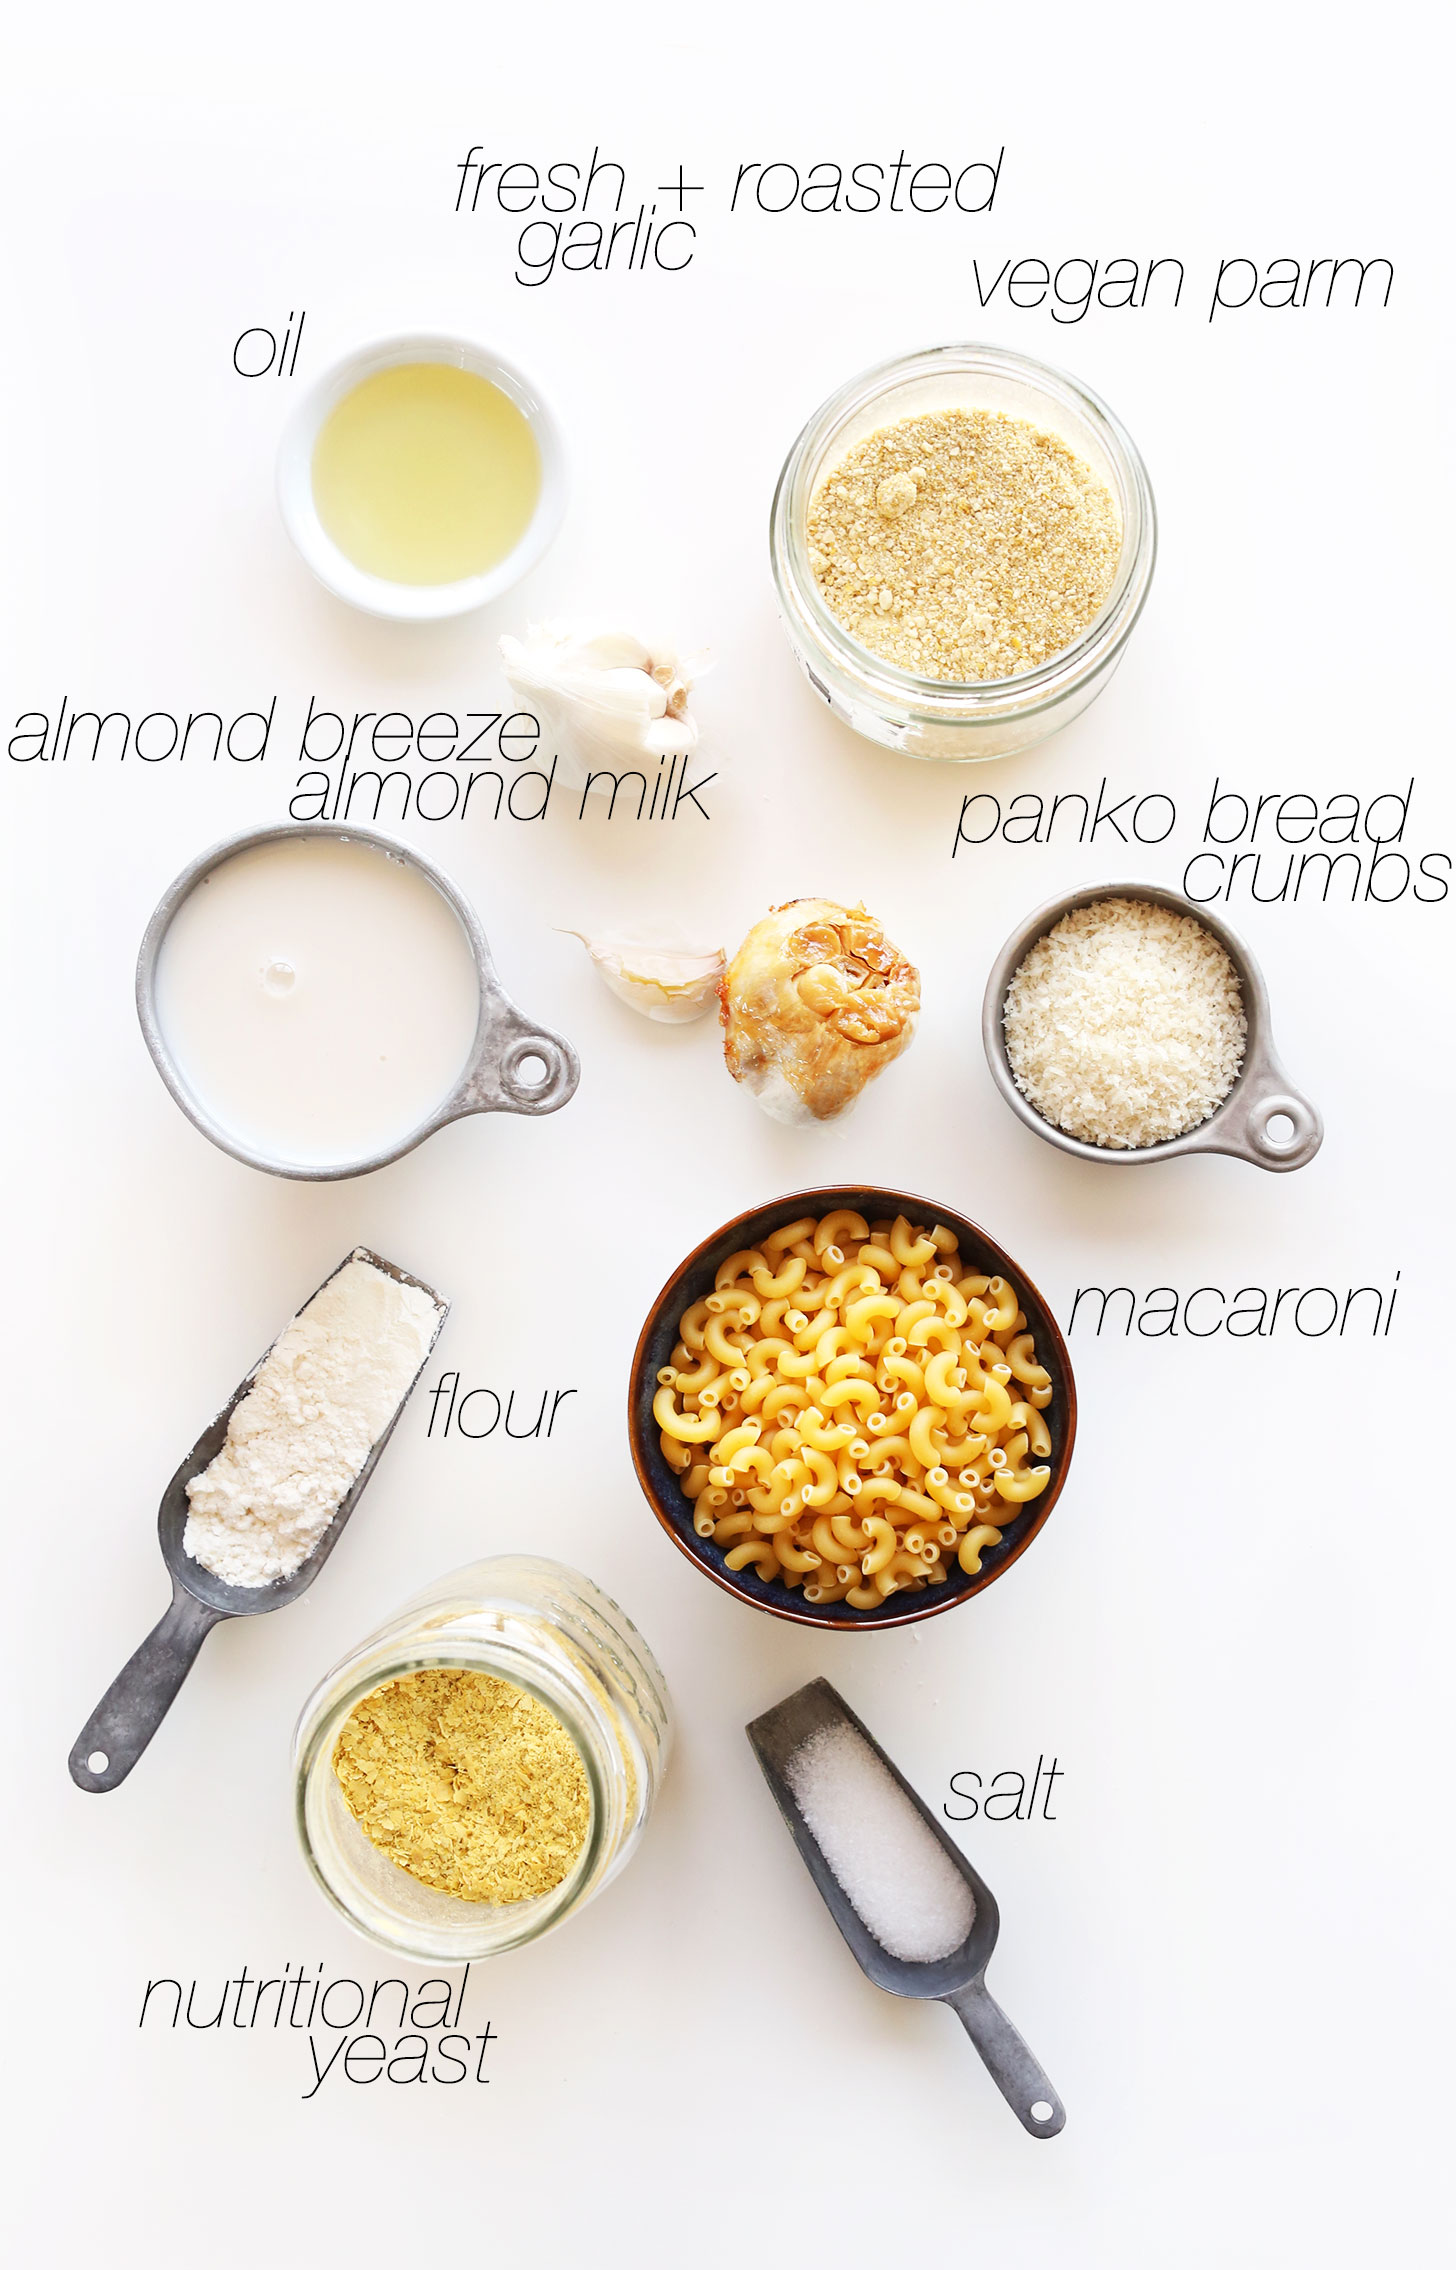
Having already created an eggplant– and cashew-based mac ‘n’ cheese recipe, I wanted to do something a bit more traditional using a flour and (almond) milk roux. Although it doesn’t have as much plant power going on, it is insanely creamy and way faster than my other methods once the garlic is roasted, leaving just a 30-minute prep/cook time. This recipe also only requires 10 ingredients.
To inject extra flavor I infused the sauce with two kinds of garlic: an entire head of roasted garlic and fresh minced garlic. This provides both a spicy, garlic bite, and a sweet, creamy roasted garlic flavor. I’m in love.
Want to see this recipe in action? Check out our latest recipe video. (See our previous videos here, here and here). More to come!
If you try this easy Garlic Mac ‘n’ Cheese, let us know what you think! Leave a comment and rate it – it’s so helpful for us and other readers. And don’t forget to take a picture and tag it #minimalistbaker on Instagram – we love seeing what you come up with. Cheers!
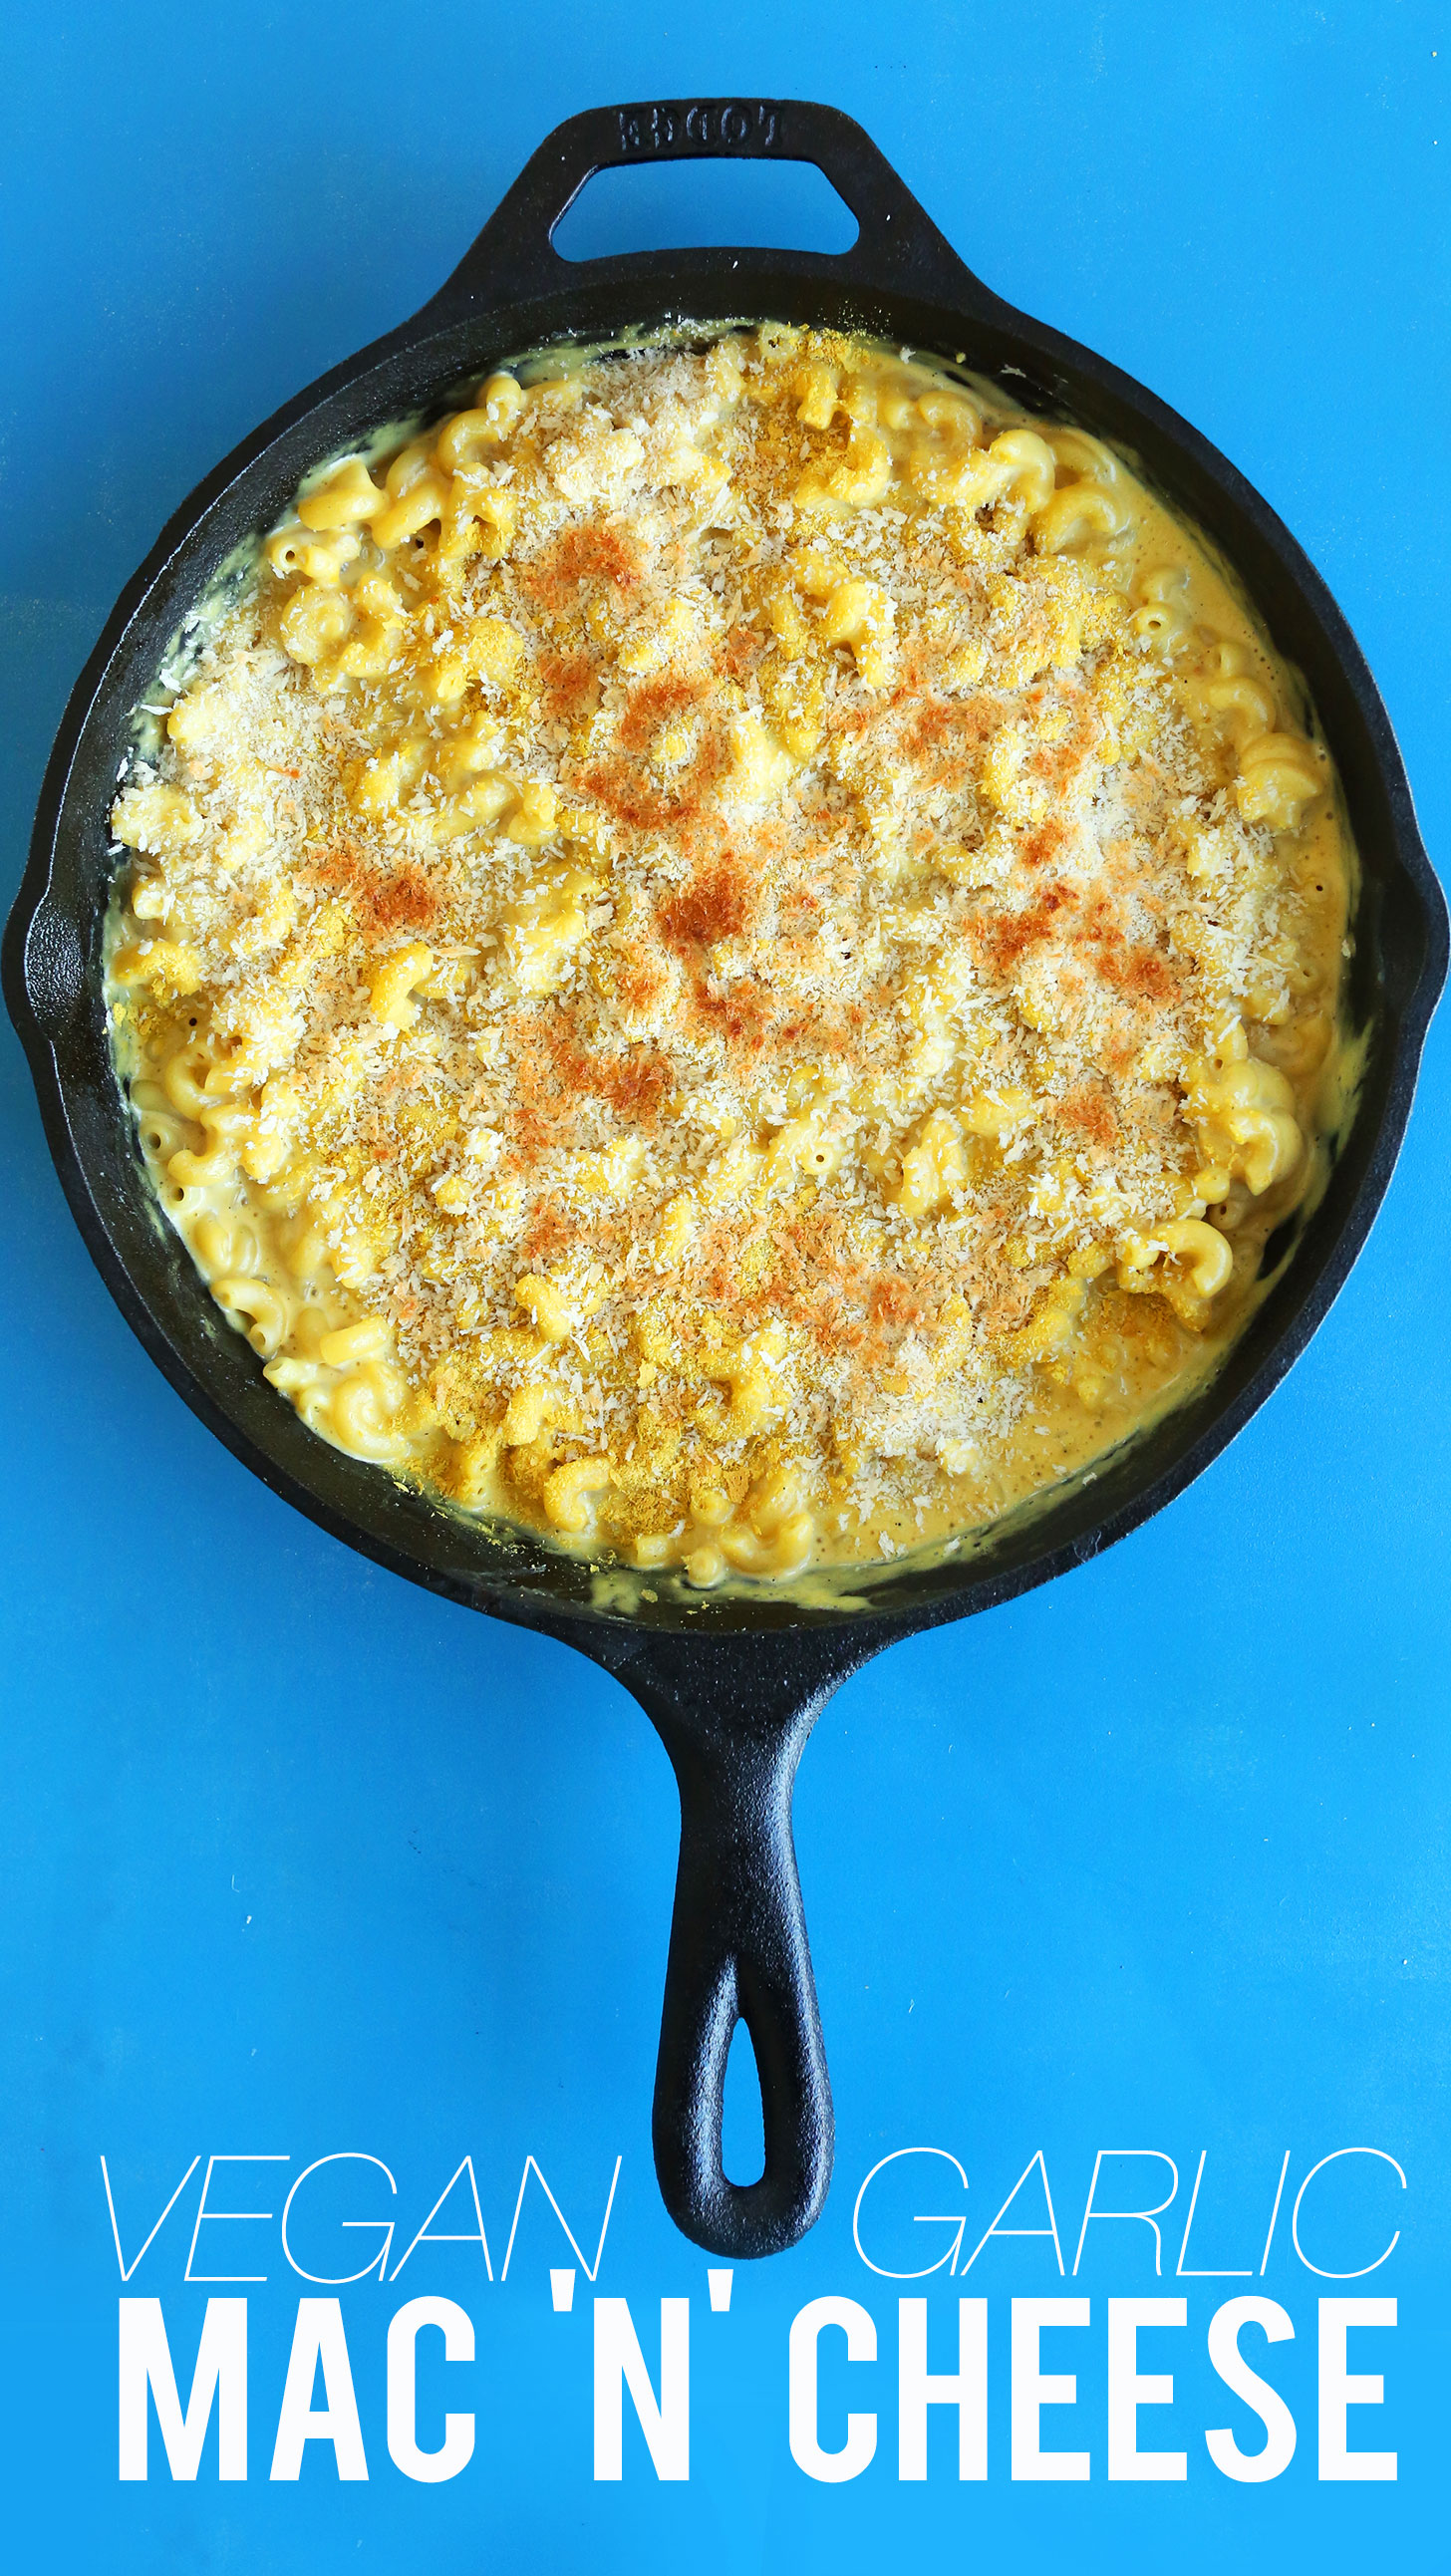
Garlic Mac ‘n’ Cheese
Ingredients
- 1 head roasted garlic (see instructions for method)
- 10 ounces macaroni noodles* (use gluten-free pasta for GF // 10 ounces equals ~2 1/4 cups dry)
- 4 Tbsp olive or avocado oil
- 5 cloves garlic (minced)
- 4-5 Tbsp unbleached all-purpose flour (or sub arrowroot powder for GF)
- 2 – 2 1/4 cups Blue Diamond Almondmilk Original Unsweetened
- ~1/2 tsp each salt and pepper (to taste)
- 1/2 cup vegan parmesan cheese (plus more for serving)
- 4-6 Tbsp nutritional yeast (plus more for topping)
- 1/4 cup panko bread crumbs (optional // gluten-free for GF)
Instructions
- To roast garlic, preheat oven to 400 degrees F (204 C) and cut off the very top of a head of garlic. Drizzle the top with a bit of oil, a sprinkle of salt and loosely wrap in foil.
- Place directly on oven rack and roast for 45 minutes – 1 hour, depending on size of garlic. You’ll know it’s done when the garlic is very fragrant and the bulb appears soft and golden brown. Remove from oven and let cool.
- To prepare pasta, add macaroni to a large pot of boiling, well-salted water. Stir to prevent noodles from sticking, and boil according to package instructions (about 8-10 minutes). Drain and cover with a towel to keep moist – set aside.
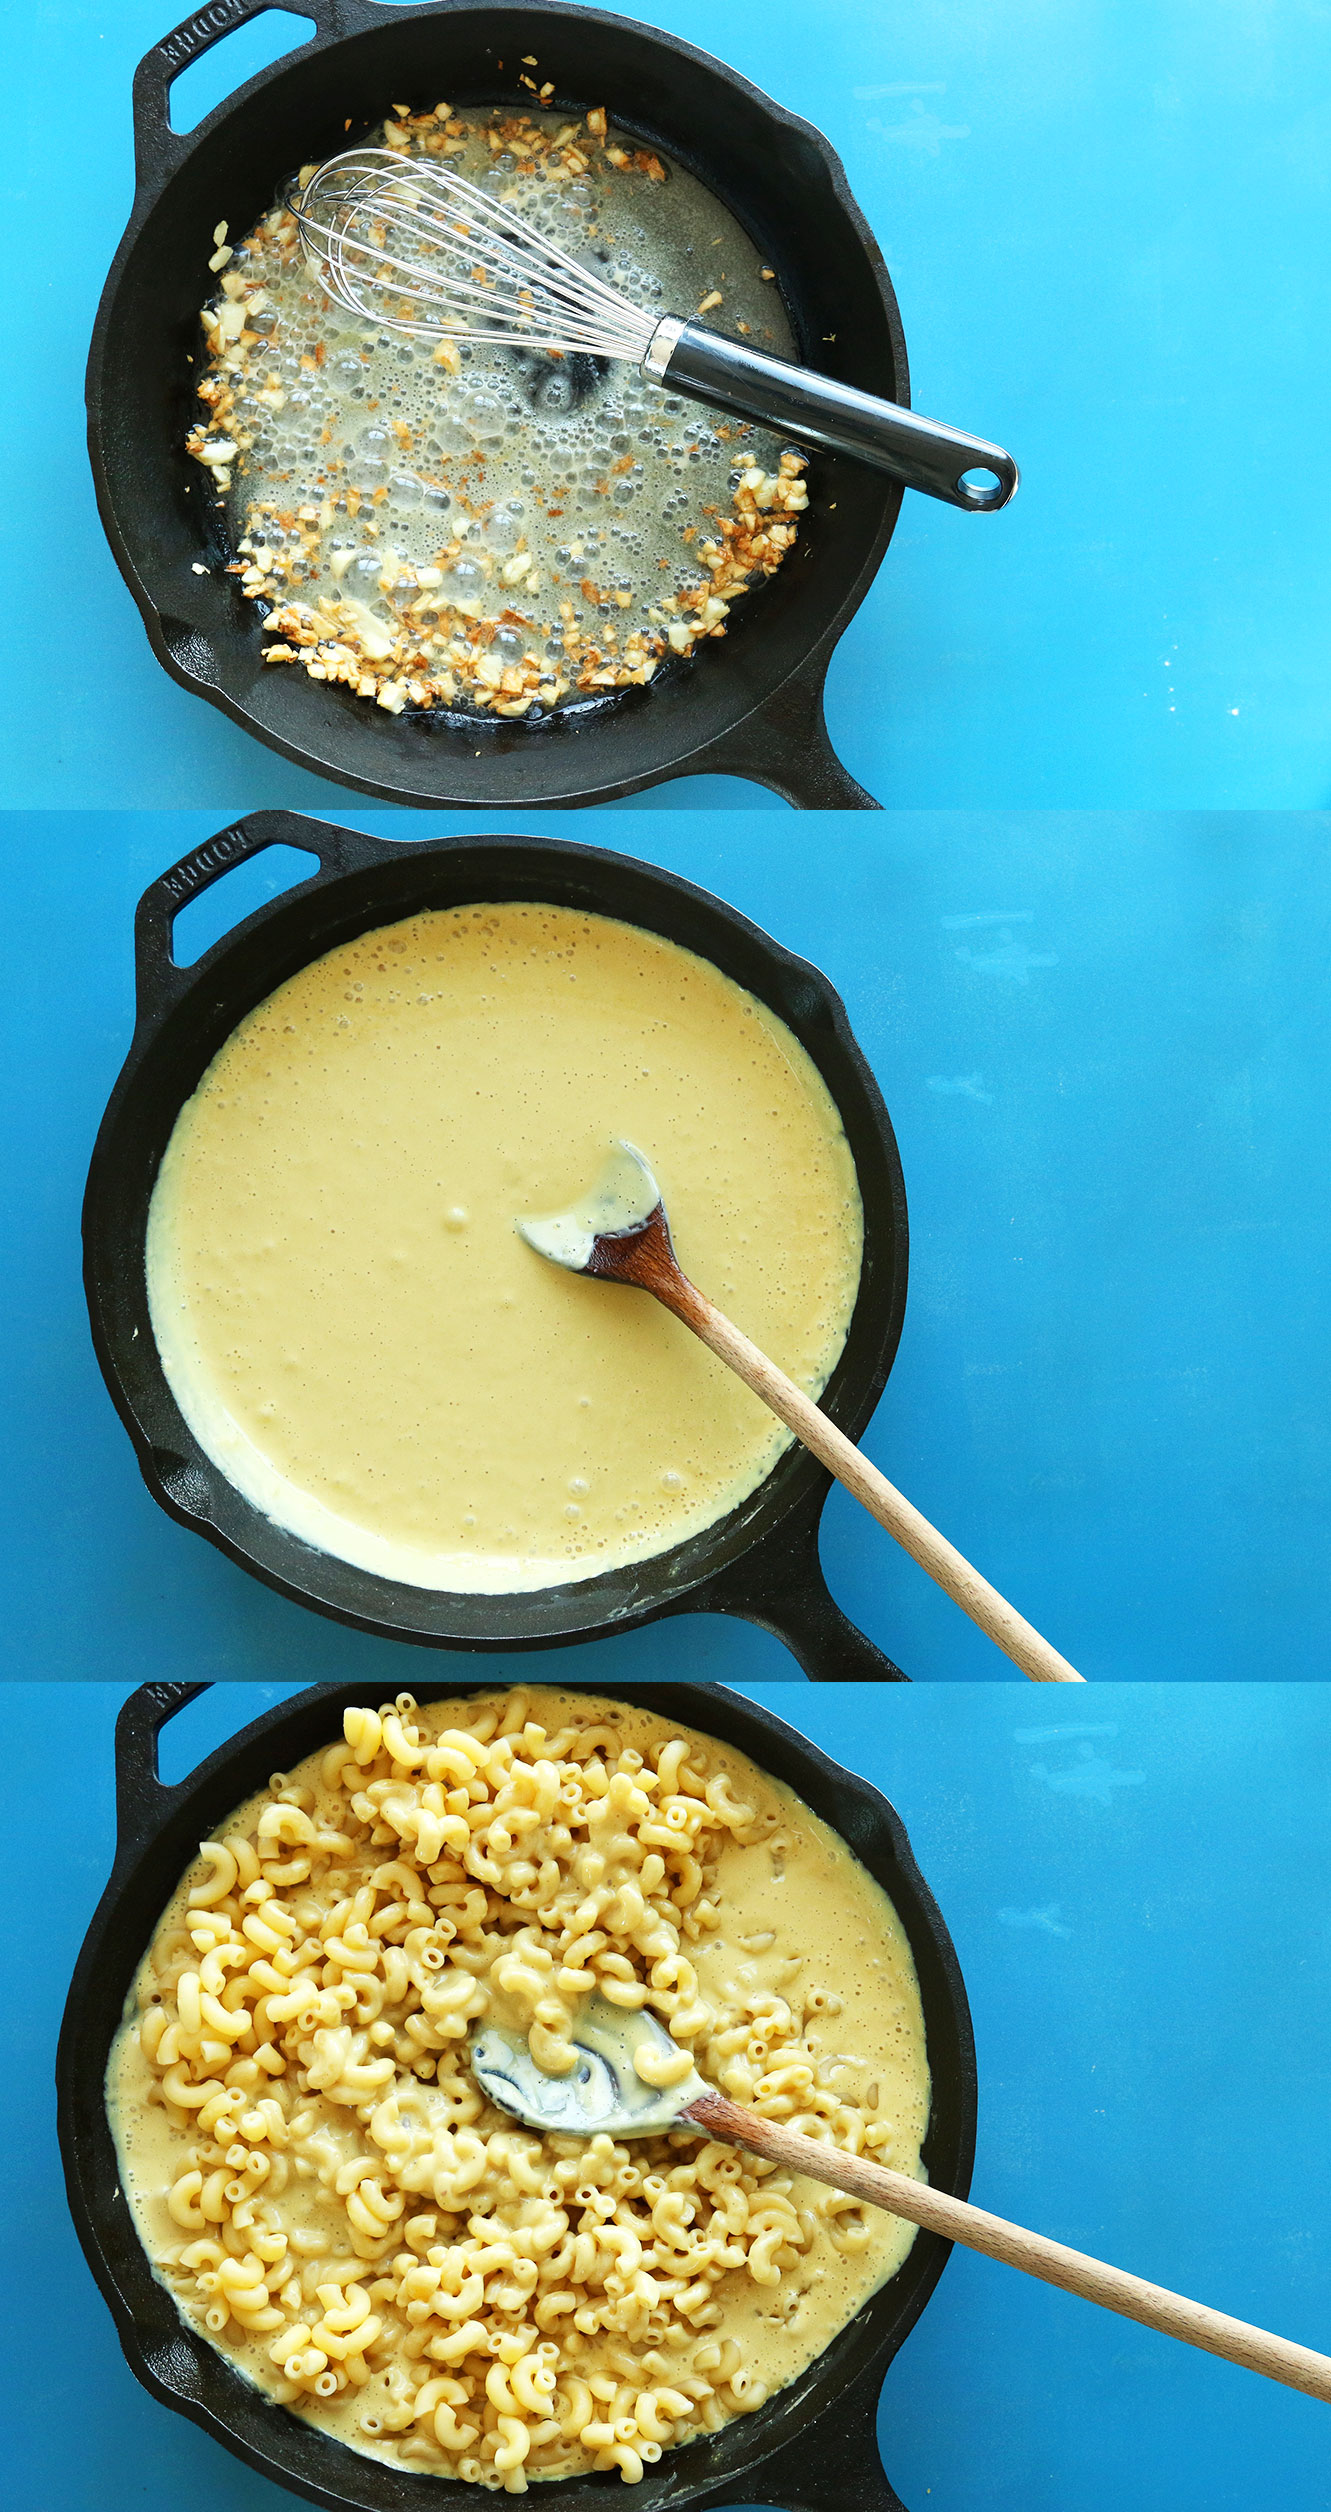
- To prepare sauce, heat a large skillet over medium heat. Once hot add oil and minced garlic. Stir and cook for 1-2 minutes, or until light golden brown.
- Immediately add lesser amount of flour (or use arrowroot powder // 4 Tbsp as original recipe is written) and whisk – cook for 1 minute. (Later on, if the sauce is not thick enough, add an extra 1 Tbsp (amount as original recipe is written // adjust if altering batch size) later on during the blending process. I found 4 Tbsp to be the perfect amount).
- Add almond milk 1/2 cup at a time, whisking to prevent clumps, until 2 cups have been added (amount as original recipe is written // use lesser end of range if altering batch size). Cook for 2 minutes, stirring frequently. (Add the additional 1/4 cup (amount as original recipe is written // adjust if altering batch size) almond milk later on if the sauce appears too thick.)
- Transfer sauce to a blender and add roasted garlic (squeeze from base to push out cloves), salt and pepper, vegan parmesan cheese, nutritional yeast, and blend on high until creamy and smooth. Taste and adjust seasonings as needed – you want it pretty well salted + cheesy, so don’t be shy.
- Return sauce back to skillet and cook over low heat until warmed and slightly thickened – about 2-3 minutes.
- Add cooked, drained pasta and toss to coat. Then top with 1 more Tbsp nutritional yeast and 1/4 cup panko bread crumbs (amounts as original recipe is written // adjust if altering batch size).
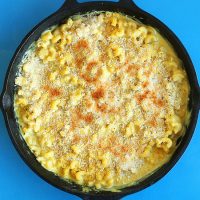
- Broil on high on the top rack of your oven for 1-2 minutes, or until golden brown (see photo). Watch closely as it can burn quickly.
- Serve immediately. I love topping mine with an extra pinch of vegan parmesan cheese and a little red pepper flake.
- Leftovers keep covered in the refrigerator for up to 3 days, though best when fresh. Reheat in the microwave or on the stovetop – add extra almond milk if it’s dry.
Notes
*Nutrition information is a rough estimate calculated with panko bread crumb topping.

Melissa says
Hi!
Looks amazing!
Have you tried adding Just Egg and some black salt to grace eggy texture and taste?
Thanks!
Hi Melissa, we haven’t. Let us know if you try it!
Nira Johri says
Hi there, wanted to make this for Thanksgiving, but do it two days ahead. A bit concerned about the best when fresh part…thoughts? Can I make the sauce ahead of time and then mix with mac, heat up – that’s also an option!
Hi Nira, we think making the sauce ahead should be fine! If it thickens too much in the fridge, you can thin with more almond milk when adding to the mac. Hope that helps!
wizard says
this is so dank!!! i used half normal nutritional yeast and half nacho spice nutritional yeast so mine is a little spicer :) i love it!!! thank u for this brilliant, easy to follow recipe !
We’re so glad you enjoyed it! Thank you for the lovely review!
Lynn says
I went in pretty skeptical this would taste good, but thankfully I was wrong.
Now to be clear, I had to do a variation of this recipe due to ingredient preferences, no high speed blender, and the weather.
I used oat milk instead of almond then added ground mustard, gochugaru flakes, minced garlic (no roasted garlic on hand), hot sauce to taste, and then the other recipe ingredients. Also added roughly 2 tsp of lemon juice at the end to finish and give it some sharpness.
I followed the instructions with exception to blending since I don’t have a high speed blender, and broiling because it’s currently too hot to turn my oven on. Despite that, this still turned out creamy.
It’s not 100% my favorite, I need to experiment more, however I would recommend this as a good base to work off of.
Thanks for the recipe!
Carola says
This was delicious, made it tonight for dinner. The only change I made was using cashew milk instead of almond milk, as I prefer it for savoury recipes. Your recipes are always so yummy. Thank you for inspiring our dinner tonight. :)
We’re so glad you enjoyed it, Carola! Thank you for your sweet words and lovely review! xoxo
Emily says
Hi! I’ve made this and your vegan asparagus and white sauce, and the first few times were perfect and the last two times the sauce has been really sweet. I don’t think I changed anything. Any idea where I’m going wrong?
Any advice would be much appreciated 🙏🏻
Hi Emily, is it possible you’re using a different brand of almond milk? Or one that’s sweetened?
Sherryn Adair says
Will definitely make! What do you think would happen if I baked it for 10-15 minutes instead of just broiling?
Hi Sherryn, That should work well! We’d recommend 400 F for 10-15 minutes. Would love to hear if you give it a try!
Jessica says
Do you half to put it into the blender or could you just keep it in the pan and stirring until it’s all combined?
Hi Jessica! The main reason for using the blender here is to help incorporate the whole cloves of roasted garlic, but it’s possible you could have success by just combining them with everything in the pan, though we aren’t sure they will break down as well. Let us know how it goes if you give it a try! xo
Emily Vieira says
AMAZING! I have made this recipe three times this week! I am obsessed. I would recommend this to anyone. The last time I made the recipe I used baked cauliflower and broccoli instead of pasta. It was easily the best vegetables I have ever had. Thank you so much for sharing this recipe!!
Whoop! We’re so glad you enjoy it, Emily. Love your creative modifications too. Thanks so much for sharing!
Liah says
I gotta admit, I was lazy when it came to the prep on this recipe, and it still turned out FABULOUS!!! I’ve been needing some comfort food this week and this hit the mark!! Rather then roasting the garlic for a whole hour, i minced 4 cloves, and sauted them in 1/4th cup butter on low heat for 15min while prepping the pasta. When the garlic reached a soft golden color (and started smelling ahmaziiiiing) I began incorportating equal ammounts of flour to olive oil, stopping at 4tbls each. I blended the trio on medium high heat for 2min before incorporating 2 cups of plain oatmilk and whisking until smooth. Then I poured the entire mixture into my blender with the nutritional yeast, black pepper, parmesan, a smidge of rock salt, a dash of red pepper flakes, and 1 tsp white miso paste. Then I blended it all on high for 3 or so minutes until I had a steaming hot bucket of cheesey sauce! I have a vitamix which blends and also works to heat up mixtures. Next i poured the well strained elbows into a baking dish, added 1/3cup mozzerella shreds, the cheese sauce mixture, and another 1/3cup of mozzerella shreds for good measure. I mixed until all noodles were covered then topped with italian seasoning, panko bread crumbs, and a dash of red pepper flakes. Broiled on low for 2 min, turning halfway inbetween, then let it rest on the stovetop for 5 or so minutes.
I served it with your instapot mashed potatoes, blanched green beans almondine, and bourbon crockpot baked beans. My husband, an avid meat eater, went back for seconds. As a vegan celebrating my 10th year of plant based eating, thank you for proving a mac n cheese recipe that is both dairy free, and delicious! Happy cooking! :)
We’re so glad you both enjoyed it! Thanks so much for sharing, Liah! xo
Angelica says
Can I sub the flour for coconut flour? Thank you so much for the recipe!
We wouldn’t recommend it as it has a strong flavor. A GF all purpose blend would be a better GF alternative here.
KG says
Great recipe! My husband made this yesterday for Thanksgiving and it turned out so good! He’s new to following recipes, but with your great photos AND video, he felt confident to try it. He doubled the recipe so we’d have leftovers – using your handy way to update the servings, it took the guesswork out of the measurements. Thank you for your amazing recipes!!
Aw, love that! Thanks so much for your kind words and lovely review! xo
Nidhi says
I just made this with and the vegan cashew parmesan you have linked–THANK YOU SO MUCH! I loved this recipe–it tasted cheesy with a little bit of kick. I had to adjust the ingredient quantities because I was only making it for myself, I didn’t broil, didn’t use bread crumbs, and added a tiny amount of crushed pepper. LOVE!
We’re so glad you enjoyed it, Nidhi! Thank you so much for sharing!
Amira B says
This Mac n cheese is so bomb! Family loves it every time I’ve made it. Always a hit! And I use Jovial’s gluten free elbow pasta and its just as great!
We’re so glad you and your family enjoy it, Amira! Thanks so much for the lovely review!
Taylor Loranger says
UNBELIEVABLE. I am getting more and more use to the vegan lifestyle and this mac n cheese makes it so easy to do so. Not hard to make and delicious. We added buffalo sauce on top and it was a game changer. Will be making it again and again. Thank you!!!
Thanks so much for the lovely review, Taylor. We are so glad you enjoyed it! Next time, would you mind leaving a rating with your review? It’s super helpful for us and other readers. Thanks so much! Xo
Lindsay says
You know what else this “cheese” sauce would be good on? EVERYTHING! I love this recipe. It really hits the spot when I’m craving mac & cheese. I use coconut milk in place of almond milk and store-bought Earth Island vegan Parmesan because our family has a nut allergy, but otherwise follow the recipe exactly and it turns out amazing every time. I have also used this sauce to make chilli cheese fries and they were delicious! We have made this recipe many times and it’s one of our favourite comfort meals.
Thanks so much for the lovely review, Lindsay. We are so glad you enjoy it! Next time, would you mind leaving a rating with your review? It’s super helpful for us and other readers. Thanks so much! Xo
Lindsay says
Ahh, yes! Thank you so much for pointing that out. I totally missed that!
Jackie says
Hands down amazing!! I used 2 parts hemp 1 part full fat coconut milk, added a pinch of nutmeg and lots of cracked pepper, and peas ;)
Your vegan parmesan is amazing too- I use it to make vegan garlic bread.
Good job!
Aw, thanks Jackie! We’re so glad you enjoyed it! xo
April says
Love this recipe! During the blender/food processor stage I tossed 1/4 cup and some change of vegan cheddar for a wee bit more cheese taste, and a shake of cayenne pepper for a tiny bit of heat.
Having leftovers for lunch! <3
Yay! Thanks for sharing, April!
Mindy says
Sooooo good! Had this for dinner and the whole family enjoyed it. The left overs will be in the kids school lunches tomorrow. I love it when I get two meals out of one.
Yay! Thanks for sharing, Mindy! xo
Timmy says
I made this and was so chuffed with the result! Another staple in our household.
Whoop! Thanks for sharing, Timmy!
Katie says
We made this for our family and all of us loved it. Can’t wait to try your other recipes!
Thanks, Katie!