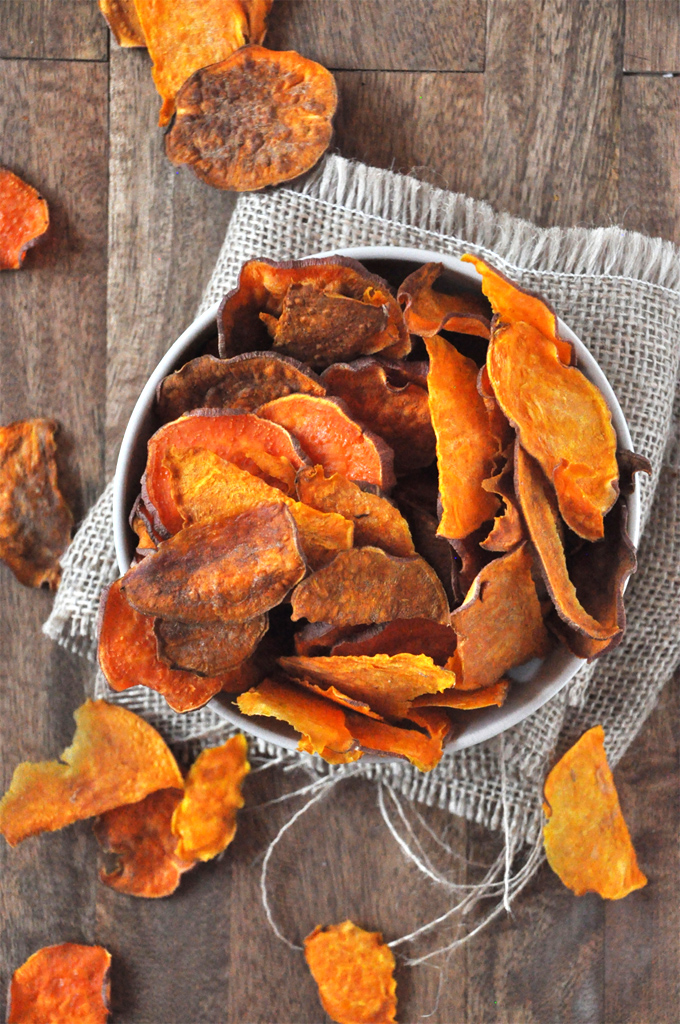
A few weeks ago we had our neighbors up for dinner and they brought the most fabulous sweet potato chips; baked sweet potato chips, I might add. I’d never tasted sweet potato chips so crispy, light and flavorful! Two bites in and I knew I needed the recipe. Thanks Laura, you’re a lifesaver. John finally likes sweet potatoes in some form. This is some kind of pre-Christmas miracle.
Let us show you how easy it is to make these 2-ingredient chips!
How to Make Sweet Potato Chips
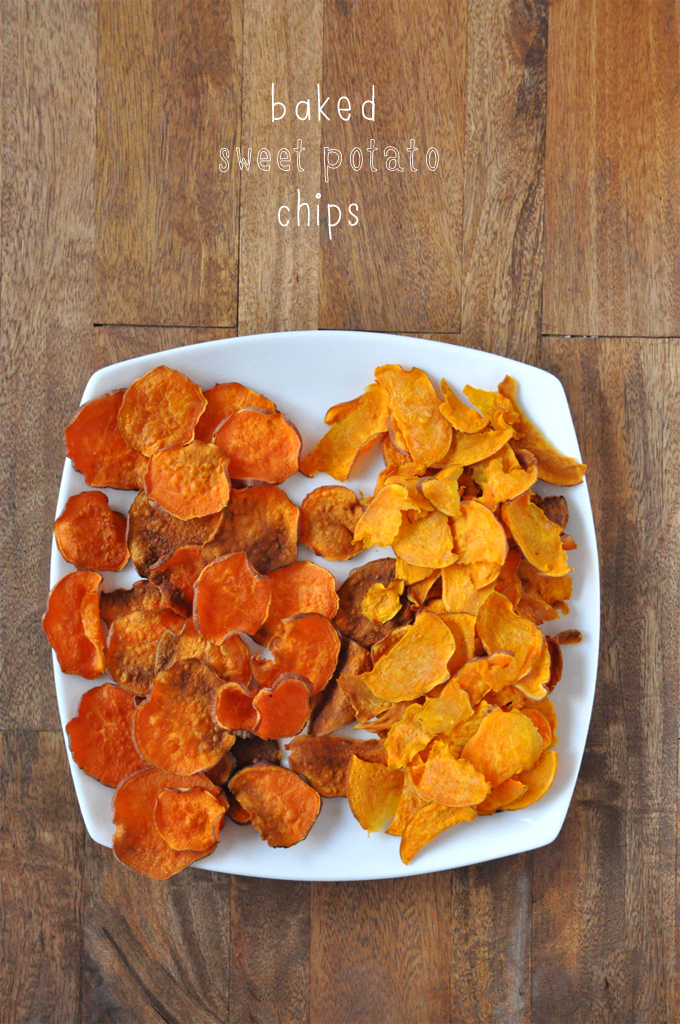
Out of curiosity since I don’t have a mandolin, I made these sweet potato chips two ways: I sliced half the batch thinly with a knife (left) and the other half with a vegetable peeler (right). The results were equally delicious, but I must say the knife method yielded a more satisfying bite so I’d recommend this over the peeler.
After that, all they require is a little olive oil and a pinch of salt before going into the oven to bake for a couple hours. That’s the trick – keeping your oven at 250 degrees F (121 C) and flipping once during the baking process to make sure they crisp up on both sides. The result is amazing.


We hope you LOVE these chips! They’re
Crispy
Flavorful
Simple
Versatile
& So delicious!
They’re a great stand-alone side dish but you could also top them with black beans, salsa, and cheese for some crazy delicious nachos. Or you could add them to a sandwich for some serious crunch. Dream big people, the possibilities are endless.
More Homemade Chips
If you give this recipe a try, let us know! Leave a comment, rate it, and tag a picture #minimalistbaker on Instagram. We’d love to see what you come up with. Cheers, friends!

Baked Sweet Potato Chips
Ingredients
- 2 organic (~150 g each) sweet potatoes
- 2 Tbsp olive oil
- 1/4 tsp sea salt (optional)
Instructions
- Preheat oven to 250 degrees F (121 C) and position oven rack in the center of the oven.
- Rinse and dry your sweet potatoes thoroughly and slice them as uniformly thin as possible (~1/8-1/16 inch thick slices). If you have a mandolin, use it. Otherwise, use a very sharp knife to get these uniformly thin. Know that chips that are too thick in parts won't crisp up all the way. Still delicious, just not "chip" crispiness.
- Toss slices in a touch of olive oil to lightly coat, then sprinkle with salt. Lay out in a single layer on a parchment-lined baking sheet and bake for about 1 hour 30 minutes to 1 hour 45 minutes, flipping chips once at halfway point to ensure even cooking. I also rotated mine for more even cooking (optional but recommended). Note: thickness of slices will impact cooking time. Check at ~10 minute intervals during the second hour of cooking to ensure they aren't burning.
- Remove once crisp and golden brown. Some may feel a little tender in the middle but take them out and let them rest for 10 minutes or so to crisp up before sampling. Serve immediately.
Video
Notes
*Know that chips that are too thick in some spots may not crisp up all the way. They’re still delicious, just not as crispy as the uniformly thin chips. It takes practice!
*RECIPE UPDATED 1/26/14: I originally had the temperature at 200 degrees, but a few readers had trouble with the chips not crisping up properly. So I have retested with success, adjusting the temperature to 250 degrees. It still takes about 2 hours, but the low temperature allows them to get more evenly crispy.
*Nutrition information is a rough estimate calculated without salt.






Steven Hepokoski says
I cut the sweet potato with my new KitchenAid vegetable sheet cutter attachment. It worked beautifully! I used the thinnest cutter, and the chips baked in about one hour.
Amazing! Thank you for sharing your experience, Steven.
Mrs c says
Hi. What’s the best way to store left overs? Thanks
Hi Mrs C, these chips are best when fresh and leftovers may not stay crispy. You could store them in the refrigerator and then warm/crisp them in the oven when you want to enjoy them!
Noelle says
How do you store these once you’ve baked them?
Hi Noelle, these are best when fresh as they lose crispiness once cooled. But you can store them in a sealed container in the refrigerator.
Linda says
This recipe was delicious! I made it yesterday. My oven was set for convection cooking. It only took an hour and 15 minutes at 250° (With one flip of the chips). I did use a mandolin slicer set to the thinnest amount – so that could also be why they cooked so quickly.
Great! Thanks so much for sharing, Linda! xo
Claudia Cooper says
I’ve NEVER signed up for e-mails for anything on the internet. You had me at used a knife instead of a mandolin. Thank you.
Whoop! Enjoy =)
Joanna Lynn Bacchus says
Can you do this recipe in an airfryer?
We haven’t experimented with an air fryer, but it should work well. Just know they’ll probably cook faster. Let us know if you try it!
Michele says
So excited. I have tried to make sweet potato chips several times—always burned or just dried out. Very low temp makes so much sense!! I roast my sweet potatoes at 325-350 for hours anyway to increase the sugar, baking until they ooze caramel, so this is no more difficult. Thanks!!
Thanks for sharing, Michele!
Dale says
This was a complete stuff up! You have a section called ‘how to make sweet potato chips’ and then state ‘keeping your oven at 250 degrees’ without noting you are talking about Farenheit.
Results: One destroyed sweet potato. I am glad I checked at the 15min mark.
Hi Dale, we’re so sorry to hear that happened! We’ll add a note to clarify. The recipe box has the full instructions and temperatures listed in both Fahrenheit and Celsius. But we can see how if you only looked at the text that could have happened.
Dale says
I definitely believe, when you have an international audience, the measurements used should be clarified. I had looked for the recipe but got lost in ads and other promotions so I assumed the instruction was what was on offer. Just adding the ‘F’ or ‘C’ after the degrees sorts it out.
On the plus side, some of the ‘chips’ were not completely burnt and were absolutely delicious so I will be giving this dish another go at the correct setting.
Cheers, Dale
Baylee Friedlander says
I tried used a food processor with the slicing attachment to slice the sweet potatoes! Some were really thin! I found that 250 was a tad too warm and gave them a little burnt taste, but I turned it down to 225 and they were perfect! This is my second time making this recipe! This time I used 8 sweet potatoes because they were gone so quickly last time 😂😂
Thanks for sharing, Baylee!
Chuck Schaeffer says
I cut the chips by hand – 1/8 in as instructed; however it took almost 3 hours for them to crisp up and the last hour was at 275F. Seems like the opposite problem people using the mandolin had. In any case, they did finally turn out well though!
Thanks for the feedback, Chuck! We’d say maybe try cutting just very slightly thinner next time to see if that helps.
Sarah says
These are fantastic! I’ve tried many other recipe and always been disappointed by too many burned chips, even when I keep a close eye on them. The lower temperature and long cook time is key! I used my food processor to get even slices and used my fingers to lightly coat each side in oil individually rather than toss in a bowl. Bear in mind the slices shrink down a lot, so don’t hesitate to put as many slices as can for without overlap (i used a silplat). I sprinkled a bit of salt and ground rosemary and turned them after an hour. The smaller ones were done by then, and the others I cooked for another 20 mins. I also recommend turning off the oven and letting the tray cool inside for max crispiness! Thanks for the great recipe, it’s a keeper!
Whoop! We’re so glad you enjoyed them, Sarah! Thanks so much for sharing!
Leigh says
These were great, thank you! So easy to make with my mandolin and yummy! I give you credit for being able to thinly slice them without a mandolin! Next time I will check during the last 10 minutes because they ended up a little burnt after being cooked for the full 2 hours.
Can’t wait to try this with russet potatoes next!
We’re so glad you enjoyed them, Leigh! Thanks so much for sharing!
Jillian says
These were *INCREDIBLE, thank you! I used a mandolin and followed recipe to a t other than using avocado oil instead of OO. They turned out SO crisp! I ate with a side of fresh guac and it was heavenly. These are better than the store bought chips I recently discovered at Aldi. So happy I found this recipe!
Whoop! Thanks so much for sharing, Jillian!
♥ Dana & James ♥ says
Oh, totally forgot! Will do!! Awesome chips!
♥ Dana & James ♥ says
Awesome chips! Make them all month long. Thanks!
Regards,
~ ♥ Dana & James ♥ ~
Thanks so much for the lovely review. We are so glad you enjoy them! Next time, would you mind leaving a rating with your review? It’s super helpful for us and other readers. Thanks so much! Xo
♥ Dana & James ♥ says
Oh will do! Totally forgot. Awesome chips!!
Thanks so much!
Janice Hurd` says
Can you use white potatoes with the same directions?
Hm, we’ve never tried that so we’re not sure! Let us know if you try it!
Lauren Turner says
Followed the recipe using a mandoline. They came out quite brown (even brown at the half way point). They’re certainly edible and perfect consistency but I do wonder if the brown was because of over cooking— it tastes slightly like it’s on the way to burnt? Could I reduce the temperature even if it means taking more time?
Hi Lauren, you could try that! Or keep the same temperature, but reduce the time.
Krista says
Hello! I was wondering, if I would like to toss these with zaatar, should I do that before or after the roasting? Thanks!
We think both ways would be delicious! Probably before though to help it stick better. Let us know how it goes!
James says
250 much too hot!! Everything burns…
120 best
Barbara says
She refers at 250 Fahrenheit which would be roughly 105 degrees Celsius which is not to hot!
Lee says
What about deep frying in oil? Do you have to soak them in water after you cut them and before you soak them in the oil?
Hi Lee, we haven’t tried deep frying and aren’t sure. Let us know if you do some experimenting!
Michaela says
Followed this recipe precisely and wow, these are heavenly! They turned out crunchy with a tad hint of salt and I can’t stop eating them. Thank you! Will make again and again. :)
We’re so glad you enjoyed them, Michaela! Thanks for sharing!
Olivia says
Can you store the sweet potato chips for a few after they’ve been made?
Hi Olivia, If you let them cool completely and then store covered, they will be OK for a few days. But they are best when fresh.
Isa says
Best sweet potato recipe ever! It’s certainly worth the time! The trick is cutting them as finely as possible. Otherwise it’s a fail safe!
Whoop! Thanks for sharing, Isa!
Mindimoo says
Okay, so I tried a slightly different approach. I used a mandolin to thinly slice about 6 quite small sweet potatoes that I found in the garden. I tossed the slices in some cornflour (cornstarch) and then drizzled some olive oil over and tossed again. I laid them on trays lined with parchment paper and sprinkled with salt. Instead of baking for 2 hours at 220F, I baked at 220C (or 425F) for about 10 minutes. The potatoes weren’t particularly crisp when they came out of the oven but I left them to cool for about 15 minutes and then they did crisp up. I then put them in a dish and kept them warm with the residual heat from the oven.
Thanks for sharing!
Luci says
I added a squirt or two of dark molasses to the Avacodo oil and salt so now my dog is able to have this treat with me!
Margaret says
My sweet potato crisps crisped up a treat! I used a mandolin set thin and even result. Love sweet Taste as it intensifies as they dehydrate in the oven. I put onion salt on them instead of plain salt. Thanks for the recipe!
Laura Anderson says
Hmm, after 2 hours and raising the temp to 350, still not crisp. Some were burned though. They were still good and I may try them again, but they didn’t get crisp like I thought they would.
Hi Laura, we wonder if maybe the slices were too thick?
Nanette Rode says
I tried your recipe, and half of my chips are spotted so I’m not sure why they look that way?
Hi Nanette, we’re not sure what you mean by spotted. Mind clarifying? We’d love to help troubleshoot, if possible!
Dawdlin Mama says
Experienced chefs, please help!! I love this recipe, but the prep takes me for-freakin-EVER. My mandoline makes lovely thin slices, but they stick together like crazy. The process of separating the slices, coating with oil, and placing them on the sheets is so laborious — not to mention “flipping” them. I can never flip them with a spatula, I always end up having to grab each one individually with tongs. And giving them enough room means I need two 13×18 pans per potato. I would make these all the time, if someone can help me figure out how to do it more efficiently…?
PTS Arlene says
Try putting the slices in a zip lock gallon bag and shaking then with the oil. My prep takes me 10 minutes and that includes pulling the smaller slices out so they are on the same cookie sheet.
Dawdlin Mama says
Thanks, PTS Arlene, I’ll try it! Do you flip yours?
Jordan says
Do you have a silpat for your baking sheet? Makes flipping a dream!
Charlotte says
Buy an oil mister on Amazon and spray the chips with the oil. I also have an air fryer but if you put the chips on a cooling rack set over the pan it will allow the air to flow all around them for best crisping results.
Dawdlin Mama says
Charlotte, I love both these suggestions! Thanks. I make the chips every couple of weeks, and though they’re one of my family’s favorite treats, I’m always annoyed at how labor intensive they are.
Tutut Indonesia says
May ALLAH bless u…
I like this recipe
Simple…
Katy lindsey says
Has anyone tried an air fryer for these and how did they turn out?
Hi Katy, we haven’t, but it would probably work well! Let us know if you try it!
David says
I’ve been looking for another way to enjoy sweet potatoes, & your recipe was inspiring. I set my mandolin to the thinnest setting and sliced up 2 orange sweet potatoes. I brushed each slice with virgin coconut oil and set oiled-side-down onto 2 parchment lined sheet pans, then brushed the other side with the oil & salted. I baked 1 hr at 250, flipped the slices and baked another hr. They turned out crispy and really dark, but they were oily, even after patting dry when flipping them.
So, I tried another batch that I did not oil, simply laid out on a parchment lined sheet pan, seasoned with “house” seasoning (original recipe was 4 parts salt to 1 part garlic powder & 1 part black pepper, but have trimmed it down to 2 parts salt to each part garlic powder & black pepper). I cooked them 2 hrs without flipping. They are crispy, not nearly as dark, and have a great flavor, although I am not as happy with the house seasoning as when I usually use it.
So, I’m doing another pan full, no oil, and using just salt on them. Unless something goes terribly wrong, I am expecting them to be exactly what I want. My wife will eat a plain sweet potato for breakfast, so I’m waiting for her to critique these 3 batches.
I really appreciate your recipe as it got me to try a new way to enjoy sweet potatoes! Thank you!!!
Megan says
These turned out well for me, though the larger chips took 2.5-3 hours. I cut them as thinly and evenly as possible with my knife. They also turned brown instead of beautifully orange like the photo. My roommates gave them a thumbs-up!
Gary says
OOOPS…, disater…, Note to myself…, “Wear my glasses”and DON’T put your oven on at 250C on a fan forced oven….., I wondered what the smell was. ha ha ha…,
Miles says
I was looking for an alternative method of doing my sweet potato crisps when I came across this posting.
I’ve never had a problem with my potatos crispying up – but I seem to be the only one who bakes/dries them on a wire grid instead of on a tray or on baking paper. Just a thought – the grid allows the moisture to leave from all sides and you never need to turn the crisps.
Great idea, Miles! Thanks for sharing!
Toni says
The few that didnt adhere to the pan were delicious. You definitely have to coat the pan with non stick spray or something to help the chips from sticking. I wasted more than half of the recipe because I could not get them off of the pan. I like to season them with red pepper flakes and garlic powder. I wish I would have thought to coat the pan because the ones that did come off were perfectly crisp. Lesson learned.
Sorry to hear that happened, Toni! It sounds like there wasn’t enough oil. You could also use parchment paper to prevent sticking next time.
Sue says
These are delicious! I had one giant sweet potato sliced very thin (used a mandolin) and had to use 3 baking sheets! Put all three sheets in the convection oven at 250 and they were perfect after an hour. My advise would be to adjust cooking time based on how thick you cut your potato.
Sábeth says
It doesn’t let me post a photo, but overheated to 375 and then turned down to 250F for 45 minutes per side (90 total) with convection on for the first half also worked well. Crispy, sweet, and a hint salty. Used season salt and smoked paprika, and about a tablespoon of oil per sweet potato. I will cook slightly hotter next time and see if that makes them more consistently crunch, a few leathery ones in the mix but even this are yummy.
jack rokon says
wanted to mention to watch your time. I did 1 hour at 250 F and then it only took 15 more minutes once flipped. Thank you for this recipe posting!
Kate says
I made these. Used my food processor for slicing (which was super fast & easy). My slices never got crispy. The just became dry and chewy. Frustrating
Hi Kate, sorry that happened! It sounds like they maybe needed additional oil?
Lindy Shelly says
This is Yummy!! and very delicious. Recently I bought a meat slicer use this device for slicing the potatoes :-).
stacey says
I made these in my confection toaster oven (using the regular oven, not confection setting) at 350 for about 30 minutes and then turned down the temp to to 250 for another 10 min. I let them sit for another 15 min and they were perfect!
stacey says
I also sprayed the parchment paper with avocado oil before laying them down.
Ash says
I am excited to try this recipe but am wondering if it would a good idea to put the sweet potatoes on a raised cooling rack to be baked on rather than having to flip them half way through?
Sheree says
I am trying that right now, in lieu of those “crisper” trays. I’m figuring the air circulation will help. If I find your question later, I’ll update.
Sheree says
Ok, the cooling rack worked great. No oil, no parchment, no salt. one hour at 250F. BTW, I used my Kitchenaid “Sheeter”, thin blade, and I got a very thin, consistent strand of sweet potato. I cut the strands into 4×4 pieces and thought they’d be HUGE chips-but no, they ended up about 1×2”.
Steph says
What is the best way to store these and how long would they last if made in a large batch?
Hi! They aren’t good for long – maybe 1 day in my experience. Store in an air-tight container at room temperature.
stacey says
I also sprayed the parchment paper with avocado oil before laying them down.
Ronnie Fulton says
This was DELISH! Thanks for sharing. I seasoned mine with a little paprika, cayenne pepper and cajun season. Satisfies my sweat tooth and salty cravings in one bite :)
John Ton says
I tried this, substituted Best Buy for Argos – I think the Best Buy toaster works better! Thanks so much Alex – a newbie to toast.
Anyways, on a serious note, I’m goin’ in! Got my yams -check! Oven – check! Mandolin for slicing – check! Going to combine all the comments and successes / failures above including temp, baking sheet type, thickness of chips … wish me luck!
Camille says
I used my food processor fine mandolin blade to slice the potatoes, which took maybe 2 seconds. Tossed with a little oil and salt and put them in at 250. Mine were done in about an hour and 15 minutes and I flipped them once about halfway through. They are great!
Kimberley says
I just made these last night! This was the second recipe I’ve tried for these and they worked great! I don’t own a mandolin so I sliced them with the biggest setting on my grater which worked pretty well for the most part. I soaked them in cold water for an hour (apparently this gets rid of some starch which make them soggier?), then I threw em on a pan and left it on my counter to dry over night! Tossed w some oil, salt and pepper and followed the oven instructions exactly! Note: these will shrivel up into tiny little morsels but they do get crispy! Keep checking on them every 30 min – mine didn’t need the full 2 hours! I also made a second batch where I left in the oven as it cooled and they were even crispier the next morning!
SM says
I made these last evening and my teenaged kids went nuts over them. I used a mandolin to slice the sweet potatoes to 1/8″ and baked at 225 since my oven tends to run a little hot. After the chips were done baking, I turned the oven off and left them for another 30 minutes before removing them and allowing to cool. I’m not sure if this step helped but these were definitely not chewy or leathery! Kids were disappointed there weren’t more so I’ll definitely be making these again.
Amy says
I see it says to serve right away. Has anyone had success in making them for your lunches for the week (Food prepping)?
Hi there! If you let them cool completely and then store covered, they will be OK for a few days. But they are best when fresh.
Marie T Cutler says
Do you peal sweet potatoes first?
Nope!
Dave The Lighting Guy says
Followed to a T except ended up adding an extra half hour to the cooking time and using the broiler for the last 5 minutes, turned out perfect. Will definitely be making these regularly.